
Easy Sourdough Sandwich Bread
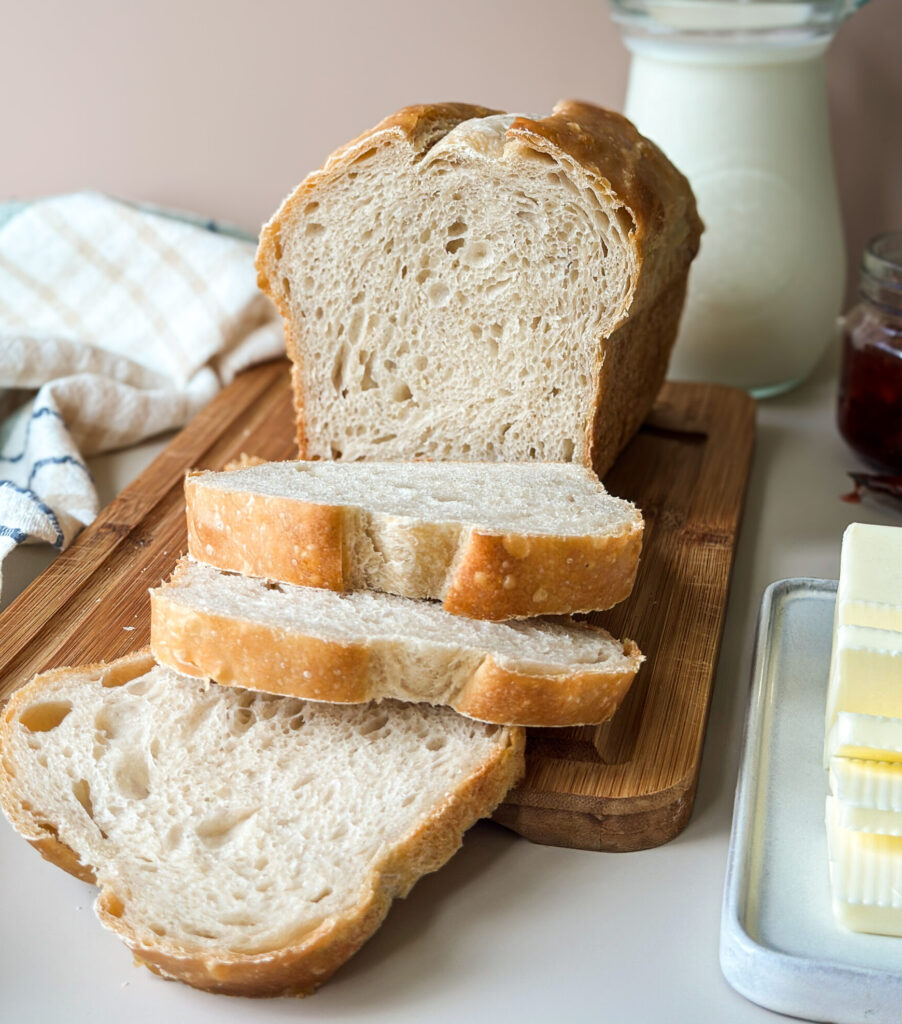
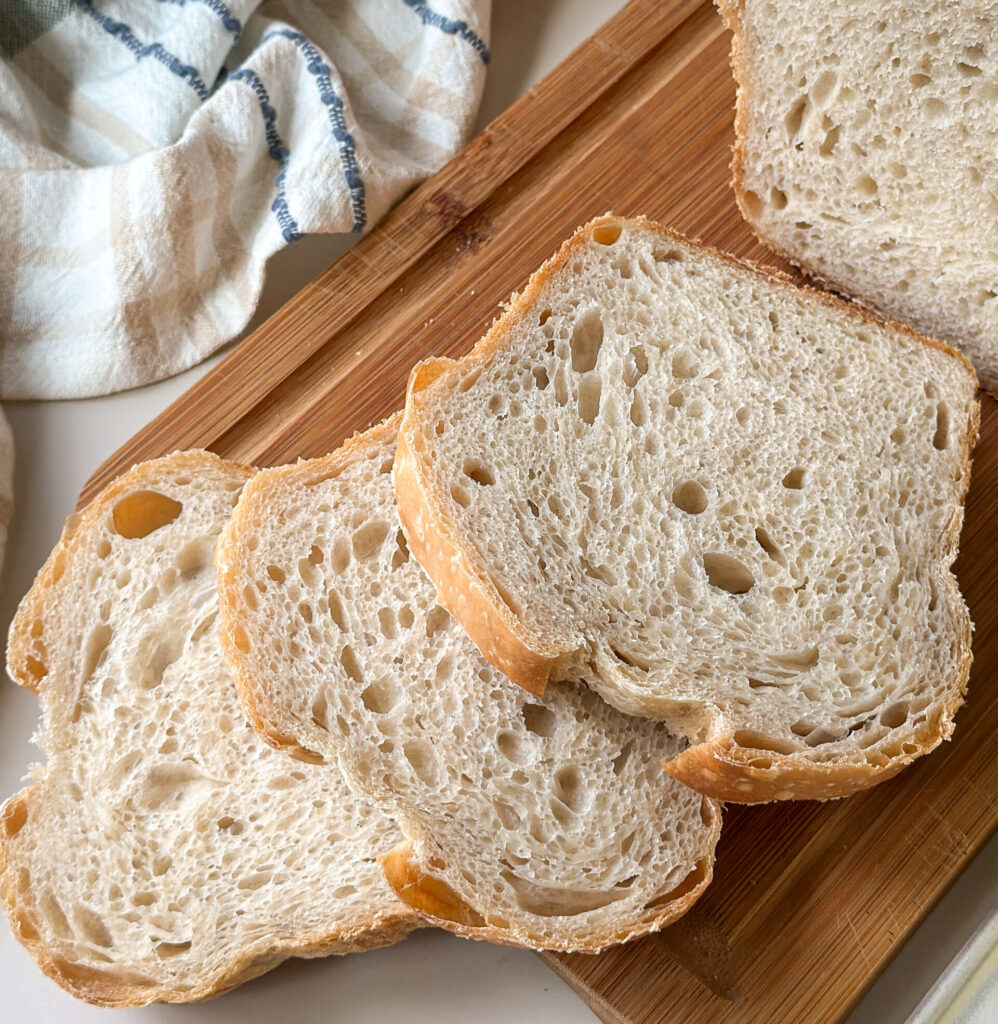
This Easy Sourdough Sandwich Bread is soft, fluffy, and perfect for everyday baking. It’s beginner friendly, made with simple ingredients, and can be baked all in one day or fermented overnight. Whether you’re making toast, sandwiches, or just want an easy homemade loaf for the week, this recipe keeps sourdough simple and approachable.
Table of contents
Why You’ll Love This Recipe
- Same day or overnight option: Bake this loaf fresh the same day or refrigerate it overnight for better digestion and flexibility.
- Soft and fluffy texture: This loaf stays tender, sliceable, and perfect for sandwiches and toast.
- Beginner friendly: Baked in a loaf pan with simple shaping and easy to follow steps.
- Made with simple ingredients: No complicated techniques or hard to find ingredients are needed.
- Versatile for everyday: Great for sandwiches, grilled cheese, toast, or warm slices with butter while preserving that classic tangy sourdough flavor.
Tools You’ll Need:
- Large bowl or straight edge container- You can use a bowl if you’d like, but I prefer to use a large square Tupperware with a straight edge so I can assess the rise of my dough easily. I use this Cambro 6 quart with a lid for up to 2 loaves at a time.
- Digital kitchen scale– for accurate measuring as this recipe is in grams and cups, especially helpful with sourdough baking. This kitchen scale is great to start with.
- Digital food thermometer (optional)- to check the temperature of your dough and bread, this ensures a more reliable result. I use this one linked here.
- Dough Spatula (optional)- to help release the dough and divide it. I love this silicone dough spatula for mixing linked here.
- Bench Knife- to divide the dough for shaping.
- Bread Lame or sharp knife- to score the bread so it can expand properly. This bread lame is inexpensive and great as a starter tool.
- Loaf Pan- I always use these 1 lb sandwich loaf pans from USA Baking, they’re reliable, don’t stick, and give a golden finish to your bread.
- Cooling rack- to allow bread to cool.
- Bread Knife- a quality bread knife is essential to even slices for your bread.
Gather Your Ingredients:
- Cultured Sourdough Starter- A strong sourdough starter is key to making this bread. It should be recently fed and refreshed to use in this recipe. Need help making a starter? Visit my Sourdough Starter Guide to get started!
- Flour- To make this process simple, my recommendation is to start off using high protein (high-gluten) flour. Why? Because this flour has the highest gluten percentage to best support the ideal structure and high nutrients needed to support a fast active fermentation process. Typically you’ll see a protein percentage on the bag of flour, I recommend using flour between 11-12% protein (gluten). This can be all-purpose or bread flour.
- Water- Water hydrates the flour, activating enzymes that break down starches into sugars. These sugars then feed the wild yeast and lactic acid bacteria, creating more fermentation in your bread. It is best practice to use water that is free of chlorine, which can inhibit the microbes. Filtered water, spring water, and non-chlorinated tap water are all fine options to use.
- Salt- any high quality sea salt is fine to use in your bread. I typically use Redmond Sea Salt, I recommend staying away from iodized salt as it can inhibit yeast and bacteria development.
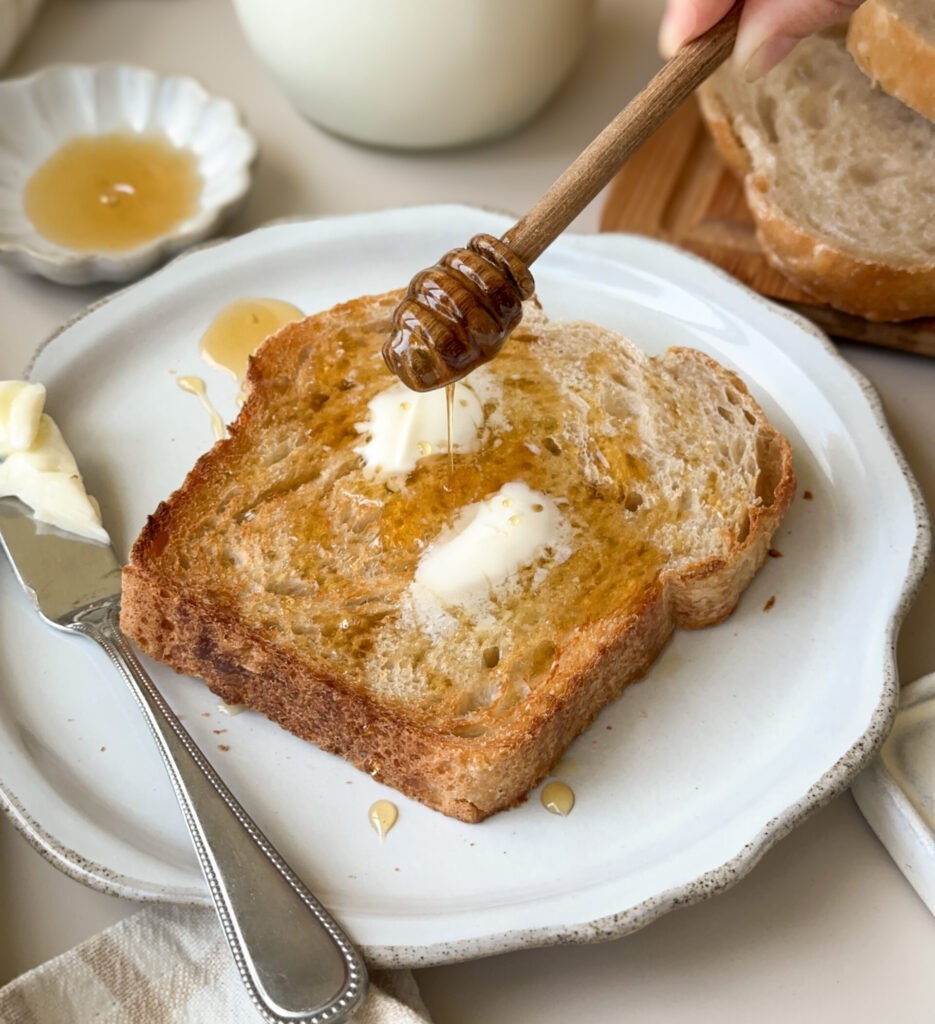
- Raw Honey- honey is a wonderful ingredient in sourdough to slightly sweeten the loaf and attracts and retains moisture which helps keep bread softer for longer time periods. If needed, you can substitute with sugar.
- Salted Butter (optional)- to brush on top of the bread for an extra soft crust and golden shine. You can skip this if you’d like!
Instructions
Step 1: Feed Your Starter Night Before Baking
Baker’s Schedule: 8:00 PM
To ensure a bubbly and active starter, feed your starter the night before baking.
Use a 1:5:5 ratio to feed your starter (this means one part mature mother starter, five times the water, five times the flour).
Mix flour and water in a jar with a spatula, cover loosely with lid, and mark the volume of the starter in your jar with a rubber band or piece of tape and marker. Let starter sit at room temperature (70-75 degrees) overnight until bubbly and doubled in size.
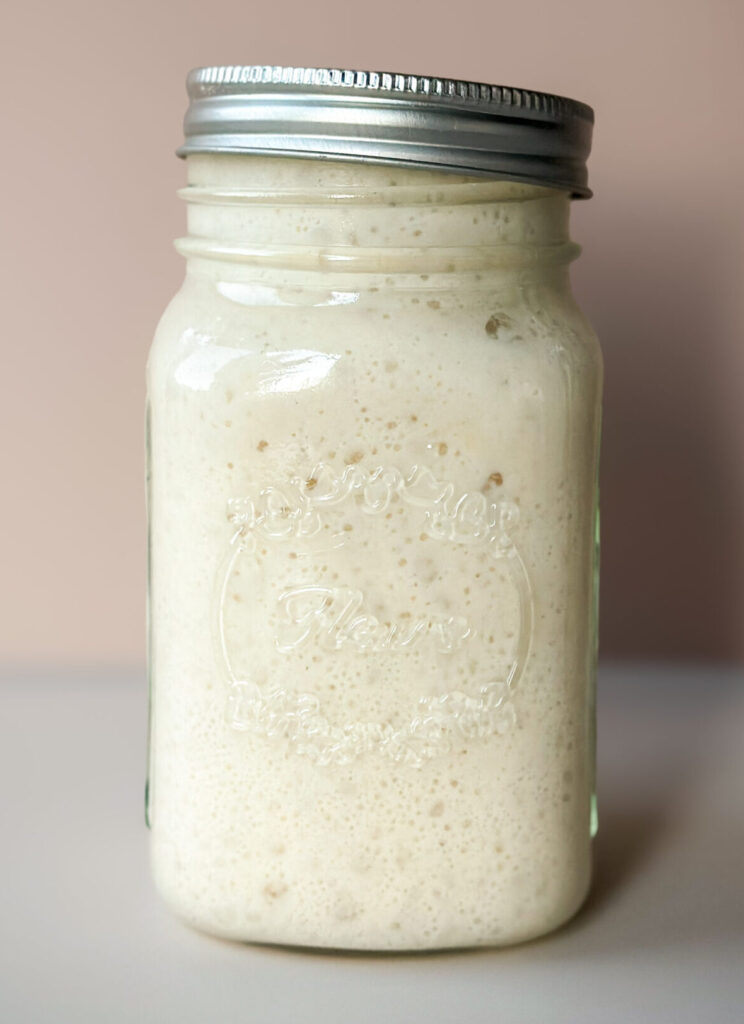
Starter doubled and ready to be used
Step 2: Make the Dough
Baker’s Schedule: Day 1- 8:00 AM
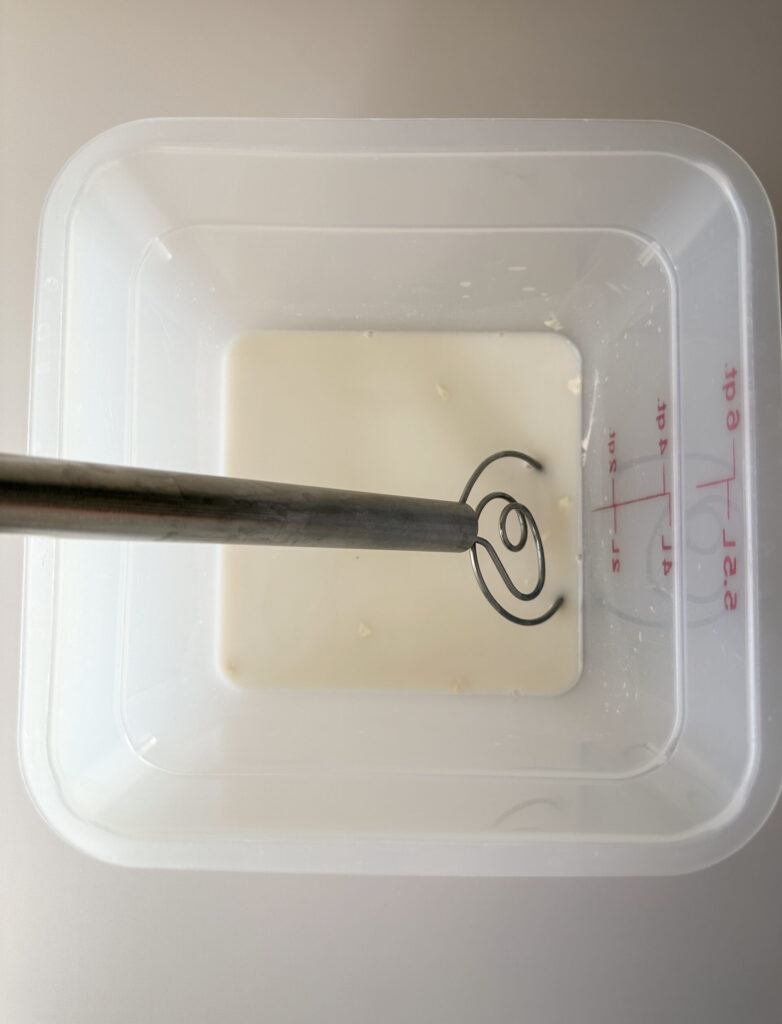
In a large bowl or as I prefer a clear straight edge container, mix the active starter, water, and honey until the ingredients are combined.
Humidity Note: If you live in a hot and humid climate, adjust the water to reduce it by 25 grams to accommodate for the extra moisture in the environment.
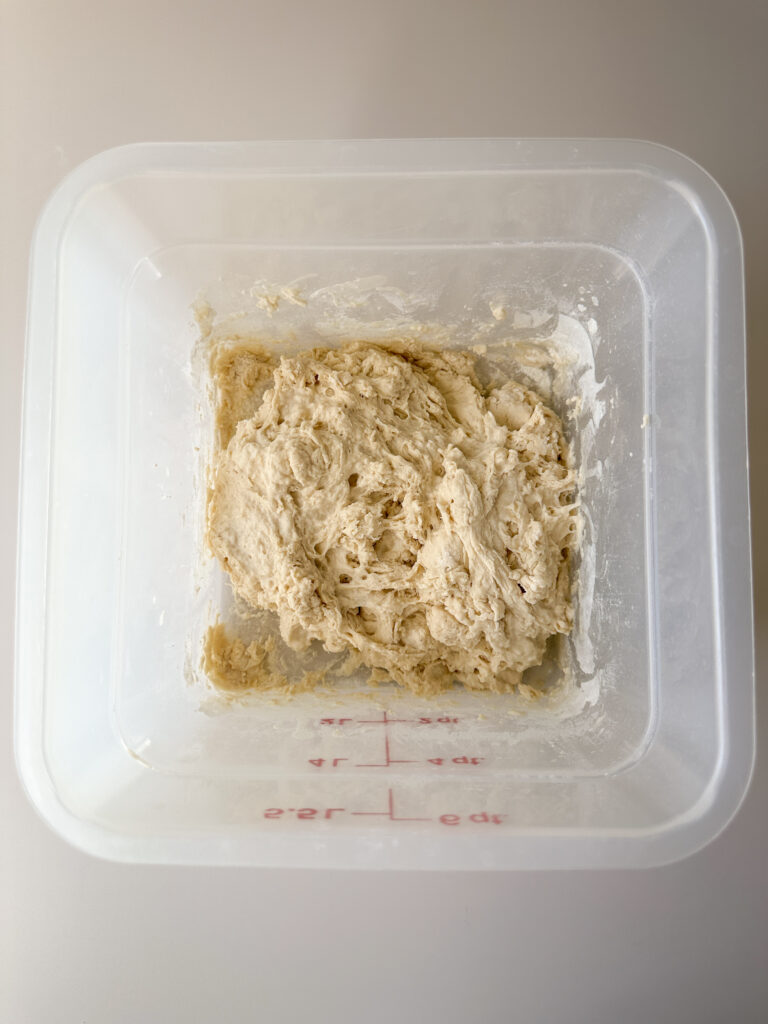
Add the salt and flour to the starter mixture. Stir and knead with your hand until all ingredients are combined into a shaggy dough. Cover with a damp towel or plastic and let it rest for 30 minutes at room temperature (70-77 degrees).
Step 3: Strengthen the Dough (Stretch & Folds)
Once the 30 minute rest has finished, you’ll begin your stretch and folds. This helps build structure in your dough and strengthen gluten bonds.
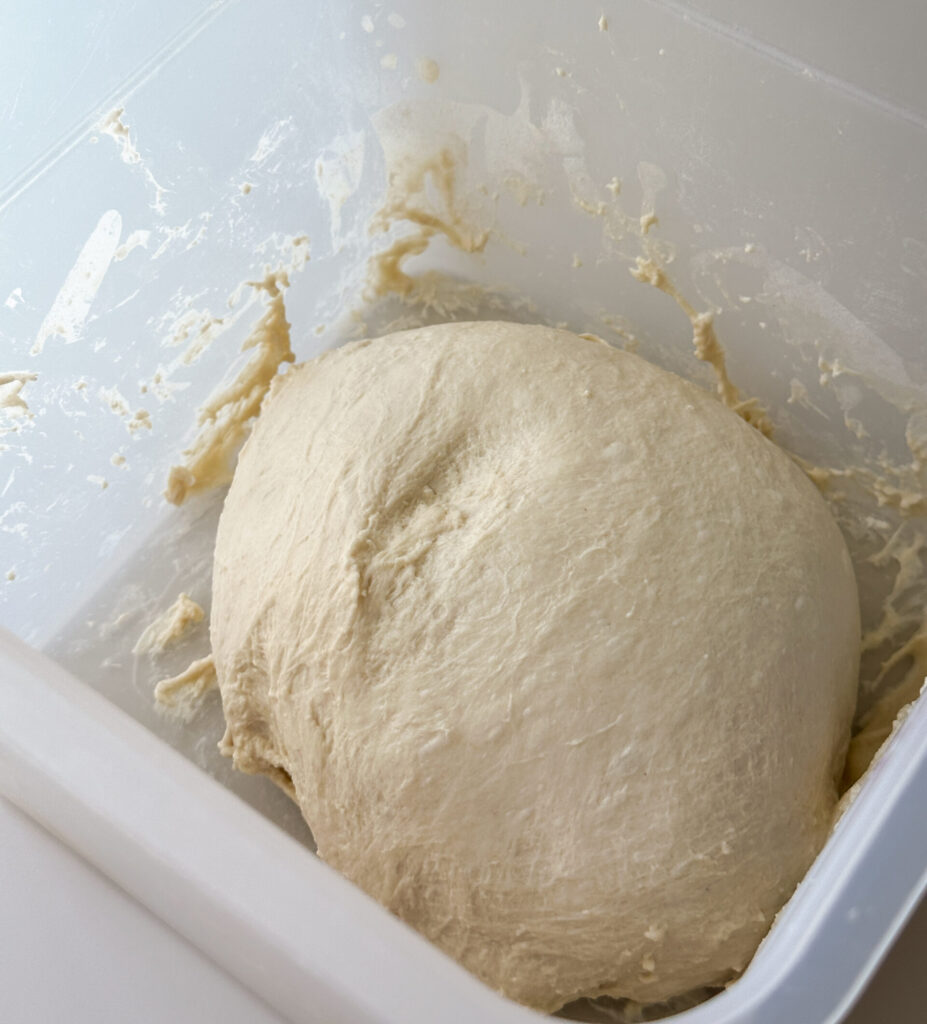
Starting at the edge of the dough with lightly wet hands, gently lift one edge of the dough, stretch it up, and fold it over the center. Rotate the bowl or container 90 degrees and repeat with the next side. Do this for all four sides of the dough to form a ball.
Cover the dough and let it rest for 30 minutes. Repeat this stretch-and-fold process two more times at 30-minute intervals for a total of 3 sets. Your dough should go from being rough and clumpy to smooth and silky.
Note on Temperature: Your dough loves a warmer climate, so aim to keep your dough between 73-78 degrees (you can use your digital thermometer to check the temperature). If you need to warm it up, try putting it in the oven with a light on, near a heater, or even on top of a dryer that’s on to conduct some heat!
Step 4: Bulk Fermentation
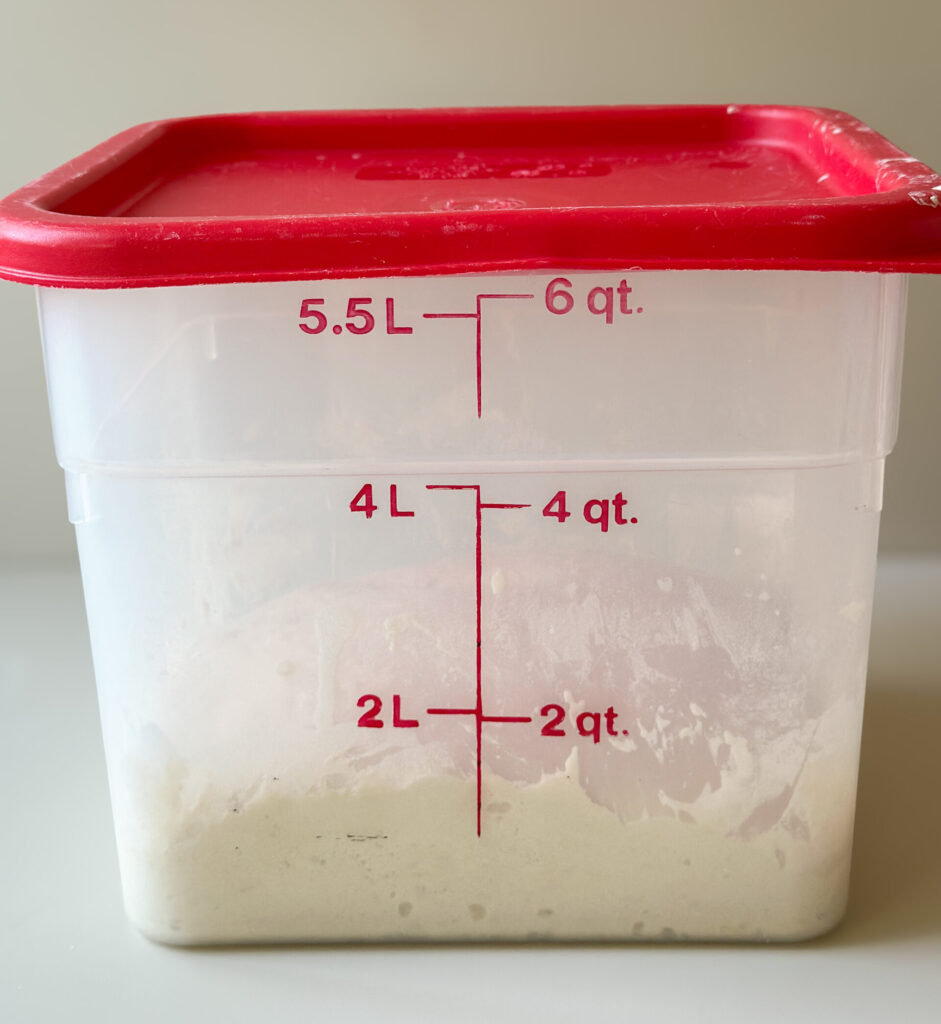
Assessing Rise Tip: After your dough is incorporated, try to gently push the dough down to be level in the bowl or container after the stretch and folds. Mark roughly where your dough is hitting on the side of the container with a sharpie or dry erase marker (you can put a piece of tape over if you don’t want to mark your bowl or jar).
After you mark the volume, make another mark above the that where the dough would be if it rose roughly 90 percent. This will be your target for how much you want your dough to rise during bulk fermentation. This dough is very easy to overproof, so I strongly suggest a guide and to shape it right BEFORE it reaches a 90 percent rise.
Cover the dough and allow it to rest in a warm spot until it has reached a 90 percent rise.
Step 5: Shaping the Dough
Lightly spray a clean work surface with cooking spray or dust with flour, then gently turn out your dough. I prefer cooking spray here; it makes shaping easier and helps prevent sticking.
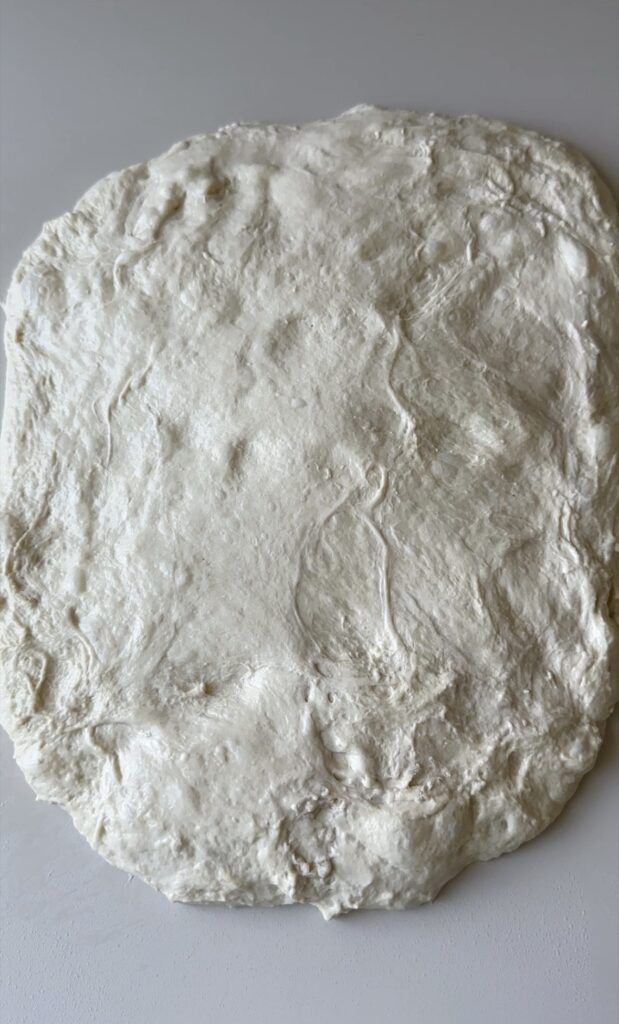
To shape the sandwich loaf: Gently stretch one portion about 8 inches wide and 9 inches long.
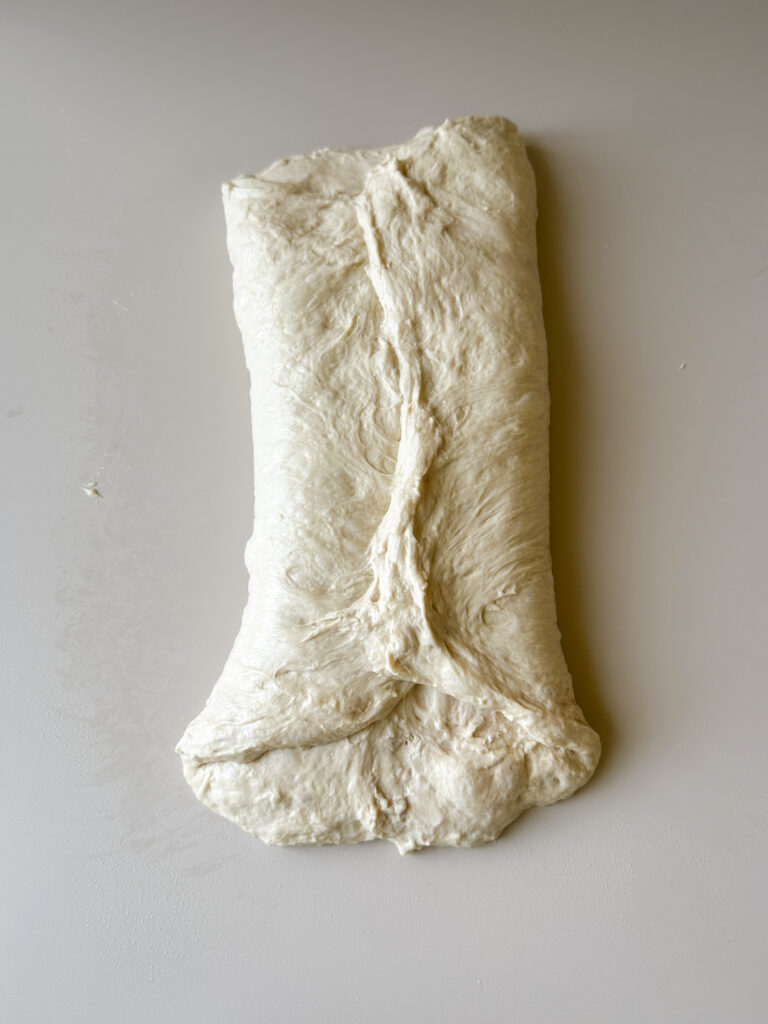
Starting with one of the (9 inch) sides, fold the dough into thirds over itself, like a letter. Repeat this step on the other side. You should now have a rectangle about 9 inches long and 5 inches wide.
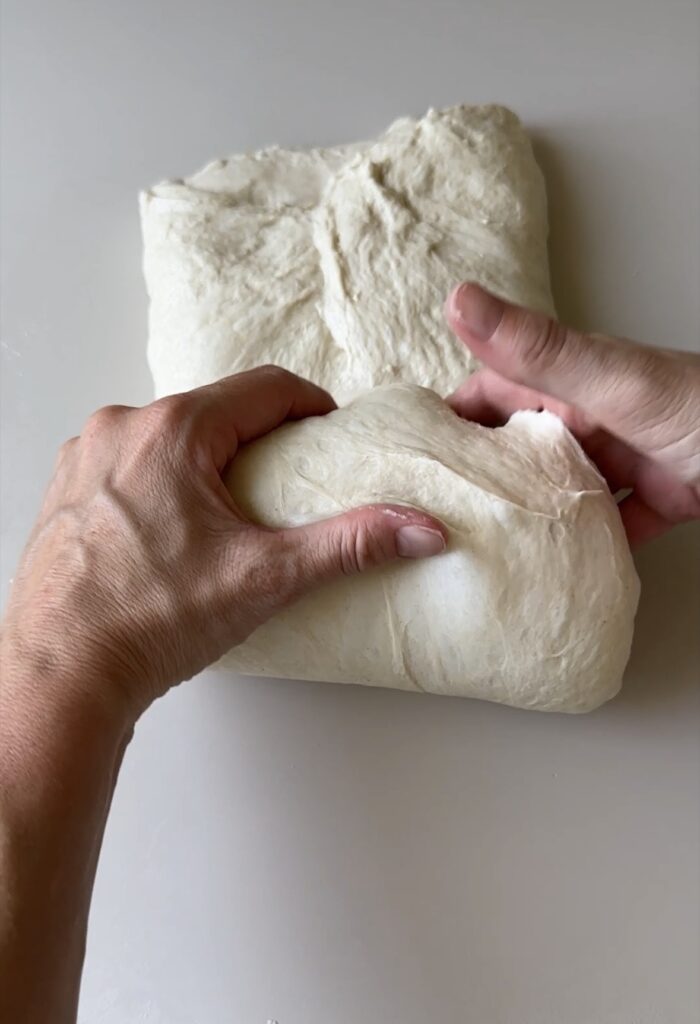
Starting at the bottom, roll the dough up gently to form a log shape. Pinch the seam and ends to seal.
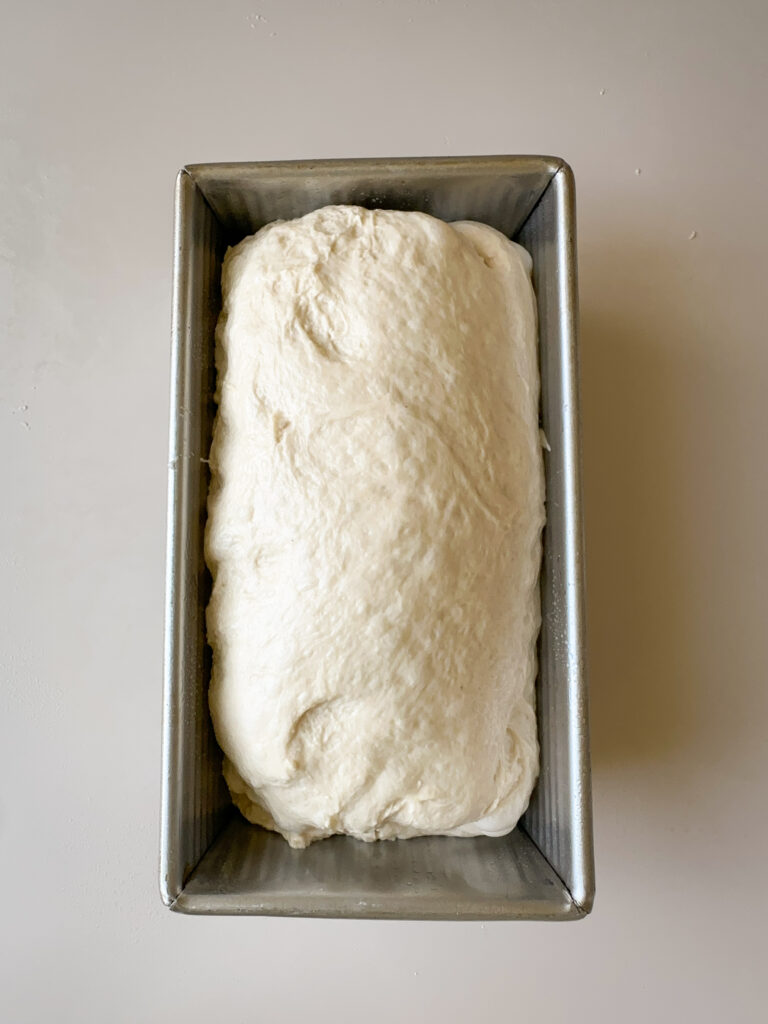
Transfer your loaf to the oiled pan, seam side down. Cover loosely with plastic or a damp towel to proof.
Step 6: Final Proofing
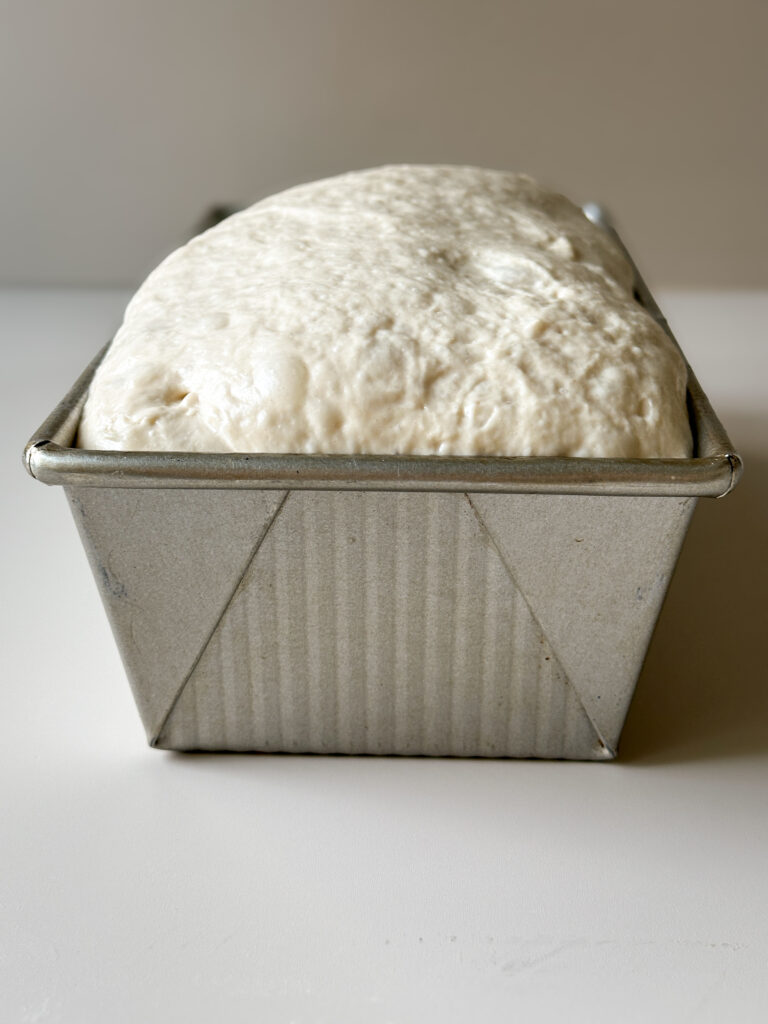
Allow the sandwich loaf to proof roughly an hour at room temperature covered, the dough should rise about 1/2 inch over the edge of the pan. Don’t skip this rise, it’s key to a light and airy loaf!
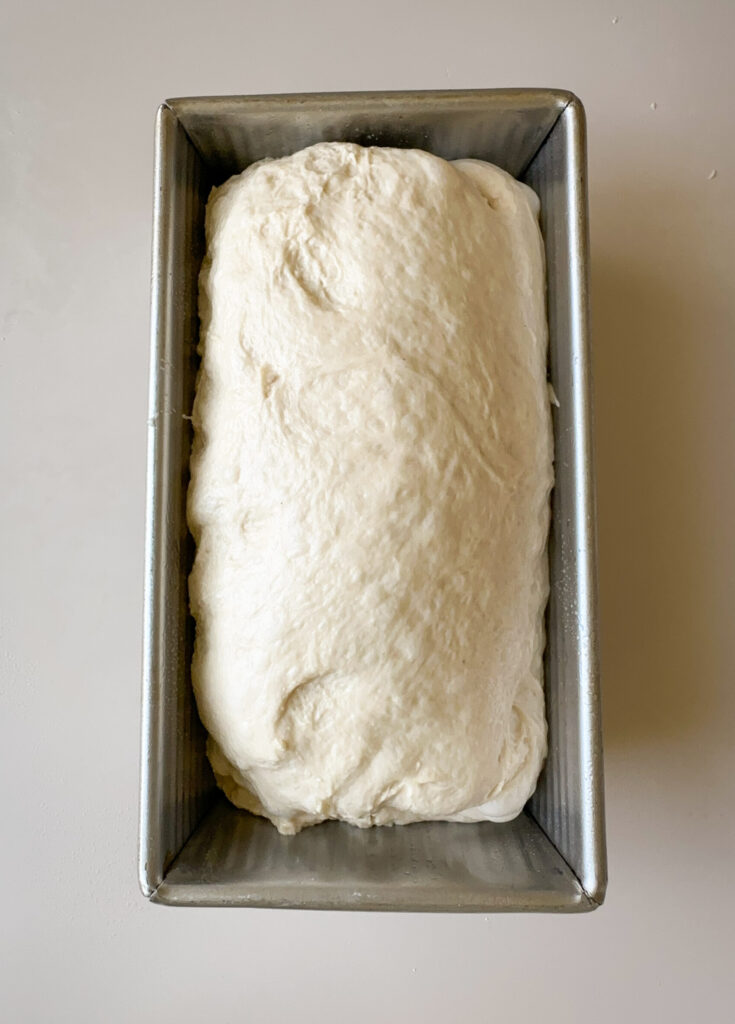
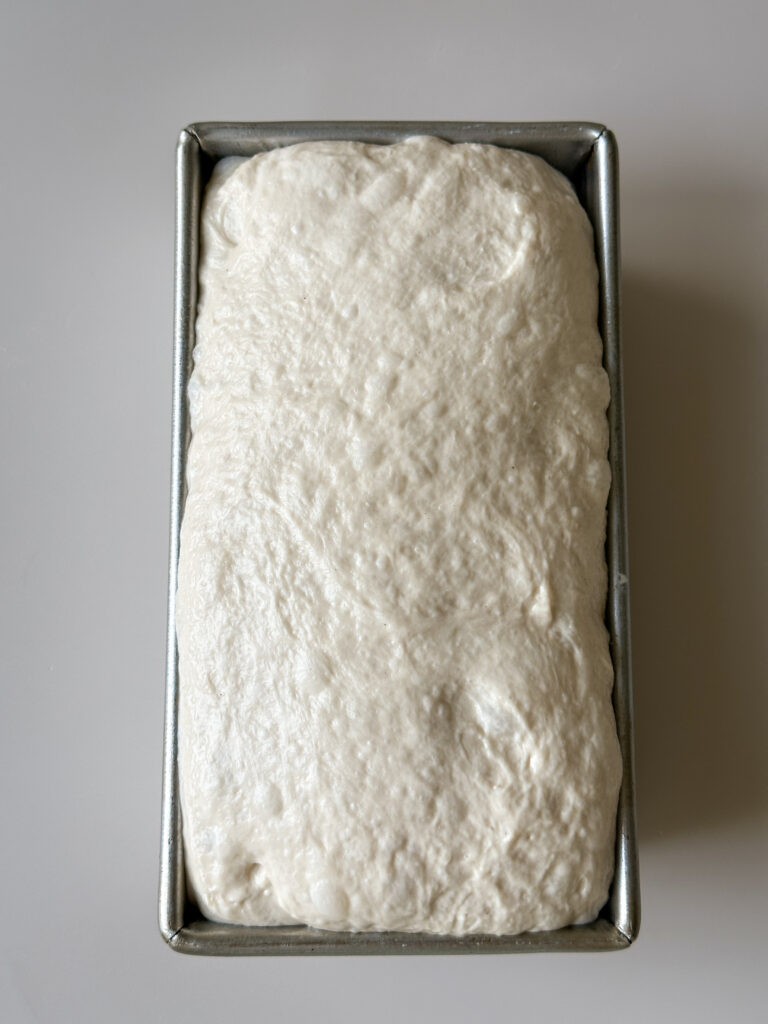
Overnight Fermentation Option: If you want to refrigerate your loaf overnight, simply cover the dough filled pan with plastic (I use a disposable shower cap) and transfer to the refrigerator overnight. You WILL NOT proof the dough in the pan until the next day.
When you’re ready to bake the loaf the next day, follow the directions to proof the dough over the edge of the pan before baking. Please note that this make take longer as the dough is colder, and that the loaf may brown more on the edges due to condensation.
Step 7: Baking the Bread
Preheat your oven to 400 F. Make sure your oven is full preheated before baking your bread.
Transfer your bread to the oven, and set the timer for ten minutes.
After ten minutes, remove the bread pan and cut a single deep score down the center of the loaf. This score helps with expansion and makes sure the bread can rise properly.
Return the bread quickly back to the hot oven (400 F), and set the timer for another 20 minutes. After 20 minutes of baking, rotate the pan to avoid the edges over browning.
Bake the bread for another 20 minutes after this at 400 F, for a total of 50 minutes. Your bread internal temperature should read between 200-205 F, you can check this by inserting a digital thermometer into the side of the bread (Don’t worry, it won’t hurt it!).
If your bread is starting to burn or get too brown on the top and hasn’t finished baking, tent with foil and finish baking to avoid the top being burned. All ovens are different so watch for this!
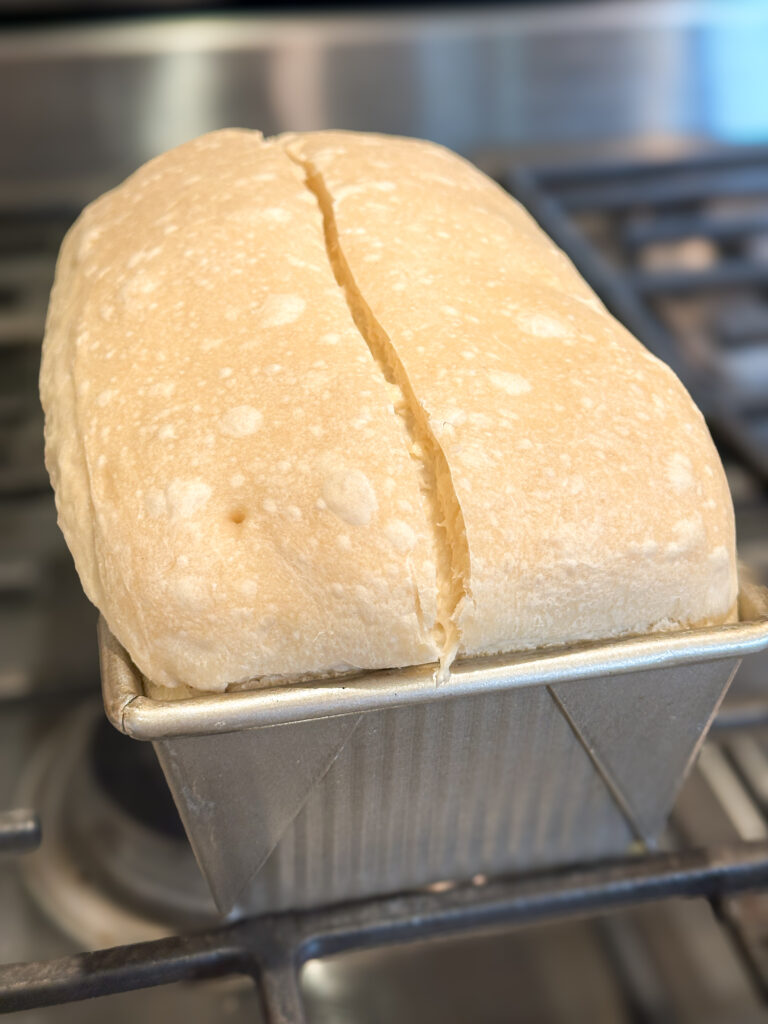
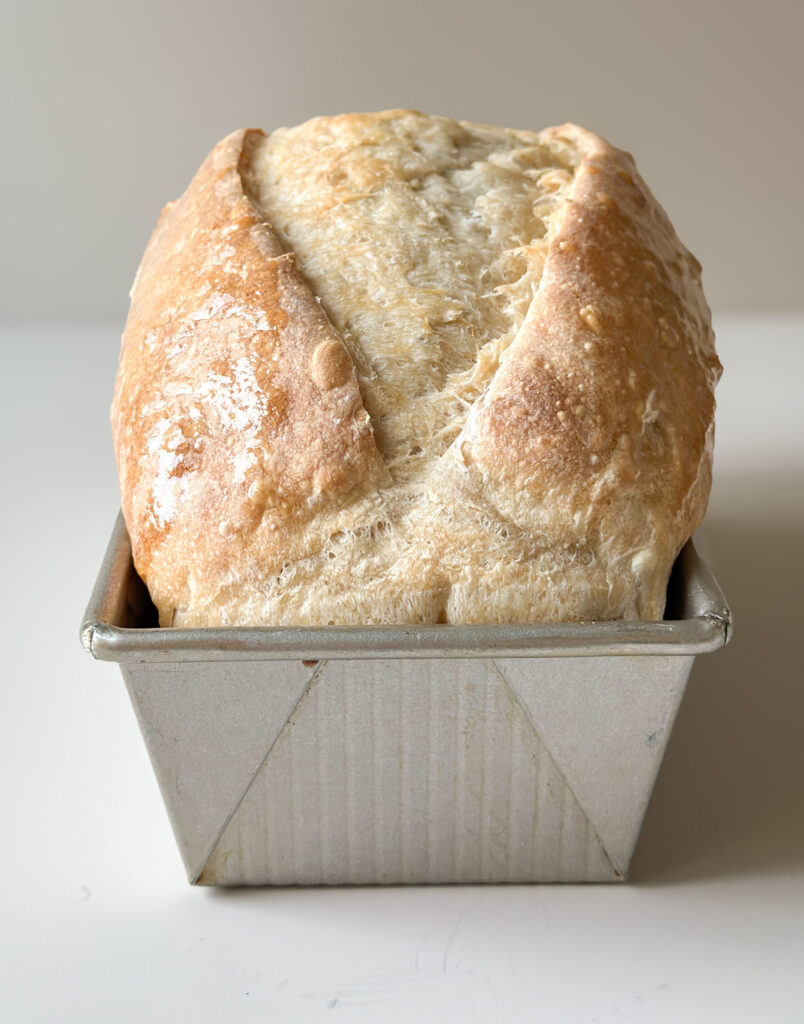
Remove the bread from the oven as soon as it’s finished baking, and let it rest in the pan a minute or two. Once slightly cooled, remove the bread from the pan and transfer the loaf to a wire cooling rack to completely cool and to prevent soggy crusts.
If you want an extra golden crust and shine, you can brush the top of the loaf with melted butter but this is optional.
Allow bread to fully cool before slicing and serving!
Yields 1 sandwich loaf
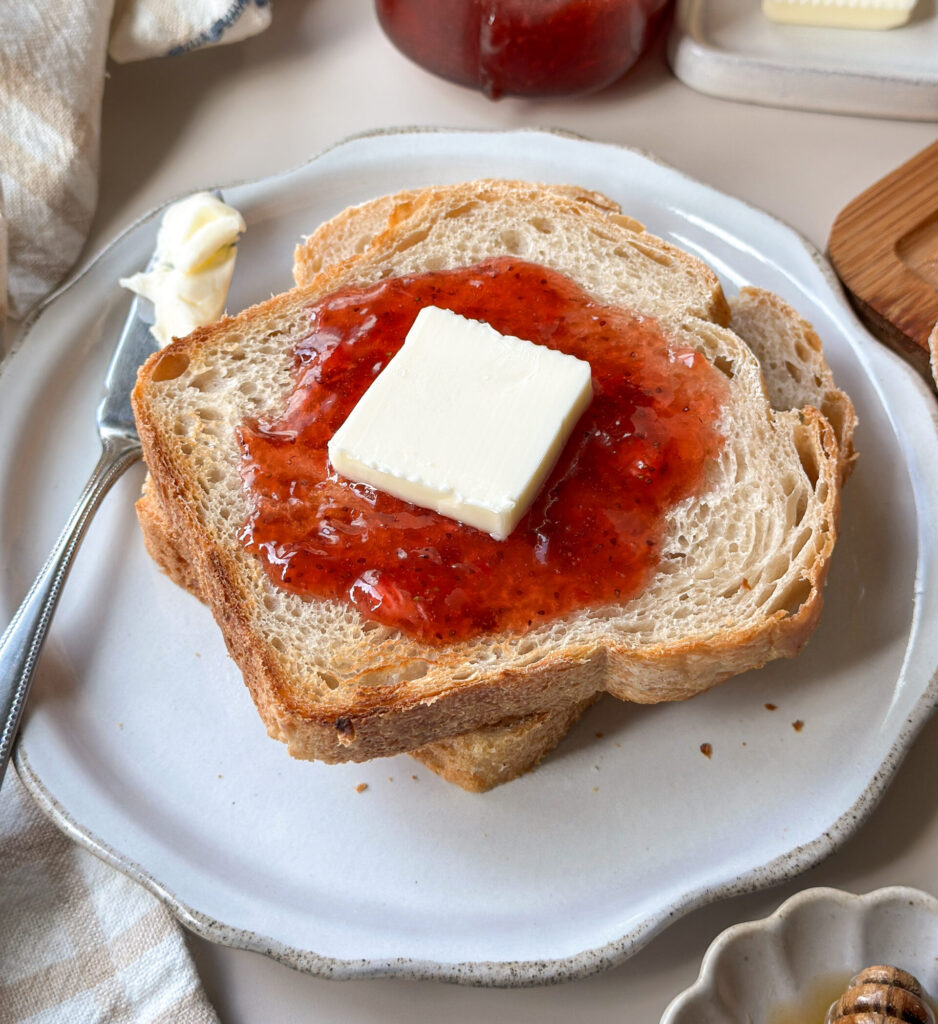
How to Store:
Room Temperature- Allow bread to cool completely before storing. Transfer to a sealed bag of your choice with the air removed. This sandwich bread will stay fresh at room temperature for 4-5 days before molding. For best results, slice and freeze by day 3-4 to extend freshness.
Freezer- Store sliced bread in a freezer-safe bag with as much air removed as possible. For easier separation, place pieces of parchment between the slices before freezing. Thaw at room temperature and toast directly for best flavor and texture.
FAQ’s
Your starter may not have been active enough, or your dough was too cold. Sourdough loves warmer environments try to keep your dough at 75 degrees (not warmer).
That’s normal at first. The stretch-and-folds help it become smooth and easier to handle. If you live in a very humid place, reduce the water by 25 grams to help balance out the moisture in you air.
Yes! Shape the loaf, cover it, and refrigerate overnight before the final proof. Be aware it might be a little more brown on the edges due to condensation.
It likely needed more bake time or needed to cool longer before slicing. Make sure the bread cools fully and the internal temperature is at least 195 F.
If you enjoyed this recipe, drop a comment and leave a star review and don’t forget to try more of my sourdough bread recipes!
Sourdough Bread Recipes:
- Sourdough Cinnamon Raisin Swirl Bread
- Sourdough Raspberry Cheesecake Bread
- Sourdough Jalapeño Popper Bread
Easy Sourdough Sandwich Bread
Equipment
- Large bowl or straight edge container – You can use a bowl if you'd like, but I prefer to use a large square Tupperware with a straight edge so I can assess the rise of my dough easily. I use this Cambro 6 quart with a lid for up to 2 loaves at a time.
- digital kitchen scale – for accurate measuring as this recipe is in grams, especially helpful with sourdough baking. This kitchen scale is great to start with.
- Digital food thermometer (optional) – to check the temperature of your dough and bread, this ensures a more reliable result. I use this one linked here.
- Dough Spatula (optional) – to help release the dough and divide it. I love this silicone dough spatula for mixing linked here.
- Bench knife – to divide the dough for shaping.
- Bread Lame or sharp knife – to score the bread so it can expand properly. This bread lame is inexpensive and great as a starter tool.
- Loaf Pan – I always use these 1 lb sandwich loaf pans from USA Baking, they're reliable, don't stick, and give a golden finish to your bread.
- Cooling rack – to allow bread to cool.
- Bread knife – a quality bread knife is essential to even slices for your bread.
Ingredients
Feed Your Starter:
- 1 1/2 (20g) Tbspn mother starter
- 1/2 (100g) cup water
- 3/4 (100g) cup all-purpose flour
For the Bread:
- 1/3 (100g) cup active sourdough starter (fed and bubbly)
- 1 1/2 (360g) cups room temperature water (approx 75 degrees F)
- 2 (25g) Tbspns honey
- 1 1/2 (10g) tsp sea salt
- 4 (500g) cups bread flour or all-purpose
For Brushing on Top:
- 1 Tbsp salted butter cold
Instructions
Step 1: Feed Your Starter Night Before Baking
- Baker’s Schedule: 8:00 PM
- To ensure a bubbly and active starter, feed your starter the night before baking.
- Use a 1:5:5 ratio to feed your starter (this means one part mature mother starter, five times the water, five times the flour).1 1/2 (20g) Tbspn mother starter, 1/2 (100g) cup water, 3/4 (100g) cup all-purpose flour
- Mix flour and water in a jar with a spatula, cover loosely with lid, and mark the volume of the starter in your jar with a rubber band or piece of tape and marker. Let starter sit at room temperature (70-75 degrees) overnight until bubbly and doubled in size.
Step 2: Make the Dough
- Baker’s Schedule: Day 1- 8:00 AM
- In a large bowl or as I prefer a clear straight edge container, mix the active starter, water, and honey until the ingredients are combined.1/3 (100g) cup active sourdough starter , 1 1/2 (360g) cups room temperature water, 2 (25g) Tbspns honey
- Humidity Note: If you live in a hot and humid climate, adjust the water to reduce it by 25 grams to accommodate for the extra moisture in the environment.
- Add the salt and flour to the starter mixture. Stir and knead with your hand until all ingredients are combined into a shaggy dough. Cover with a damp towel or plastic and let it rest for 30 minutes at room temperature (70-77 degrees).1 1/2 (10g) tsp sea salt, 4 (500g) cups bread flour
Step 3: Strengthen the Dough (Stretch & Folds)
- Once the 30 minute rest has finished, you'll begin your stretch and folds. This helps build structure in your dough.
- Starting at the edge of the dough with lightly wet hands, gently lift one edge of the dough, stretch it up, and fold it over the center. Rotate the bowl or container 90 degrees and repeat with the next side. Do this for all four sides of the dough to form a ball.
- Cover the dough and let it rest for 30 minutes. Repeat this stretch-and-fold process two more times at 30-minute intervals for a total of 3 sets. Your dough should go from being rough and clumpy to smooth and silky.
- Note on Temperature: Your dough loves a warmer climate, so aim to keep your dough between 73-78 degrees (you can use your digital thermometer to check the temperature). If you need to warm it up, try putting it in the oven with a light on, near a heater, or even on top of a dryer that's on to conduct some heat!
Step 4: Bulk Fermentation
- Assessing Rise Tip: After your dough is incorporated, try to gently push the dough down to be level in the bowl or container after the stretch and folds. Mark roughly where your dough is hitting on the side of the container with a sharpie or dry erase marker (you can put a piece of tape over if you don't want to mark your bowl or jar).
- After you mark the volume, make another mark above the that where the dough would be if it rose roughly 90 percent. This will be your target for how much you want your dough to rise during bulk fermentation. This dough is very easy to overproof, so I strongly suggest a guide and to shape it right BEFORE it reaches a 90 percent rise.
- Cover the dough and allow it to rest in a warm spot until it has reached a 90 percent rise.
Step 5: Shaping the Dough
- Lightly spray a clean work surface with cooking spray or dust with flour, then gently turn out your dough. I prefer cooking spray here; it makes shaping easier and helps prevent sticking.
- To shape the sandwich loaf: Gently stretch one portion about 8 inches wide and 9 inches long.
- Starting with one of the (9 inch) sides, fold the dough into thirds over itself, like a letter. Repeat this step on the other side. You should now have a rectangle about 9 inches long and 5 inches wide.
- Starting at the bottom, roll the dough up gently to form a log shape. Pinch the seam and ends to seal.
- Transfer your loaf to the oiled pan, seam side down. Cover loosely with plastic or a damp towel to proof.
Step 6: Final Proofing
- Allow the sandwich loaf to proof roughly an hour at room temperature covered, the dough should rise about 1/2 inch over the edge of the pan. Don’t skip this rise, it’s key to a light and airy loaf!
- Overnight Fermentation Option: If you want to refrigerate your loaf overnight, simply cover the dough filled pan with plastic (I use a disposable shower cap) and transfer to the refrigerator overnight. You WILL NOT proof the dough in the pan until the next day.
- When you’re ready to bake the loaf the next day, follow the directions to proof the dough over the edge of the pan before baking. Please note that this make take longer as the dough is colder, and that the loaf may brown more on the edges due to condensation.
Step 7: Baking the Bread
- Preheat your oven to 400 F. Make sure your oven is full preheated before baking your bread.
- Transfer your bread to the oven, and set the timer for ten minutes.
- After ten minutes, remove the bread pan and cut a single deep score down the center of the loaf. This score helps with expansion and makes sure the bread can rise properly.
- Return the bread quickly back to the hot oven (400 F), and set the timer for another 20 minutes. After 20 minutes of baking, rotate the pan to avoid the edges over browning.
- Bake the bread for another 20 minutes after this at 400 F, for a total of 50 minutes. Your bread internal temperature should read between 200-205 F, you can check this by inserting a digital thermometer into the side of the bread (Don’t worry, it won’t hurt it!).
- If your bread is starting to burn or get too brown on the top and hasn't finished baking, tent with foil and finish baking to avoid the top being burned. All ovens are different so watch for this!
- Remove the bread from the oven as soon as it’s finished baking, and let it rest in the pan a minute or two. Once slightly cooled, remove the bread from the pan and transfer the loaf to a wire cooling rack to completely cool and to prevent soggy crusts.
- If you want an extra golden crust and shine, you can brush the top of the loaf with melted butter but this is optional.1 Tbsp salted butter
- Allow bread to fully cool before slicing and serving!
- Yields 1 sandwich loaf
I finally found my sourdough sweet spot! After struggling with Dutch oven loaves, I decided to try your loaf pan method and wow – what a game-changer! The bread came out beautifully and makes the most perfect sandwich slices. The fact that it is a same-day bake is just cherry on top! I think I am officially converted to loaf pan sourdough. Thank you for sharing this recipe – it’s given me my confidence back in my sourdough journey!
Alla,
Thank you for your review this recipe was meant to be easy and hassle free so I’m thrilled it was that for you! Thank you for your wonderful feedback!
If you haven’t made this yet, here is your sign!!! So soft and delicious, and the flavor!
I have made at least 20 different sourdough sandwich bread recipes and this replaces them all. Thank you for sharing!! B
This loaf…so yummy, so fluffy, soft, nice crisp top! I love how easy this recipe is and that it can be a same day or next day bake and in the loaf pan! No dutch oven needed! After many trials & tribulations figuring out the heat conduction of my oven, I have perfected this loaf and my baby gives it 2 thumbs up! 🙂
Sourdough crisis averted! After some trial and error with Dutch oven loaves, I switched back to your loaf pan method and with this recipe the results are amazing. This saved the day (and my sanity)! Perfect sandwich slices, same-day bake – I’m sold! My sourdough journey just leveled up, and I’m forever grateful. Thanks for this easy bread-winning recipe.
I’m so grateful for your feedback and I’m so happy you love this recipe! Happy baking!
I cannot stop making this sourdough sandwich loaf. It is pure perfection!! My whole family actually preferred this over the traditional sourdough bread . Thank you so much for the recipe . Comes out beautifully 💛
I’m so happy this loaf is so well loved! Thank you for your feedback 🙂
I have been making sourdough for almost one year but never have tried using a loaf pan. I am pleasantly surprised ! My whole family enjoyed this and it was so simple. Clear instructions. Perfect recipe. Thank you!!
Hi Lindsay, I’m so happy this recipe was easy for you and you found the recipe easy 🙂
This is going on my weekly food prep list! I’ve made the rustic loaf for years and this was my first time making the sandwich bread- it was perfect. Love how versatile it is for sandwiches, toast, etc. I made it this morning and it’s already half gone!
Hi Brooke, the versatility of the sandwich loaf is my favorite too. Glad you loved this recipe!
This recipe is so easy to follow and fits perfectly into your day. I mixed my dough up first thing in the morning and about 12 hours later I baked it. I prefer to get as much fermentation as possible, but in this case I needed to bake same day and feel pretty comfortable with 12 hours of fermenting. Also, if you’re used to the double loaf pan method don’t shy away from trying this recipe that’s uncovered. I ended up needing about 5 min less on cook time but it was perfect and so easy!
Hi Anita, I’m so happy you loved this recipe and found it so versatile! I’m glad you loved the one loaf pan bake it’s tried and true for me!