
Sourdough Brown Sugar Cinnamon Pop-Tarts
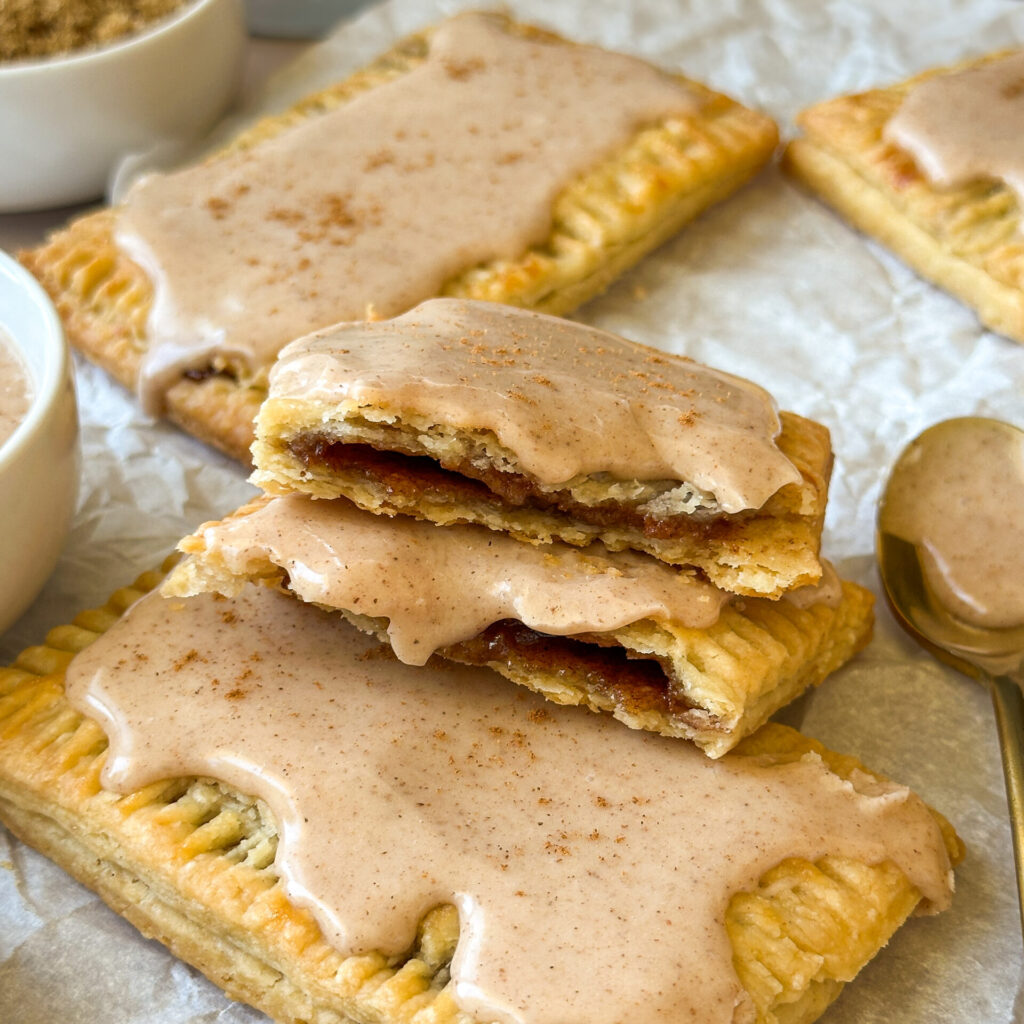
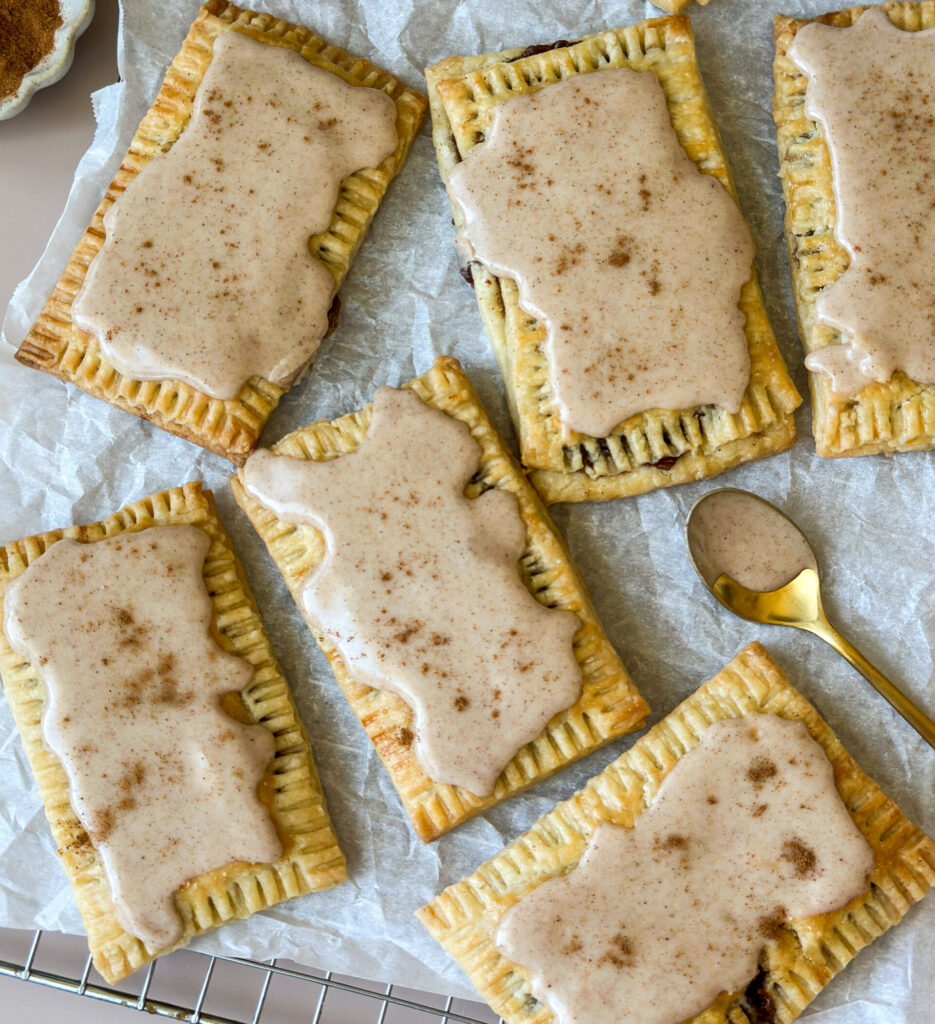
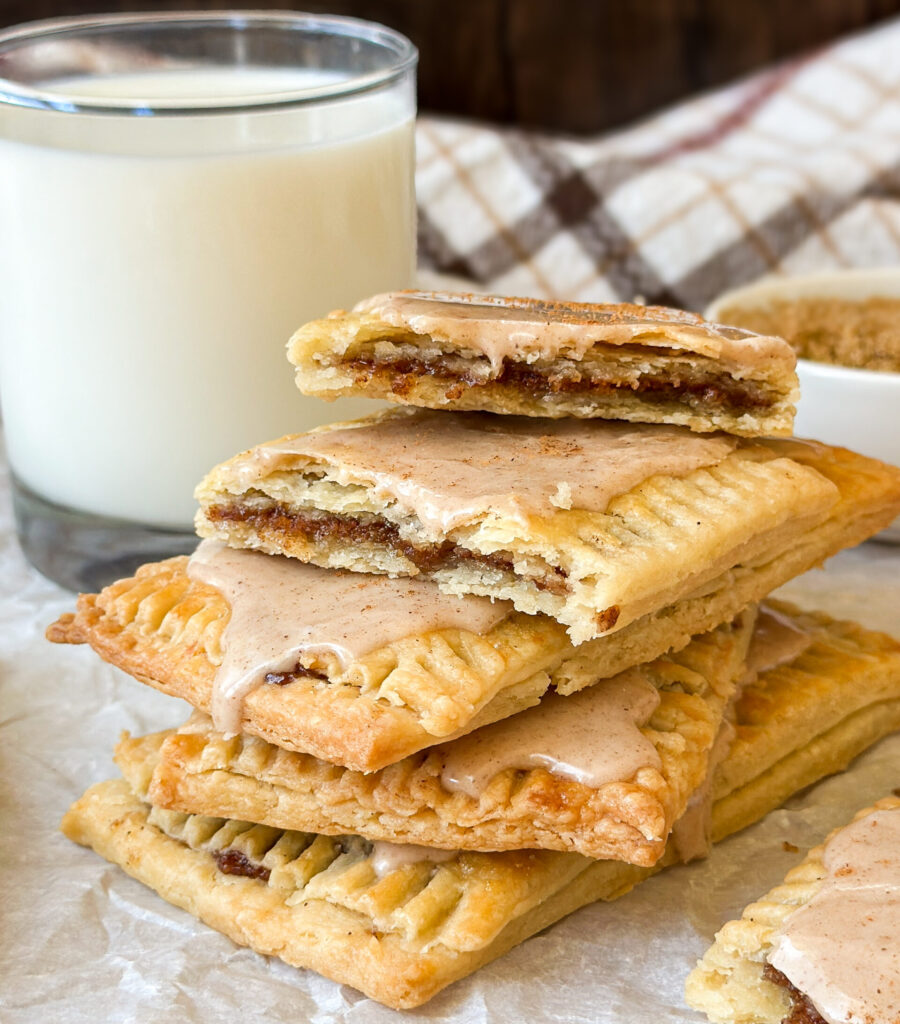
Skip the box, and make these Sourdough Brown Sugar Cinnamon Pop-Tarts instead. They’re surprisingly easy to make with a buttery, flaky sourdough discard pastry, a rich brown sugar cinnamon filling, and topped with a glossy cinnamon vanilla glaze. They’re nostalgic, homemade, and even better than you remember.
Why You’ll Love This Recipe
- A great way to use discard: Have discard on hand? This is a delicious way to use it!
- Tastes better than the original: with a brown sugar cinnamon filling and a sweet glaze, these buttery pastries are even better than the boxed version.
- Simple ingredients: Made with pantry staples you probably already have on hand.
- Clear step-by-step directions: Easy to follow instructions and photos walk you through each step.
- Flexible for your schedule: Prep the pastry ahead of time or keep a batch in the freezer for fresh Pop-Tarts whenever you’re craving one!
Tools You’ll Need:
- Mixing Bowls-to combine pastry crust if mixing dough by hand, the brown sugar filling, and the glaze.
- Pastry Blender (optional)- helpful to mix and combine the pastry dough when mixing by hand. I love this pastry blender but this is entirely optional and I’ll show you how to make the dough without it.
- Digital kitchen scale (optional)– for accurate measuring especially helpful with sourdough baking.
- Cheese Grater (if mixing by hand)- if you’re mixing this pastry dough by hand, I highly recommend using a cheese grater to grate your butter into even pieces. If you don’t have one, you can also cut the butter. This is the cheese grater I use linked here.
- Food Processor (if using food processor method)- If you want to make this pastry using a food processor, you’ll need a food processor with the chopping attachment.
- Rolling pin- to roll out your pastry dough.
- Tape measure or ruler- to measure your pastries if you want them even.
- Fork- to crimp the edges of the pop-tarts.
- Pastry brush- for the egg wash. You can also use a folded paper towel.
- Baking Sheets- to bake the pop-tarts.
- Parchment Paper- to line the baking sheet to avoid the pastries sticking to the pan.
- Whisk- to combine the cinnamon glaze.
- Spoon- for spreading the glaze on the pop-tarts.
- Cool rack (optional)- to cool the pop-tarts.
Gather Your Ingredients:
- All-purpose Flour- Creates the base of the pastry. You’ll also use flour for the filling.
- Sourdough discard– Adds flavor and moisture and is the magic that ferments your pie crust if you choose. You can use starter or discard that is straight from the fridge, just make sure it’s cold so the dough stays cold.
- Unsalted Butter- You want to use very cold butter for the pastry, I really love Kerrygold butter for the flavor and texture but any butter will work. You’ll also need butter for the filling.
- White Sugar- adds a touch of sweetness to the crust.
- Sea Salt- balances the sweetness in the pop-tarts.
- Baking Powder- the secret ingredient I add to give a little extra lift to my pastries and a flaky texture.
- Lemon Juice- the acid from the lemon juice breaks down the gluten and makes the crust so tender.
- Ice Water- binds the crust without activating the gluten too much.
- Brown Sugar- creates that rich filling; you can use light or dark.
- Cinnamon- this is added to the filling for that classic flavor and warmth. You’ll also use this in the cinnamon glaze.
- Vanilla Extract- added for a touch of sweetness to the filling and glaze.
- Powdered Sugar- thickens and sweetens the cinnamon glaze. Do not use granulated sugar or the glaze will be gritty.
- Light corn syrup (optional)- this gives the glaze a shine and helps it set and harden. You can skip it and use extra milk but the texture of the glaze may not be as close to a pop-tart.
- Maple Flavoring (optional)- I recommend adding some maple flavoring to the icing it’s absolutely divine. I love this Maple Flavoring that is Organic and non-GMO from Frontier Co-op.
- Whole Milk- thins the glaze for the desired consistency.
- Egg- for the egg wash.
Step-by-step Instructions
Step 1: Mix the Pastry Crust
This pastry crust can be made by hand or by using a food processor, I will give you both options, depending on what fits your needs.
Mixing by hand: Combine the flour, white sugar, baking powder, and salt in a mixing bowl. Whisk together.
Using a cheese grater on the largest setting, grate your cold butter and transfer it to the bowl with the dry ingredients.
Mix in the butter until it’s fully coated in the flour mixture, you should see pea-sized chunks of butter in the dough.
Add the cold sourdough discard and lemon juice to the bowl, and start to combine the dough.
Begin to mix with a pastry whisk or your hands to bring the dough together. If you need to, you can turn your dough out on a clean surface to mix it with your hands.
The ball of dough should come together easily, if it’s too dry add a teaspoon of cold ice water at a time until your dough just comes together.
If the dough is too wet or sticky, sprinkle with a little flour and continue to bring the dough together.
I typically don’t even need to use water, but it’s okay and normal if you do!
Because your hands can melt the butter, it’s important to just bring the dough together and then stop mixing. You want chunks of butter and overworking the dough isn’t the goal.
Flatten the dough into a disc, and cut the dough in half (this doesn’t have to be perfect just guess). You want to see the bits of butter throughout your dough, this is what makes those flakey layers!
Flatten each half into a round, then wrap tightly in plastic wrap and refrigerate at least 2 hours but optionally overnight for longer fermentation.
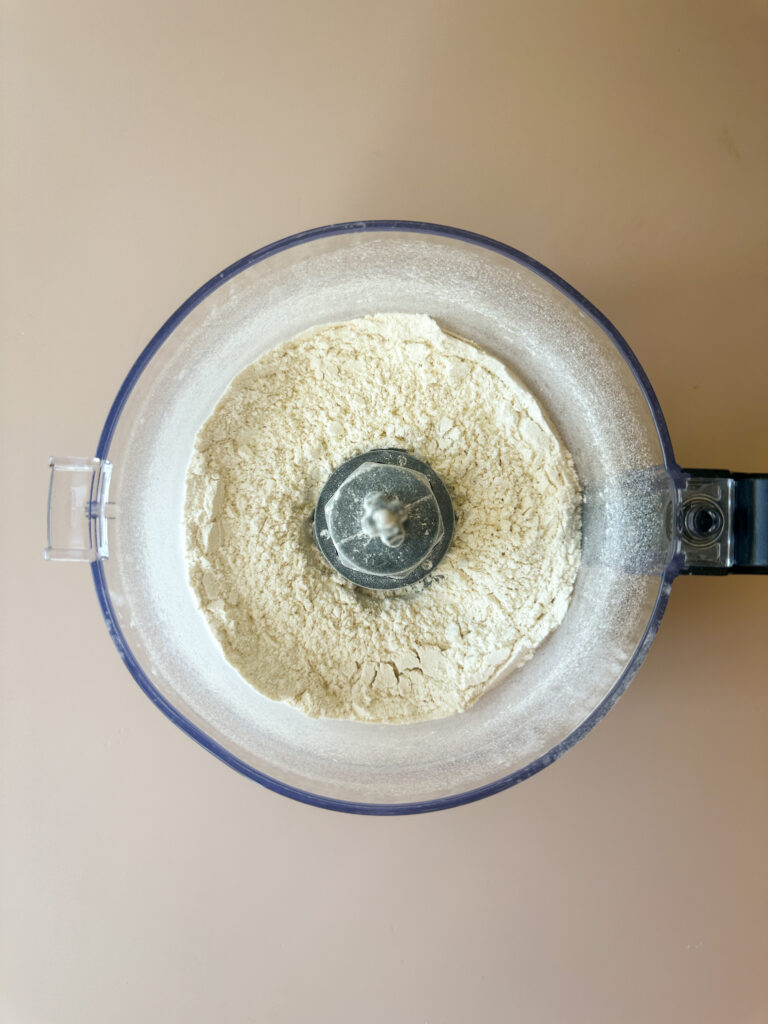
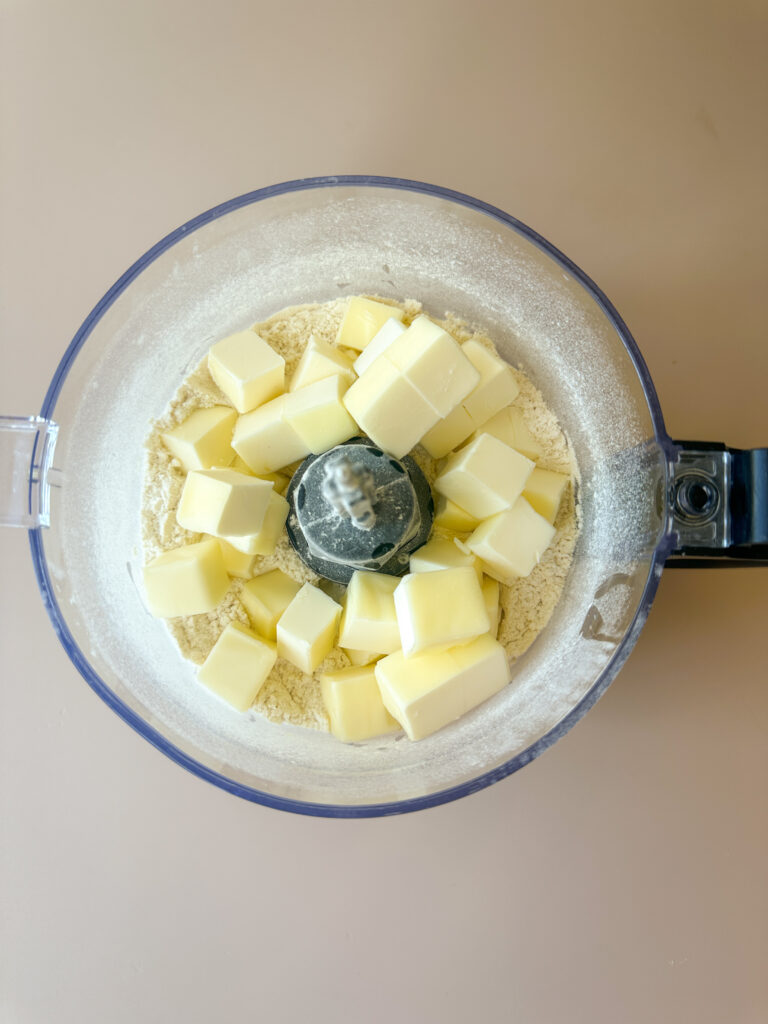
Food Processor Option: Add the flour, white sugar, baking powder, and salt to the bowl of your food processor fitted with the blade attachment. Pulse a few times to combine all of the dry ingredients.
Cut up your butter (make sure it’s very cold), into 1/4 inch cubes. Add the butter to the dry ingredients.
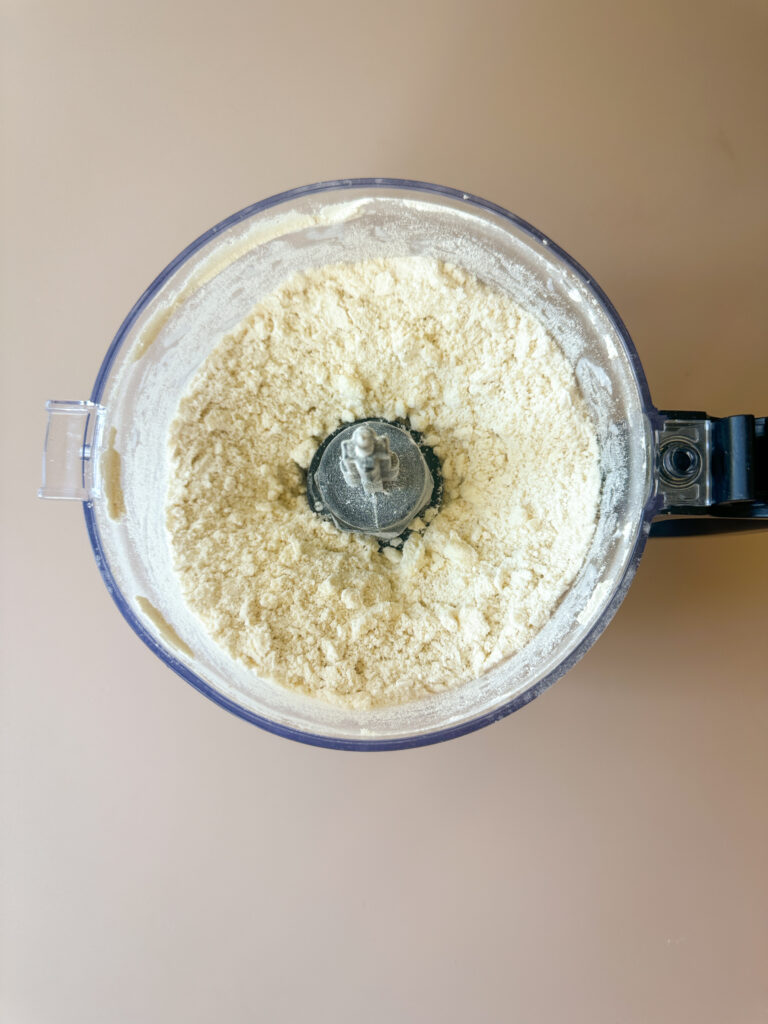
Pulse the butter until you have blueberry sized balls of butter cut up into the flour mixture. Don’t over blend the butter into the flour at this stage! Go slow and stop when you see the butter is chopped up to the desired size.
Add the sourdough discard and the lemon juice to the work bowl.
Pulse together the ingredients slowly until a dough starts to form. If the dough is very dry, you can add 1 teaspoon of ice water at a time until the dough just comes together.
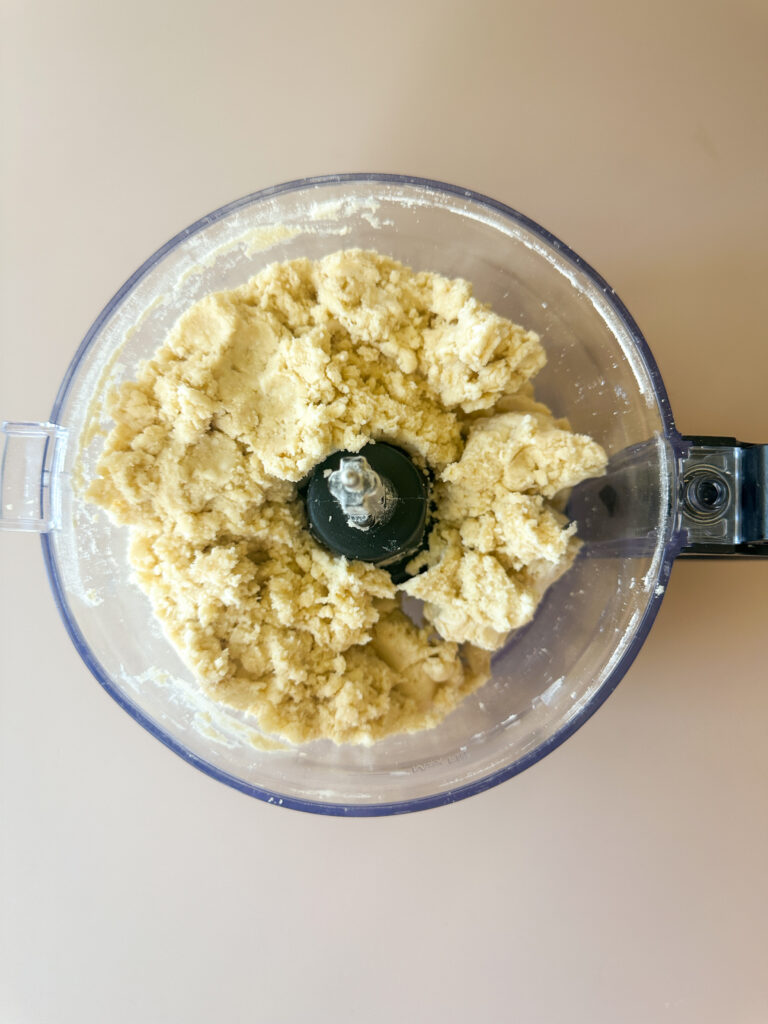
Once a pie dough is forming, dump out the dough onto a clean work surface and use your hands to bring the dough together. You want to see the bits of butter throughout your dough, this is what makes those flakey layers!
Divide the dough, and flatten both sections into discs and wrap tightly in plastic wrap.
Refrigerate the pastry dough at least 2 hours but optionally overnight for the longer fermentation.
Step 2: Make the Brown Sugar Cinnamon Filling
In a small bowl, add the softened butter. Make sure this isn’t MELTED or the filling will be too runny.
Add the brown sugar, cinnamon, flour, salt, and vanilla extract to the softened butter.
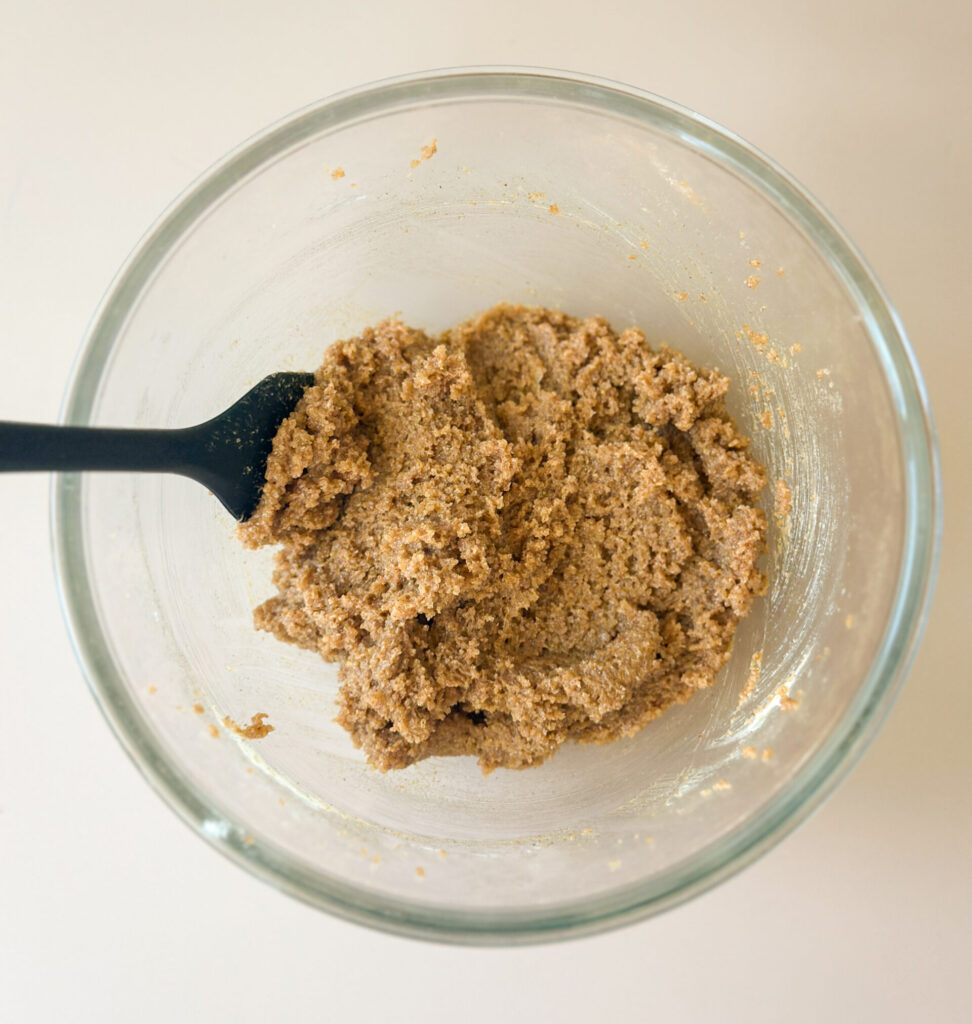
Using hand beaters or a spatula, mix the filling really well until it forms a smooth paste like mixture. Set aside for filling the pop-tarts.
Step 3: Shape the Tarts
Line 2 baking sheets with parchment paper, and set aside.
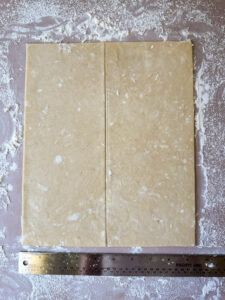
On a well floured surface (this is important to avoid sticking), roll one disc of dough into a 9 × 12-inch rectangle, about ⅛ inch thick. The bottom and top edges should be 9 inches, the sides 11 inches.
Using a pizza cutter or sharp knife, trim the edges until even. Cut the dough in half lengthwise to create two long strips about 4 1/2 inches wide.
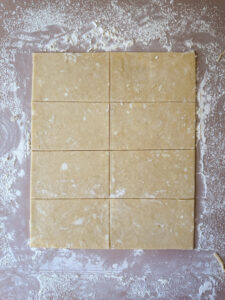
Next, cut each strip into four equal pieces horizontally to make eight rectangles measuring approximately 4 1/2 × 3 inches.
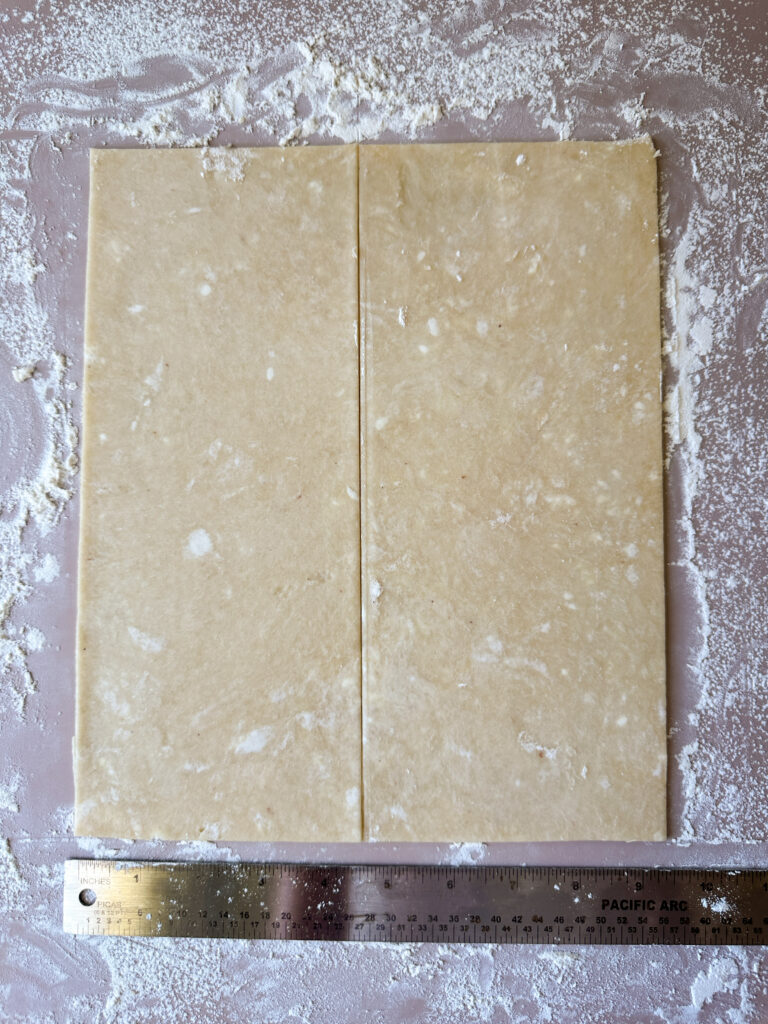
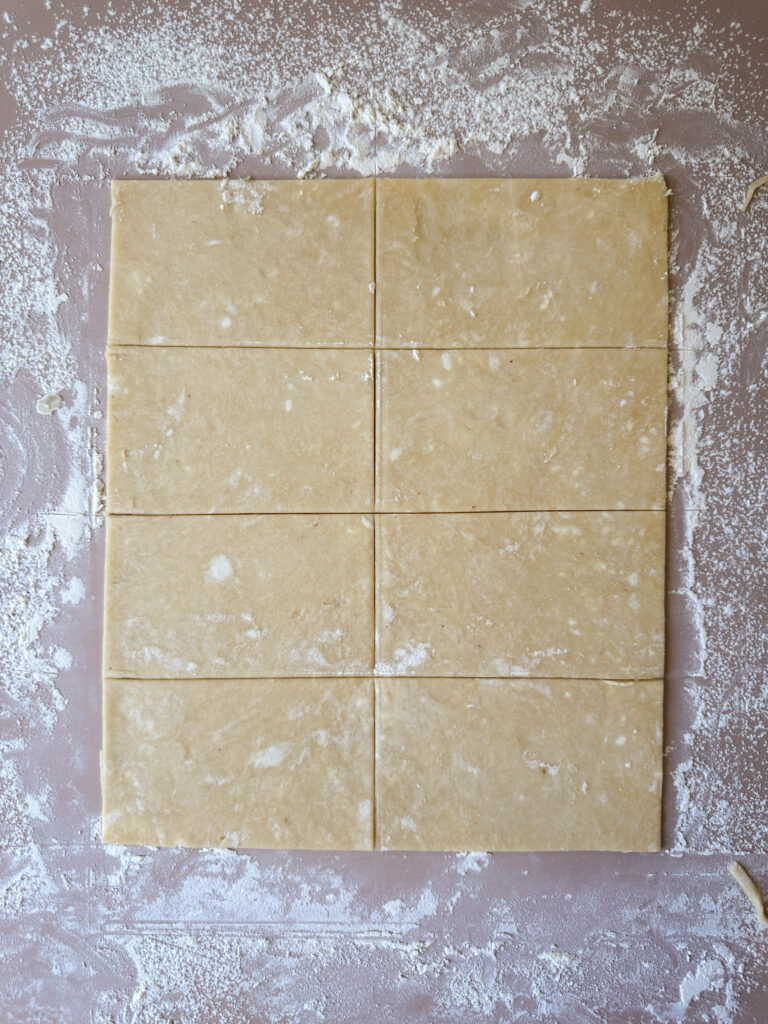
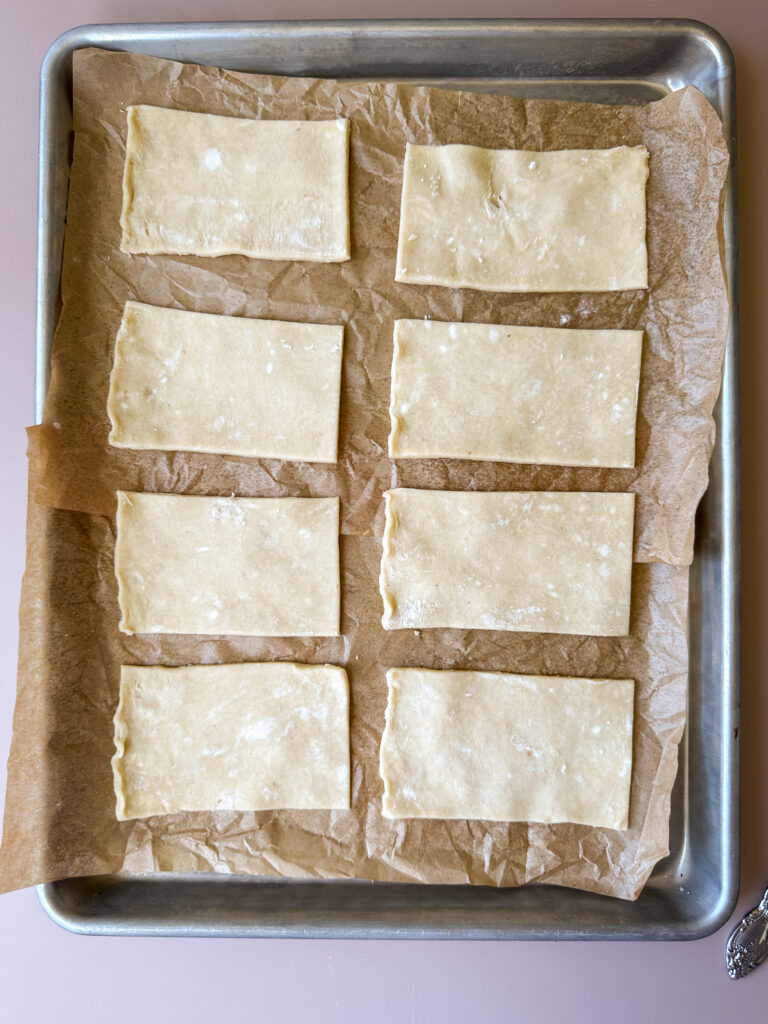
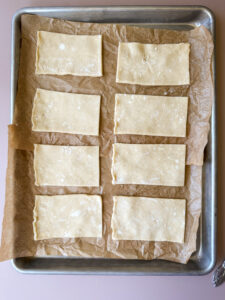
Gently lift these sections of dough and place on a parchment lined baking sheet, and transfer to the refrigerator to chill and set up. This dough is very buttery, so frequently chilling these tarts is key to shaping them.
Repeat the same shaping step as listed above with the second disc to create 16 rectangles total. Make sure you chill the shaped sections of dough for about 30 minutes before you proceed with filling the pop-tarts.
Step 4: Fill the Pop-Tarts
Remove on of the sheets of shaped dough from the refrigerator, and gather your brown sugar cinnamon filling.
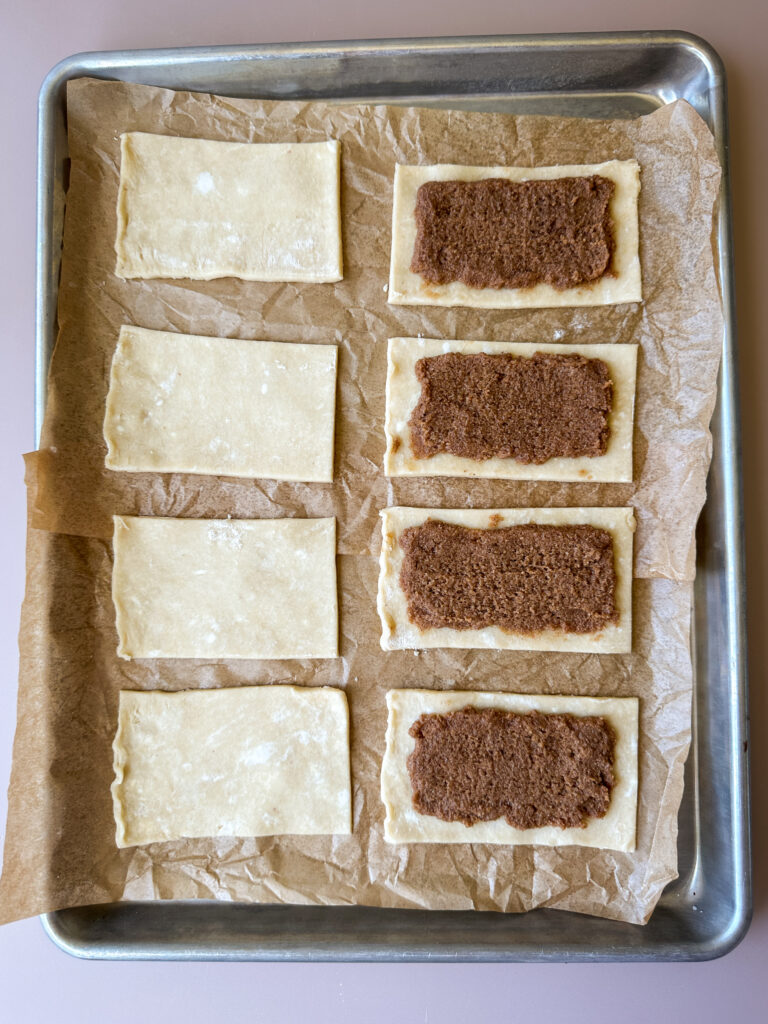
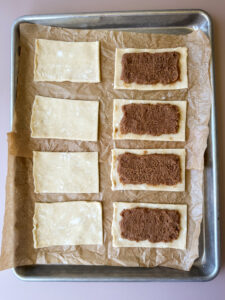
Spread about 1½ tablespoons of brown sugar cinnamon filling onto each rectangle, leaving a 1/4-inch border around the edges. Don’t overfill these or you will have a lot of leakage.
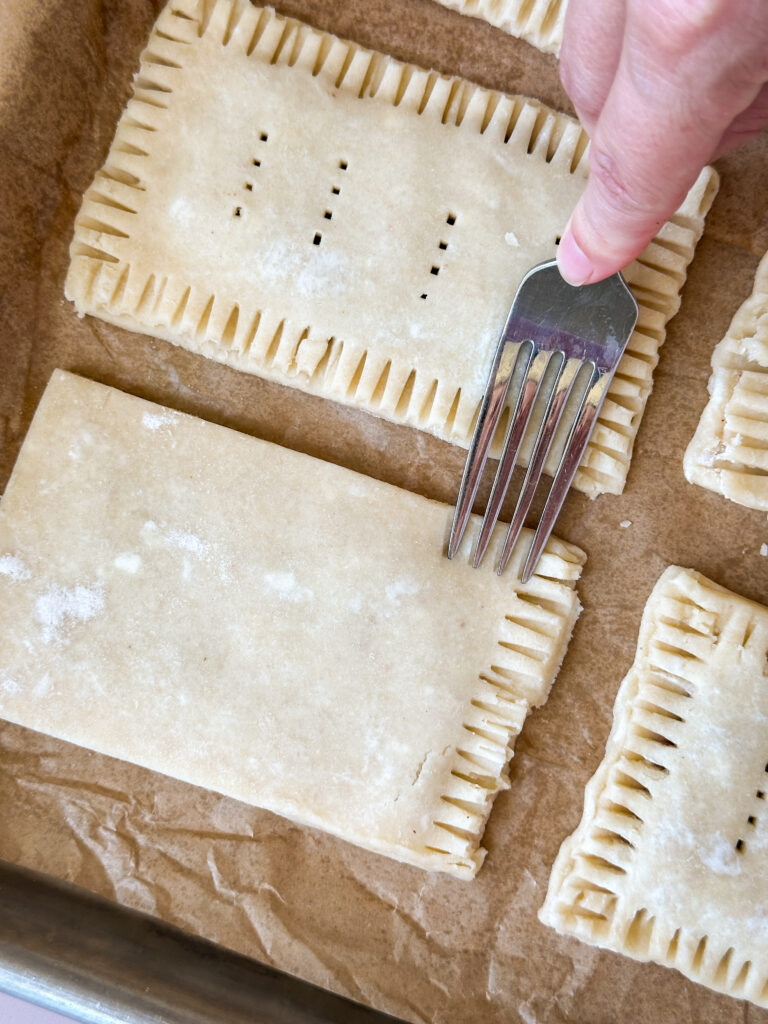
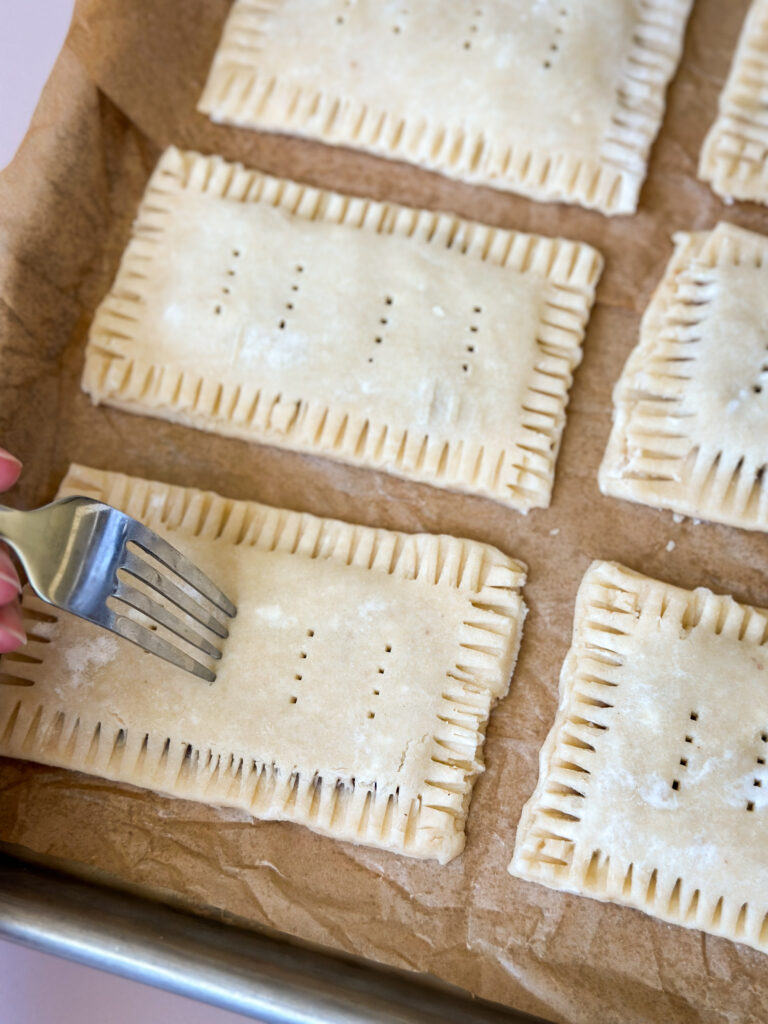
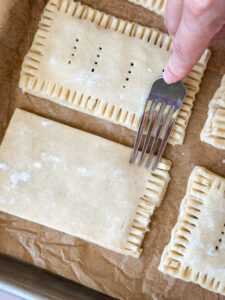
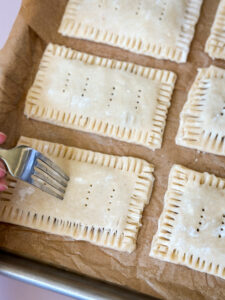
Top the 8 tarts with filling with the remaining sections of dough in the refrigerator. Gently press out any trapped air with your fingers, and crimp all of the edges of the tarts with a fork to seal them together.
If the dough is cold and wants to crack, allow the tarts to rest a few minutes to allow the dough to soften before proceeding.
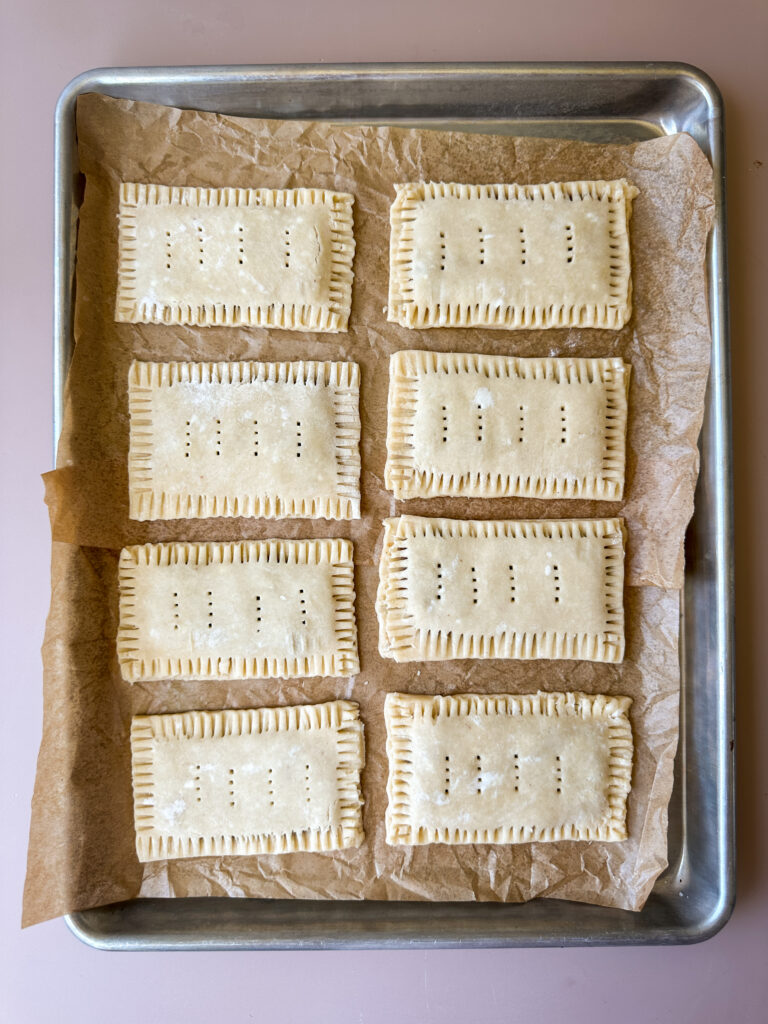
Using your fork, poke your tarts 4 or 5 times on the top to create vents for the steam so they don’t split open.
Refrigerate the assembled Pop-Tarts for 20–30 minutes while the oven preheats.
Success Tip: Don’t skip the listed chill times, or the butter will melt and make the dough harder to shape and your tarts will not be as flaky and hold their shape in the oven. If you are noticing the dough is hard to work with, pause and chill and then resume making the tarts.
Step 5: Bake the Pop-Tarts
Preheat the oven to 375°F (190°C) while the tarts are chilling.
Beat the egg and water in a small bowl, until smooth.
Brush the tops of the pop tarts with the egg wash using a pastry brush or folded paper towel, then transfer the tarts to the oven. Make sure the oven is fully preheated before baking!
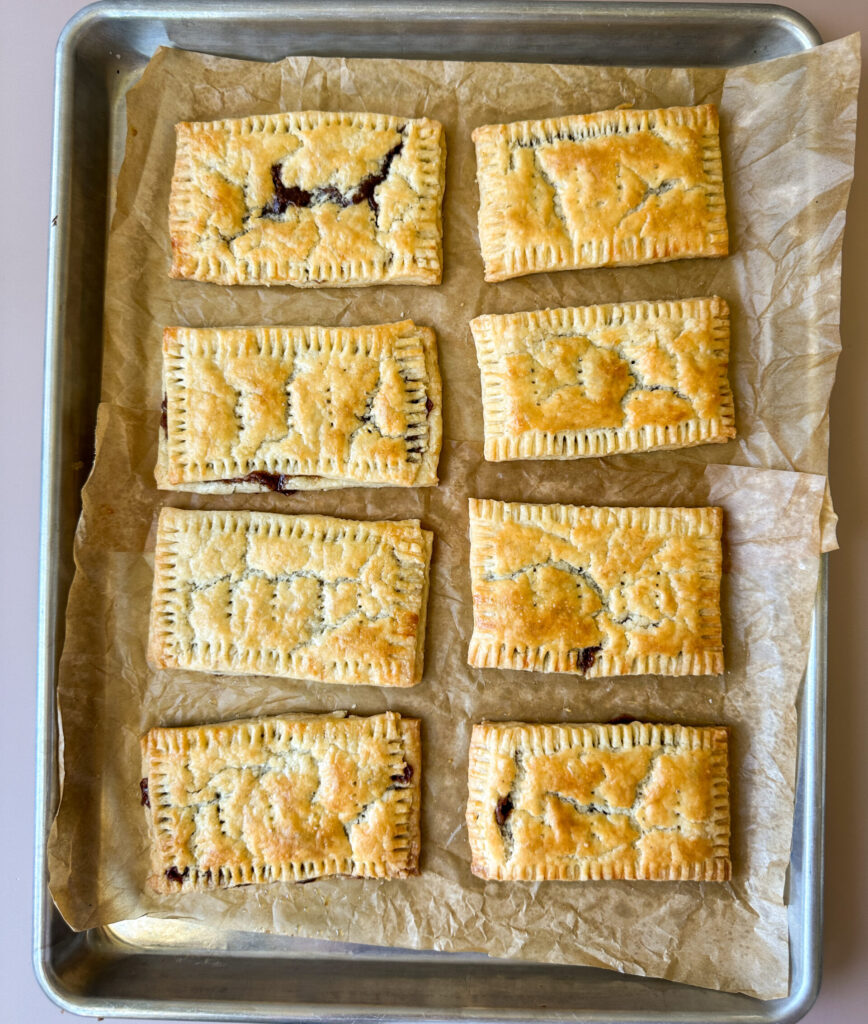
Bake the Pop-Tarts for 22–26 minutes, or until the pastries are deeply golden brown.
Allow them to cool on the baking sheet for 5 minutes before transferring to a wire rack to cool completely. If there is a little cracking don’t worry, the glaze will cover any imperfections.
Step 6: Glaze the Pop-Tarts
The last step to the perfect pop-tart, is to glaze them!
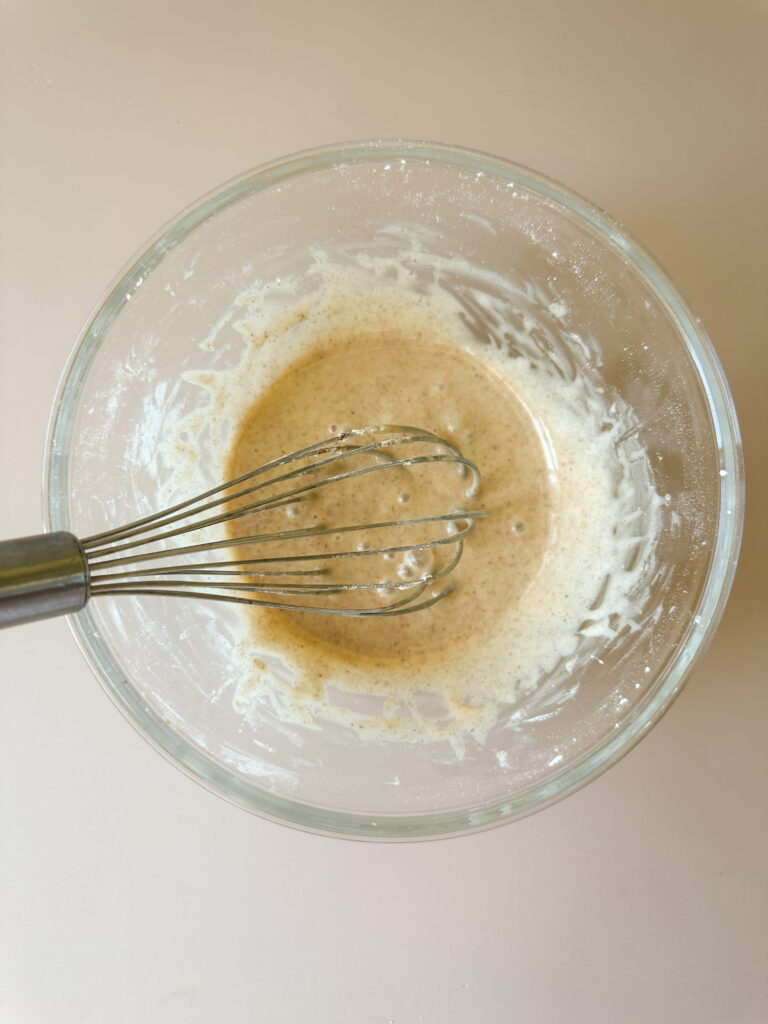
Whisk together the powdered sugar, milk, vanilla, maple extract (if using), cinnamon, and salt until smooth in a small mixing bowl.
Stir in the corn syrup, if you’re using it. This is optional, but helps give the glaze that classic shine and set.
If needed, add additional milk, 1 teaspoon at a time, until the glaze is thick but spreadable. It should slowly run off your spoon!
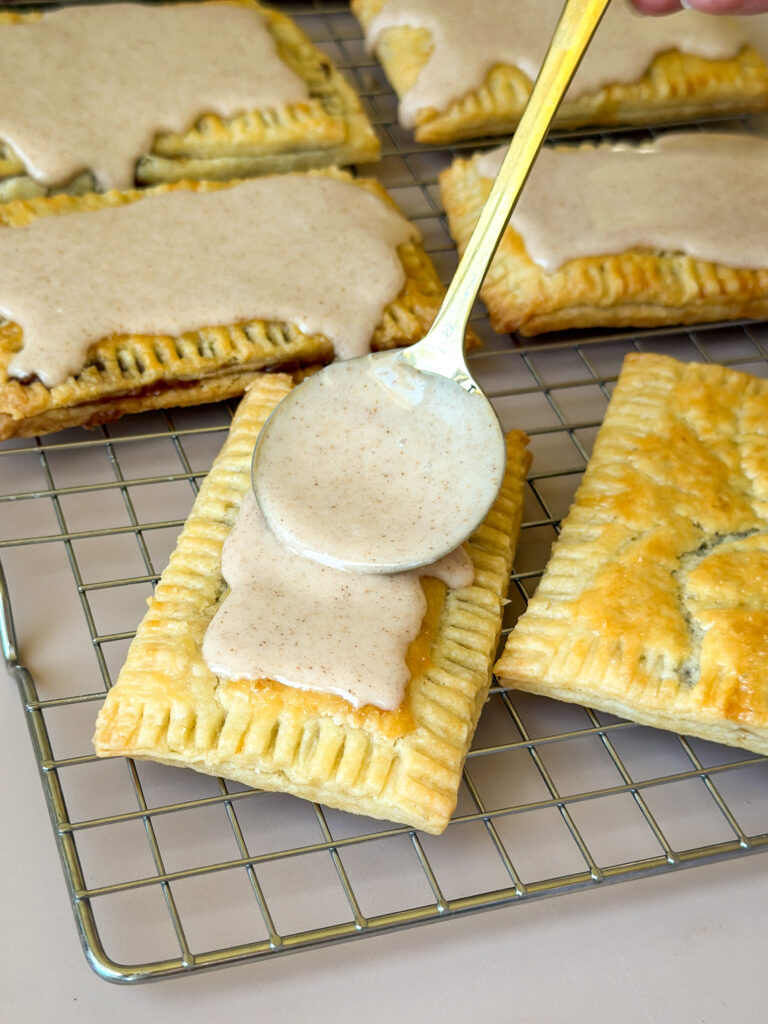
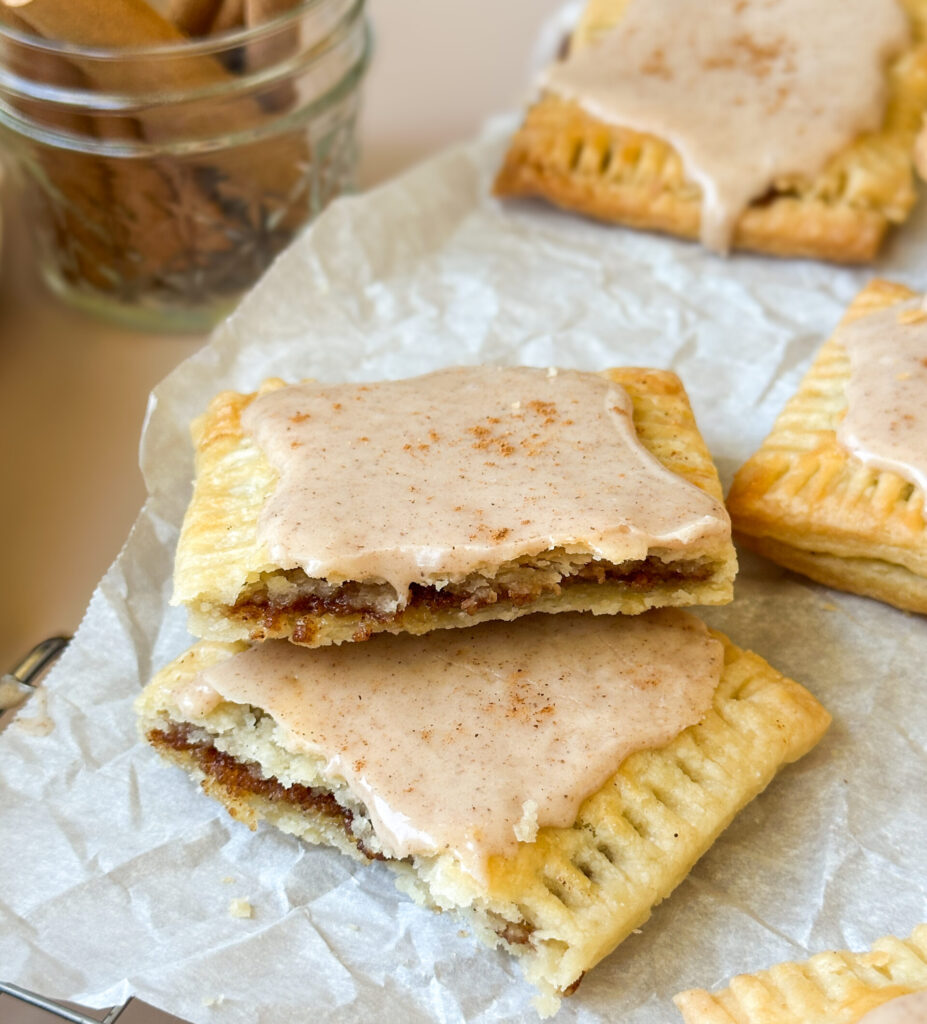
Spread 1-2 Tablespoons of the cinnamon glaze over the cooled Pop-Tarts and let the glaze set for 30–60 minutes before serving. I like to sprinkle the tops with an extra pinch of cinnamon for a pretty garnish. Enjoy!
Yields 8 Pop-Tarts
How to Store:
Room Temperature: Store in an airtight container at room temperature for up to 3 days. Gently reheat before enjoying!
Freezer:
- Unbaked option: You can assemble these tarts and store them in the freezer unbaked in an airtight container for up to 2 months. Bake when desired from frozen (you may need a few extra minutes of baking time). Glaze and enjoy!
- Baked option: You can store these once baked in the freezer in an airtight container up to 2 months, and gently reheat them in a toaster or oven at 350 F. Glaze them after reheating and enjoy!
FAQ’S
You can use any starter or discard as long as it’s COLD. This is key to keeping the butter from melting in the pastry crust.
Yes. It simply gives the glaze a shinier finish and helps it set The glaze is still delicious without it.
Most likely the pop-tarts were too warm and not cold enough before baking or you overfilled the tart.
No! You can skip it I just love the added flavor.
If you loved this recipe, drop a comment and leave a star review and don’t forget to checkout more of my sourdough copycat recipes!
Sourdough Copycat Recipes:
Sourdough Brown Sugar Cinnamon Pop-Tarts
Equipment
- Mixing bowls – to combine pastry crust if mixing dough by hand, the brown sugar filling, and the glaze.
- Pastry Blender (optional) – helpful to mix and combine the pastry dough when mixing by hand. I love this pastry blender but this is entirely optional and I'll show you how to make the dough without it.
- Digital kitchen scale (optional) – for accurate measuring especially helpful with sourdough baking.
- Cheese Grater (if mixing by hand) – if you're mixing this pastry dough by hand, I highly recommend using a cheese grater to grate your butter into even pieces. If you don't have one, you can also cut the butter. This is the cheese grater I use linked here.
- Food Processor (if using food processor method) – If you want to make this pastry using a food processor, you'll need a food processor with the chopping attachment.
- Rolling Pin – to roll out your pastry dough.
- Tape measure or ruler – to measure your pastries if you want them even.
- Fork – to crimp the edges of the pop-tarts.
- Pastry brush – for the egg wash. You can also use a folded paper towel.
- Baking sheets – to bake the pop-tarts.
- Parchment paper – to line the baking sheet to avoid the pastries sticking to the pan.
- Whisk – to combine the cinnamon glaze.
- Spoon – for spreading the glaze on the pop-tarts.
- Cool rack (optional) – to cool the pop-tarts.
Ingredients
Sourdough Pastry Dough:
- 2 (240g) cups all-purpose flour
- 1 (12g) Tbsp granulated white sugar
- 1 tsp fine sea salt
- ⅛ tsp baking powder
- 1 (227g) cup unsalted butter cold
- ½ (120g) cup sourdough discard cold
- 1½ tsp fresh lemon juice
- 1-2 tsp ice water if needed
Brown Sugar Cinnamon Filling:
- ⅔ (135g) cup brown sugar
- 2 tsp ground cinnamon
- 2 (16g) Tbsp all-purpose flour
- ¼ tsp fine sea salt
- ¼ (57g) cup unsalted butter softened
- ½ tsp vanilla extract
Egg Wash:
- 1 egg
- 1 Tbsp water
Cinnamon Glaze:
- 1 (120g) cup powdered sugar do not use granulated
- 2 (30g) Tbsp whole milk cold
- 2 (42g) Tbsp light corn syrup (optional, for a glossy finish)
- ½ tsp vanilla extract
- ¼ tsp maple extract optional, I love this Maple Flavoring that is Organic
- ½ tsp ground cinnamon
- 1/8 tsp fine sea salt
Instructions
Step 1: Mix the Pastry Crust
- This pastry crust can be made by hand or by using a food processor, I will give you both options, depending on what fits your needs.
- Mixing by hand: Combine the flour, white sugar, baking powder, and salt in a mixing bowl. Whisk together.
- Using a cheese grater on the largest setting, grate your cold butter and transfer it to the bowl with the dry ingredients.
- Mix in the butter until it’s fully coated in the flour mixture, you should see pea-sized chunks of butter in the dough.
- Add the cold sourdough discard and lemon juice to the bowl, and start to combine the dough.
- Begin to mix with a pastry whisk or your hands to bring the dough together. If you need to, you can turn your dough out on a clean surface to mix it with your hands.
- The ball of dough should come together easily, if it’s too dry add a teaspoon of cold ice water at a time until your dough just comes together.
- If the dough is too wet or sticky, sprinkle with a little flour and continue to bring the dough together.
- I typically don’t even need to use water, but it’s okay and normal if you do!
- Because your hands can melt the butter, it’s important to just bring the dough together and then stop mixing. You want chunks of butter and overworking the dough isn’t the goal.
- Flatten the dough into a disc, and cut the dough in half (this doesn’t have to be perfect just guess). You want to see the bits of butter throughout your dough, this is what makes those flakey layers!
- Flatten each half into a round, then wrap tightly in plastic wrap and refrigerate at least 2 hours but optionally overnight for longer fermentation.
- Food Processor Option: Add the flour, white sugar, baking powder, and salt to the bowl of your food processor fitted with the blade attachment. Pulse a few times to combine all of the dry ingredients.2 (240g) cups all-purpose flour, 1 (12g) Tbsp granulated white sugar, 1 tsp fine sea salt, ⅛ tsp baking powder
- Cut up your butter (make sure it’s very cold), into 1/4 inch cubes. Add the butter to the dry ingredients.1 (227g) cup unsalted butter
- Pulse the butter until you have blueberry sized balls of butter cut up into the flour mixture. Don’t over blend the butter into the flour at this stage! Go slow and stop when you see the butter is chopped up to the desired size.
- Add the sourdough discard and the lemon juice to the work bowl.½ (120g) cup sourdough discard, 1½ tsp fresh lemon juice
- Pulse together the ingredients slowly until a dough starts to form. If the dough is very dry, you can add 1 teaspoon of ice water at a time until the dough just comes together.1-2 tsp ice water
- Once a pie dough is forming, dump out the dough onto a clean work surface and use your hands to bring the dough together. You want to see the bits of butter throughout your dough, this is what makes those flakey layers!
- Divide the dough, and flatten both sections into discs and wrap tightly in plastic wrap.
- Refrigerate the pastry dough at least 2 hours but optionally overnight for the longer fermentation.
Step 2: Make the Brown Sugar Cinnamon Filling
- In a small bowl, add the softened butter. Make sure this isn’t MELTED or the filling will be too runny.¼ (57g) cup unsalted butter
- Add the brown sugar, cinnamon, flour, salt, and vanilla extract to the softened butter.⅔ (135g) cup brown sugar, 2 tsp ground cinnamon, 2 (16g) Tbsp all-purpose flour, ¼ tsp fine sea salt, ½ tsp vanilla extract
- Using hand beaters or a spatula, mix the filling really well until it forms a smooth paste like mixture. Set aside for filling the pop-tarts.
Step 3: Shape the Tarts
- Line 2 baking sheets with parchment paper, and set aside.
- On a well floured surface (this is important to avoid sticking), roll one disc of dough into a 9 × 12-inch rectangle, about ⅛ inch thick. The bottom and top edges should be 9 inches, the sides 11 inches.
- Using a pizza cutter or sharp knife, trim the edges until even. Cut the dough in half lengthwise to create two long strips about 4 1/2 inches wide.

- Next, cut each strip into four equal pieces horizontally to make eight rectangles measuring approximately 4 1/2 × 3 inches.
- Gently lift these sections of dough and place on a parchment lined baking sheet, and transfer to the refrigerator to chill and set up. This dough is very buttery, so frequently chilling these tarts is key to shaping them.
- Repeat the same shaping step as listed above with the second disc to create 16 rectangles total. Make sure you chill the shaped sections of dough for about 30 minutes before you proceed with filling the pop-tarts.
Step 4: Fill the Pop-Tarts
- Remove on of the sheets of shaped dough from the refrigerator, and gather your brown sugar cinnamon filling.
- Spread about 1½ tablespoons of brown sugar cinnamon filling onto each rectangle, leaving a 1/4-inch border around the edges. Don’t overfill these or you will have a lot of leakage.
- Top the 8 tarts with filling with the remaining sections of dough in the refrigerator. Gently press out any trapped air with your fingers, and crimp all of the edges of the tarts with a fork to seal them together.
- If the dough is cold and wants to crack, allow the tarts to rest a few minutes to allow the dough to soften before proceeding.
- Using your fork, poke your tarts 4 or 5 times on the top to create vents for the steam so they don’t split open.
- Refrigerate the assembled Pop-Tarts for 20–30 minutes while the oven preheats.
- Success Tip: Don't skip the listed chill times, or the butter will melt and make the dough harder to shape and your tarts will not be as flaky and hold their shape in the oven. If you are noticing the dough is hard to work with, pause and chill and then resume making the tarts.
Step 5: Bake the Pop-Tarts
- Preheat the oven to 375°F (190°C) while the tarts are chilling.
- Beat the egg and water in a small bowl, until smooth.1 egg, 1 Tbsp water
- Brush the tops of the pop tarts with the egg wash using a pastry brush or folded paper towel, then transfer the tarts to the oven. Make sure the oven is fully preheated before baking!
- Bake the Pop-Tarts for 22–26 minutes, or until the pastries are deeply golden brown.
- Allow them to cool on the baking sheet for 5 minutes before transferring to a wire rack to cool completely. If there is a little cracking don’t worry, the glaze will cover any imperfections.
Step 6: Glaze the Pop-Tarts
- The last step to the perfect pop-tart, is to glaze them!
- Whisk together the powdered sugar, milk, vanilla, maple extract (if using), cinnamon, and salt until smooth in a small mixing bowl.1 (120g) cup powdered sugar, ½ tsp vanilla extract, ¼ tsp maple extract, ½ tsp ground cinnamon, 1/8 tsp fine sea salt
- Stir in the corn syrup, if you’re using it. This is optional, but helps give the glaze that classic shine and set.2 (42g) Tbsp light corn syrup
- If needed, add additional milk, 1 teaspoon at a time, until the glaze is thick but spreadable. It should slowly run off your spoon!2 (30g) Tbsp whole milk
- Spread 1-2 Tablespoons of the cinnamon glaze over the cooled Pop-Tarts and let the glaze set for 30–60 minutes before serving. I like to sprinkle the tops with an extra pinch of cinnamon for a pretty garnish. Enjoy!
- Yields 8 Pop-Tarts
Notes
How to Store:
Room Temperature: Store in an airtight container at room temperature for up to 3 days. Gently reheat before enjoying! Freezer:- Unbaked option: You can assemble these tarts and store them in the freezer unbaked in an airtight container for up to 2 months. Bake when desired from frozen (you may need a few extra minutes of baking time). Glaze and enjoy!
- Baked option: You can store these once baked in the freezer in an airtight container up to 2 months, and gently reheat them in a toaster or oven at 350 F. Glaze them after reheating and enjoy!
Made these today and they got rave reviews!!
A few notes from experience: I did not have to add ice water to the dough for it to come together (my starter is typically a 1:1). I cut butter into cubes last night and refrigerated over night so it was extra cold when I put it in the dough. Additionally, I let my dough disks sit for about 1.5 hours, 1.75 hours at most….so if you are pressed for time, they will still turn out great!! Shaping was the most time intensive step for me. I refrigerated or put dough in freezer to speed things up whenever possible.
Hi Lindy! I’m so happy this recipe was a hit. A short chill with the freezer can also work! Thank you for your feedback 🙂
These were incredible! It definitely tasted like a homemade pastry and much better than the ones you buy at the store. The filling was a perfect compliment to the flakey texture on the outside! 10/10 would make these again
Hi JP, I’m so happy you loved these! Thank you for comment!
100/10!!!!! These pop tarts are the best I’ve ever tried. My husbands exact words “there is no need to ever try another recipe” So good!!!!
Hi Lauren, wow that’s a rave review! Thank you!
Will never eat store bought pop tarts again!!
We are new to your site! We made these last night and they are awesome. Had half of one with breakfast room temp and they are good that way to. We are now making your pumpkin cinnamon swirl sourdough right now. Will let you know how that goes, it’s on its second proof! Thank you for the pop tart recipe, very good pie crust is yummy buttery and flaky.
Hi Melissa, thank you for your feedback I’m so glad you’re here and loving all of the sourdough inspo!