
Sourdough Brown Bread Rolls
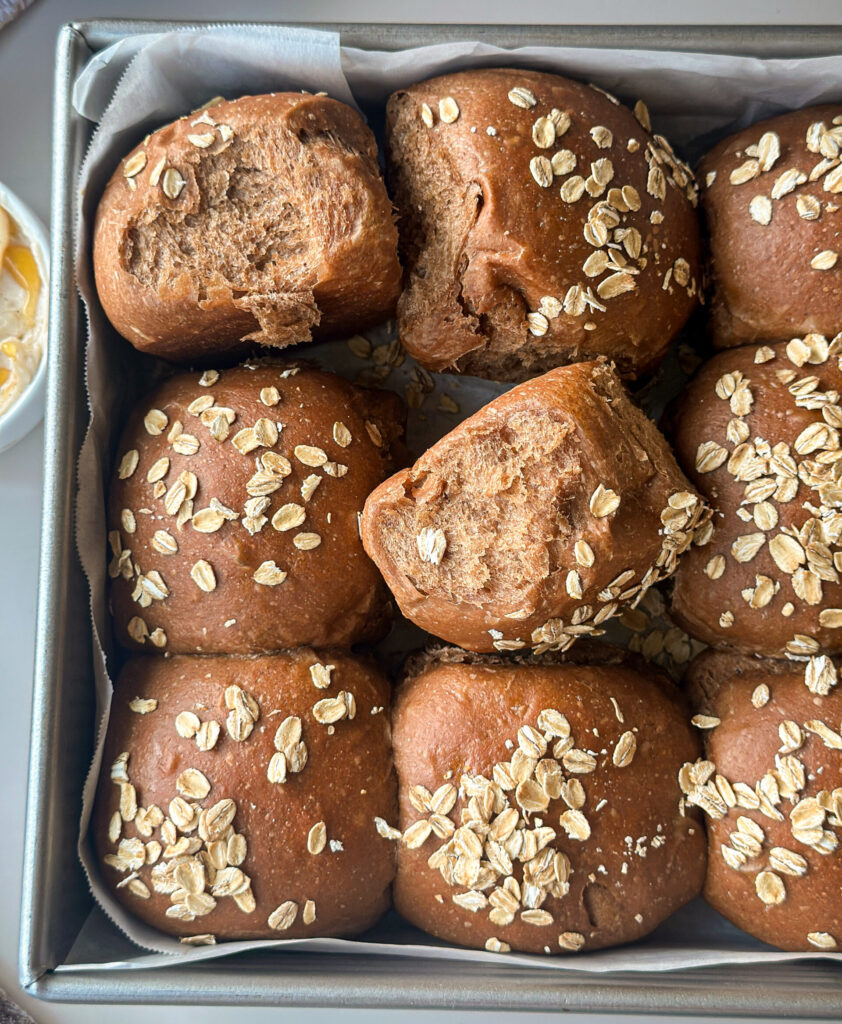
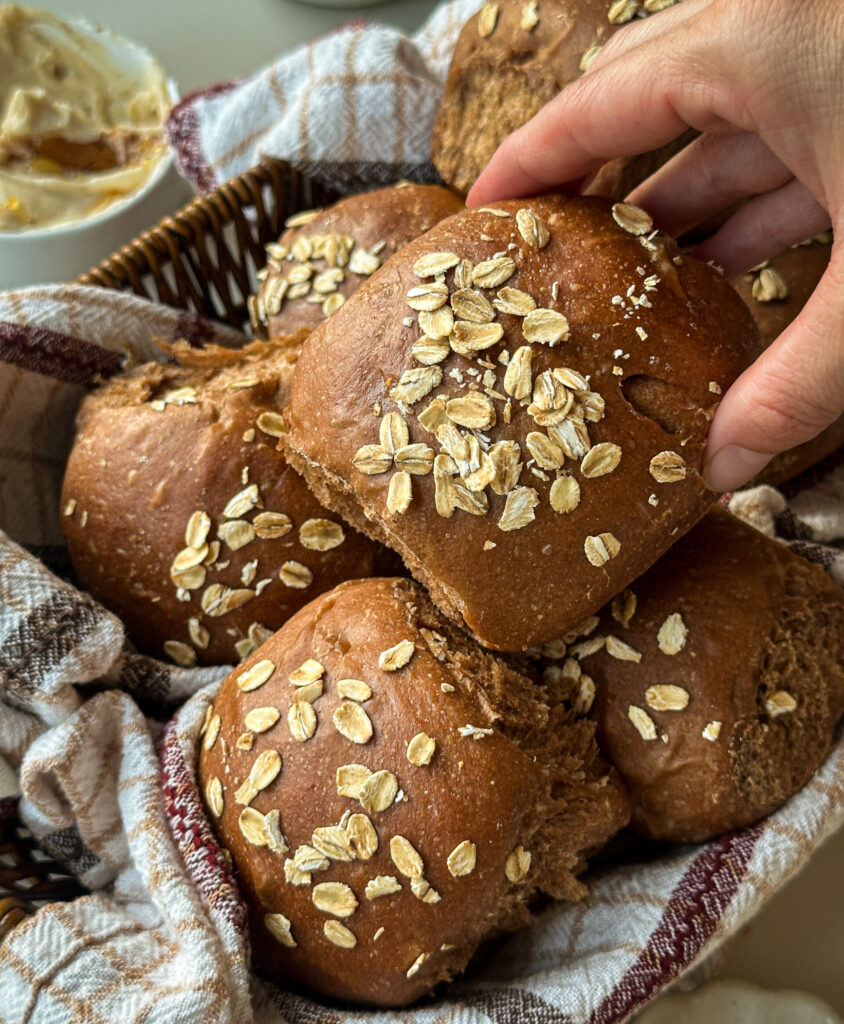
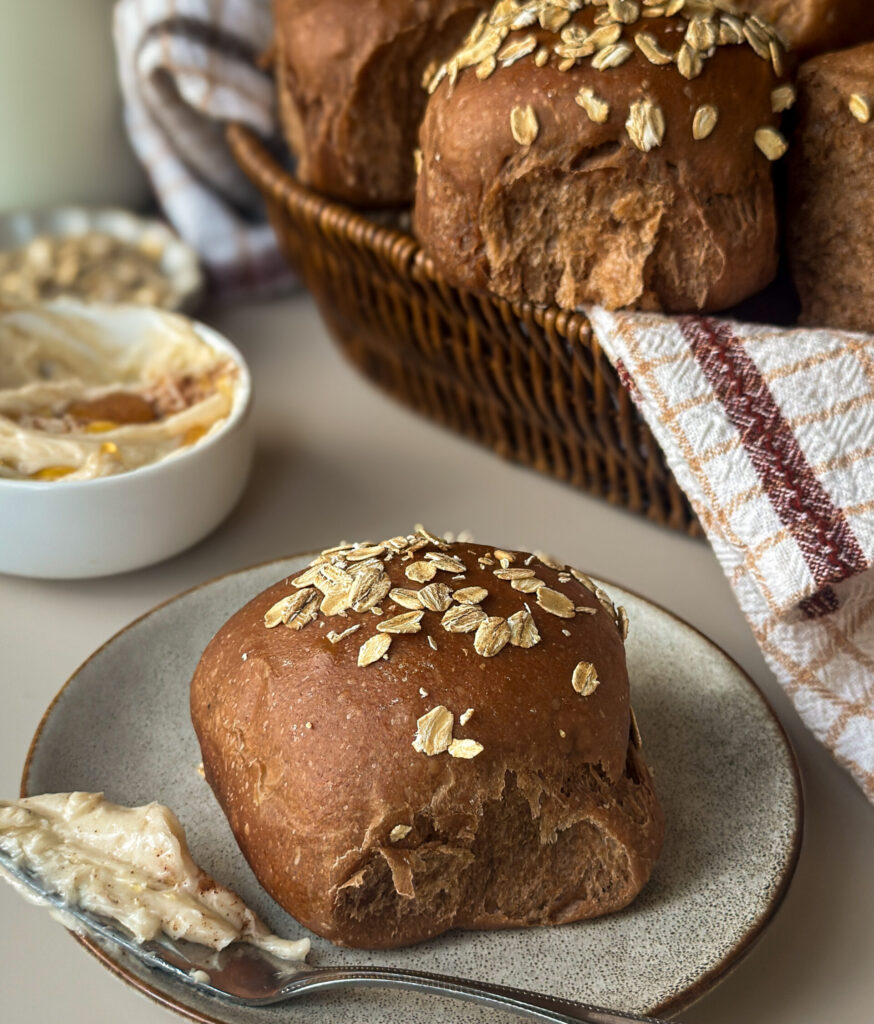
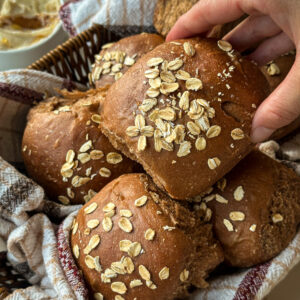
These soft, fluffy Sourdough Brown Bread Rolls are inspired by my reader favorite Sourdough Brown Bread (Cheesecake Factory Copycat)! Made with molasses, honey, and whole wheat flour, they have that same rich, slightly sweet flavor you love, but in a soft, fluffy dinner roll. They’re the perfect addition to your holiday table or a cozy weeknight dinner! Pair with my Honey Cinnamon Butter for the perfect touch.
Why You’ll Love This Recipe
- Just like Cheesecake Factory: All the rich, slight sweet brown bread flavor you love, now in a dinner roll!
- No overnight wait: A higher ratio of sourdough starter means you can mix, proof, and bake these rolls all in the same day.
- Sourdough discard option: I include an option using discard and yeast so you can have fresh rolls on the table in just a few hours.
Tools You’ll Need:
- Stand mixer with dough hook (or strong hands!) – for mixing the dough. You can also mix this dough by hand!
- Bowl or straight edge container- for proofing dough.
- Whisk– for mixing the wet ingredients.
- 9×13-inch baking pan- for baking rolls. I love this 9×13 baking pan from USA Bakeware.
- Parchment paper (optional)- keeps the rolls from sticking and makes them easy to remove.
- Digital scale– recommended for accurate measurements and weighing your rolls. I love this digital kitchens scale.
- Bench scraper or knife- for cutting dough for rolls. I like this bench knife for shaping.
- Pastry brush (optional)- for the egg white wash.
- Digital food thermometer (optional)- helpful for checking internal temperatures. This is my go-to kitchen thermometer.
Gather Your Ingredients:
- Cultured Sourdough Starter- A strong sourdough starter is key to making this bread. It should be recently fed and refreshed to use in this recipe.
- Instant dry yeast (optional)- If you choose to make the discard option, you’ll need instant yeast! I love this Scratch Gold Yeast and always have it on hand. Please note instant dry yeast isn’t the same as active dry yeast which you have to bloom to activate. I’ll include an active dry yeast swap under FAQ’s.
- All-purpose flour– I recommend AP flour over bread flour to create a more tender crumb, but you can substitute for bread flour if needed.
- Water- adds moisture to the dough; I like to add water and milk for a lighter crumb.
- Whole milk- adds richness and lightness to the rolls. You can substitute this with any milk alternative!
- Egg- works as a binder for the dough and makes the rolls extra fluffy.
- Whole Wheat Flour- adds a nutty wholesome flavor to the bread. If you want the closest result to the restaurant, I recommend using this. You can substitute this for more AP flour if you need to.
- Cocoa Powder- adds the color to this dough for that signature brown look!
- Molasses- sweetens and adds a rich iconic flavor to the dough. I prefer using unsulphered, like Grandma’s linked here that can also easily be found in major grocery stores.
- Honey- this adds sweetness and makes the crumb extra soft.
- Avocado Oil- keeps the bread light and soft. You can substitute this for any neutral cooking oil.
- Sea Salt- strengthens the gluten and balances the sweetness of the bread.
- Vanilla- adds a hint of warmth to the dough.
- Cinnamon- this is my secret ingredient, and there is something it adds to the dough that you won’t want to skip!
- Rolled Oats- sprinkled on top of the rolls for that signature look. Only use rolled oats.
- Egg White- used as an egg wash to help the oats stick to the rolls.
Instructions
Step 1: Feed the Starter the Night Before
In a clean jar, mix your mother starter with the flour and water. Give it a good stir, and allow it to rest at room temperature (optimally 73-75 degrees F).
I like to mark the volume in my jar with a rubber band so it’s easy to asses the rise the next morning. When the starter has doubled in size, it’s time to mix your dough.
Step 2: Mix the Dough
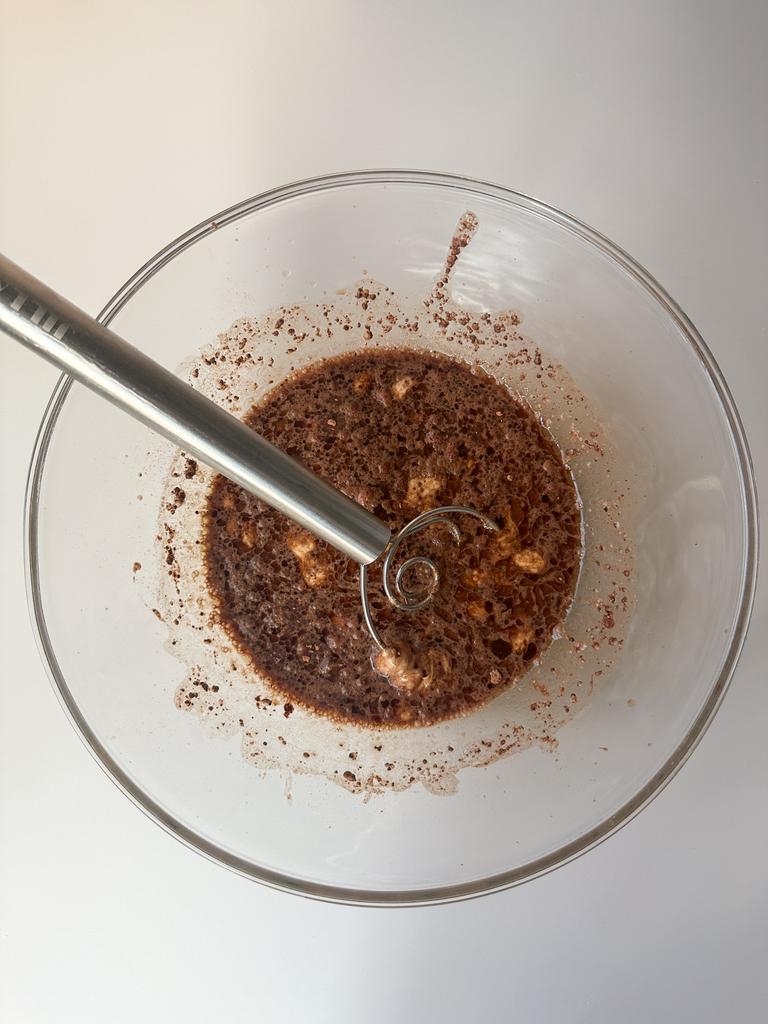
In a mixing bowl, add the active starter, warm water, milk, egg, cocoa powder, molasses, honey, avocado oil, vanilla, and cinnamon and whisk until generally combined.
Sourdough Discard Option: If you want to make this recipe with sourdough discard and yeast, add the discard and yeast to the wet ingredients above and whisk in.
Once the wet ingredients are combined, add the all-purpose flour, whole wheat flour, and salt to the bowl.
Mixing by hand: If you’re mixing this dough by hand, mix and knead the dough together until it’s a smooth ball. This should take about 6-8 minutes.
Mixing with a stand mixer: If you’re using a stand mixer, knead the dough on the lowest setting Speed 1-2 for 8-10 minutes, scraping the bowl halfway through to make sure everything is incorporated.
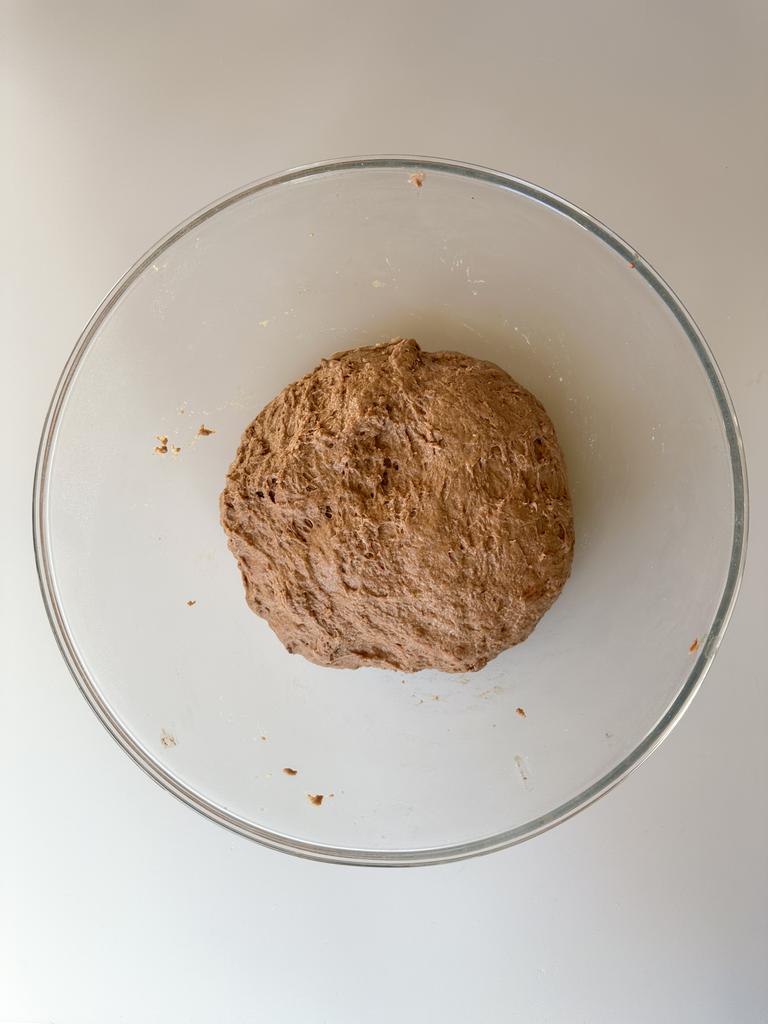
Once the dough is mixed, grease a bowl or container large enough for the dough to double with cooking spray and transfer the dough to the container. Cover the dough with plastic or a lint-free towel, and allow the dough to rest 30 minutes.
Step 3: Bulk Fermentation
Once the dough has rested for 30 minutes, it’s time to perform the first set of stretch and folds.
How to do a stretch and fold: Beginning at the edge of the bowl, lift the dough up without tearing it, and fold it back into the center. Repeat this step around the edge of the bowl until the dough forms a ball. This is one set of stretch and folds. Cover the dough again and return it to a warm environment to rest 30 minutes.
Repeat this step of stretch and folds a total of 2 times. You should see the dough go from shaggy to smooth.
Once these stretch and folds are finished, cover the dough again and allow it to rest in a warm spot for roughly 6-8 hours and doubled in size. The key is to make sure this dough has doubled before you continue.
Sourdough Discard Option: If you’re using yeast, this dough will proof much faster. Allow the dough to rise about 90 percent (almost double); this should take 1 1/2 to 2 hours.
Note on Temperature: Your dough loves a warmer climate, so aim to keep your dough between 73-78 degrees (you can use your digital thermometer to check the temperature). If you need to warm it up, try putting it in the oven with a light on, near a heater, or even on top of a dryer that’s on to conduct some heat!
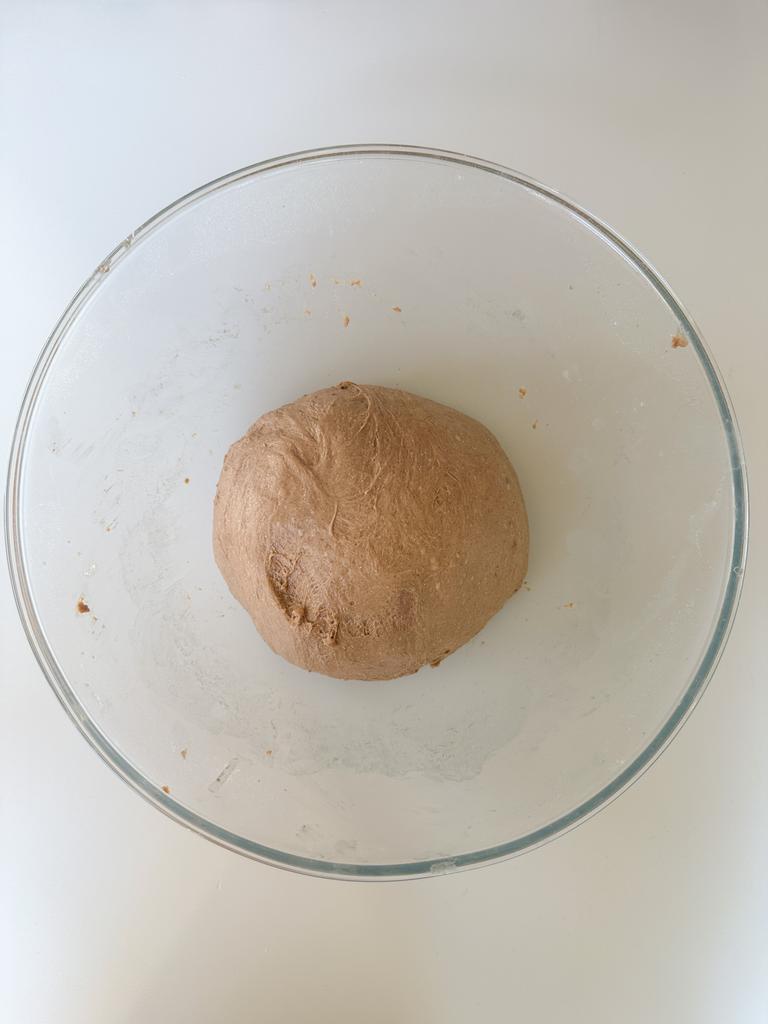
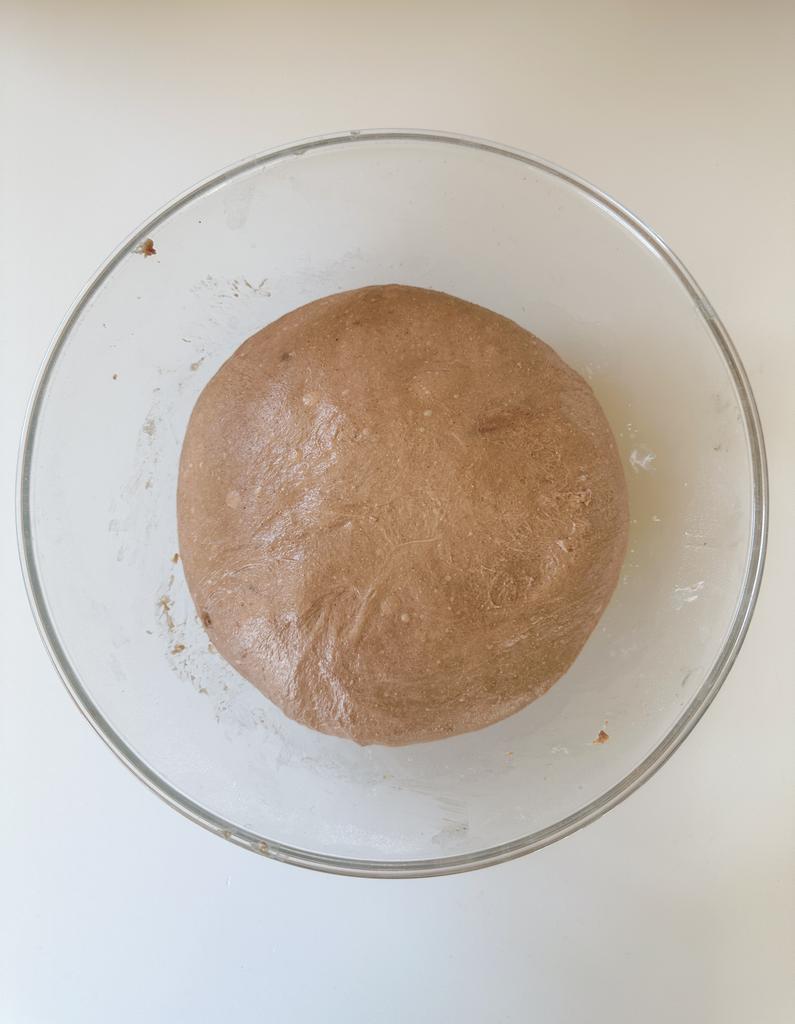
Optional Overnight Fermentation: If you want to chill the dough overnight at this point for further fermentation benefits or to shape and bake the following day, simply cover the dough and transfer to the refrigerator to shape the next day.
Step 4: Shaping the Rolls
Spray a 9×13 baking pan with non stick cooking spray. I like to line my pans with parchment for a cleaner release, but this is optional. Set the pan aside for later.
Spray your work surface with cooking spray, and gently turn the dough out onto the work surface. I find cooking spray works better than flour with this process.
Cut the dough into 12 even pieces. If you’re weighing the rolls for precision, they should each weigh roughly 90g each.
Shaping/Size Note: These rolls are larger, if you’d like a smaller roll make 24 (45g) rolls and make 6 rows of 4 rolls in the pan.
Shape each piece of dough by tucking the dough under itself to form a ball, then gently roll it in your hand to shape a tight ball.
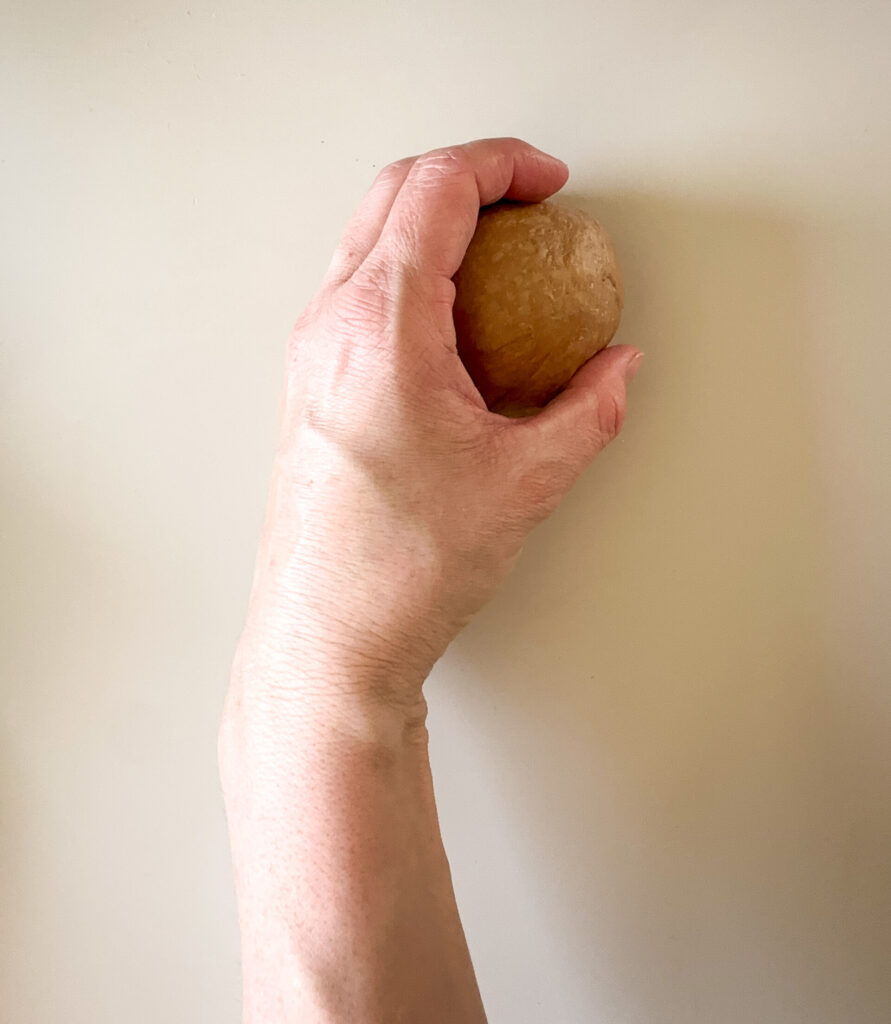
Repeat this step to shape all of the rolls, then transfer the shaped rolls to the prepared baking pan. Line the rolls in three rows of four. Cover the pan with plastic or a lint free cloth for the second proof.
Overnight Refrigeration: If you want to shape and wait to bake your rolls till the next day, you can cover your pan and transfer the rolls to the refrigerator overnight at this point. Proof rolls the next day until almost doubled and bake as directed.
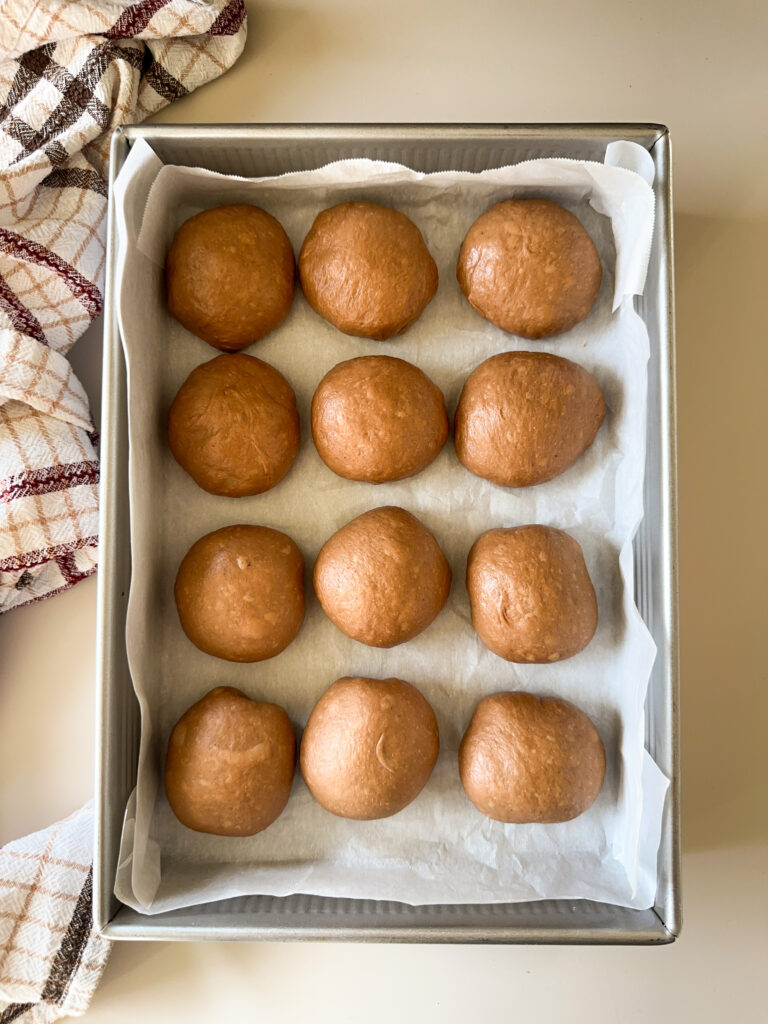
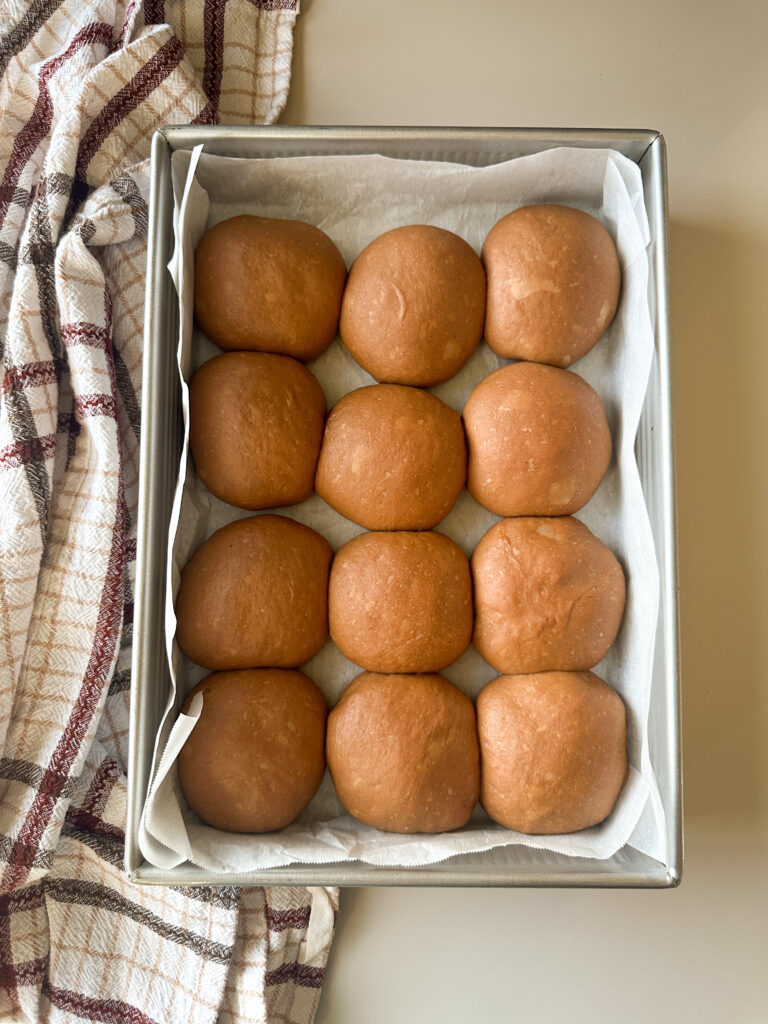
Allow the rolls to proof until about doubled in size, about 1 to 1 1/2 hours; a warm spot will make this process faster. Don’t skip letting these proof until they’re very puffy, or you will end up with a more dense roll.
Sourdough Discard Option: if you’re making the discard option of these rolls, the second rise will be shorter. I allow my rolls to proof about 45 minutes to an hour before baking when making the discard option.
Step 5: Bake the Rolls
Preheat your oven to 350 F.
In a small bowl, beat together an egg white and 2 teaspoons of water.
Lightly brush the tops of the rolls with the egg white wash, then sprinkle the tops of the rolls with the rolled oats and pat them down gently.
The egg white helps the oats stick, but you can skip this step and just sprinkle the oats right on top of the rolls.
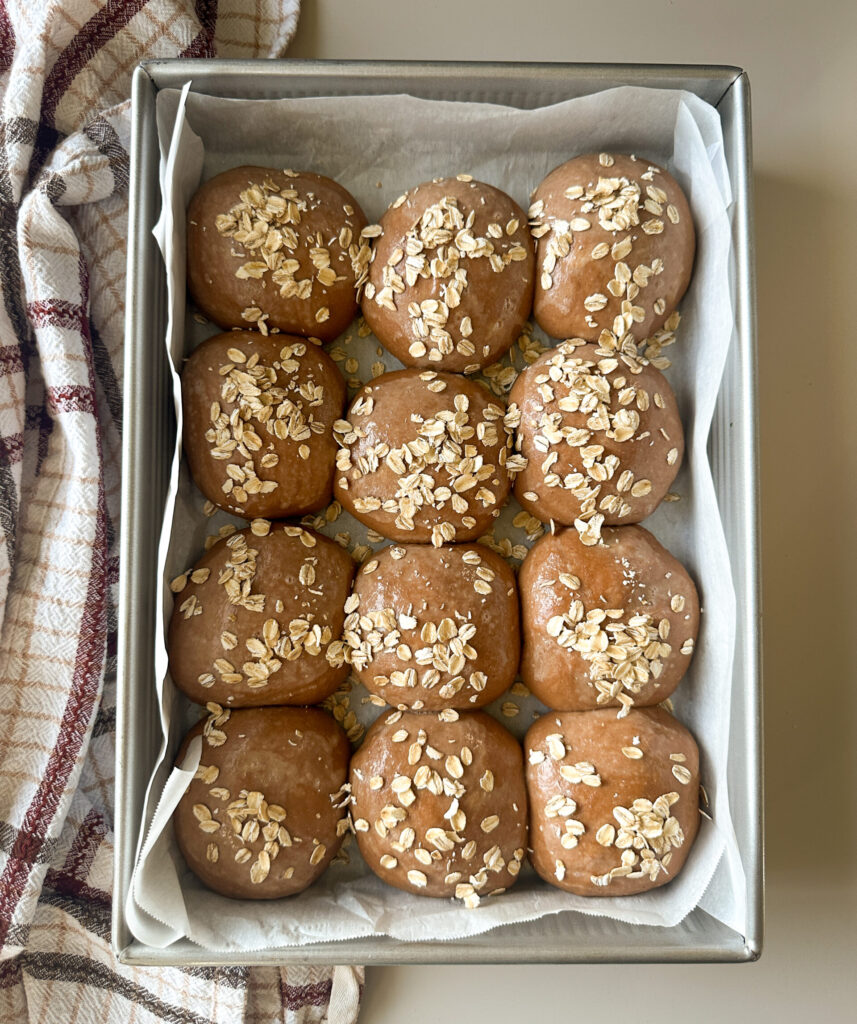
Bake the rolls for 30-35 minutes and tops are golden brown. Internal temperature should be between 195-200 F.
Remove the rolls from the oven when done and transfer to a cooling rack to avoid soggy bottoms from sitting in the pan.
Tip for using glass baking dishes
Glass baking dishes can take a longer time for the rolls to bake, so add 10-15 minutes to the bake time if needed and make sure the rolls internal temperature 195-200 F. If the tops are getting too brown, foil the pan and finish baking.
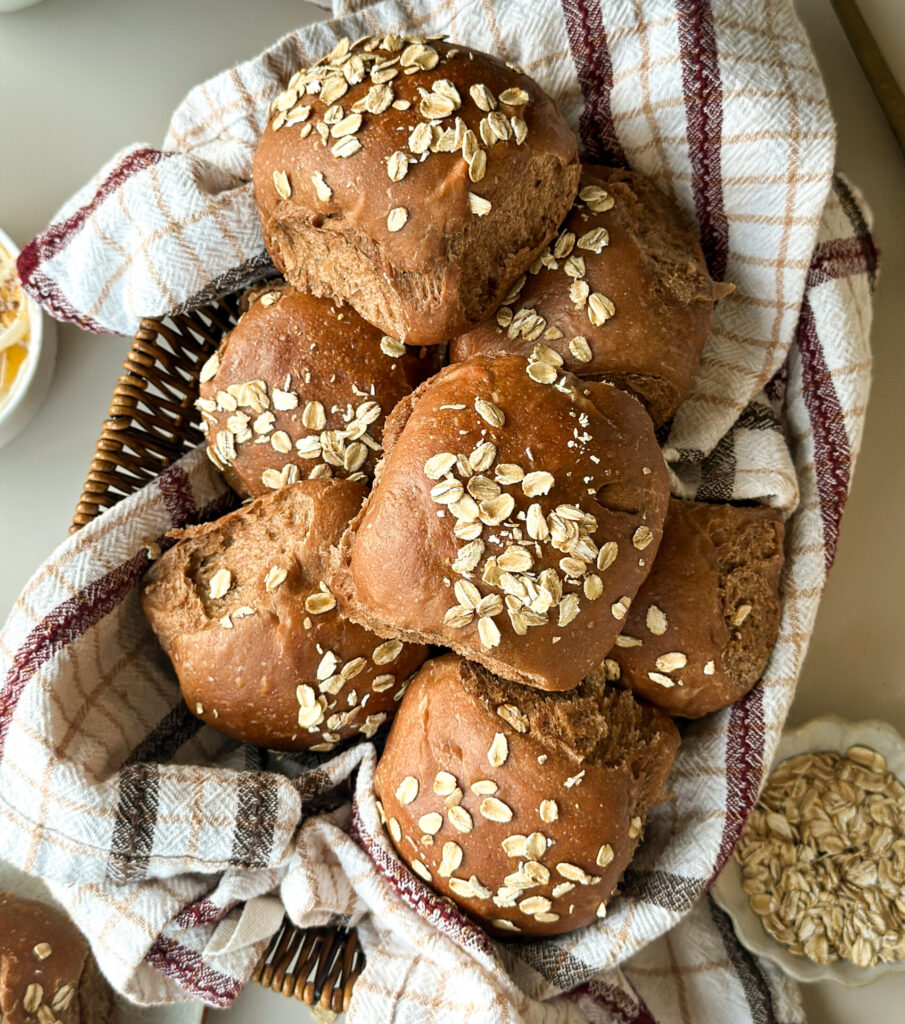
Allow the rolls to cool slightly, then serve with my Honey Cinnamon Butter!
Yields 12 dinner rolls
Make-Ahead, Freezing + Storage Tips:
Room Temperature: store rolls in airtight container up to 3 days.
Freezing and Re-heating (Baked Rolls): Bake rolls for 30 minutes at 350°F, cool fully, then freeze. To reheat, thaw 6 hours at room temp, bake at 350 F covered with foil for 15-20 minutes. Check internal temperature to make sure center has been heated to 195 F.
Freezing and Baking (Unbaked Rolls): shape rolls into your pan, and cover with plastic and foil (don’t add the egg wash and oats). Transfer to the freezer.
When you’re ready to bake the rolls, transfer to the refrigerator to thaw overnight. Replace the plastic on top of the pan to avoid condensation build up prior to refrigerating. Allow the rolls to proof at room temperature after thawing, then add the egg wash and oats and bake as recipe directs.
Please note: I only recommend freezing the rolls that have yeast added when baking from raw dough as that yields the most reliable results,
FAQ’S
Yes! Shape the rolls and refrigerate up to 48 hours, then proceed with proofing and baking.
For the closest copycat yes, but if you don’t have it replace it with more all-purpose or bread flour.
For same day success, use a very active, recently fed starter and keep the dough warm between 74-77 degrees F.
No, it’s there just to color the bread brown!
Yes! Swap it 1:1 (2 1/4 tsp or 7g). Bloom the active dry yeast first by mixing it with the milk from the recipe and a pinch of sugar. Make sure you warm the milk first in the microwave until warm to touch. Add the yeast and whisk, then let it sit 5–10 minutes until foamy, then add it in with the wet ingredients and continue as written. The dough may take slightly longer to rise (about 15–30 minutes more), but the texture will still be soft and fluffy.
If you enjoyed this recipe don’t forget to leave a comment and star review, and try more of my delicious sourdough roll recipes!
Sourdough Dinner Roll Recipes:
- Sourdough Brown Butter Herb Dinner Rolls
- Easy Sourdough Discard Dinner Rolls
- Sourdough Italian Herb and Cheese Rolls
Sourdough Brown Bread Rolls
Equipment
- Stand mixer with dough hook (or strong hands!) – for mixing the dough. You can also mix this dough by hand!
- Bowl or straight edge container – for proofing dough.
- Whisk – for mixing the wet ingredients.
- 9×13-inch baking pan – for baking rolls. I love this 9×13 baking pan from USA Bakeware.
- Parchment paper (optional) – keeps the rolls from sticking and makes them easy to remove.
- Digital scale – recommended for accurate measurements and weighing your rolls. I love this digital kitchens scale.
- Bench scraper or knife – for cutting dough for rolls. I like this bench knife for shaping.
- Pastry brush (optional) – for the egg white wash.
- Digital food thermometer (optional) – helpful for checking internal temperatures. This is my go-to kitchen thermometer.
Ingredients
Feed Your Starter (night before):
- 1 (25g) Tbsp mature mother starter
- 1/2 (100g) cup all-purpose flour
- 1/3 (100g) cup water
Wet Ingredients:
- ¾ (200g) cup active sourdough starter
- ½ (120g) cup whole milk slightly warmed
- ⅓ (90g) cup warm water slightly warmed
- 3 (60g) tablespoons unsulphured molasses
- 3 (60g) tablespoons honey
- 1 large egg
- ¼ (55g) cup avocado oil
- ½ teaspoon vanilla extract
- 2 (13g) tablespoons unsweetened cocoa powder
- ¼ teaspoon cinnamon
Sourdough Discard Swap:
- 3/4 (200g) cup sourdough discard 100% hydration
- 2 (6g) tsp instant yeast (see FAQ's for active dry yeast)
Dry Ingredients:
- 3¼ (400g) cups all-purpose flour or bread flour
- ¾ (100g) cup whole wheat flour
- 2 (10g) teaspoons fine sea salt
Oat Topping:
- 1 egg white
- 2 teaspoons water
- ⅓ (27g) cup rolled oats do not use steel cut
Instructions
Step 1: Feed the Starter the Night Before
- In a clean jar, mix your mother starter with the flour and water. Give it a good stir, and allow it to rest at room temperature (optimally 73-75 degrees F).1 (25g) Tbsp mature mother starter, 1/2 (100g) cup all-purpose flour, 1/3 (100g) cup water
- I like to mark the volume in my jar with a rubber band so it’s easy to asses the rise the next morning. When the starter has doubled in size, it’s time to mix your dough.
Step 2: Mix the Dough
- In a mixing bowl, add the active starter, warm water, warm milk, cocoa powder, molasses, honey, avocado oil, egg, vanilla, and cinnamon and whisk until generally combined.¾ (200g) cup active sourdough starter, ½ (120g) cup whole milk, ⅓ (90g) cup warm water, 3 (60g) tablespoons unsulphured molasses, 3 (60g) tablespoons honey, 1 large egg, ¼ (55g) cup avocado oil, ½ teaspoon vanilla extract, 2 (13g) tablespoons unsweetened cocoa powder, ¼ teaspoon cinnamon
- Sourdough Discard Option: If you want to make this recipe with sourdough discard and yeast, add the discard and yeast to the wet ingredients above and whisk in.3/4 (200g) cup sourdough discard, 2 (6g) tsp instant yeast
- Once the wet ingredients are combined, add the all-purpose flour, whole wheat flour, and salt to the bowl.3¼ (400g) cups all-purpose flour, ¾ (100g) cup whole wheat flour, 2 (10g) teaspoons fine sea salt
- Mixing by hand: If you're mixing this dough by hand, mix and knead the dough together until it's a smooth ball. This should take about 6-8 minutes.
- Mixing with a stand mixer: If you're using a stand mixer, knead the dough on the lowest setting Speed 1-2 for 8-10 minutes, scraping the bowl halfway through to make sure everything is incorporated.
- Once the dough is mixed, grease a bowl or container large enough for the dough to double with cooking spray and transfer the dough to the container. Cover the dough with plastic or a lint-free towel, and allow the dough to rest 30 minutes.
Step 3: Bulk Fermentation
- Once the dough has rested for 30 minutes, it’s time to perform the first set of stretch and folds.
- How to do a stretch and fold: Beginning at the edge of the bowl, lift the dough up without tearing it, and fold it back into the center. Repeat this step around the edge of the bowl until the dough forms a ball. This is one set of stretch and folds. Cover the dough again and return it to a warm environment to rest 30 minutes.
- Repeat this step of stretch and folds a total of 2 times. You should see the dough go from shaggy to smooth.
- Once these stretch and folds are finished, cover the dough again and allow it to rest in a warm spot for roughly 6-8 hours and doubled in size. The key is to make sure this dough has doubled before you continue.
- Sourdough Discard Option: If you're using yeast, this dough will proof much faster. Allow the dough to rise about 90 percent (almost double); this should take 1 1/2 to 2 hours.
- Note on Temperature: Your dough loves a warmer climate, so aim to keep your dough between 73-78 degrees (you can use your digital thermometer to check the temperature). If you need to warm it up, try putting it in the oven with a light on, near a heater, or even on top of a dryer that's on to conduct some heat!
- Optional Overnight Fermentation: If you want to chill the dough overnight at this point for further fermentation benefits or to shape and bake the following day, simply cover the dough and transfer to the refrigerator to shape the next day.
Step 4: Shaping the Rolls
- Spray a 9×13 baking pan with non stick cooking spray. I like to line my pans with parchment for a cleaner release, but this is optional. Set the pan aside for later.
- Spray your work surface with cooking spray, and gently turn the dough out onto the work surface. I find cooking spray works better than flour with this process.
- Cut the dough into 12 even pieces. If you're weighing the rolls for precision, they should each weigh roughly 90g each.
- Shaping/Size Note: These rolls are larger, if you'd like a smaller roll make 24 (45g) rolls and make 6 rows of 4 rolls in the pan.
- Shape each piece of dough by tucking the dough under itself to form a ball, then gently roll it in your hand to shape a tight ball.
- Repeat this step to shape all of the rolls, then transfer the shaped rolls to the prepared baking pan. Line the rolls in three rows of four. Cover the pan with plastic or a lint free cloth for the second proof.
- Overnight Refrigeration: If you want to shape and wait to bake your rolls till the next day, you can cover your pan and transfer the rolls to the refrigerator overnight at this point. Proof rolls the next day until almost doubled and bake as directed.
- Allow the rolls to proof until about doubled in size, about 1 to 1 1/2 hours; a warm spot will make this process faster. Don’t skip letting these proof until they’re very puffy, or you will end up with a more dense roll.
- Sourdough Discard Option: if you're making the discard option of these rolls, the second rise will be shorter. I allow my rolls to proof about 45 minutes to an hour before baking when making the discard option.
Step 5: Bake the Rolls
- Preheat your oven to 350 F.
- In a small bowl, beat together an egg white and 2 teaspoons of water.1 egg white, 2 teaspoons water
- Lightly brush the tops of the rolls with the egg white wash, then sprinkle the tops of the rolls with the rolled oats and pat them down gently.⅓ (27g) cup rolled oats
- The egg white helps the oats stick, but you can skip this step and just sprinkle the oats right on top of the rolls.
- Bake the rolls for 30-35 minutes and tops are golden brown. Internal temperature should be between 195-200 F.
- Remove the rolls from the oven when done and transfer to a cooling rack to avoid soggy bottoms from sitting in the pan.
- Tip for using glass baking dishes: Glass baking dishes can take a longer time for the rolls to bake, so add 10-15 minutes to the bake time if needed and make sure the rolls internal temperature 195-200 F. If the tops are getting too brown, foil the pan and finish baking.
- Allow the rolls to cool slightly, then serve with my Honey Cinnamon Butter!
- Yields 12 dinner rolls