
Sourdough Pumpkin Cinnamon Swirl Bread
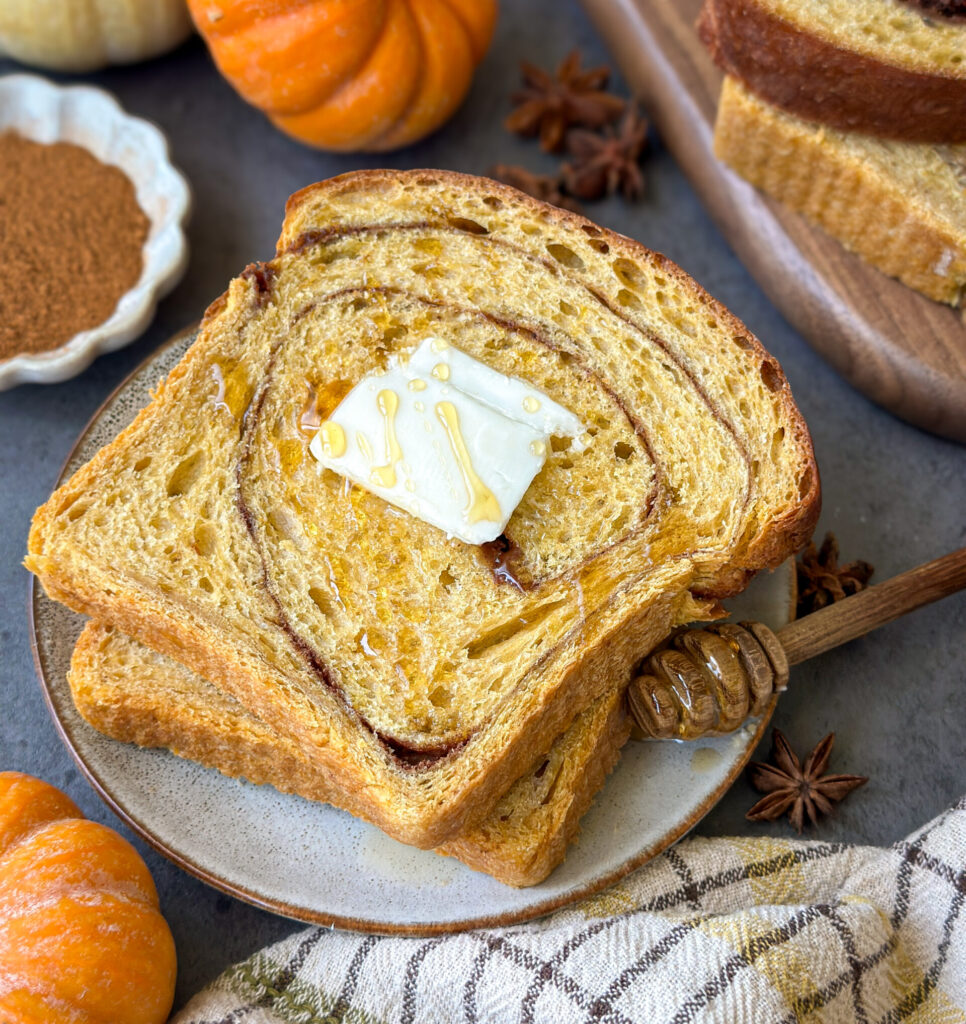
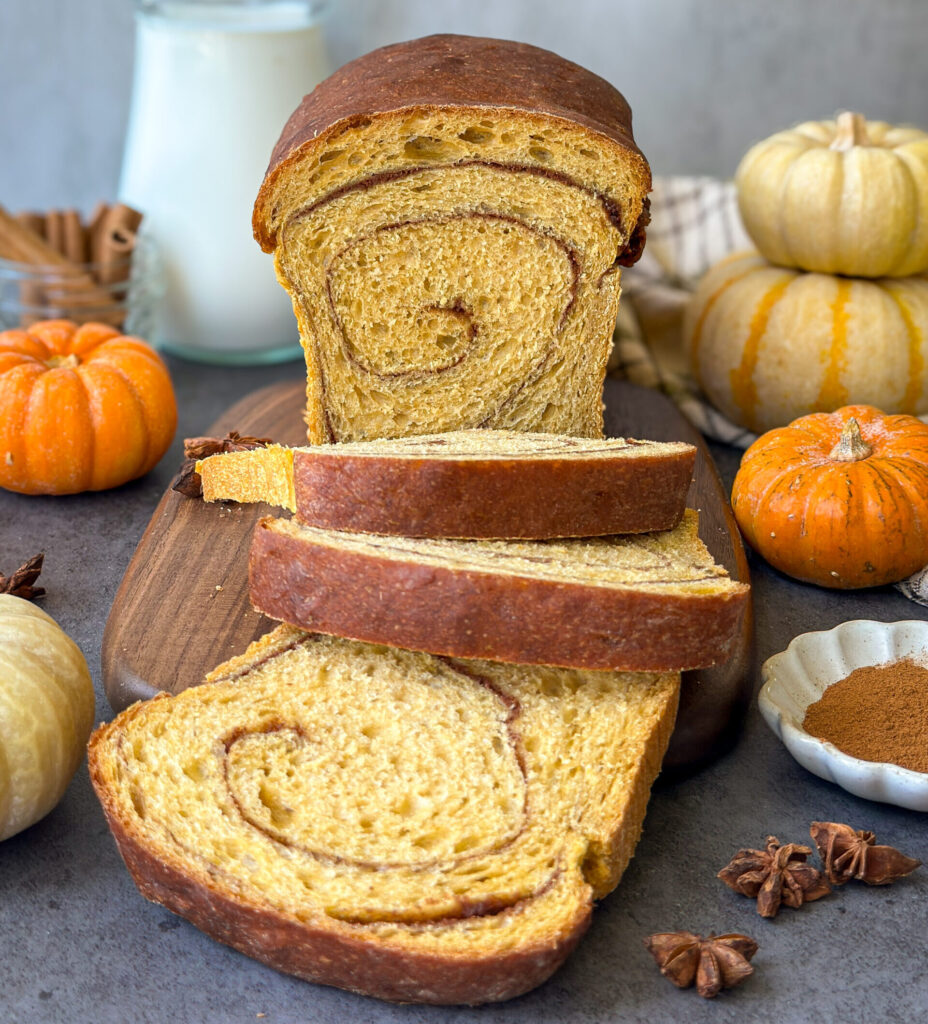
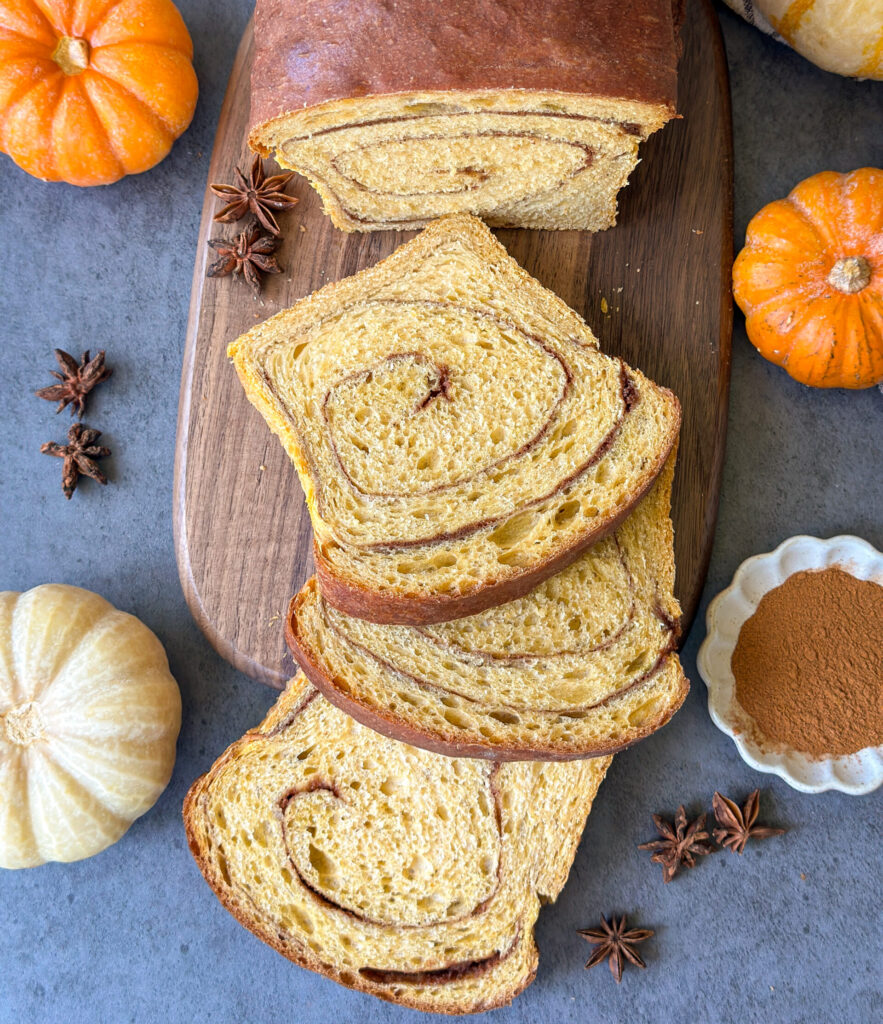
Soft, cozy, and swirled with brown sugar and warm pumpkin spice, this Sourdough Pumpkin Cinnamon Swirl Bread is the kind of loaf you’ll keep on repeat. Pumpkin purée keeps each slice soft and tender, while cinnamon, ginger, nutmeg, and cardamom give the swirl that cozy pumpkin spice flavor. Enjoy it warm with butter, or turn thick slices into the dreamiest fall French toast.
Why You’ll Love This Recipe
- Soft, fluffy crumb: Pumpkin puree keeps the loaf tender and gives it the prettiest golden color.
- Perfect cinnamon swirl: built to avoid oozing and give you an even swirl every time.
- 100% sourdough: Made with active sourdough starter for the best flavor and all the fermentation benefits.
- Beginner friendly process: this recipe has simple, clear steps with photos that give consistent results.
- Same day bake option: Need bread quickly? This recipe lists a same day bake option to fit your busy schedule.
Tools You’ll Need:
- Digital Kitchen Scale– for weighing out your ingredients (highly recommended for accuracy). This one linked here is great to start with.
- Measuring Cups & Spoons- if you prefer to not use a scale.
- Bowl or straight edge container for mixing and proofing dough– to mix your dough and make sure your dough is rising properly. You can use a clear square Tupperware for this, I don’t recommend a bowl as it is hard to assess your rise. I’ve linked here the container I like to use.
- Silicone Dough Spatula– to mix and shape the loaf. I love these dough spatulas linked here.
- Rolling Pin (optional) – to help you roll out the dough to the desired size. You can laminate by hand if you prefer. I love this small rolling pin linked here.
- Small Bowl- for mixing the cinnamon sugar filling.
- Lint-free cloth or plastic wrap– to cover the dough while resting.
- 9×5 loaf pan– standard size for shaping and baking the final loaf. I love this loaf pan from USA Bakeware linked here.
- Bread Knife– for cutting your bread once cooled. I love this bread knife linked here.
- Cooling rack– to cool your loaf evenly after baking.
Gather your Ingredients:
- Cultured Sourdough Starter- A strong sourdough starter is key to making this bread. It should be recently fed and doubled to use in this recipe. Need help making a starter? Visit my Sourdough Starter Guide to get started!
- All-purpose Flour– Forms the structure of the loaf with a soft, balanced crumb. You can also use bread flour. Flour also binds the swirl mixture to prevent leaking and create a clean spiral.
- Water- Filtered water, spring water, and non-chlorinated tap water are all fine options to use.
- Salt- any high quality sea salt is fine to use in your bread. I typically use Redmond Sea Salt, I recommend staying away from iodized salt as it can inhibit yeast and bacteria development.
- Honey– This adds a natural sweetness, promotes browning on the crust, and keeps the crumb soft. You can substitute for sugar, maple syrup, or agave if you like but I find honey to have the best flavor.
- Avocado Oil– Enhances moisture and tenderness in the dough. You can substitute for any neutral cooking oil, but I don’t recommend olive oil as the flavor can be overpowering.
- Pumpkin Puree– This adds softness and pumpkin flavor to the bread. Don’t use pumpkin pie filling only use 100% pumpkin puree.
- Ground Cinnamon, Nutmeg, Ginger, and Cardamom– Creates the warm, spiced flavor that defines the swirl through the bread.
- Brown Sugar– Adds sweetness that melts into the cinnamon swirl.
- Salted Butter (optional)- for brushing on top of the loaf for a softer crust and deeper flavor.
Instructions
Step 1: Feed Your Starter Night Before Baking
Baker’s Schedule Day 1- 8:00 PM
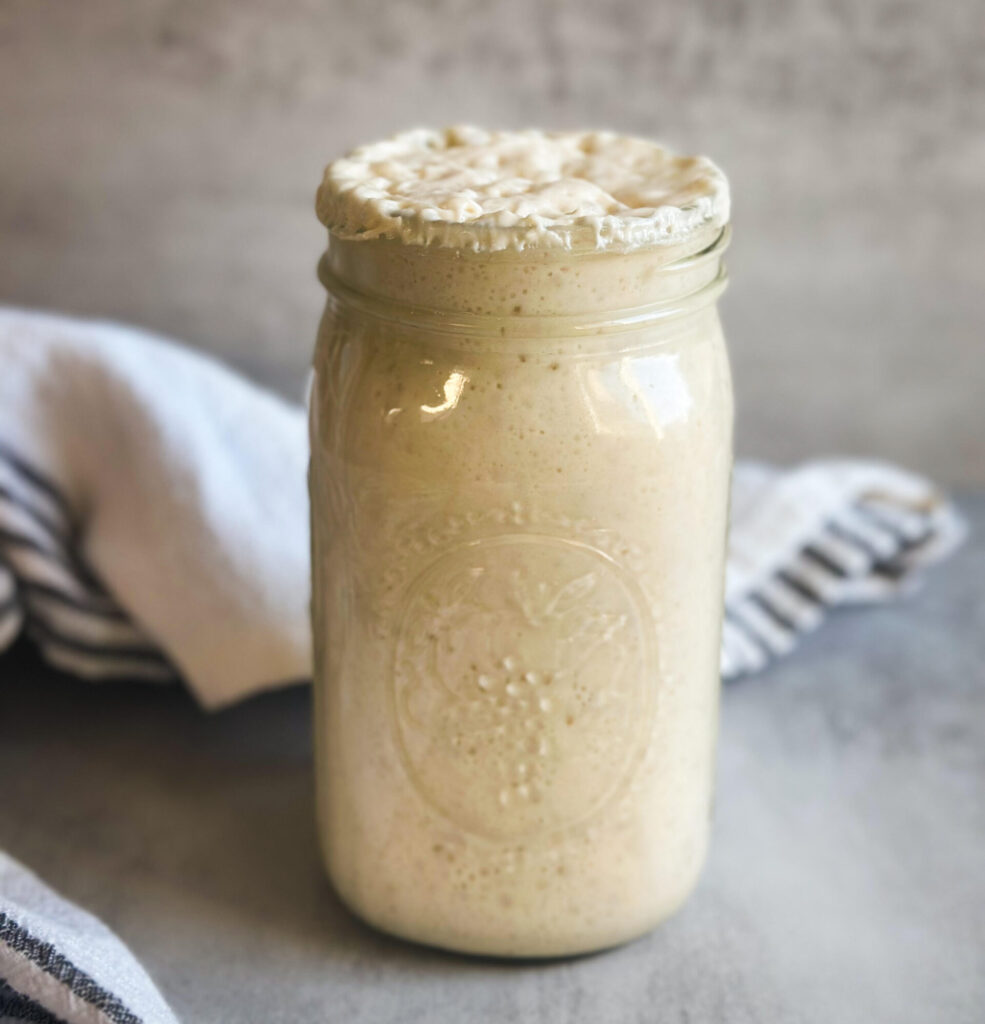
To ensure a bubbly and active starter, feed your starter the night before baking.
Use a 1:2:2 ratio to feed your starter (this means one part mature mother starter, two times the water, two times the flour).
Mix flour and water in a jar with a spatula, cover loosely with lid, and mark the volume of the starter in your jar with a rubber band or piece of tape and marker. Let starter sit at room temperature (70-75 degrees) overnight until bubbly and doubled in size.
Step 2: Make the Dough
Baker’s Schedule: Day 2- 8:00 AM
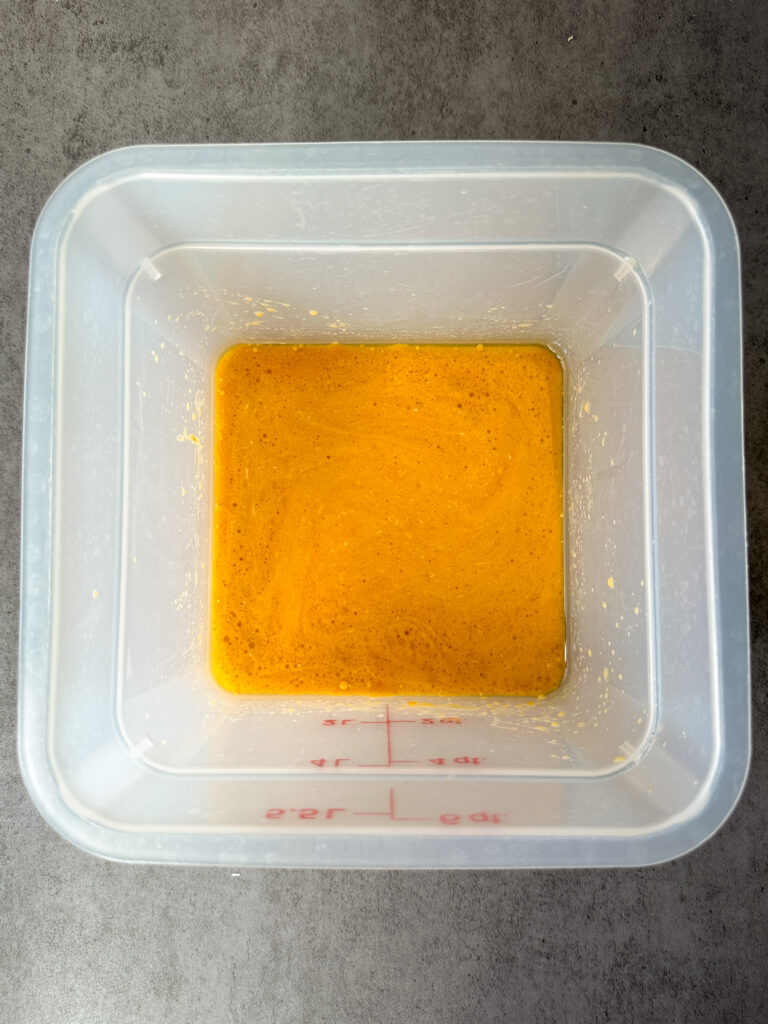
In a large bowl (or as I prefer a clear straight edge container), mix the active starter, pumpkin puree, water, avocado oil, and honey or brown sugar until everything is well combined.
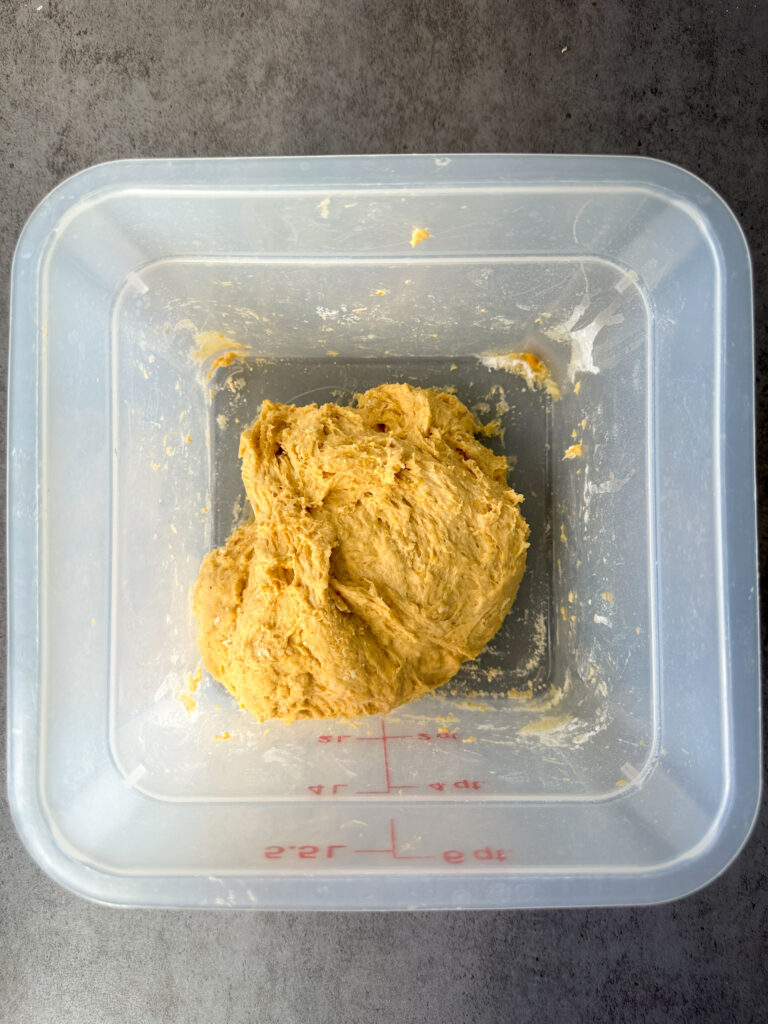
Add the salt and flour to the starter mixture. Stir and knead with your hand or dough whisk until all ingredients are combined into a shaggy dough. Cover with a damp towel or plastic and let it rest for 30 minutes at room temperature (70-77 degrees).
Step 3: Stretch and Folds
After the rest, begin your stretch and folds. This helps build structure in your dough.
How to do a stretch and fold: Starting at the edge of the dough with wet hands, gently lift one edge of the dough, stretch it up, and fold it over the center. Rotate the bowl/container 90 degrees and repeat with the next side. Do this for all four sides of the dough to form a ball.
Cover the dough and let it rest for 30 minutes. Repeat this stretch-and-fold process two more times at 30 minute intervals for a total of 3 sets. Your dough should go from being rough and clumpy to smooth and silky.
Step 4: Bulk Fermentation
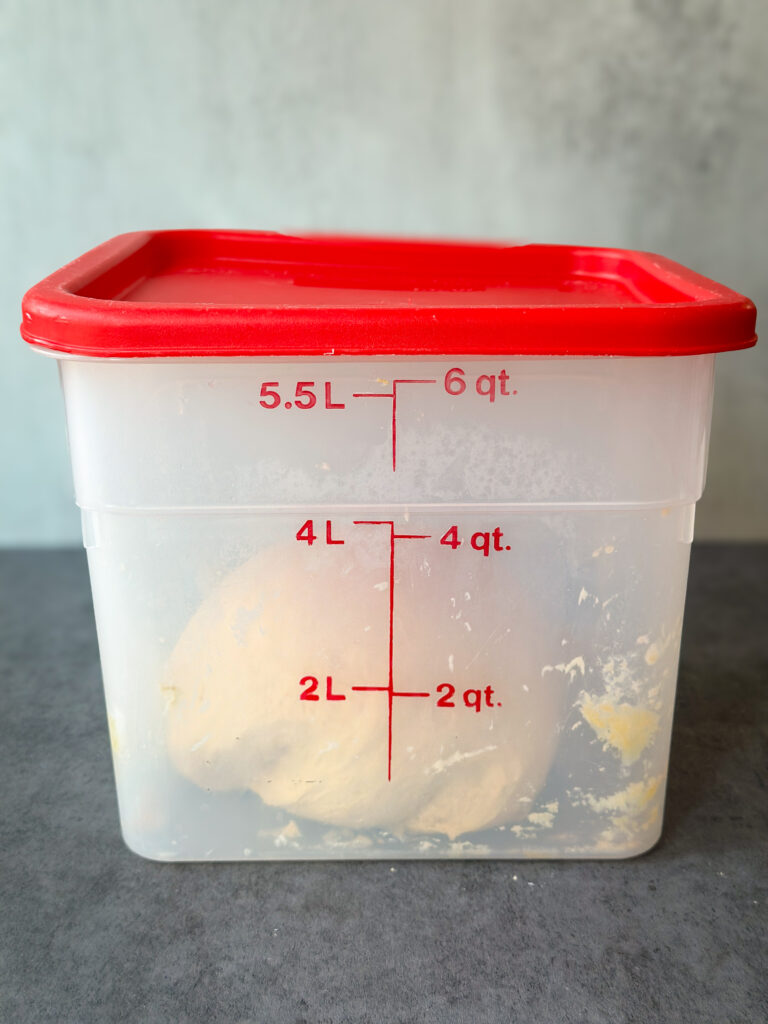
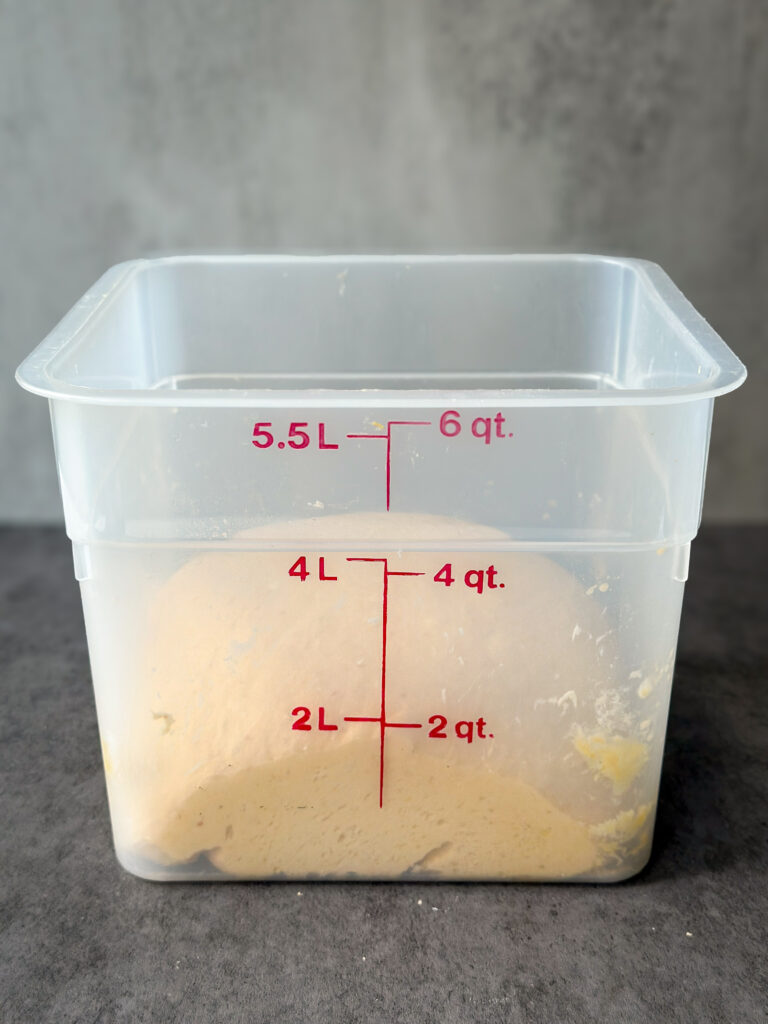
After the stretch and folds, cover the dough and let it bulk ferment for 5-6 hours. Keep the dough at a temperature of 75–78°F (24–26°C) for best results. The dough should rise by 90%, stopping just shy of doubling in size.
The best way to measure dough has proofed 90 percent in volume is to mark the volume of the dough in your container or bowl when you first mix your dough, then as the dough ferments you can more accurately assess how much it has risen in volume and when it’s ready to shape.
Other signs of dough being properly fermented and ready for shaping include fermentation bubbles, a domed top, and springs back when you poke it with your finger.
Same Day Baking Note: if dough proofs over 90%, it’s best to bake same day. Over proofed dough won’t sustain an overnight refrigeration and runs the risk of being flat.
Step 5: Shaping & Filling the Loaf
In a small bowl, prepare your cinnamon swirl filling by mixing together the brown sugar, cinnamon, ginger, nutmeg, cardamom and flour until well combined. Set aside.
Lightly flour your work surface to prevent sticking, and grease your loaf pan with a light coat of oil or nonstick spray.
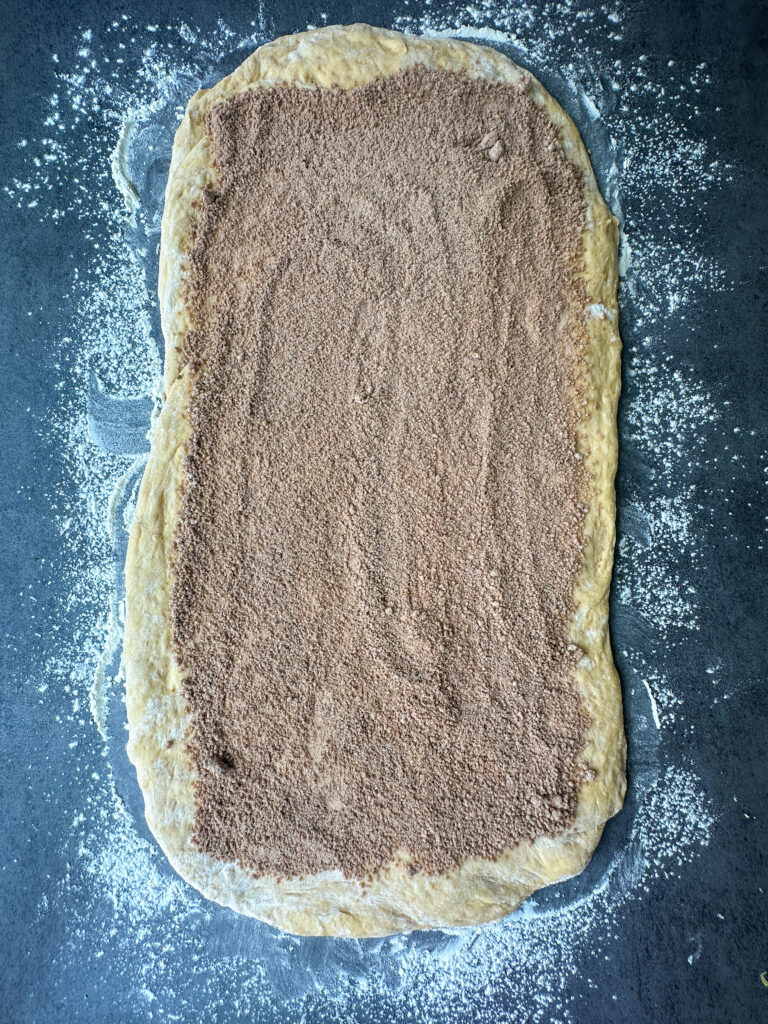
Gently turn your dough out onto the floured surface. Using a rolling pin, roll the dough into a large rectangle approximately 10×20 inches (bottom and top being 10 inches). The width should match the length of your loaf pan; the longer the rectangle, the more distinct the swirl will be.
Evenly sprinkle the cinnamon sugar mixture over the surface of the dough, leaving a ½-inch border along the edges to help seal the bread.
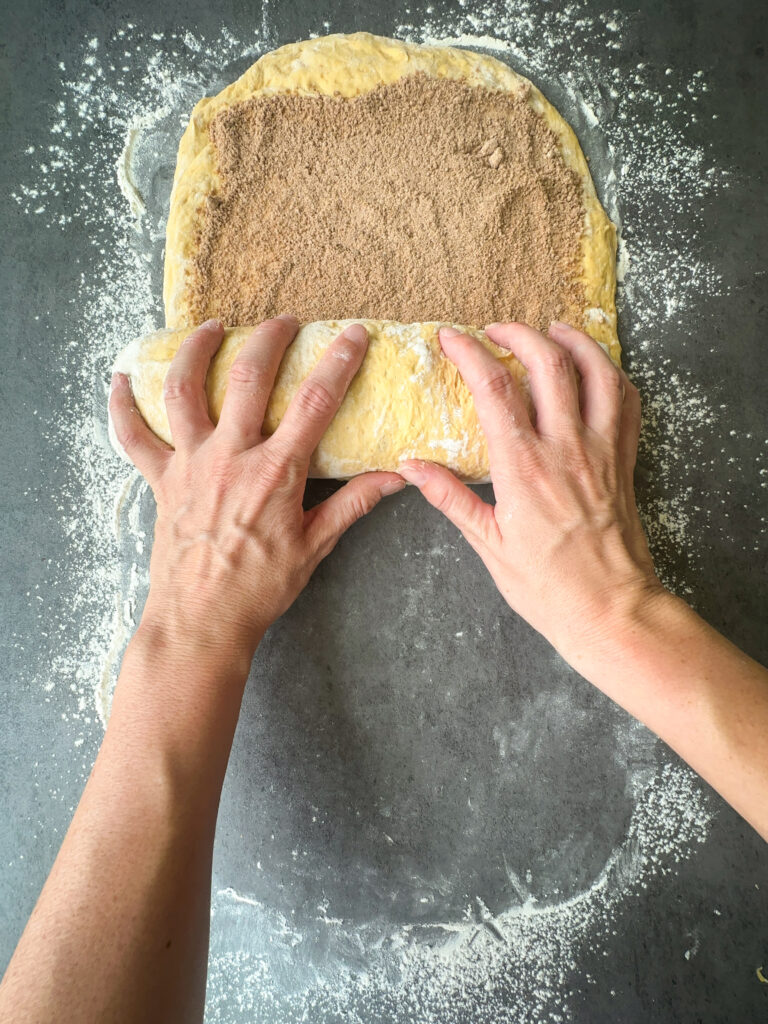
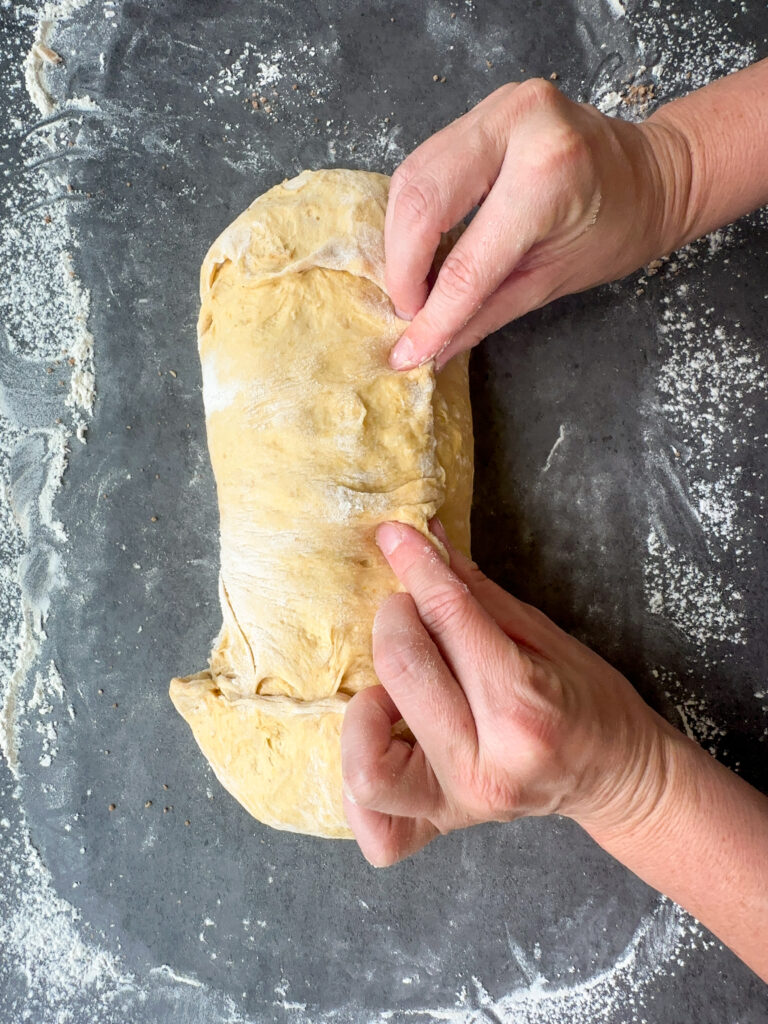
Starting at the bottom (the edge closest to you), gently roll the dough up into a tight log using your hands or a dough scraper to help lift and tuck as you go. Once rolled, pinch the seam closed along the top and seal the ends by pinching and tucking them under slightly.
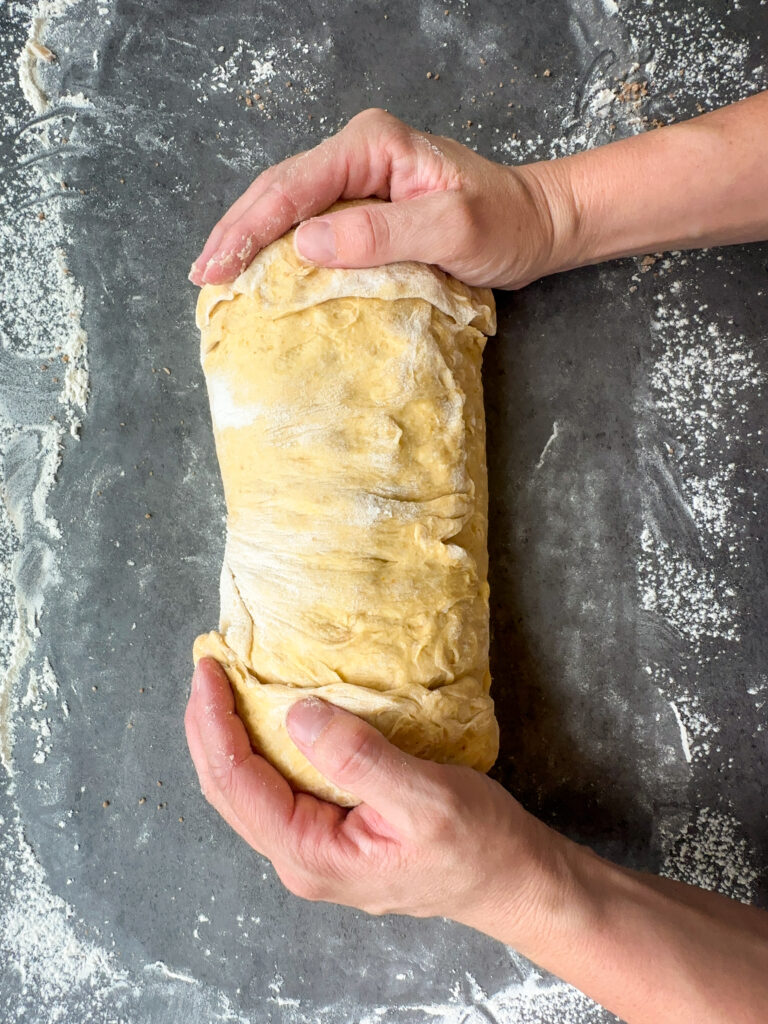
Carefully transfer the rolled dough into the greased loaf pan, seam side down. Cover loaf pan with plastic.
NOTE FOR OVERNIGHT REFRIGERATION AFTER SHAPING:
At this point you have the option to cover the loaf in the pan with plastic and refrigerate overnight for longer fermentation, or proceed with proofing and baking.
If you choose to refrigerate overnight, do not proof after shaping. Bread will proof in refrigerator in pan, but will need additional proofing time at room temperature the next day.
Allow the bread to come to room temperature the next morning and proof 1-2 hours or until dough is risen over the edge of the pan and proceed with baking instructions as listed below. Temperature of the dough and your home will affect how long this process takes, rely on visual cues more than time.
Be aware the crust may get slightly more brown due to condensation from the pan with an overnight fermentation rest.
IF SKIPPING OVERNIGHT FERMENTATION:
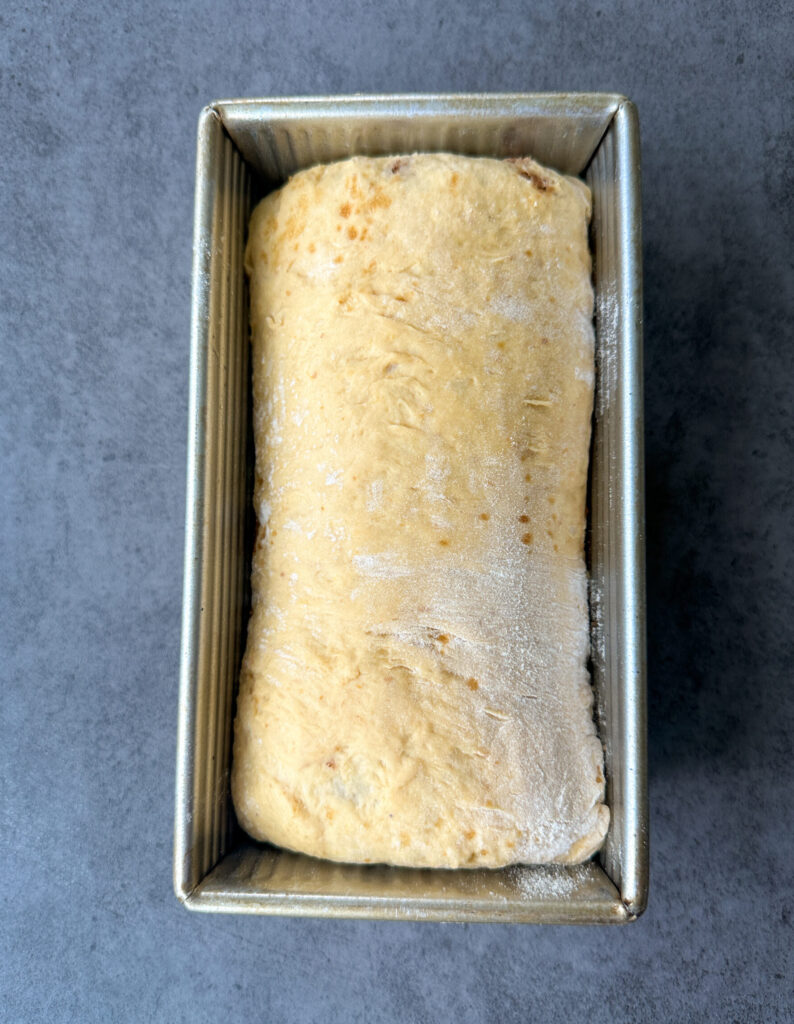
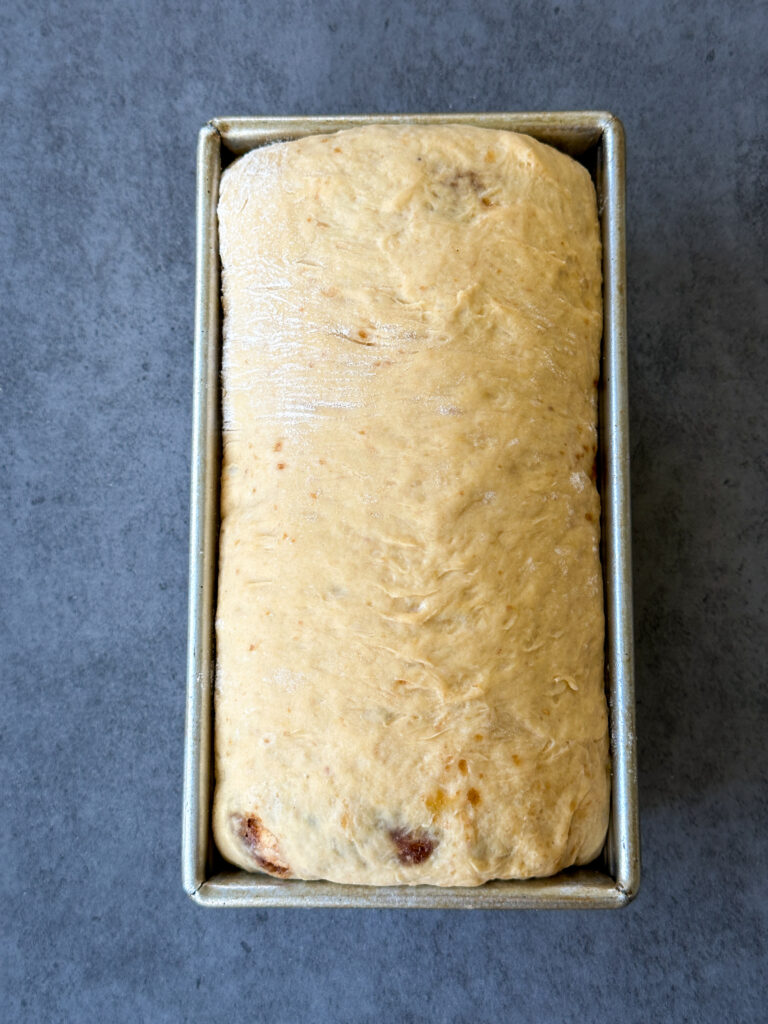
Let the bread proof at room temperature for about 1 hour, or until the dough is just peeking over the edge of the pan. See the picture below for how the bread should look before baking.
Note: If you over proof the bread while it’s in the pan, you will end up with a distorted swirl.
Step 6: Baking the Bread
Preheat your oven to 400°F (200°C) on convection bake.
When the oven is hot, place the loaf in the oven on the center rack and bake for 45-50 minutes or the internal temperature of the loaf reads 200-205 F. You can use a digital thermometer inserted into the loaf to check this.
If the top of the loaf starts to get too brown, tent the top with foil and continue baking.
Remove the loaf from the oven as soon as it’s done baking, and allow to cool five minutes before brushing the top with butter.
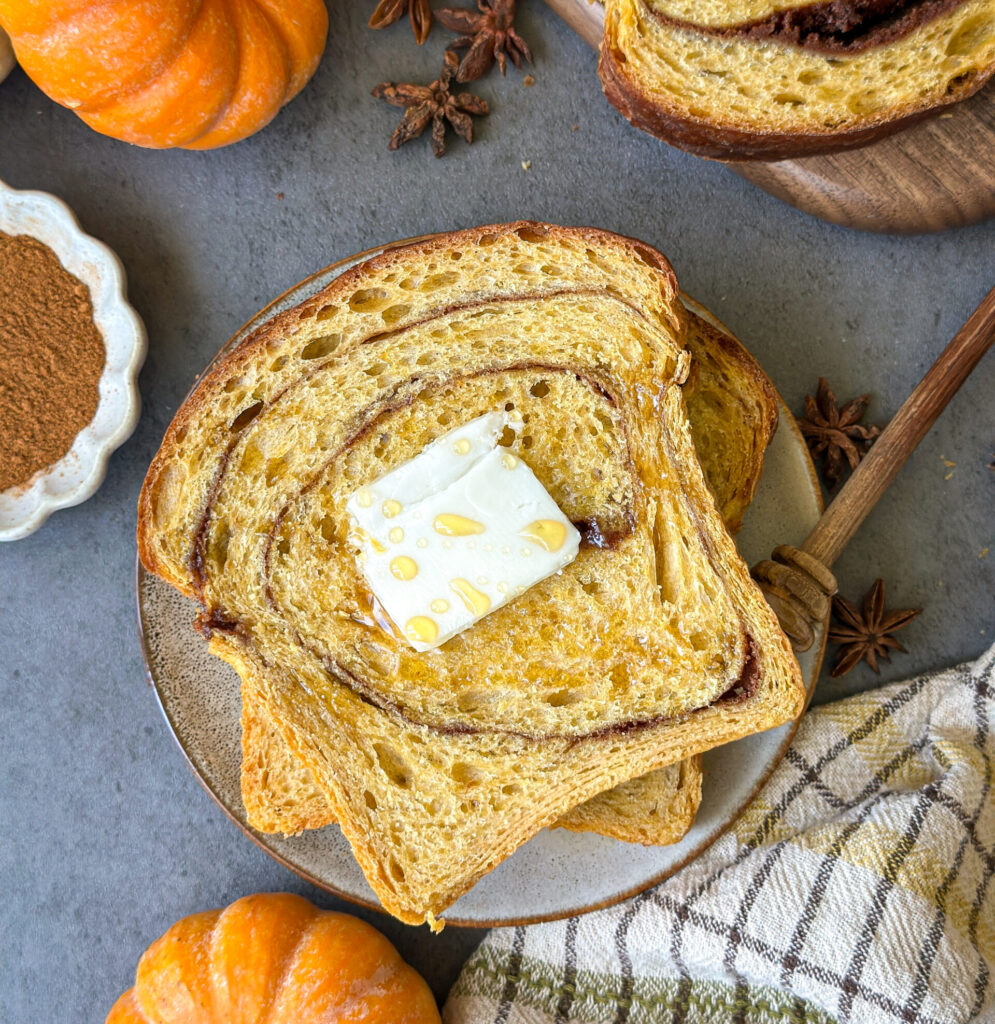
While the loaf is still warm, brush the top with cold butter for a soft and shiny crust. Allow the bread to cool completely on a wire rack before slicing.
Yields 1 loaf
How to Store:
Room Temperature- Store wrapped in plastic at room temperature for up to 3 days. Toast for best texture and enjoy!
Refrigerator- Store bread tightly wrapped in plastic in the refrigerator for up to five days. Reheat slices in the oven or toaster for best texture.
Freezer- Store sliced bread in the freezer in a Ziplock bag with all air removed. For easier separation, put pieces of parchment between the slices before freezing. Allow bread to thaw to room temperature and toast for best flavor.
FAQ’S
No. This recipe relies on an active, bubbly starter for proper rise and structure.
Yes. After shaping the bread, cover and refrigerate overnight. Let it come to room temperature and finish proofing before baking. See my notes on this.
This can happen if the dough is rolled too loosely or proofs too long in the pan. Roll tightly and seal the seam well, and avoid over proofing in the pan.
A standard 9×5 loaf pan works best for proper height and even baking. I’ve linked the one I use under Tools.
The top should be golden brown, and the internal temperature should be around 195–200°F.
No. This won’t result in the same flavor and texture. Use 100% pumpkin puree.
If you enjoyed this recipe, drop a comment and leave a star review and don’t forget to try more of my sourdough bread recipes!
Sourdough Bread Recipes:
- Sourdough Brown Bread (Sandwich Style)
- Easy Sourdough Sandwich Bread
- Sourdough Cinnamon Raisin Swirl Bread
Sourdough Pumpkin Cinnamon Swirl Bread
Equipment
- Measuring cups & spoons – if you prefer to not use a scale.
- Bowl or straight edge container for mixing and proofing dough – to mix your dough and make sure your dough is rising properly. You can use a clear square Tupperware for this, I don't recommend a bowl as it is hard to assess your rise. I've linked here the container I like to use.
- Silicone Dough Spatula – to mix and shape the loaf. I love these dough spatulas linked here.
- Rolling Pin (optional) – to help you roll out the dough to the desired size. You can laminate by hand if you prefer. I love this small rolling pin linked here.
- Small Bowl – for mixing the cinnamon sugar filling.
- Lint-free cloth or plastic wrap – to cover the dough while resting.
- Digital food thermometer (optional) – to check the temperature of your starter and dough, this ensures a more reliable result. I use this one linked here.
- 9×5 loaf pan – standard size for shaping and baking the final loaf. I love this loaf pan from USA Bakeware linked here.
- Bread knife – for cutting your bread once cooled. I love this bread knife linked here.
- Cooling rack – to cool your loaf evenly after baking.
Ingredients
Feed Your Starter:
- 2 (20g) Tbsp mature sourdough starter
- 1/3 (50g) cup all-purpose flour add a little extra flour if mixture is too thin; should be pancake batter consistency
- 1/4 (50g) cup water
Main Dough:
- ¾ (200g) cup water room temperature
- ½ (100g) cup active sourdough starter
- ¾ (180g) cup pumpkin purée
- 2½ (50g) Tbsp pure honey or ¼ cup packed (50g) brown sugar
- 2 (30g) Tbsp avocado oil or neutral cooking oil
- 4 (500g) cups all-purpose flour or bread flour
- 2 (12g) tsp sea salt
Pumpkin Spice Cinnamon Swirl:
- ⅓ (67g) cup brown sugar
- ¼ (30g) cup all-purpose flour
- 2 tsp ground cinnamon
- ¼ tsp ground ginger you can swap the ginger, nutmeg, and cardamom for 1 tsp pumpkin pie spice blend or omit
- ⅛ tsp ground nutmeg
- ⅛ tsp ground cardamom
For Brushing (optional):
- 1 Tbsp 14g salted butter, optional
Instructions
Step 1: Feed Your Starter Night Before Baking
- Baker’s Schedule Day 1- 8:00 PM
- To ensure a bubbly and active starter, feed your starter the night before baking.
- Use a 1:2:2 ratio to feed your starter (this means one part mature mother starter, two times the water, two times the flour).
- Mix starter, flour, and water in a jar with a spatula, cover loosely with lid, and mark the volume of the starter in your jar with a rubber band or piece of tape and marker. Let starter sit at room temperature (70-75 degrees) overnight until bubbly and doubled in size.2 (20g) Tbsp mature sourdough starter, 1/3 (50g) cup all-purpose flour, 1/4 (50g) cup water
Step 2: Make the Dough
- Baker’s Schedule: Day 2- 8:00 AM
- In a large bowl (or as I prefer a clear straight edge container), mix the active starter, pumpkin puree, water, avocado oil, and honey or brown sugar until everything is well combined.¾ (200g) cup water, ½ (100g) cup active sourdough starter, ¾ (180g) cup pumpkin purée, 2 (30g) Tbsp avocado oil , 2½ (50g) Tbsp pure honey
- Add the salt and flour to the starter mixture. Stir and knead with your hand or dough whisk until all ingredients are combined into a shaggy dough. Cover with a damp towel or plastic and let it rest for 30 minutes at room temperature (70-77 degrees).4 (500g) cups all-purpose flour, 2 (12g) tsp sea salt
Step 3: Stretch and Folds
- After the rest, begin your stretch and folds. This helps build structure in your dough.
- How to do a stretch and fold: Starting at the edge of the dough with wet hands, gently lift one edge of the dough, stretch it up, and fold it over the center. Rotate the bowl/container 90 degrees and repeat with the next side. Do this for all four sides of the dough to form a ball.
- Cover the dough and let it rest for 30 minutes. Repeat this stretch-and-fold process two more times at 30 minute intervals for a total of 3 sets. Your dough should go from being rough and clumpy to smooth and silky.
Step 4: Bulk Fermentation
- After the stretch and folds, cover the dough and let it bulk ferment for 5-6 hours. Keep the dough at a temperature of 75–78°F (24–26°C) for best results. The dough should rise by 90%, stopping just shy of doubling in size.
- The best way to measure dough has proofed 90 percent in volume is to mark the volume of the dough in your container or bowl when you first mix your dough, then as the dough ferments you can more accurately assess how much it has risen in volume and when it’s ready to shape.
- Other signs of dough being properly fermented and ready for shaping include fermentation bubbles, a domed top, and springs back when you poke it with your finger.
- Same Day Baking Note: if dough proofs over 90%, it’s best to bake same day. Over proofed dough won’t sustain an overnight refrigeration and runs the risk of being flat.
Step 5: Shaping & Filling the Loaf
- In a small bowl, prepare your cinnamon swirl filling by mixing together the brown sugar, cinnamon, ginger, nutmeg, cardamom and flour until well combined. Set aside.⅓ (67g) cup brown sugar, ¼ (30g) cup all-purpose flour, 2 tsp ground cinnamon, ¼ tsp ground ginger, ⅛ tsp ground nutmeg, ⅛ tsp ground cardamom
- Lightly flour your work surface to prevent sticking, and grease your loaf pan with a light coat of oil or nonstick spray.
- Gently turn your dough out onto the floured surface. Using a rolling pin, roll the dough into a large rectangle approximately 10×20 inches (bottom and top being 10 inches). The width should match the length of your loaf pan; the longer the rectangle, the more distinct the swirl will be.
- Evenly sprinkle the cinnamon sugar mixture over the surface of the dough, leaving a ½-inch border along the edges to help seal the bread.
- Starting at the bottom (the edge closest to you), gently roll the dough up into a tight log using your hands or a dough scraper to help lift and tuck as you go. Once rolled, pinch the seam closed along the top and seal the ends by pinching and tucking them under slightly.
- Sprinkle the cinnamon sugar filling over the top of the dough leaving a 1/2 inch border at the edge
- Carefully transfer the rolled dough into the greased loaf pan, seam side down. Cover loaf pan with plastic.
NOTE FOR OVERNIGHT REFRIGERATION AFTER SHAPING:
- At this point you have the option to cover the loaf in the pan with plastic and refrigerate overnight for longer fermentation, or proceed with proofing and baking.
- If you choose to refrigerate overnight, do not proof after shaping. Bread will proof in refrigerator in pan, but will need additional proofing time at room temperature the next day.
- Allow the bread to come to room temperature the next morning and proof 1-2 hours or until dough is risen over the edge of the pan and proceed with baking instructions as listed below. Temperature of the dough and your home will affect how long this process takes, rely on visual cues more than time.
- Be aware the crust may get slightly more brown due to condensation from the pan with an overnight fermentation rest.
IF SKIPPING OVERNIGHT FERMENTATION:
- Let the bread proof at room temperature for about 1 hour, or until the dough is just peeking over the edge of the pan. See the picture below for how the bread should look before baking.
- Note: If you over proof the bread while it's in the pan, you will end up with a distorted swirl.
Step 6: Baking the Bread
- Preheat your oven to 400°F (200°C) on convection bake.
- When the oven is hot, place the loaf in the oven on the center rack and bake for 45-50 minutes or the internal temperature of the loaf reads 200-205 F. You can use a digital thermometer inserted into the loaf to check this.
- If the top of the loaf starts to get too brown, tent the top with foil and continue baking.
- Remove the loaf from the oven as soon as it’s done baking, and allow to cool five minutes before brushing the top with butter.
- While the loaf is still warm, brush the top with cold butter for a soft and shiny crust. Allow the bread to cool completely on a wire rack before slicing.1 Tbsp 14g salted butter, optional
- Yields 1 loaf
I have made this bread now four times. The spice and the bread is really nice. Pumpkin flavor to me isn’t very very strong. But it is a nice bread. We like it with French toast and put it in the toaster and letting the butter melt into it. I follow the recipe to a T. Don’t change a thing. Dough is a very wet dough so make sure you flour your counter and dust your rolling pin! Thank you for another great recipe. Been enjoying your site all week!
Hi Melissa, I’m so happy you love this recipe! French toast is my favorite too!