
Sourdough Blueberry Coffee Cake
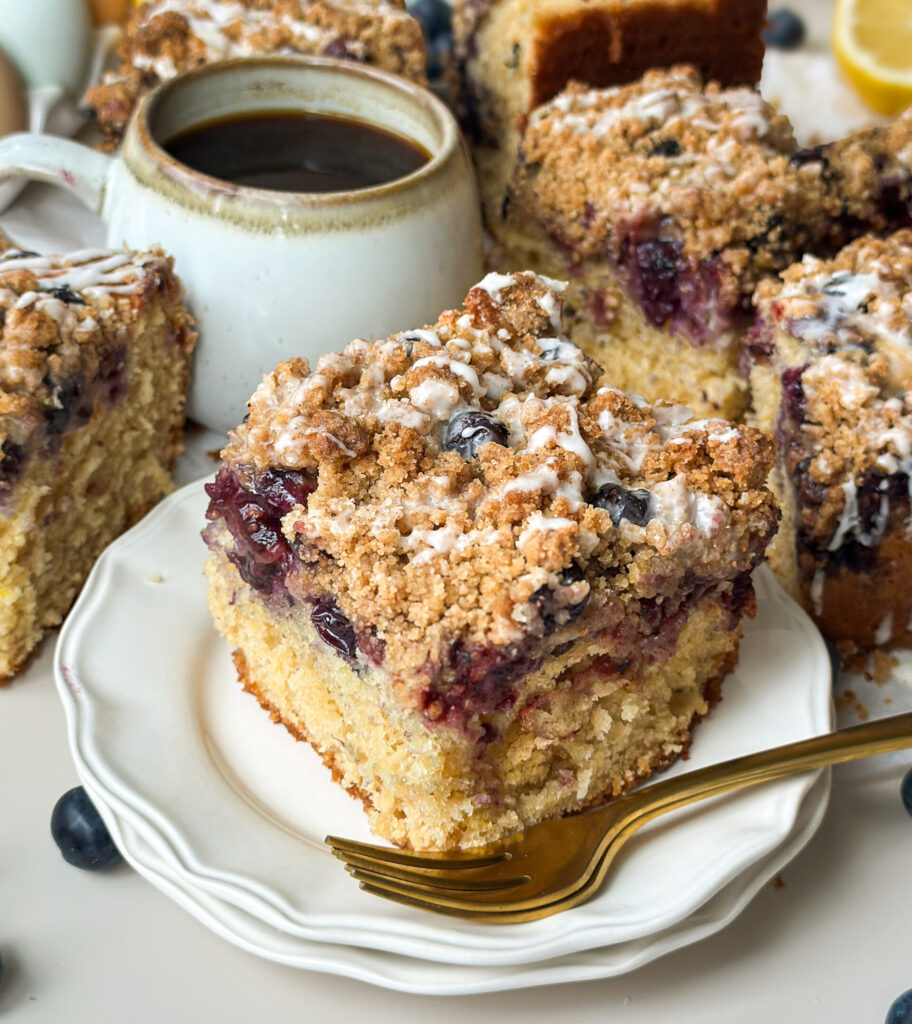
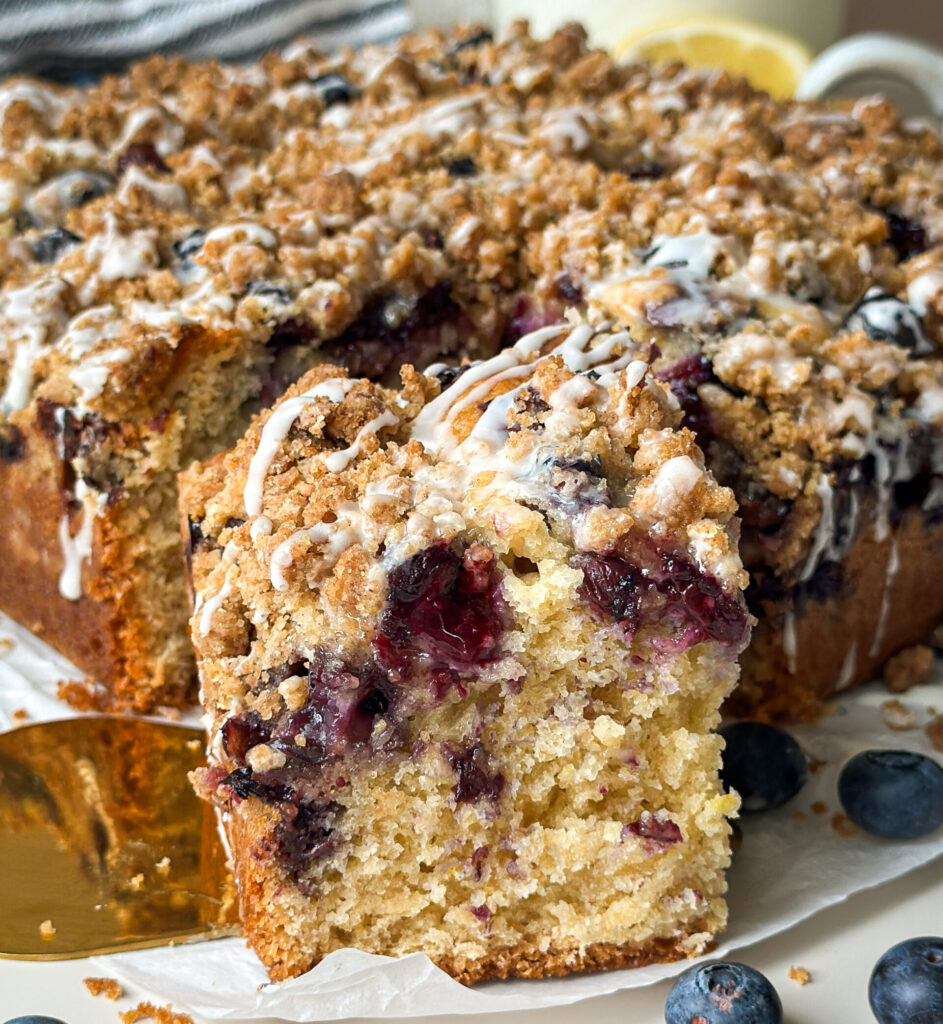
I took my popular Sourdough Coffee Cake, and made it even better with a thick layer of juicy blueberries baked right in the cake. This Sourdough Blueberry Coffee Cake is soft, buttery, bursting with juicy blueberries in each bite, and is topped with a brown sugar cinnamon crumble that makes it impossible to stop at just one slice!
Why You’ll Love This Recipe
- Soft, buttery crumb: This coffee cake bakes up super soft and tender with with rich flavor in each bite.
- Loaded with blueberries: A thick layer of blueberries baked under the crumble gives this cake delightful pockets of bright blueberries.
- Uses up sourdough discard: Have discard you need to use? This is a delicious way to put it to use.
- Easy one bowl batter: This cake is simple to mix and approachable without sacrificing texture.
- Optional overnight fermentation: This recipe includes an optional overnight fermentation step if you want a fully fermented cake that’s easier to digest, or you can bake it the same day!
Tools You’ll Need:
- Mixing bowls- for the cake batter, crumble, blueberry layer, and glaze. I love this set of glass mixing bowls with lids for fermenting my cake batters!
- Whisk- for mixing the batter and glaze.
- Digital kitchen scale (optional)– for accurate measuring, especially helpful with sourdough baking. I linked the one I like here.
- Measuring cups and spoons– for measuring ingredients.
- Fork or pastry blender- for mixing the crumble.
- Spatula- to spread the batter in the cake pan.
- 9×13-inch or 9×9 inch baking pan- for baking the coffee cake. For a thinner coffee cake, use a 9×13 baking pan. If you want a taller cake, you can use a 9×9 cake pan. I love these USA 9×9 baking pans that have a nice tall edge for this type of cake and aluminized steel that gives the most perfectly even bake!
- Parchment paper- to line the cake pan to avoid sticking.
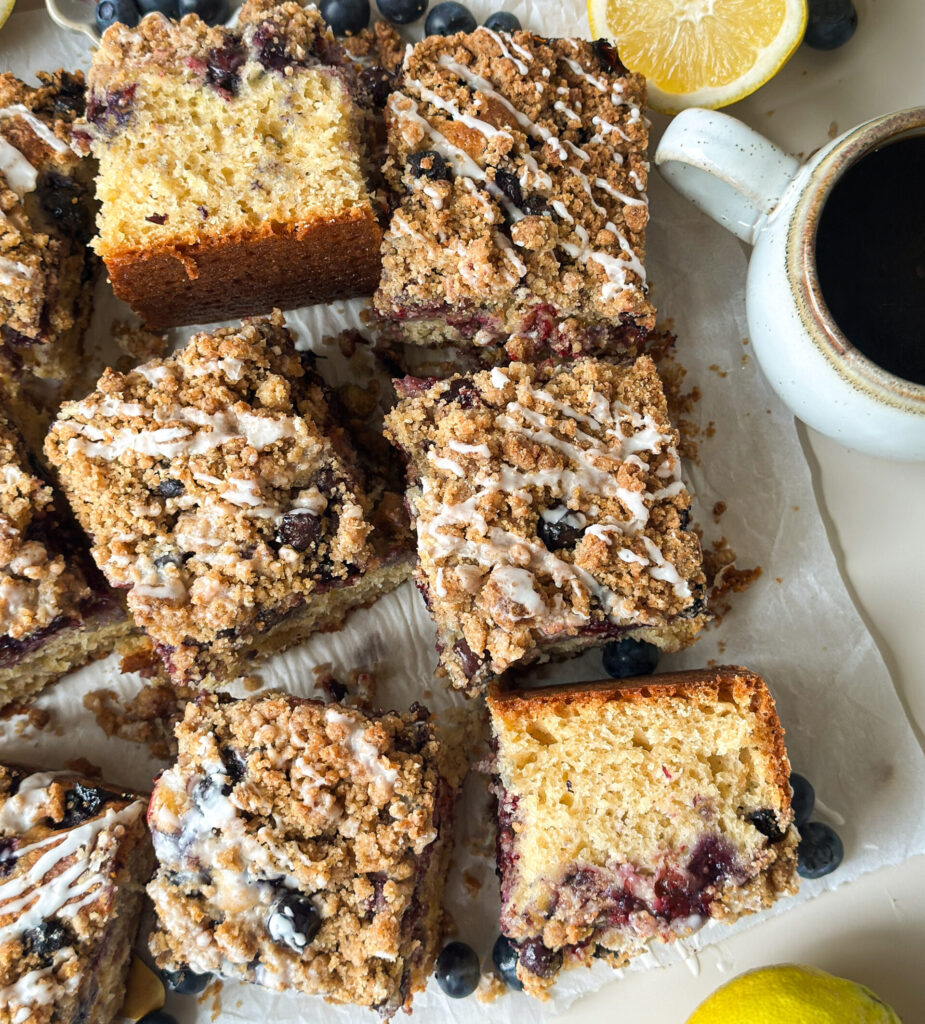
Gather Your Ingredients:
- Sourdough Starter- (flat or past peak, can be cold or room temperature). Key for fermentation if you choose to ferment the batter.
- All-purpose Flour- Gives cake structure and keeps the crumb tender.
- Buttermilk or milk- Lightens the batter and keeps the crumb soft. I personally highly recommend using buttermilk, the texture and tenderness is so lovely.
- Avocado Oil- Adds moisture and keeps the cake soft and tender. You can substitute for any neutral cooking oil.
- Sour Cream- this is key to a moist cake! You can also substitute this for full-fat Greek yogurt.
- White Sugar– Sweetens the cake and brings out the blueberries.
- Brown Sugar- for that classic coffee cake flavor. Added to the crumble and the cake.
- Ground Cinnamon- Adds warmth to the crumble for the perfect contrast to the blueberries.
- Vanilla extract– Enhances the flavor and brings warmth.
- Eggs (room temperature)– provide structure and lift.
- Baking powder + Baking soda– Ensures the right rise and tenderness.
- Salt- Balances sweetness and enhances all the other flavors.
- Salted Butter- Binds the crumble together for the perfect texture.
- Powdered Sugar- Sweetens and stabilizes the glaze. Do not use granulated sugar or your icing will be grainy.
- Blueberries- I used fresh blueberries and this is what I would recommend for the best texture, but you can use frozen in a pinch. Please see the recipe for notes.
- Lemons (optional)- lemon zest brightens the batter and gives it a delicious citrus note.
Instructions
Step 1: Mix The Cake Batter
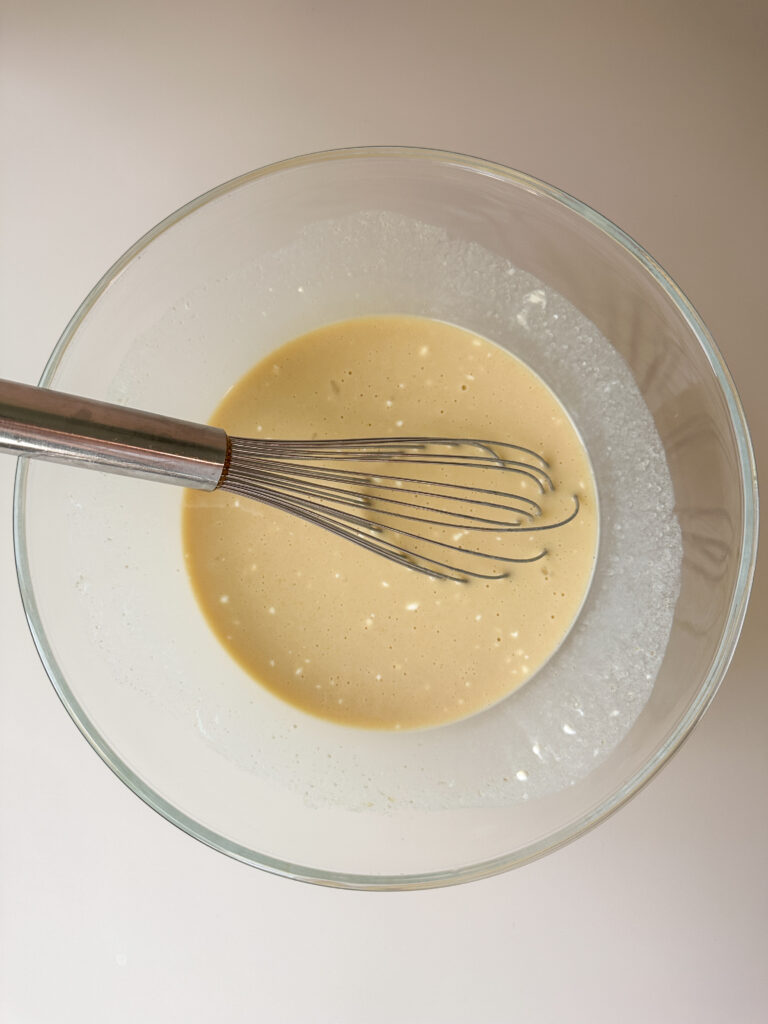
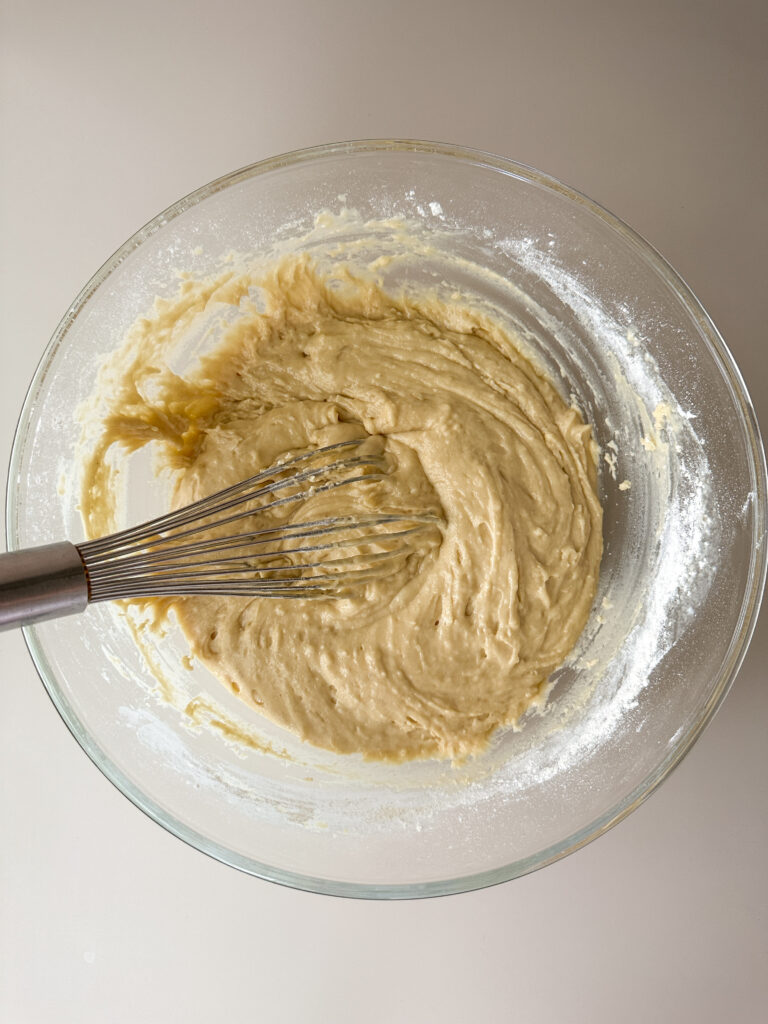
In a mixing bowl, add the white sugar, brown sugar, sourdough starter or discard, sour cream, milk, oil, eggs, lemon zest, and vanilla. Whisk the wet ingredients until smooth.
Add your flour, baking powder, baking soda, and salt to the bowl. Whisk in the dry ingredients until just combined, and no flour streaks remain. It’s important once you add the flour to avoid overmixing!
Optional Overnight/Same Day Fermentation: Cover the bowl with plastic wrap or a lid, and refrigerate overnight. This step is key in your fermentation process. If you want to shorten your fermentation time, you can allow the batter to rest for 4 hours at room temperature for a same day bake. I don’t advise leaving this batter at room temperature overnight, its too hydrated and will overproof.
Please note you can skip the resting periods and just mix and bake the cake!
Step 2: Mix The Ripple and BLueberry Filling
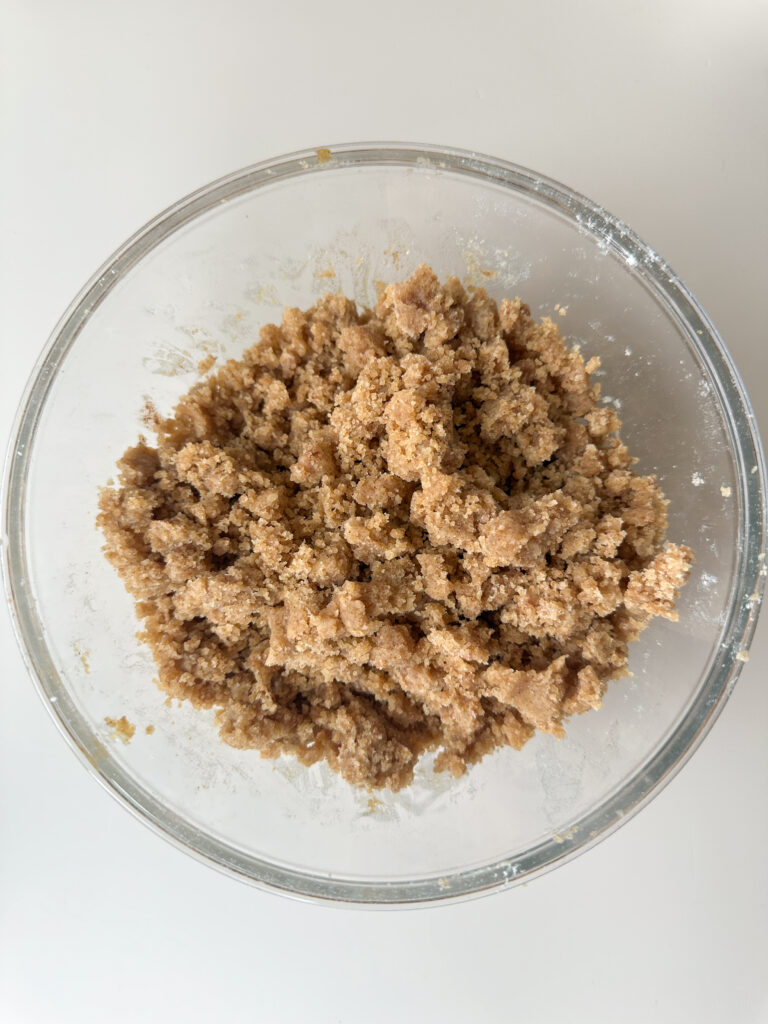
To make the crumble topping, add the butter to a microwave safe bowl and melt it.
Add the brown sugar, flour, ground cinnamon, and salt to the melted butter. Using a fork or a spoon, combine the crumble mixture until it’s clumpy and crumbly. Set aside for later.
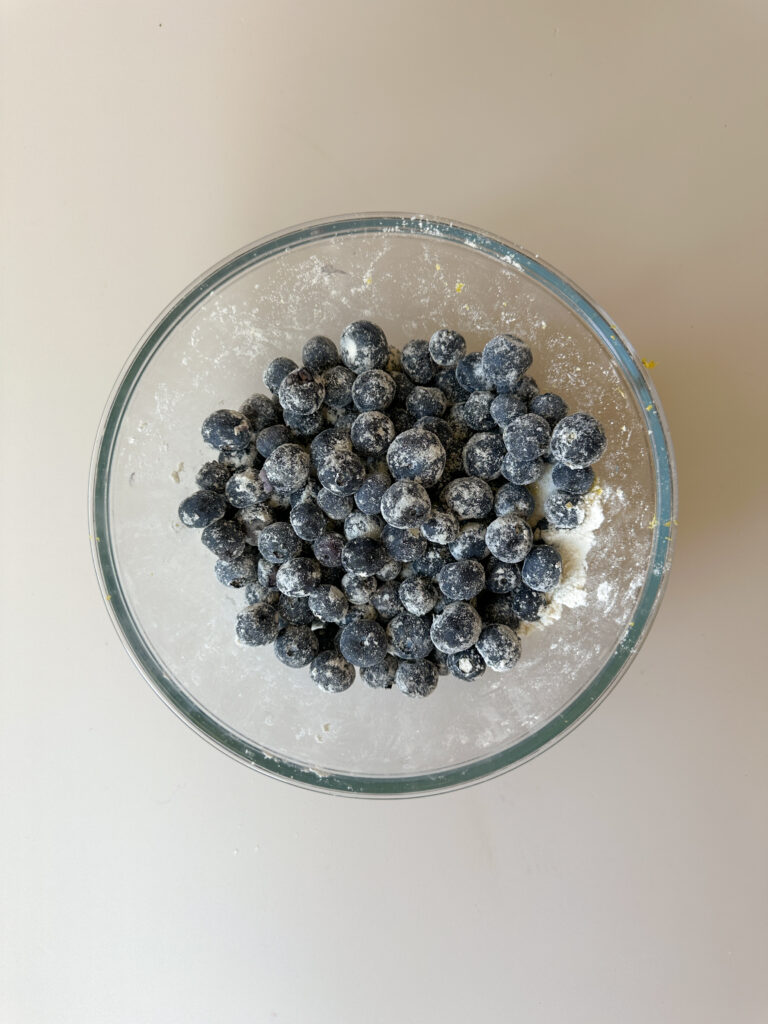
In another bowl, add the blueberries, flour, and white sugar. Gently mix to combine all of the ingredients for the blueberry filling and set aside for later.
To use frozen blueberries: Weigh out frozen blueberries and allow to rest in a bowl of warm water to thaw. After about 5-10 minutes, strain the blueberries from water and transfer them to a bowl lined with a paper towel to absorb any excess moisture (you can also just strain and blot). After water has been absorbed, remove the paper towel and toss the blueberries in the flour and sugar.
Step 3: Assemble the Cake
Fermentation Note: If you fermented the batter overnight in the refrigerator, allow the bowl of batter to rest on the counter for roughly 1 hour. This is a key step to achieving a tender crumb, don’t skip this step! If you like temperature cues, the temperature of the batter should read roughly 70 F before proceeding.
Note on choosing a pan: I used a 9×9 pan, but this will make the bake time longer as the cake is thicker but I love the thickness of the layers. I’m listing directions on how to make a 9×9 cake or a 9×13 cake, the bake time will vary. If you use a dark metal pan the cake may brown more on the edges and glass pans take much longer to bake the cake. I recommend a light metal pan for best results.
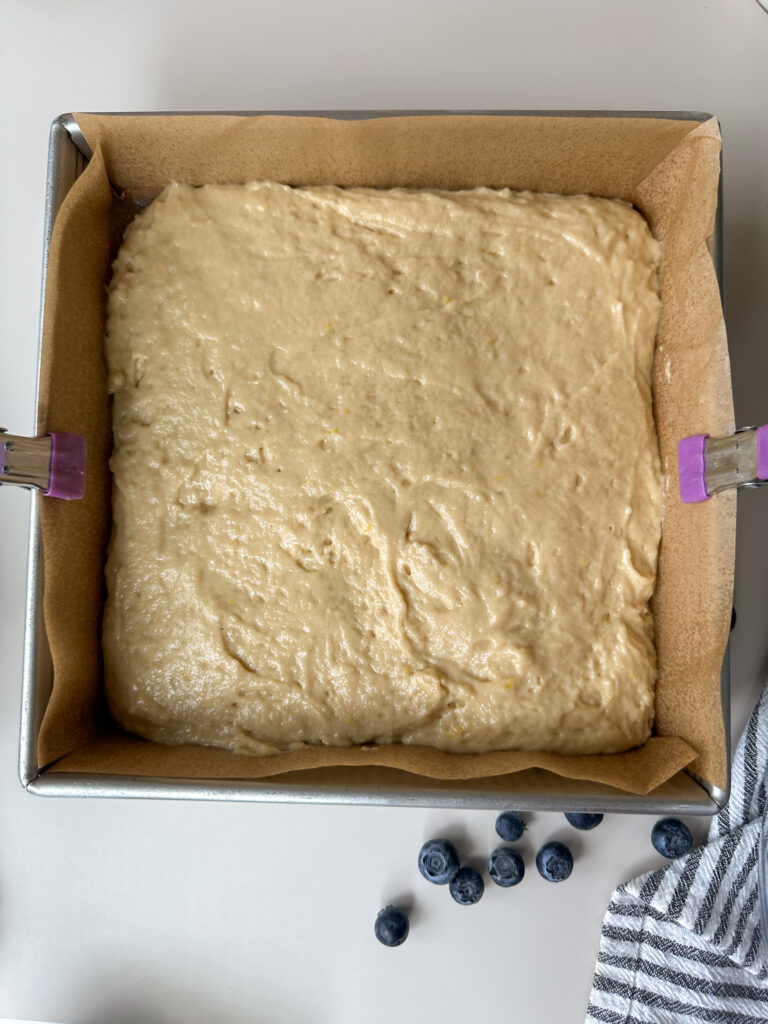
Preheat your oven to 350°F. Line your 9×13 or 9×9 cake pan with parchment paper (this helps to remove the cake easily), and spray lightly with cooking oil.
Scoop the cake batter into the cake pan, and gently use a spatula spread the batter to the edges to make sure the bottom of the cake pan is covered with the batter.
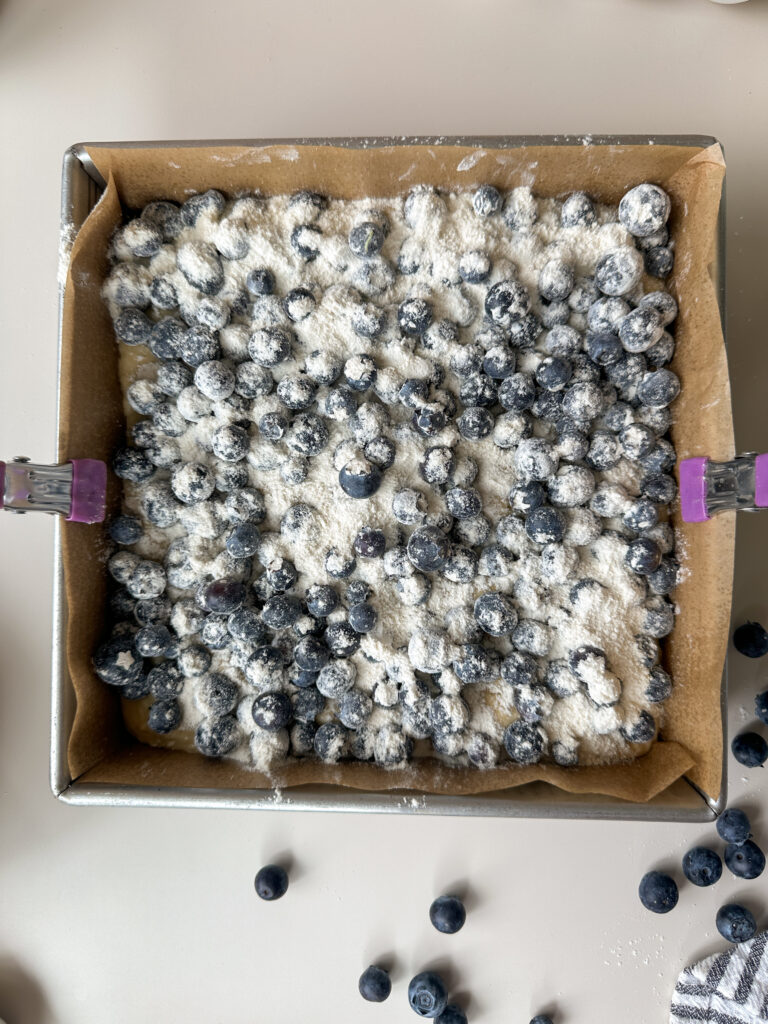
Add the blueberries evenly over the top of the cake batter (hold back one handful for the top of the cake). Shake the remaining sugar and flour in the bowl over the top of the blueberries evenly.
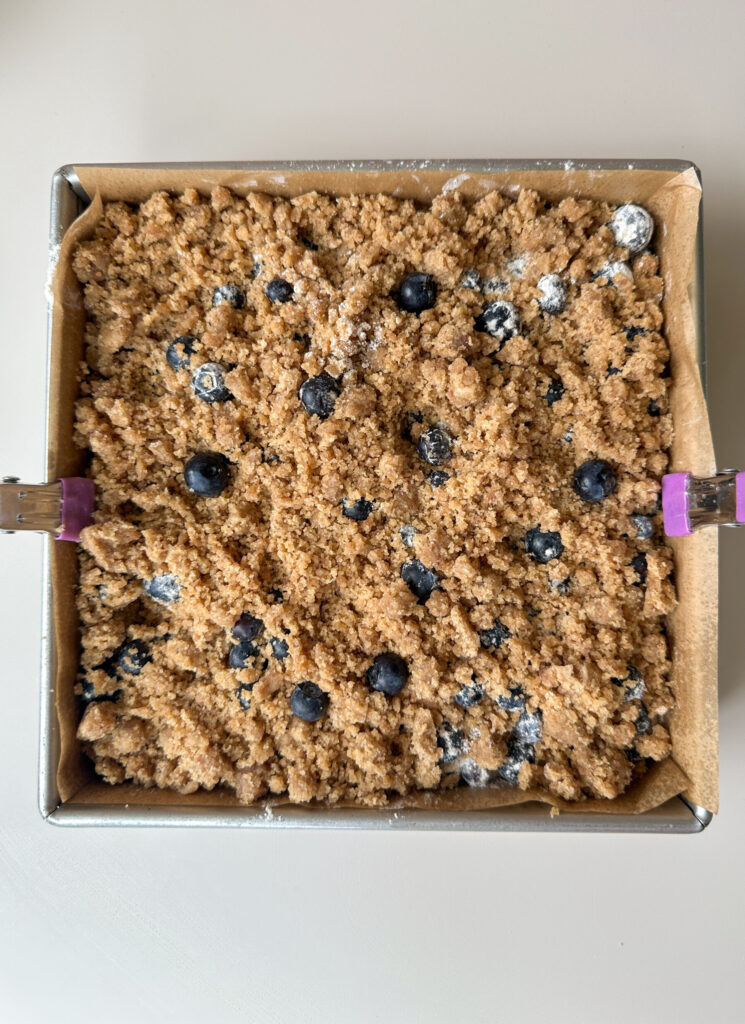
Sprinkle the crumble evenly over the top of the cake, making sure to cover the edges. Sprinkle the remaining blueberries over the top of the crumble.
Step 4: Bake the Cake
Transfer the cake to the preheated oven. If you’re cake is in a 9×13 cake pan, you’ll bake this cake for about 60 minutes.
You’ll want to check then center with a toothpick around 40 minutes, and bake the cake until a toothpick comes out clean with just a few loose crumbs. Do not remove the cake if you see wet batter!
Internal temeprature of the cake should be 200 F in the center when it’s done. The bake time is a general guide go off of visuals and internal temperature for the best results.
9×9 pan baking note: If you used a 9×9 cake pan, this cake typically needs 75-90 minutes of bake time to fully cook the center as the cake is taller and more dense.
Remove the cake from the oven as soon as it’s finished baking, and allow it to cool completely before glazing.
Step 5: Glaze the Coffee Cake
In a small bowl, add the powdered sugar, vanilla, and 1 Tablespoon of milk.
Start to whisk the glaze and bring it together, and add the milk or half and half one teaspoon at a time while you’re whisking until the glaze has reached you’re desired consistency.
You want the glaze to still be thick, but able to slowly run off the spoon.
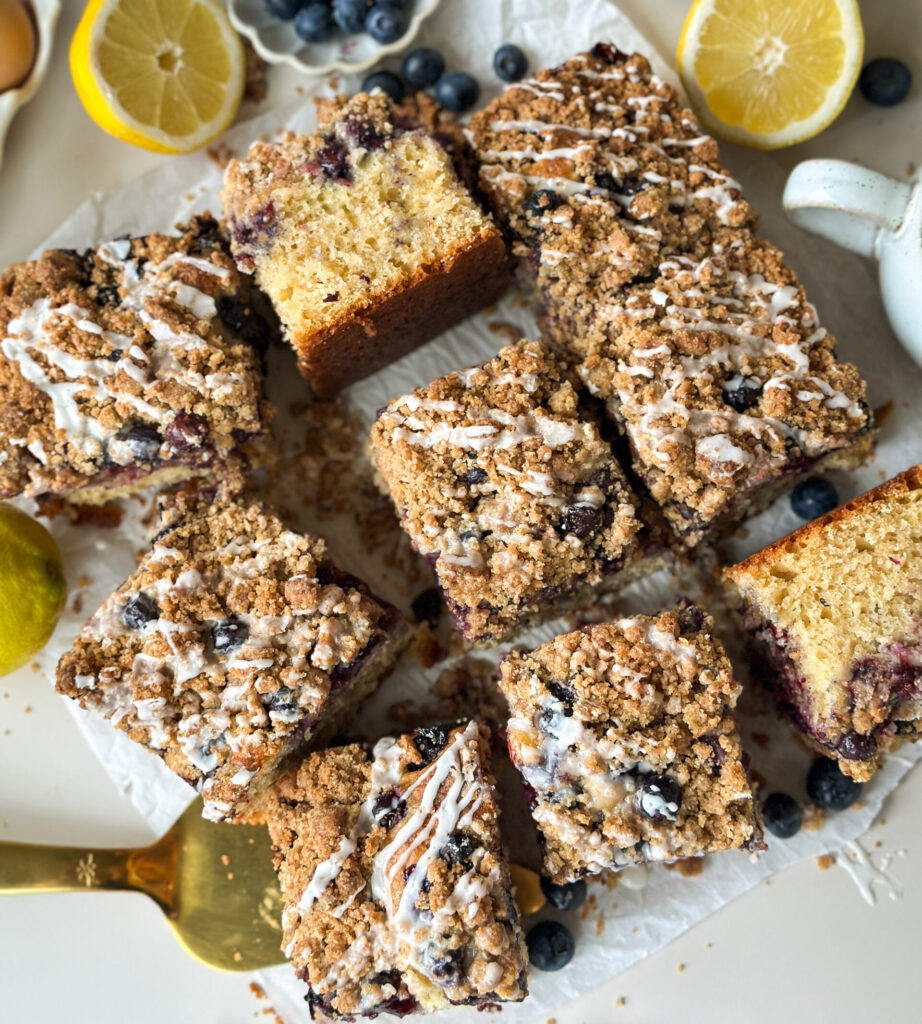
Drizzle the glaze over the top of the cooled coffee cake. Allow the glaze to set up for about 15-20 minutes before slicing and serving!
Yields 9-12 slices of cake (depending on cake pan size)
How to Store:
Room temperature: Store on the counter in an airtight container up to 2 day. Because of the blueberries, this cake is best refrigerated.
Refrigerator: For longer storage, refrigerate in an air tight container for up to 5 days. The blueberry layer keeps it extra moist.
Freezer: Store in the freezer in an airtight container for up to 3 weeks. Gently thaw on the counter and reheat gently in the microwave at 15 second intervals or in the oven at 350 F until cake is warmed.
FAQ’s
Fresh blueberries work best for this recipe because frozen berries release much more moisture and can make the center gummy. If you’re in a pinch though, you can use frozen and I have included directions on how to do this on the recipe card.
This is a very thick coffee cake with a full layer of fresh blueberries, so the extra moisture naturally increases the bake time. It is normal for this recipe to take 1 hour 15 minutes to 1 hour 30 minutes especially if using a 9×9 pan.
Yes! This coffee cake is even better the next day because the flavors have time to settle and develop. Just wait to glaze until serving for the freshest look.
Yes! Replace the discard with 1/4 (60g) cup whole milk and 1/4 (60g) cup sour cream or your full-fat yogurt with the wet ingredients.
No! You can mix up this batter right away and bake the cake if you want to make this quickly.
Drop a comment and leave a star review if you loved this recipe, and don’t forget to try more of my sourdough cake recipes!
Sourdough Cake Recipes:
- Sourdough Vanilla Cake (moist and fluffy!)
- Sourdough Brown Butter Carrot Cake
- Sourdough Chocolate Cake
- Sourdough Lemon Cake
Sourdough Blueberry Coffee Cake
Equipment
- Mixing bowls – for the cake batter, crumble, blueberry layer, and glaze. I love this set of glass mixing bowls with lids for fermenting my cake batters!
- Whisk – for mixing the batter and glaze.
- Digital kitchen scale (optional) – for accurate measuring, especially helpful with sourdough baking. I linked the one I like here.
- Measuring cups and spoons – for measuring ingredients.
- Fork or pastry blender – for mixing the crumble.
- Spatula – to spread the batter in the cake pan.
- 9×13-inch or 9×9 inch baking pan – for baking the coffee cake. For a thinner coffee cake, use a 9×13 baking pan. If you want a taller cake, you can use a 9×9 cake pan. I love these USA 9×9 baking pans that have a nice tall edge for this type of cake and aluminized steel that gives the most perfectly even bake!
- Parchment paper – to line the cake pan to avoid sticking.
Ingredients
Coffee Cake:
- 1 (200g) cup granulated white sugar
- 1/4 (50g) cup packed brown sugar
- 1/2 (120g) cup sourdough discard 100% hydration
- 2/3 (160g) cup full-fat sour cream or full-fat Greek yogurt
- 2/3 (150g) cup whole milk or buttermilk
- 1/4 (60g) cup avocado oil or neutral oil
- 2 large eggs
- 2 tsp vanilla extract
- 1 lemon zested
- 3 (400g) cups all-purpose flour
- 2 1/2 tsp baking powder
- 1/2 tsp baking soda
- 3/4 tsp salt
Blueberry Layer:
- 3 (400g) cups fresh blueberries see recipe for frozen
- 4 (32g) Tbsp all-purpose flour
- 1 (12g) Tbsp granulated white sugar
Brown Sugar Cinnamon Crumble:
- 1 1/2 (180g) cup all-purpose flour
- 3/4 (150g) cup packed brown sugar
- 1 tsp ground cinnamon
- 1/4 tsp salt
- 1/2 (113g) cup salted butter melted
Vanilla Glaze:
- 1/2 (60g) cup powdered sugar
- 1-2 Tbsp milk or half and half
- 1/4 tsp vanilla extract
Instructions
Step 1: Mix The Cake Batter
- In a mixing bowl, add the white sugar, brown sugar, sourdough starter or discard, sour cream, milk, oil, eggs, lemon zest, and vanilla. Whisk the wet ingredients until smooth.1 (200g) cup granulated white sugar, 1/4 (50g) cup packed brown sugar, 1/2 (120g) cup sourdough discard, 2/3 (160g) cup full-fat sour cream , 2/3 (150g) cup whole milk , 1/4 (60g) cup avocado oil, 2 large eggs, 2 tsp vanilla extract, 1 lemon
- Add your flour, baking powder, baking soda, and salt to the bowl. Whisk in the dry ingredients until just combined, and no flour streaks remain. It’s important once you add the flour to avoid overmixing!3 (400g) cups all-purpose flour, 2 1/2 tsp baking powder, 1/2 tsp baking soda, 3/4 tsp salt
- Optional Overnight/Same Day Fermentation: Cover the bowl with plastic wrap or a lid, and refrigerate overnight. This step is key in your fermentation process. If you want to shorten your fermentation time, you can allow the batter to rest for 4 hours at room temperature for a same day bake. I don't advise leaving this batter at room temperature overnight, its too hydrated and will overproof.
- Please note the fermentation is optional you can skip the resting periods and just mix and bake the cake!
Step 2: Mix The Ripple and Blueberry Filling
- To make the crumble topping, add the butter to a microwave safe bowl and melt it.1/2 (113g) cup salted butter
- Add the brown sugar, flour, ground cinnamon, and salt to the melted butter. Using a fork or a spoon, combine the crumble mixture until it’s clumpy and crumbly. Set aside for later.1 1/2 (180g) cup all-purpose flour , 3/4 (150g) cup packed brown sugar, 1 tsp ground cinnamon, 1/4 tsp salt
- In another bowl, add the blueberries, flour, and white sugar. Gently mix to combine all of the ingredients for the blueberry filling and set aside for later.3 (400g) cups fresh blueberries, 4 (32g) Tbsp all-purpose flour, 1 (12g) Tbsp granulated white sugar
- To use frozen blueberries: Weigh out frozen blueberries and allow to rest in a bowl of warm water to thaw. After about 5-10 minutes, strain the blueberries from water and transfer them to a bowl lined with a paper towel to absorb any excess moisture (you can also just strain and blot). After water has been absorbed, remove the paper towel and toss the blueberries in the flour and sugar.
Step 3: Assemble the Cake
- Fermentation Note: If you fermented the batter overnight in the refrigerator, allow the bowl of batter to rest on the counter for roughly 1 hour. This is a key step to achieving a tender crumb, don't skip this step! If you like temperature cues, the temperature of the batter should read roughly 70 F before proceeding.
- Note on choosing a pan: I used a 9×9 pan, but this will make the bake time longer as the cake is thicker but I love the thickness of the layers. I'm listing directions on how to make a 9×9 cake or a 9×13 cake, the bake time will vary. If you use a dark metal pan the cake may brown more on the edges and glass pans take much longer to bake the cake. I recommend a light metal pan for best results.
- Preheat your oven to 350°F. Line your 9×13 or 9×9 cake pan with parchment paper (this helps to remove the cake easily), and spray lightly with cooking oil.
- Scoop the cake batter into the cake pan, and gently use a spatula spread the batter to the edges to make sure the bottom of the cake pan is covered with the batter.
- Add the blueberries evenly over the top of the cake batter (hold back one handful for the top of the cake). Shake the remaining sugar and flour in the bowl over the top of the blueberries evenly.
- Sprinkle the crumble evenly over the top of the cake, making sure to cover the edges. Sprinkle the remaining blueberries over the top of the crumble.
Step 4: Bake the Cake
- Transfer the cake to the preheated oven. If you’re cake is in a 9×13 cake pan, you’ll bake this cake for about 60 minutes.
- You’ll want to check then center with a toothpick around 40 minutes, and bake the cake until a toothpick comes out clean with just a few loose crumbs. Do not remove the cake if you see wet batter!
- Internal temeprature of the cake should be 200 F in the center when it’s done. The bake time is a general guide go off of visuals and internal temperature for the best results.
- 9×9 pan baking note: If you used a 9×9 cake pan, this cake typically needs 75-90 minutes of bake time to fully cook the center as the cake is taller and more dense.
- Remove the cake from the oven as soon as it’s finished baking, and allow it to cool completely before glazing.
Step 5: Glaze the Coffee Cake
- In a small bowl, add the powdered sugar, vanilla, and 1 Tablespoon of milk.1/2 (60g) cup powdered sugar, 1-2 Tbsp milk, 1/4 tsp vanilla extract
- Start to whisk the glaze and bring it together, and add the milk or half and half one teaspoon at a time while you’re whisking until the glaze has reached you’re desired consistency.
- You want the glaze to still be thick, but able to slowly run off the spoon.
- Drizzle the glaze over the top of the cooled coffee cake. Allow the glaze to set up for about 15-20 minutes before slicing and serving!
- Yields 9-12 slices of cake (depending on cake pan size)
Great with coffee or tea. The addition of blueberry is an upgrade that coffee cake has needed for a long time
I’m not a coffee cake guy. This one made me a believer. Definitely worth a try! The blueberry filling takes this to the next level.
5-stars
My toddler orders blueberry muffins anywhere we go these days and, according to him, these Sourdough Blueberry Coffee Cakes were “the best he’s ever tried.” Equally juicy and tender, the brown sugar crumble did not over power the richness of the coffee cake. The blueberries added that extra bit of goodness that has made these a new household staple.
The step “ Optional Overnight Fermentation” is confusing. If you don’t do the overnight fermentation do you HAVE to let it rest 4 hours on counter or can you bake right away. The instructions say “you CAN let it rest 4 hours on the counter”.
Hi Kathy, you can skip all of the rest times and simply mix and bake!