Sourdough Flag Cake
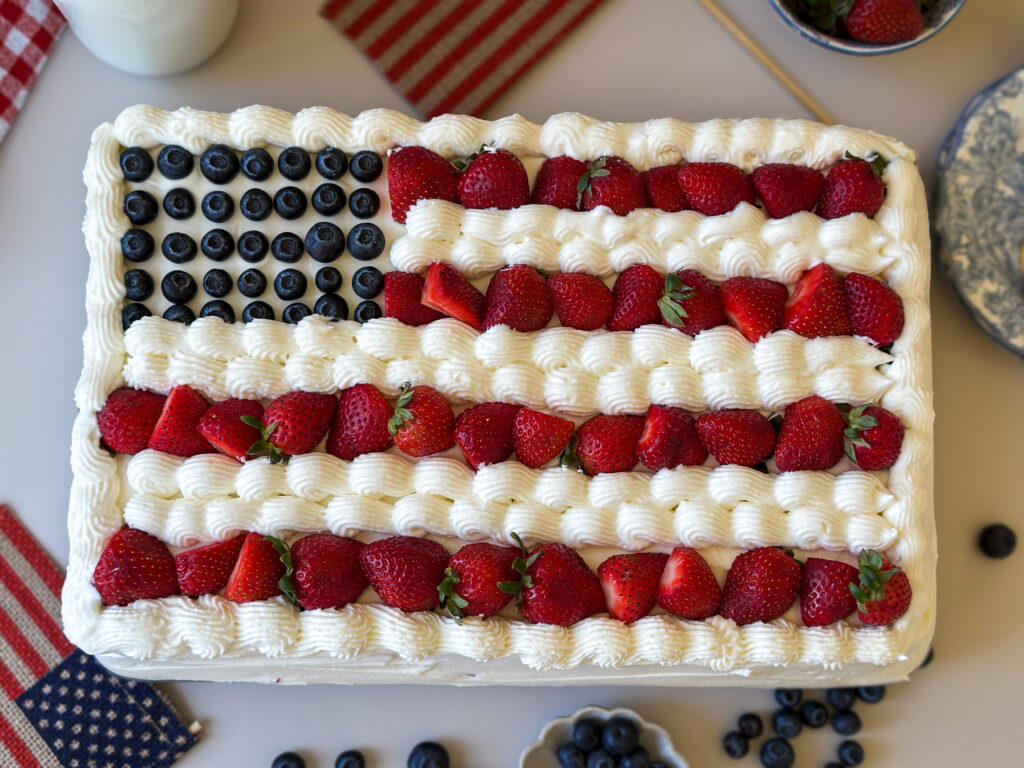
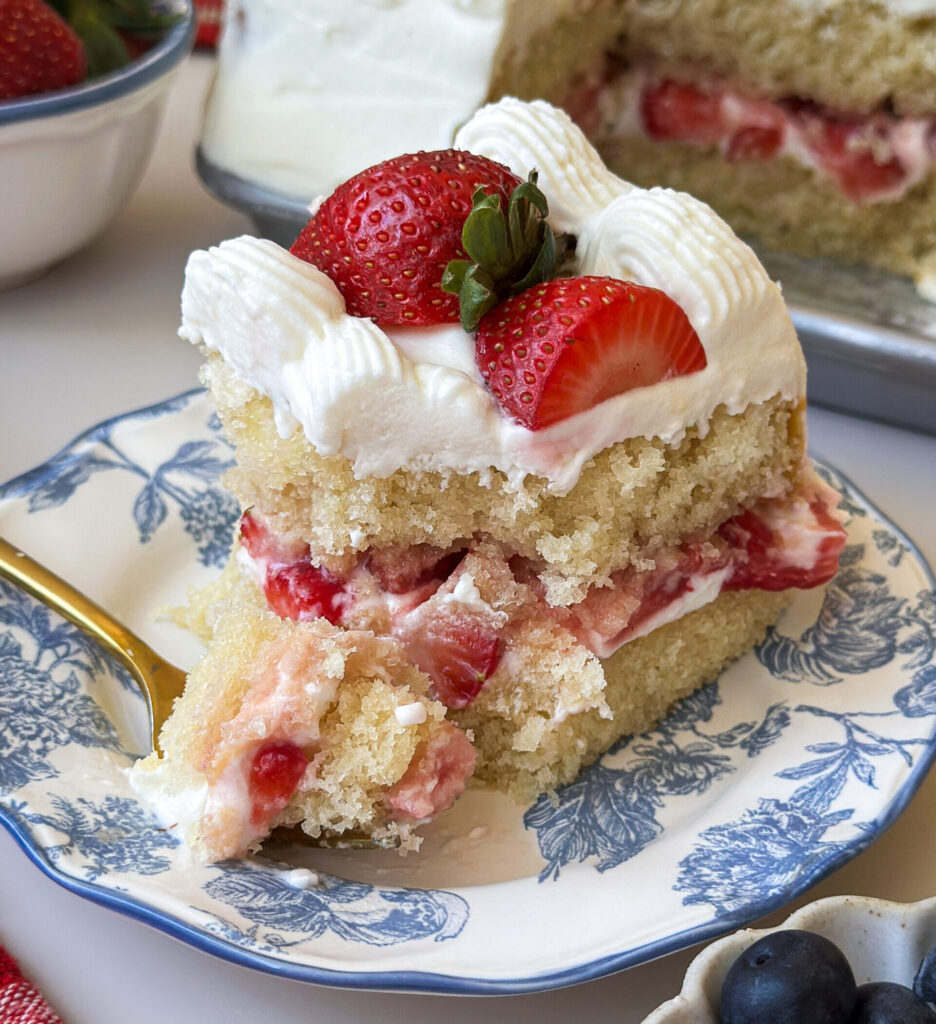
The flag cake is a staple for every patriotic holiday, and I wanted to give it a sourdough twist. Inspired by strawberry shortcake, this Sourdough Flag Cake layers soft sourdough vanilla cake with fresh strawberries and a stabilized whipped cream frosting for a dessert that tastes as good as it looks. Decorated with blueberries and strawberries to make a simple American flag, it’s the perfect centerpiece for your Fourth of July celebration.
Table of contents
Why You’ll Love This Recipe
- Layers of fresh strawberries: Juicy strawberries in every bite for that classic strawberry shortcake flavor.
- Light whipped cream frosting: Fluffy, stable, and perfect for frosting and decorating.
- Perfect for summer: Light, fresh, and the ultimate warm weather dessert.
- Uses up sourodugh discard: Have discard to use? This is a delicious way to use it up.
- Made for patriotic parties: This cake feeds a crowd while also being a festive centerpiece for any 4th of July cookout.
Tools You’ll Need:
- Mixing bowls (large and medium)- for mixing the batter, strawberries, and frosting. You can also use your stand mixer bowl for the frosting.
- Stand mixer or hand beaters- I highly recommend using your stand mixer for the frosting, but you can use hand beaters too.
- Whisk- for combining ingredients.
- Kitchen scale (optional)– for accurate measuring, especially helpful with sourdough baking linked here.
- Measuring cups and spoons- if not using a scale and for smaller ingredients.
- 9×13 cake pan– you can use two 9×13 cake pans to bake your layers or bake one at a time using a single pan. You can also alternatively use a classic jelly roll pan to bake your cake layers. You can alternatively use a half sheet baking pan or a jelly roll pan too.
- Parchment paper- for lining pans. This really helps the cake release cleanly from the pan.
- Cooling rack- for cooling cakes.
- Toothpick or cake tester- to test when cake is done.
- Offset spatula– for spreading frosting on cake.
- Cutting board and knife- for chopping the strawberries.
- Slotted spoon- for strawberry filling.
- Fine-mesh sieve or sifter- for powdered sugar to avoid grainy frosting.
- Pastry bags and decorating tips (optional)– for adding decorations to the cake. If you’re new to cake decoration, this set linked here has pastry bags and an assortment of classic tips to choose from.
- Star piping tip (optional)- I used a Wilton star 1M for piping the borders and design.
Gather Your Ingredients:
- Sourdough starter- (flat or past peak, can be cold or room temperature). Adds depth of flavor and moisture without making this cake “sour”. Key for fermentation.
- All-purpose flour- Gives cake structure and keeps the crumb tender. You can also substitute for cake flour.
- Buttermilk or milk- Lightens the batter and keeps the crumb soft. I personally highly recommend using buttermilk, the texture and tenderness is so lovely. If you don’t have it though, you can substitute with whole milk.
- White sugar– Sweetens the cake and gives it a golden finish. You’ll also use this to sweeten the strawberries.
- Vanilla extract– Enhances the flavor and brings warmth. Used in the cake and the frosting for that classic vanilla flavor.
- Eggs (room temperature)– provide structure and lift with moisture, works as a binder for ingredients.
- Baking powder + Baking soda– Ensures the right rise and tenderness.
- Salt- Balances sweetness and enhances all the other flavors. You’ll need this for the cake and the frosting.
- Avocado Oil- Adds moisture and keeps the cake soft and tender. You can substitute for any neutral cooking oil.
- Fresh strawberries- Used to make the strawberry center layer and make the flag design.
- Fresh blueberries- Used to decorate the flag cake.
- Powdered Sugar- Sweetens and stabilizes the whipped cream frosting. Do not use granulated sugar or your icing will be grainy.
- Heavy Cream- Whips into the the frosting for a silky finish.
- Cream Cheese- adds amazing flavor to the frosting and helps stabilize the whipped cream. Use full-fat and do not use a spread.
- Almond extract (optional)- this is entirely optional but it really elevates and brings out the flavors in the frosting. l highly recommend adding it!
Instructions
Step 1: Mix The Cake
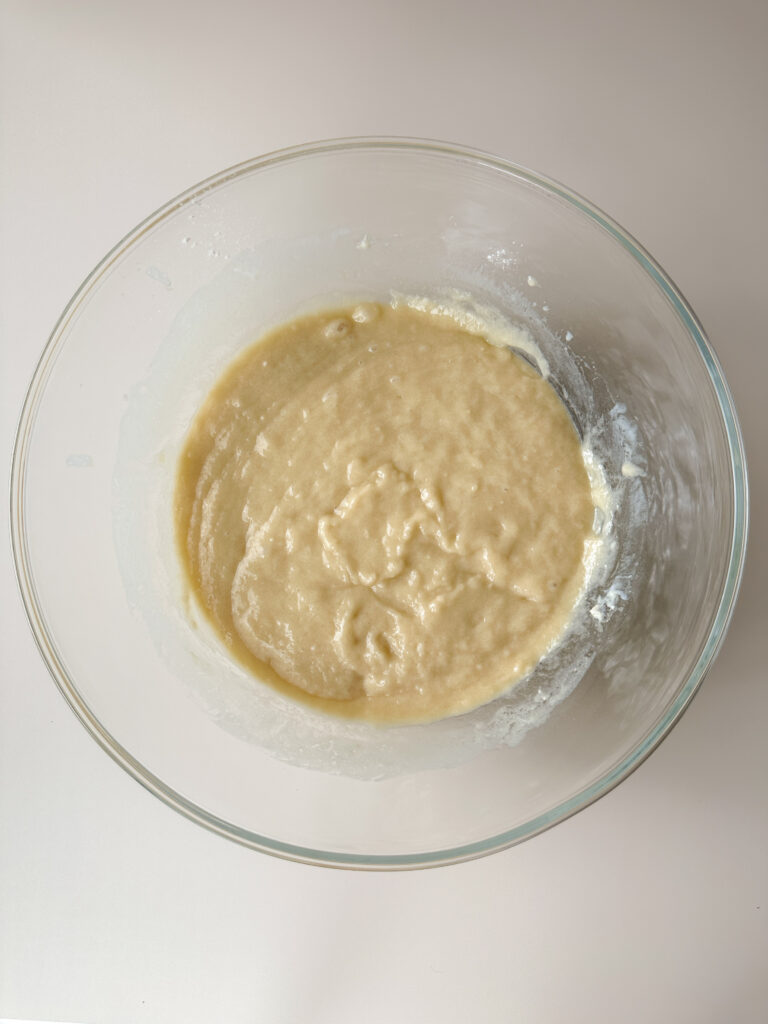
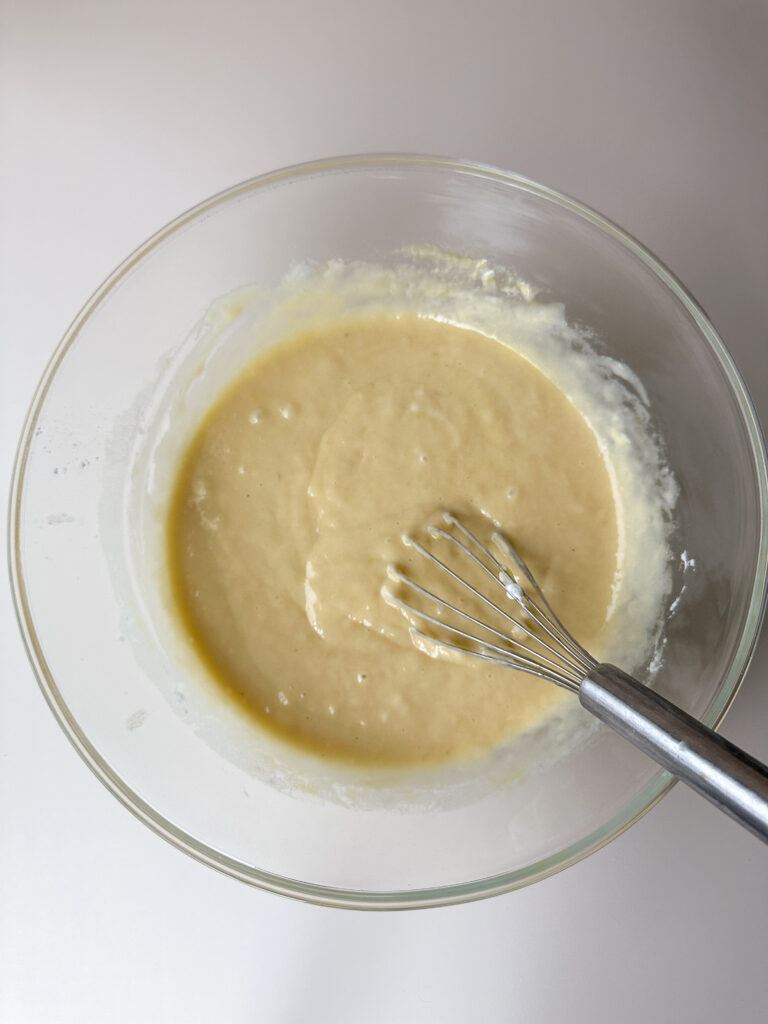
In a bowl, combine with a whisk loosely the flour, sourdough discard, white sugar, buttermilk or milk, avocado oil (or neutral oil), and the vanilla. It’s okay if a few small lumps remain, you don’t want to overmix this base.
Optional Overnight Fermentation: Cover the bowl with plastic wrap, and refrigerate overnight. This step is key in your fermentation process. If you want to shorten your fermentation time, you can allow the batter to rest for 4 hours at room temperature for a same day bake. I don’t advise leaving this batter at room temperature overnight, its too hydrated and will overproof.
If you fermented the batter overnight in the refrigerator, allow the bowl of batter to rest on the counter for roughly 1 hour. This is a key step to achieving a tender crumb, don’t skip this step! If you like temperature cues, the temperature of the batter should read roughly 70 F before proceeding.
If you allowed batter to rest on the counter and did not refrigerate or you’re doing a quick bake, skip this step of resting.
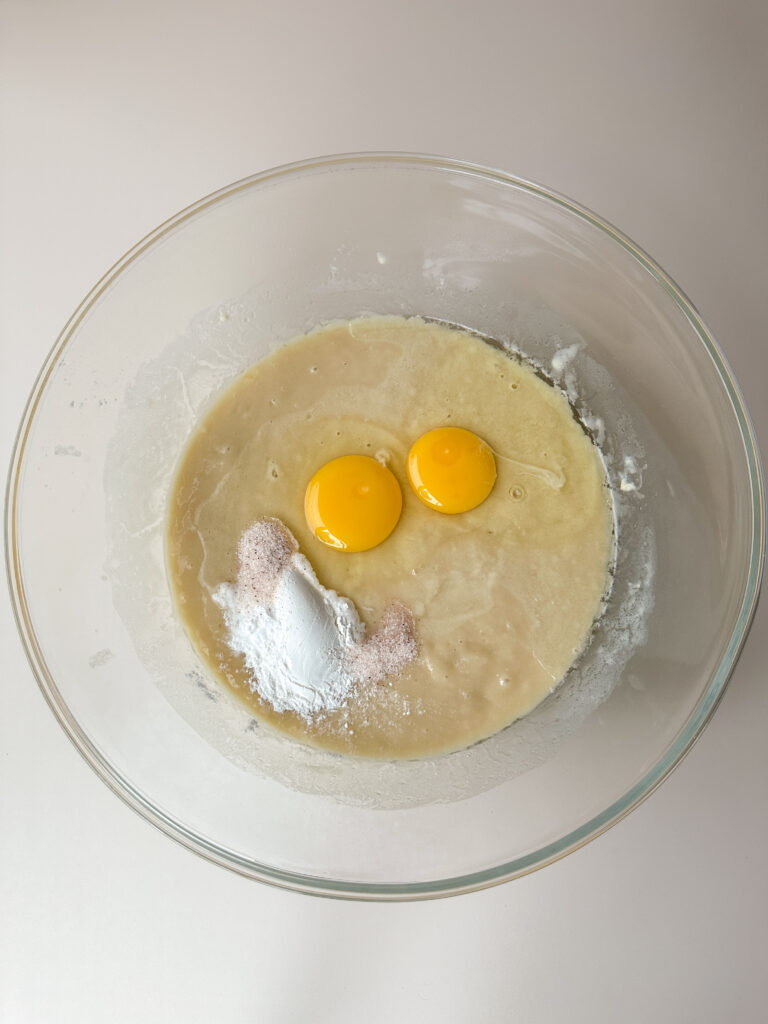
Once the batter has reached room temperature, add the eggs, baking powder, baking soda, and salt to the bowl.
Whisk gently the remaining ingredients into the batter just until combined and smooth, avoiding overmixing to make sure your cake crumb doesn’t get tough.
Step 2: Bake the Cakes
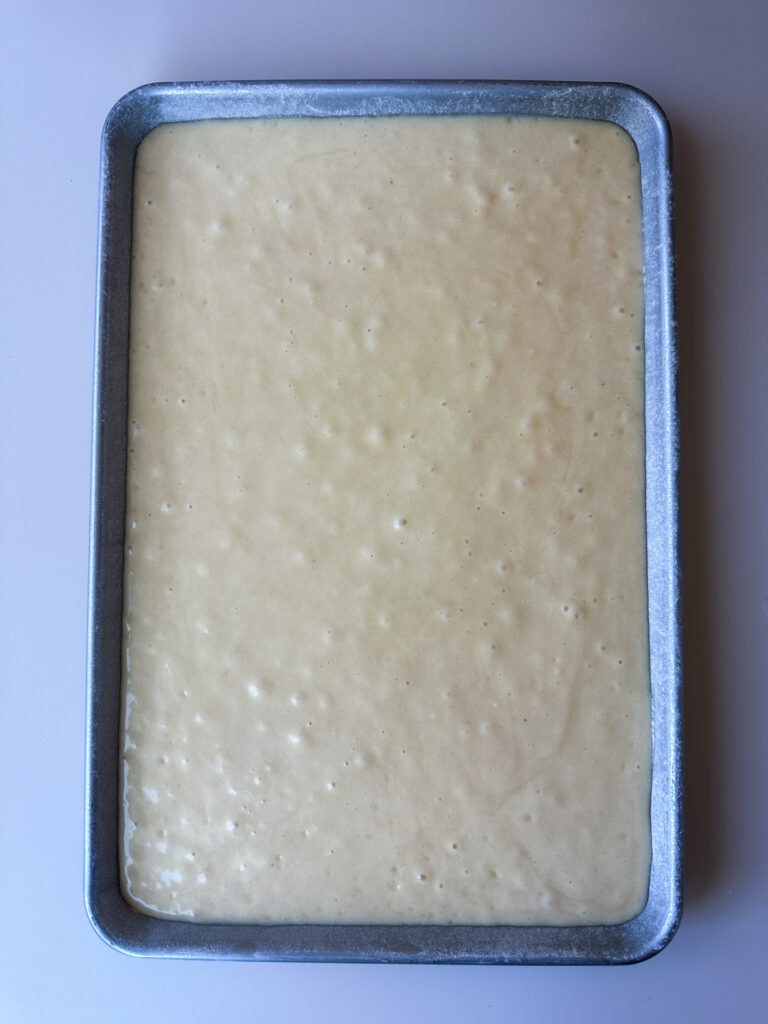
Preheat the oven to 350°F (175°C). Grease and lightly flour two 9×13 baking pans (if you only have one pan you can bake one at a time). You can also use a jelly roll pan or a half sized baking sheet for this cake.
I strongly recommend lining the very bottom of the pan with parchment paper at this time, this helps the cake release evenly.
Baker’s Tip: If you aren’t sure how to line the bottom of your cake pan with parchment, simply place your cake pan on a sheet of parchment and draw along the edge to form the shape you need. Cut and place at the bottom of your pan.
Divide the cake batter evenly between the two pans. This should roughly be 4 cups (950g) batter per 9×13 inch pan. Tap the pans lightly on a hard surface to release any air bubbles before baking.
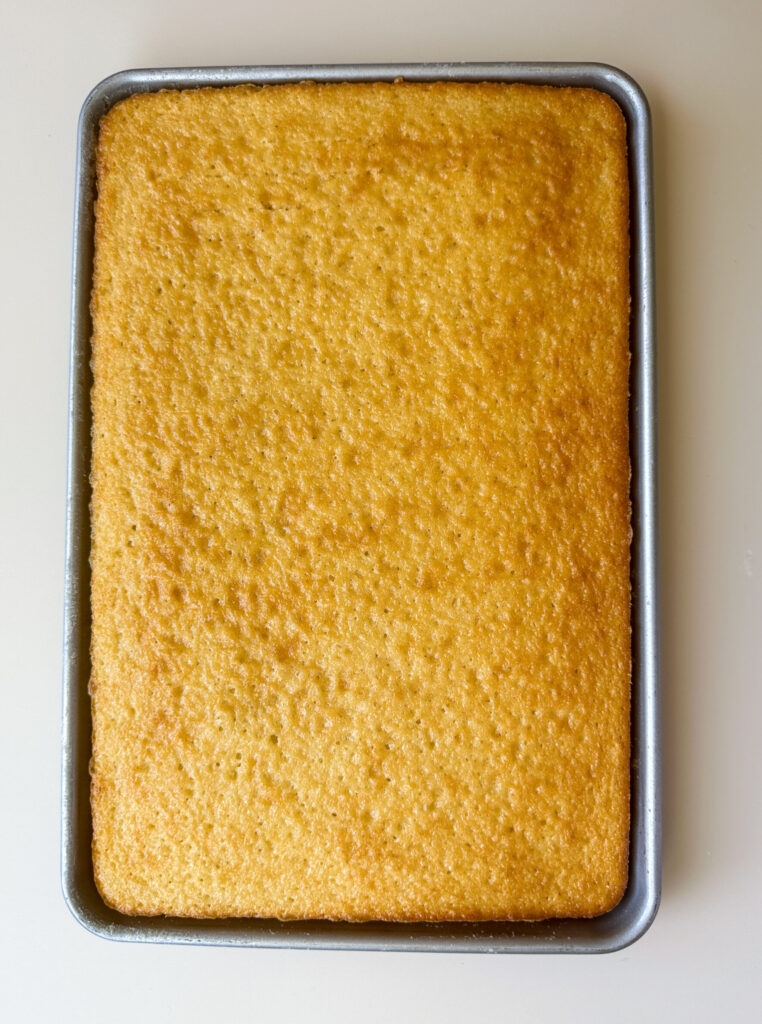
Set your timer for 25 minutes. Check the cake at 25 minutes, inserting a toothpick to check doneness. This cake takes me anywhere between 25-35 minutes to be done. When the cake is done, a toothpick should come out with a few moist crumbs but not with wet batter.
When you touch the top of the center of the cake, it should be firm and not overly glossy. Internal temperature should be between 200-205 F in the center.
Baking Note: If vanilla cake is under done, when cake is removed from heat the center will fall. If you overbake the cake, it will err on the side of being dry. Go slow and check frequently after the 25 minute mark to ensure the cake is baked properly without losing moisture. Use the notes above to make sure cake is baked correctly.
When the cakes are done, cool slightly in the pans. Line a cooling rack with parchment, and place it over one of the cake pans. Invert the pan with the cooling rack to safely release the cake, and allow this cake to cool completely. Don’t skip the parchment this is key to avoid sticking.
For the bottom cake layer you can either leave one of the cakes in the pan and assemble the cake that way, or if you want to use a serving platter for your cake you can transfer the second cake to a parchment lined cooling rack as well.
Allow the cakes cool completely, then wrap well in plastic wrap and transfer to the refrigerator or freezer for at least an hour before frosting. I like to place my cooling rack on a baking sheet with the cake and wrap the whole thing in plastic to avoid my cake cracking.
Because this cake uses a whipped cream frosting, the colder the cakes are the better.
You can also prepare the cakes ahead in advance for easier assembling, and refrigerate up to 3 days or freeze up to 1 month.
Step 3: Prepare the Strawberry Filling
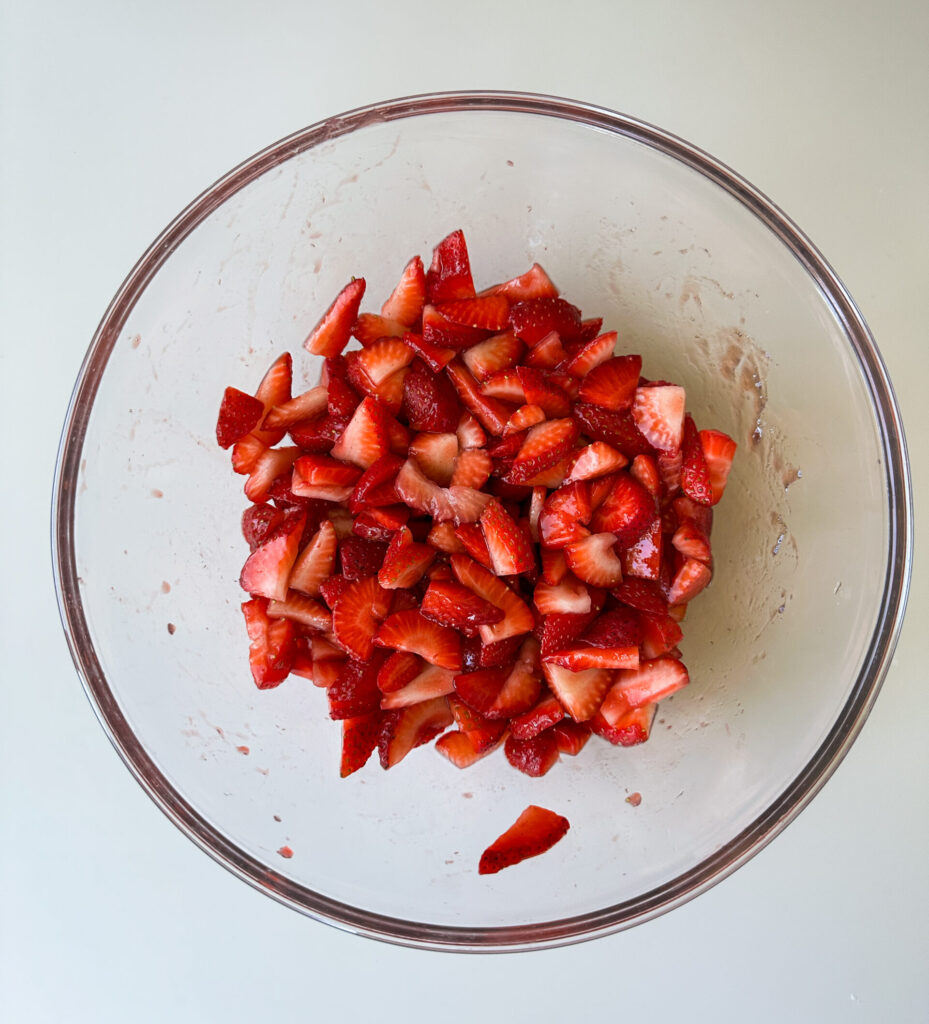
Wash all of your strawberries, and pat them completely dry. Cut them in half, then slice them thinly and toss in a bowl.
Add the sugar and vanilla to the berries. Toss the berries to coat them in the sugar, this brings out their natural juices.
Allow the filling to rest in the refrigerator while you make your frosting.
Step 4: Make the Whipped Cream Frosting
Make sure your cream cheese is completely soft and at room temperature before making this frosting, or you will have a grainy result.
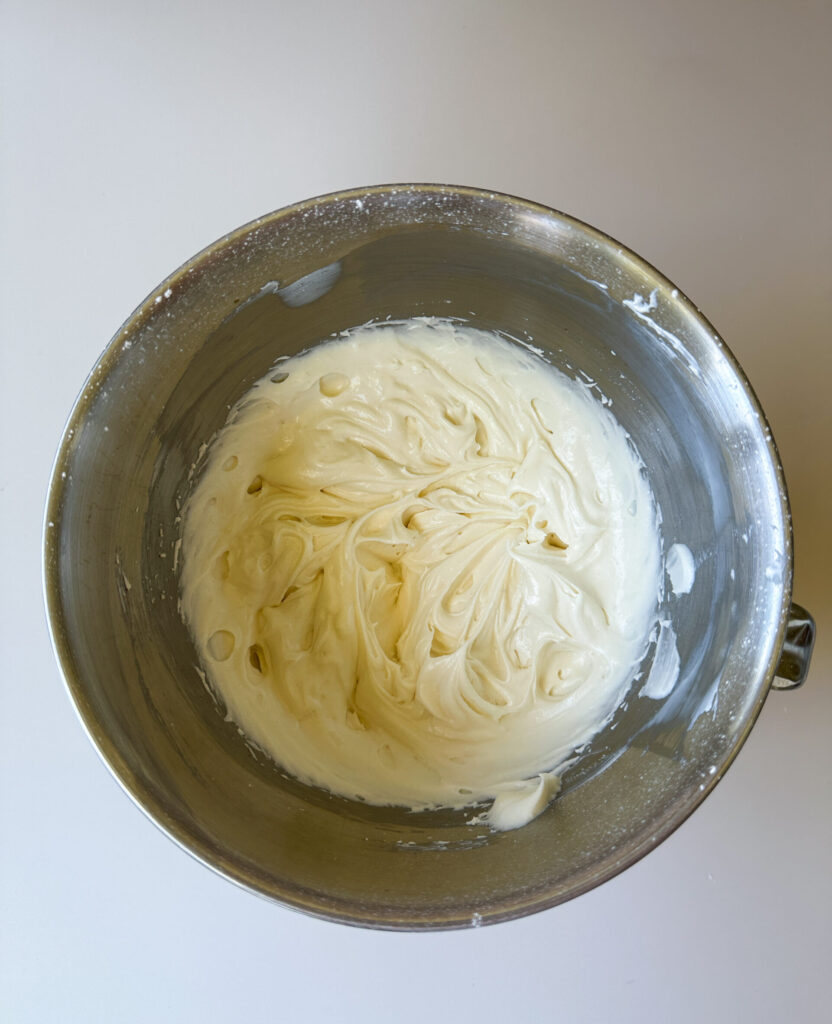
In the bowl of a stand mixer fitted with the whisk attachment or using your hand beaters, beat the cream cheese until completely smooth.
Sift the powdered sugar into the cream cheese, and add the vanilla, almond extract (if using), and salt. Mix on low to incorporate the sugar, then increase to high speed and beat for 3-4 minutes until creamy and no lumps remain.
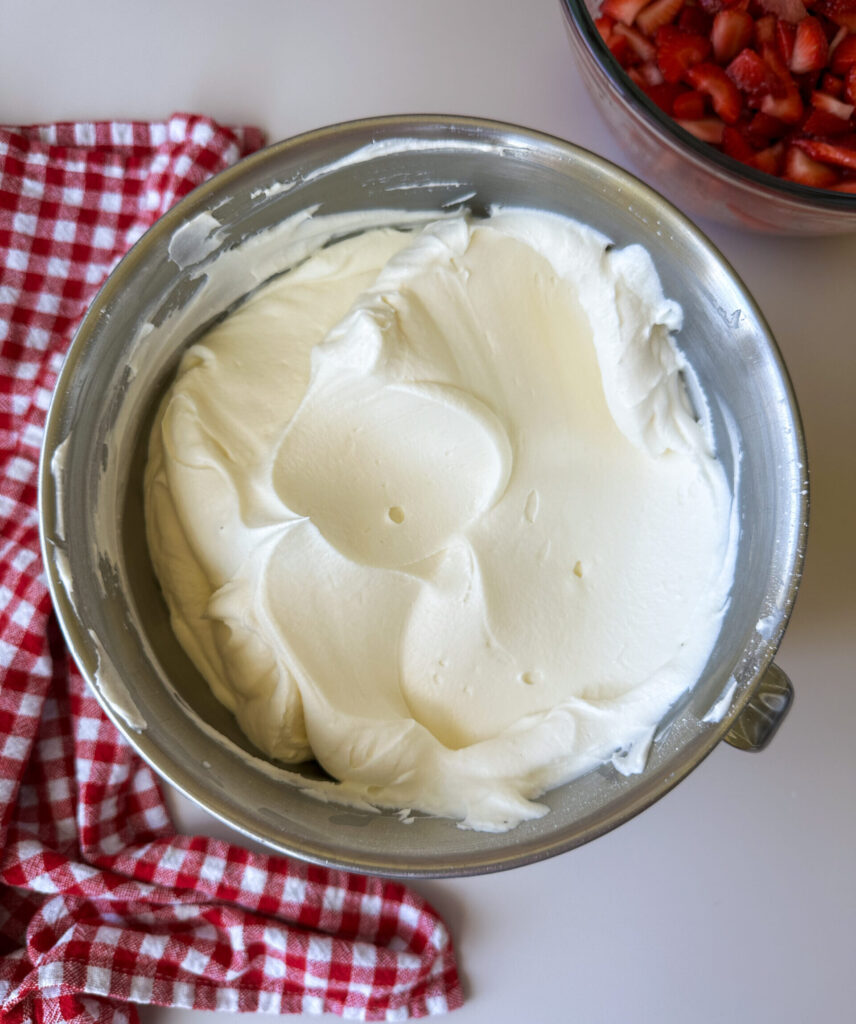
With the mixer running on low speed, slowly stream in the cold heavy whipping cream. Once the cream is incorporated, increase the mixer to high speed. This might look very liquidy, but it’s important to give it time and beat this frosting until stiff peaks form.
The frosting should be light, fluffy, and hold its shape on the whisk. Do not overmix or the frosting will split.
Step 5: Assemble the Flag Cake
Wash and dry your blueberries and strawberries for decorating the cake. I cut the stems off of some of the strawberries and left some with them on for color. Cut the strawberries in half for decorating and set aside the fruit for later.
If you want to serve this cake on a platter, place one of the cake layers upside down on the desired platter. If you prefer to build the cake in your pan, gather your cake that is still in the pan.
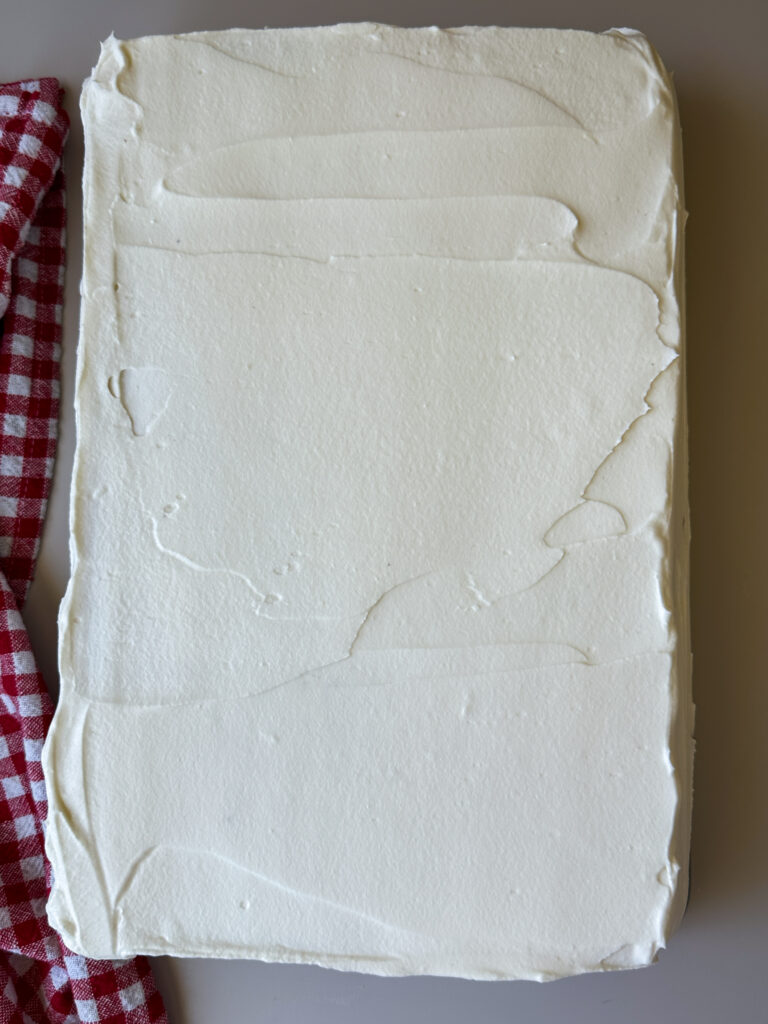
Add 1/3 of the frosting on top of the cake and smooth the frosting out over the top to meet the edges of the pan. Cover the sides if necessary.
Transfer 1 cup of frosting to a pastry bag fitted with your Wilton 1M star tip or a Ziplock with 1/2 inch cut off of the end. Pipe a border around the edges of the cake to avoid the strawberry filling from leaking.
Using a slotted spoon, drain the strawberries and spoon on top of the frosted cake in an even layer. You want to avoid adding excess juice to the center or the top cake will slide.
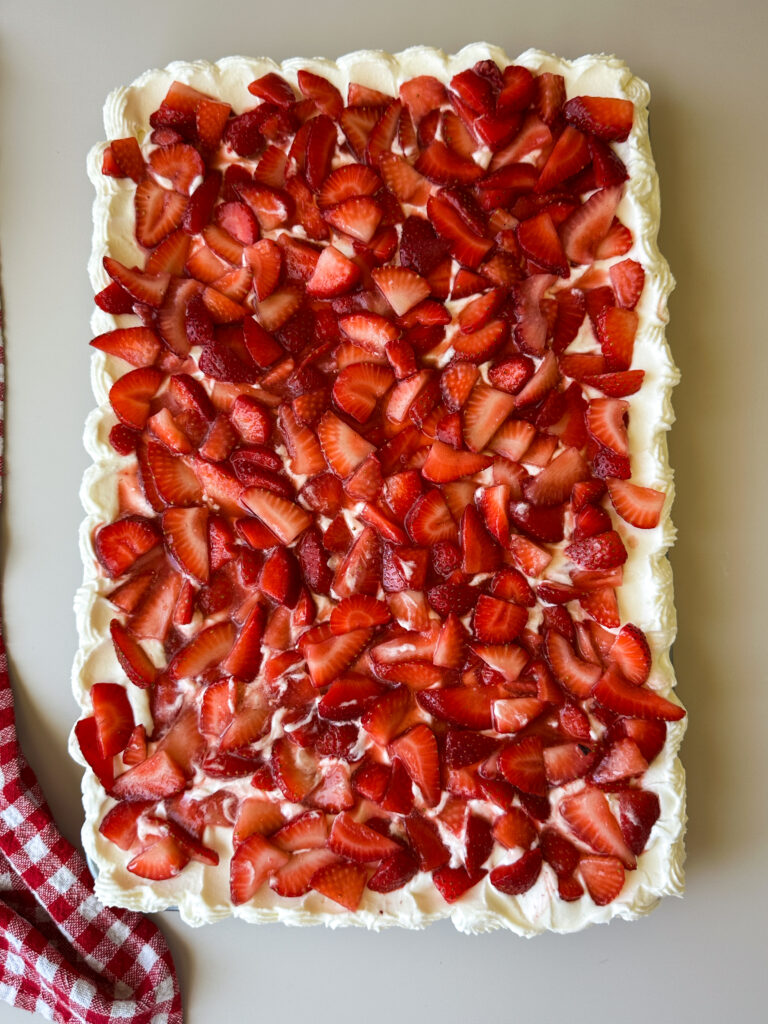
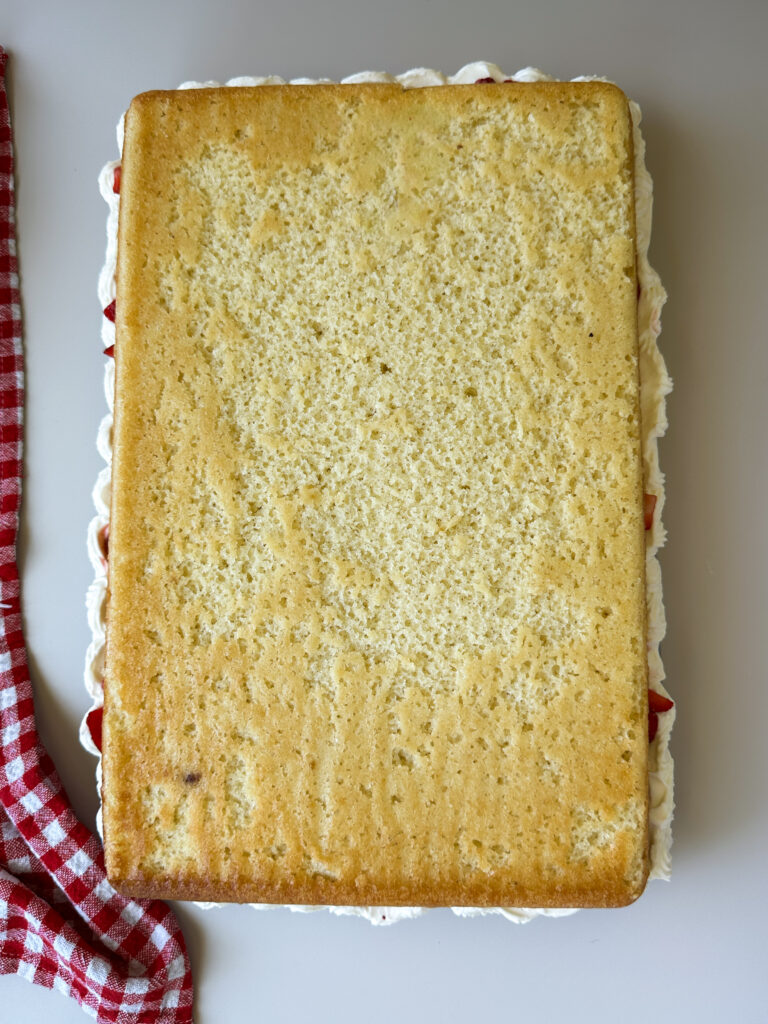
Place the second cake upside down on top of the layer of strawberries.
Add another 1/3 of the frosting on top of the cake, and smooth to cover the top and edges using a frosting spatula.
Note: If you used a 9×13 pan with a higher edge, you may not have any edges to cover. If you use a half sized baking sheet or jelly roll pan or platter, make sure to frost the edges as well to meet the bottom pan.
Transfer the cake to the refrigerator for 30 minutes to set up before finishing decorating. If you notice anything sliding or melting before this, make sure you transfer the cake immediately to the refrigerator to set up before continuing.
Transfer the remaining frosting to your bag fitted with the star tip. Make sure you keep this cold as well while the cake sets up.
Once the cake has chilled, it’s time the make your flag design.
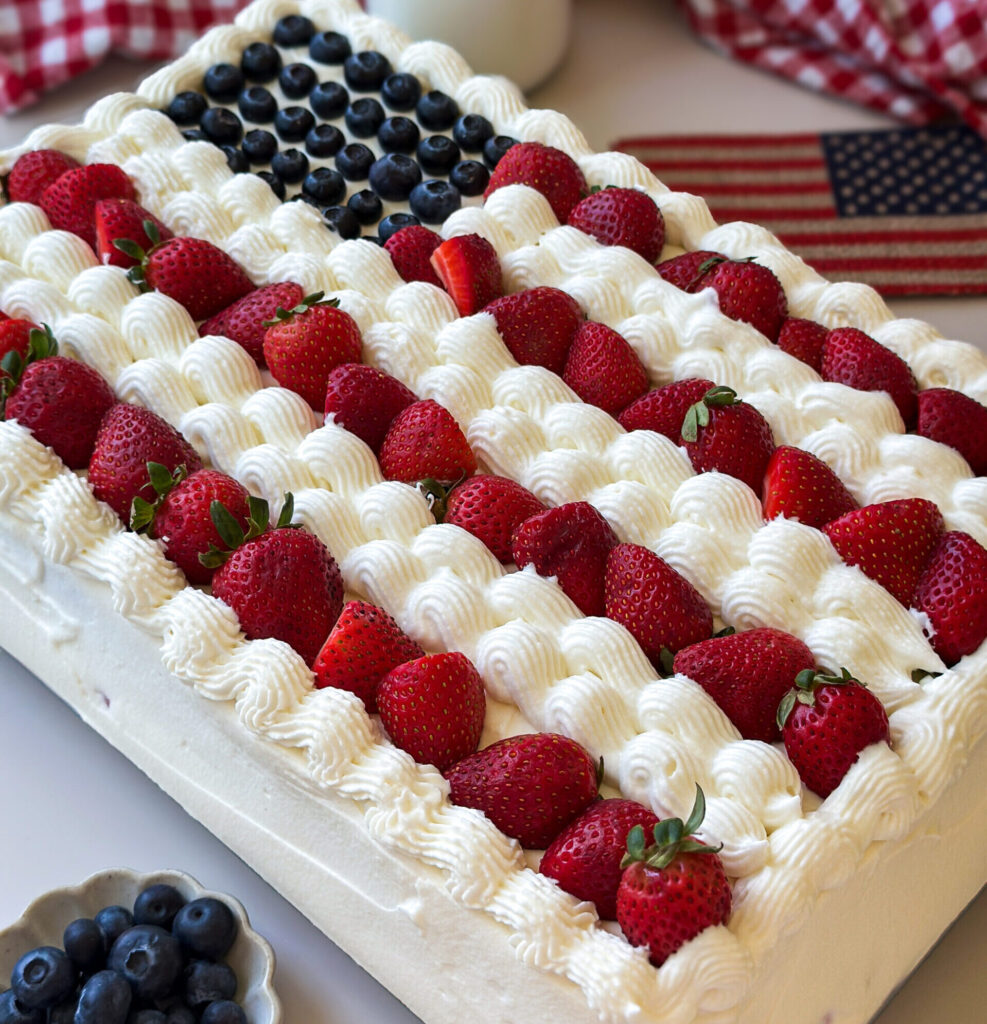
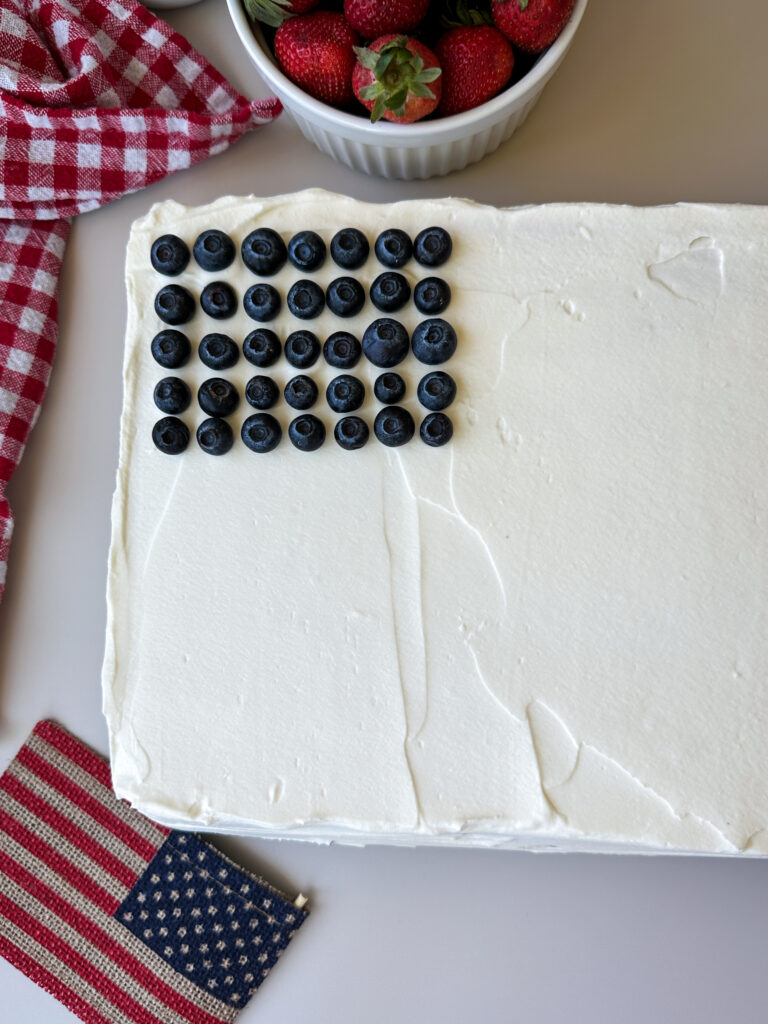
Arrange the blueberries in the top right hand corner in 5 rows of six. This forms the blue field of the flag.
Next, starting at the top of the flag begin arranging your strawberries to form the stripes. You’ll want to make 4 rows of strawberries with about 1 1/2 inches space between. Make sure you also leave room for a border if you want to add that.
I arranged my berries going in different directions to give the stripes an organic look.
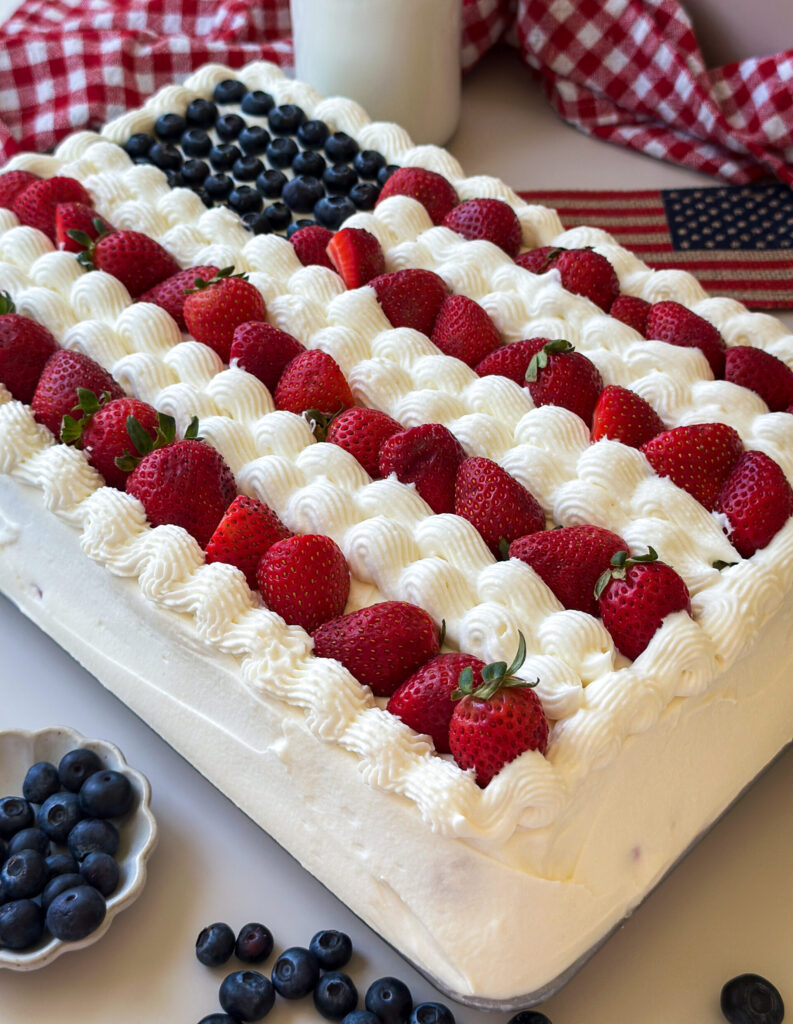
Finish the cake by piping a border around the edges, and filling in the white stripes with stars or a shell border if desired.
Transfer the cake back to the refrigerator for about 1 hour to completely set up prior to serving.
Yields 1 9×13 sheet cake (serves 24)
How to Store:
Room Temperature: this cake is best refrigerated because of the whipped cream frosting. Don’t leave it out beyond 1 hour.
Refrigerator: store in airtight container for up to 3 days. Bring to room temperature before serving.
Freezer: Wrap unfrosted cakes tightly in plastic, freeze up to 2 months. Thaw overnight in refrigerator when ready to use. Frost and serve cake.
FAQ’S
No. If you want to bake the cake the same day, just follow the directions to mix and simply bake the cake.
The flour may have been packed in the measuring cup OR the batter was overmixed. Make sure to gently mix!
Fresh strawberries are highly recommended for the best texture and appearance.
Yes. The combination of cream cheese and whipped cream creates a stabilized frosting that’s sturdy enough to frost the cake and pipe decorative borders while still tasting light and airy.
Swap the 1 cup (240g) sourdough discard for 1 cup (120g) all purpose flour and 1/2 cup (120g) buttermilk or milk.
If you loved this recipe, drop a comment and leave a star review and don’t forget to checkout more of my sourdough 4th of July inspired recipes!
Sourdough 4th of July Recipes:
- Sourdough Key Lime Pie Bars
- Sourdough Cherry Pie Bars
- Sourdough Vanilla Dot Cakes (with triple berry filling)
- Sourdough Kolaches

Sourdough Flag Cake
Equipment
- Mixing bowls – for mixing the batter, strawberries, and frosting. You can also use your stand mixer bowl for the frosting.
- Stand Mixer or hand beaters – I highly recommend using your stand mixer for the frosting, but you can use hand beaters too.
- Whisk – for combining ingredients.
- Kitchen scale (optional) – for accurate measuring, especially helpful with sourdough baking linked here.
- Measuring cups and spoons – if not using a scale and for smaller ingredients.
- 9×13 cake pan – you can use two 9×13 cake pans to bake your layers or bake one at a time using a single pan. You can also alternatively use a classic jelly roll pan to bake your cake layers. You can alternatively use a half sheet baking pan or a jelly roll pan too.
- Parchment paper – for lining pans. This really helps the cake release cleanly from the pan. for cooling cakes.
- Cooling rack – for cooling cakes.
- Toothpick or cake tester – to test when cake is done.
- Offset spatula – for spreading frosting on cake.
- Cutting board and knife- – for chopping the strawberries.
- Slotted spoon – for strawberry filling.
- Fine-mesh sieve or sifter – for powdered sugar to avoid grainy frosting.
- Pastry bags and decorating tips (optional) – for adding decorations to the cake. If you're new to cake decoration, this set linked here has pastry bags and an assortment of classic tips to choose from.
- Star piping tip (optional) – I used a Wilton star 1M for piping the borders and design.
Ingredients
Sourdough Vanilla Cake:
- 1 (240g) cup sourdough discard (100% hydration) see FAQ's for a swap
- 3 (600g) cups granulated white sugar
- 2 (480g) cups buttermilk or whole milk
- 1½ (380g) cups avocado oil or neutral oil
- 4 large eggs room temperature
- 2 Tbsp vanilla extract
- 3½ (450g) cups all-purpose flour
- 2 Tbsp baking powder
- 1½ tsp fine sea salt
- ½ tsp baking soda
Sourdough Discard Swap:
- 1 (120g) cup all-purpose flour
- 1/2 (120g) cup buttermilk or whole milk
Strawberry Shortcake Filling:
- 3½ (525g) cups fresh strawberries hulled and sliced
- 2 (25g) Tbsp granulated sugar
- 1 tsp vanilla extract
Whipped Cream Frosting:
- 16 (454g) oz full-fat cream cheese softened
- 2½ (300g) cups powdered sugar sifted
- 1½ tsp vanilla extract
- ½ tsp almond extract optional
- ¼ tsp fine sea salt
- 3½ (840g) cups heavy whipping cream cold
Garnish:
- 2 (300g) cups fresh blueberries
- 2-3 (450g) cups fresh strawberries sliced
Instructions
Step 1: Mix The Cake
- In a bowl, combine with a whisk loosely the flour, sourdough discard, white sugar, buttermilk or milk, avocado oil (or neutral oil), and the vanilla. It’s okay if a few small lumps remain, you don’t want to overmix this base.1 (240g) cup sourdough discard (100% hydration), 3 (600g) cups granulated white sugar, 2 (480g) cups buttermilk, 1½ (380g) cups avocado oil, 3½ (450g) cups all-purpose flour, 2 Tbsp vanilla extract
- Optional Overnight Fermentation: Cover the bowl with plastic wrap, and refrigerate overnight. This step is key in your fermentation process. If you want to shorten your fermentation time, you can allow the batter to rest for 4 hours at room temperature for a same day bake. I don't advise leaving this batter at room temperature overnight, its too hydrated and will overproof.
- If you fermented the batter overnight in the refrigerator, allow the bowl of batter to rest on the counter for roughly 1 hour. This is a key step to achieving a tender crumb, don’t skip this step! If you like temperature cues, the temperature of the batter should read roughly 70 F before proceeding.
- Quick Bake Option: If you allowed batter to rest on the counter and did not refrigerate or you're doing a quick bake, skip this step of resting.
- Sourdough Discard Swap: If you want to make this cake without discard, add the flour and buttermilk instead and proceed as directed.1 (120g) cup all-purpose flour, 1/2 (120g) cup buttermilk
- Once the batter has reached room temperature, add the eggs, baking powder, baking soda, and salt to the bowl.4 large eggs, 2 Tbsp baking powder, ½ tsp baking soda, 1½ tsp fine sea salt
- Whisk gently the remaining ingredients into the batter just until combined and smooth, avoiding overmixing to make sure your cake crumb doesn’t get tough.
Step 2: Bake the Cakes
- Preheat the oven to 350°F (175°C). Grease and lightly flour two 9×13 baking pans (if you only have one pan you can bake one at a time). You can also use a jelly roll pan or a half sized baking sheet for this cake.
- I strongly recommend lining the very bottom of the pan with parchment paper at this time, this helps the cake release evenly.
- Baker's Tip: If you aren't sure how to line the bottom of your cake pan with parchment, simply place your cake pan on a sheet of parchment and draw along the edge to form the shape you need. Cut and place at the bottom of your pan.
- Divide the cake batter evenly between the two pans. This should roughly be 4 cups (950g) batter per 9×13 inch pan. Tap the pans lightly on a hard surface to release any air bubbles before baking.
- Set your timer for 25 minutes. Check the cake at 25 minutes, inserting a toothpick to check doneness. This cake takes me anywhere between 25-35 minutes to be done. When the cake is done, a toothpick should come out with a few moist crumbs but not with wet batter.
- When you touch the top of the center of the cake, it should be firm and not overly glossy. Internal temperature should be between 200-205 F in the center.
- Baking Note: If vanilla cake is under done, when cake is removed from heat the center will fall. If you overbake the cake, it will err on the side of being dry. Go slow and check frequently after the 25 minute mark to ensure the cake is baked properly without losing moisture. Use the notes above to make sure cake is baked correctly.
- When the cakes are done, cool slightly in the pans. Line a cooling rack with parchment, and place it over one of the cake pans. Invert the pan with the cooling rack to safely release the cake, and allow this cake to cool completely. Don't skip the parchment or you run the risk of sticking.
- For the bottom cake layer you can either leave one of the cakes in the pan and assemble the cake that way, or if you want to use a serving platter for your cake you can transfer the second cake to a parchment lined cooling rack as well.
- Allow the cakes to cool completely, then wrap well in plastic wrap and transfer to the refrigerator or freezer for at least an hour before frosting. I place my cooling rack on a baking sheet and wrap the whole pan in plastic to keep the cake structure safe. Because this cake uses a whipped cream frosting, the colder the cakes are the better.
- You can also prepare the cakes ahead in advance for easier assembling, and refrigerate up to 3 days or freeze up to 1 month.
Step 3: Prepare the Strawberry Filling
- Wash all of your strawberries, and pat them completely dry. Cut them in half, then slice them thinly and toss in a bowl.3½ (525g) cups fresh strawberries
- Add the sugar and vanilla to the berries. Toss the berries to coat them in the sugar, this brings out their natural juices.2 (25g) Tbsp granulated sugar, 1 tsp vanilla extract
- Allow the filling to rest in the refrigerator while you make your frosting.
Step 4: Make the Whipped Cream Frosting
- Make sure your cream cheese is completely soft and at room temperature before making this frosting, or you will have a grainy result.16 (454g) oz full-fat cream cheese
- In the bowl of a stand mixer fitted with the whisk attachment or using your hand beaters, beat the cream cheese until completely smooth.
- Sift the powdered sugar into the cream cheese, and add the vanilla, almond extract (if using), and salt. Mix on low to incorporate the sugar, then increase to high speed and beat for 3-4 minutes until creamy and no lumps remain.2½ (300g) cups powdered sugar, 1½ tsp vanilla extract, ½ tsp almond extract, ¼ tsp fine sea salt
- With the mixer running on low speed, slowly stream in the cold heavy whipping cream. Once the cream is incorporated, increase the mixer to high speed. This might look very liquidy, but it’s important to give it time and beat this frosting until stiff peaks form.3½ (840g) cups heavy whipping cream
- The frosting should be light, fluffy, and hold its shape on the whisk. Do not overmix or the frosting will split.
Step 5: Assemble the Flag Cake
- Wash and dry your blueberries and strawberries for decorating the cake. I cut the stems off of some of the strawberries and left some with them on for color. Cut the strawberries in half for decorating and set aside the fruit for later.2 (300g) cups fresh blueberries, 2-3 (450g) cups fresh strawberries
- If you want to serve this cake on a platter, place one of the cake layers upside down on the desired platter. If you prefer to build the cake in your pan, gather your cake that is still in the pan.
- Add 1/3 of the frosting on top of the cake and smooth the frosting out over the top to meet the edges of the pan. Cover the sides if necessary.
- Transfer 1 cup of frosting to a pastry bag fitted with your Wilton 1M star tip or a Ziplock with 1/2 inch cut off of the end. Pipe a border around the edges of the cake to avoid the strawberry filling from leaking.
- Using a slotted spoon, drain the strawberries and spoon on top of the frosted cake in an even layer. You want to avoid adding excess juice to the center or the top cake will slide.
- Place the second cake upside down on top of the layer of strawberries.
- Add another 1/3 of the frosting on top of the cake, and smooth to cover the top and edges using a frosting spatula.
- Note: If you used a 9×13 pan with a higher edge, you may not have any edges to cover. If you use a half sized baking sheet or jelly roll pan or platter, make sure to frost the edges as well to meet the bottom pan.
- Transfer the cake to the refrigerator for 30 minutes to set up before finishing decorating. If you notice anything sliding or melting before this, make sure you transfer the cake immediately to the refrigerator to set up before continuing.
- Transfer the remaining frosting to your bag fitted with the star tip. Make sure you keep this cold as well while the cake sets up.
- Once the cake has chilled, it's time the make your flag design.
- Arrange the blueberries in the top right hand corner in 5 rows of six. This forms the blue field of the flag.
- Next, starting at the top of the flag begin arranging your strawberries to form the stripes. You’ll want to make 4 rows of strawberries with about 1 1/2 inches space between. Make sure you also leave room for a border if you want to add that.
- I arranged my berries going in different directions to give the stripes an organic look.
- Finish the cake by piping a border around the edges, and filling in the white stripes with stars or a shell border if desired.
- Transfer the cake back to the refrigerator for about 1 hour to completely set up prior to serving.
- Yields 1 9×13 sheet cake (serves 24)
The cake is great on its own but the berries and cream make it even better