
Sourdough Pumpkin Maple Bars
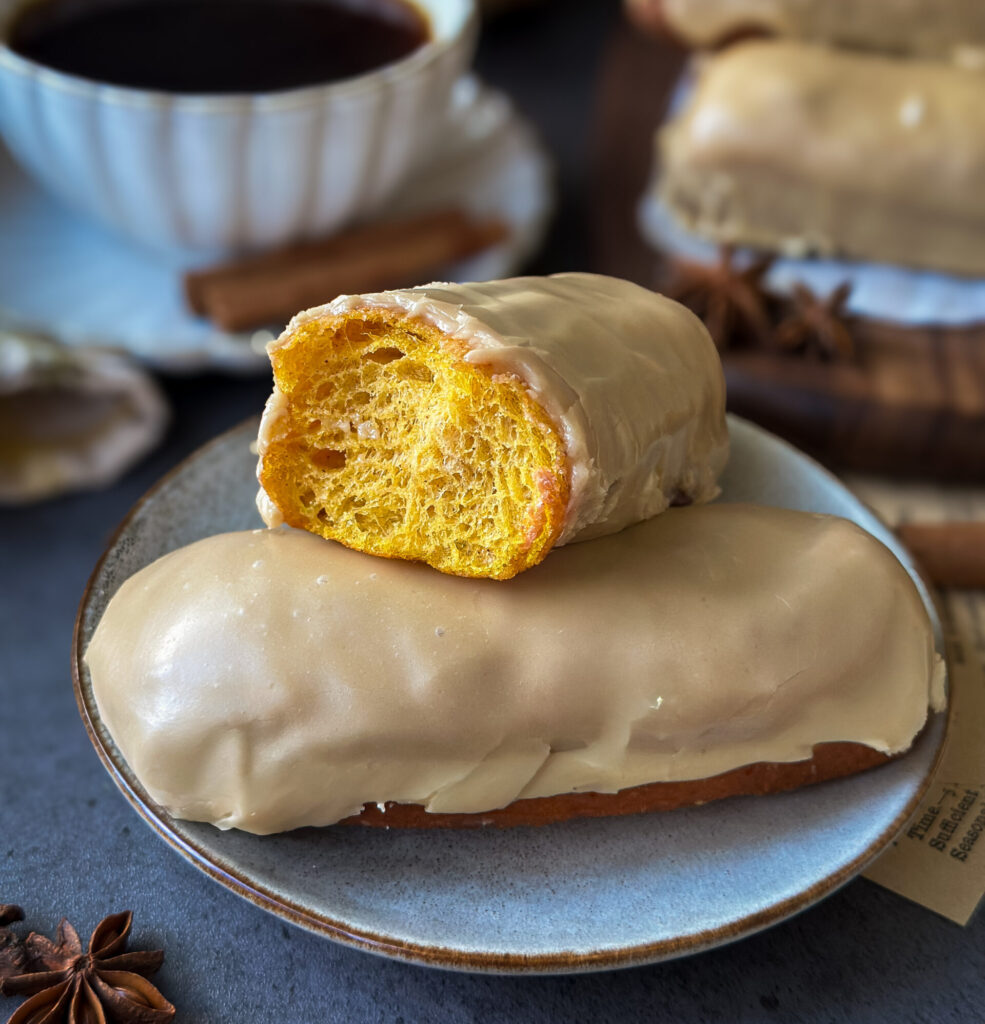
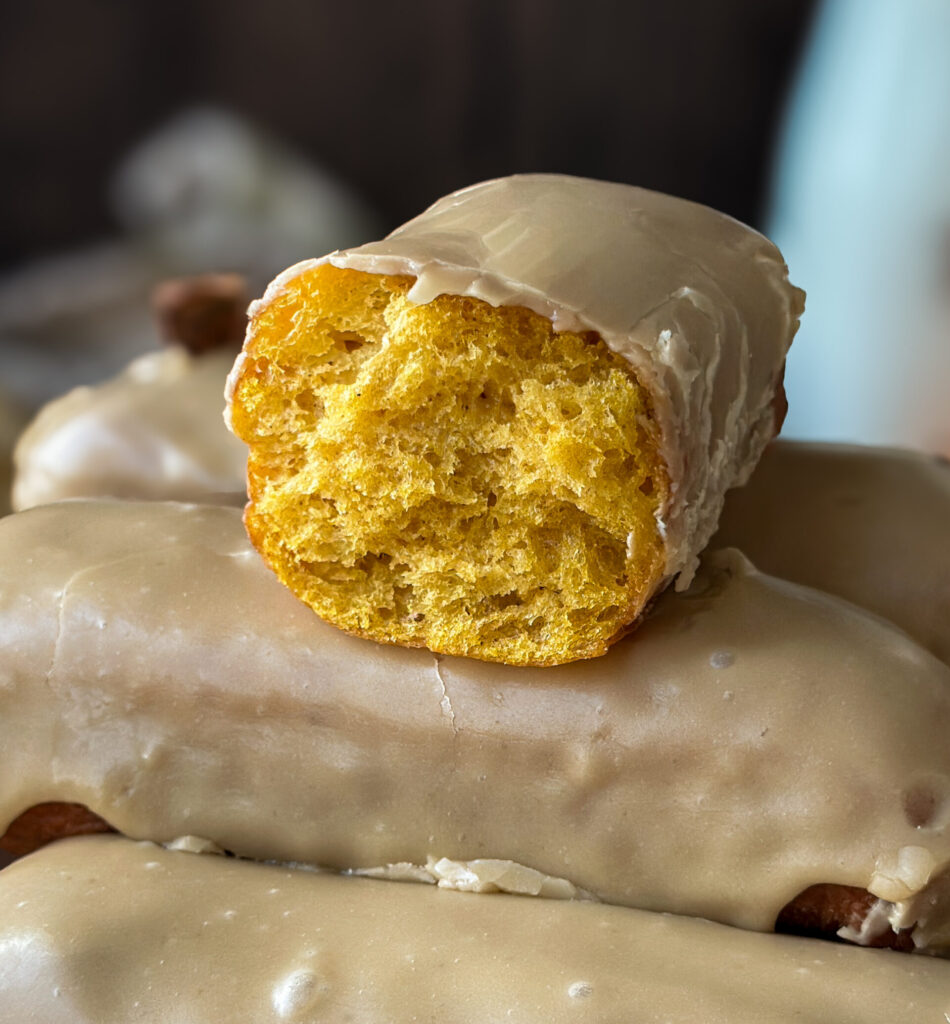
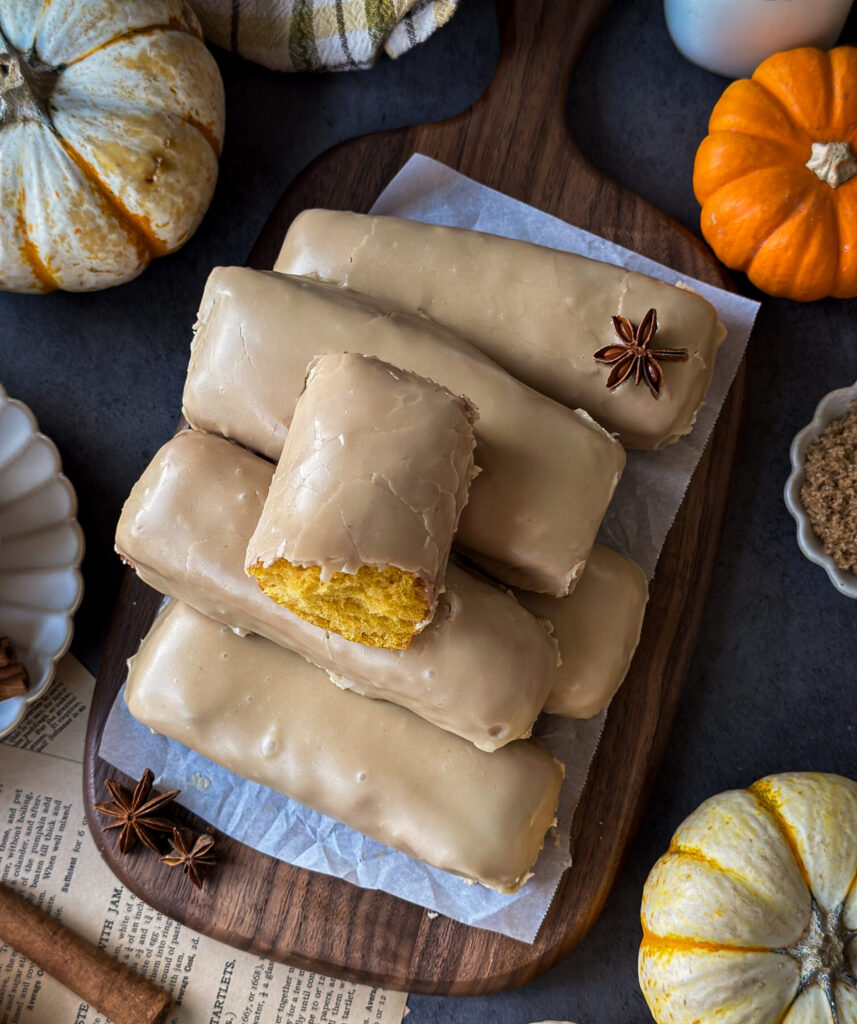
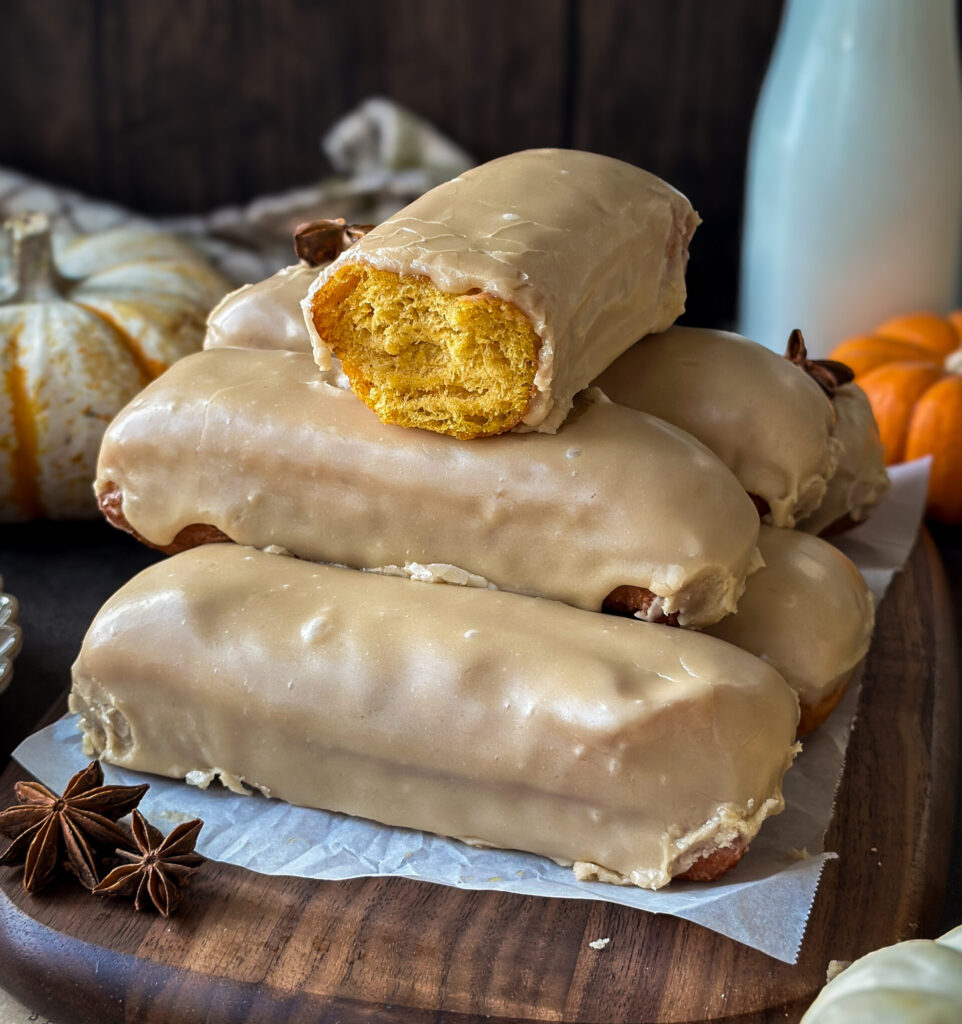
I have a serious love for maple bars, and with all things pumpkin on my mind for fall I knew I had to combine the two! These Sourdough Pumpkin Maple Bars are so soft and fluff, full of cozy fall spices, and dipped in my favorite brown sugar maple glaze that sets perfectly. If you love a a good maple bar, you need to try this pumpkin twist!
Why You’ll Love This Recipe
- Pillowy soft: Real pumpkin makes these bars extra soft and fluffy, without weighing them down.
- That maple glaze: My favorite brown sugar maple glaze is buttery, rich, and sets up just like the donuts in your favorite shop.
- Starter or discard: Make this recipe with sourdough starter or discard with yeast depending on what works for you and your schedule.
- All the fall flavors: Pumpkin, warm spices, and maple all wrapped up in one seriously good donut.
Tools You’ll Need:
- Stand mixer (optional)- for kneading dough. You can mix the dough by hand but a stand mixer is easiest.
- Medium sized pot- for making tangzhong and the glaze.
- Whisk- for mixing the tangzhong and glaze.
- Kitchen scale (optional)– for accurate measuring, especially helpful with baking linked here.
- Measuring cups and spoons- if you’re not using a scale and for smaller ingredients.
- Rolling pin- for rolling out the donuts.
- Pizza wheel or pastry cutter- for cutting out the donuts.
- 12 7×4 parchment squares- This make frying the donuts so easy! I cut my own before hand.
- Deep pot or Dutch oven– for frying the donuts.
- Frying thermometer– for keeping the oil at 340–350°F. I strongly recommend using this tool to avoid burning I use this one linked here and love it.
- Slotted spoon or spider- to flip donuts. The spider I use is linked here.
- Chopsticks (optional)- helpful for flipping the donuts. I like these reusable chopsticks linked here.
- Cooling rack + paper towels– for drying donuts after frying.
- Tongs- for removing parchment from oil while frying.
- Digital Thermometer (optional)- helps with assessing when tangzhong is done.
- Wire rack– for draining excess glaze from donuts after glazing.
Gather Your Ingredients:
- Whole milk– milk enriches this dough making it soft and tender. You’ll also use milk to make your tangzhong.
- Egg- adds tenderness and structure to the dough working as a binder.
- Sourdough starter- If you make this recipe 100% sourdough you’ll use your starter to feed a sweet levain, or you can make the discard option and add yeast. Any discard cold or fresh is fine.
- Instant dry yeast (optional)- This is the leavening agent for the dough if you do the discard option, and speeds up the process! I love this Scratch Gold Yeast and always have it on hand. Please note instant dry yeast isn’t the same as active dry yeast which you have to bloom to activate. I’ll include an active dry yeast swap under FAQ’s.
- Unsalted butter- enriches dough. You’ll also use this in the glaze.
- Pumpkin Puree- You’ll want to use 100% real pumpkin puree for this dough, I love the brand Libby’s/ Do not use pumpkin pie filling!
- White Sugar- sweetens the dough and cuts the tang of the starter with a sweet levain.
- Sea salt- balances sweet and sour flavors.
- Vanilla extract- for warmth and depth of flavor to dough.
- All-purpose flour- I recommend AP flour over bread flour to create a more tender crumb. The egg and tangzhong will provide the structure in this recipe making bread flour unnecessary, but you can substitute for bread flour if needed.
- Organic Coconut Oil- for frying donuts and achieving a crisp texture without a strong aftertaste. I highly recommend Carrington Organic coconut oil linked here. This container lasts me several batches when frying, and you just allow the oil to cool after frying and remove any excess bits before transferring left over oil to a glass jar.
- Heavy Cream- Cream a smooth, shiny finish and helps thin the glaze.
- Powdered sugar – to sweeten and thicken the maple glaze. Do not use granulated sugar as it won’t dissolve properly.
- Brown Sugar- this sweetens the glaze and adds depth to balance out the maple.
- Maple Syrup– to sweeten and and give the glaze that classic maple flavor. Use 100% real maple syrup!
- Maple Extract (optional)– to enhance the maple flavor in the glaze. This is optional, but really brings out the maple for maple lovers. I love this maple flavoring from Frontier Co-op linked here.
Instructions
Step 1: Make the Sweet Levain (Night Before)
To start your dough, you’ll want to mix a sweet levain the night before. If this sounds intimidating, it’s not! It’s literally just adding sugar to your starter. This curbs the tang of the sourdough for the perfect donut.
In a clean jar, mix your mother starter with the flour, water, and sugar. Give it a good stir, and allow it to rest at room temperature (optimally 73-75 degrees F). I like to mark the volume in my jar with a rubber band so it’s easy to asses the rise the next morning. When the sweet levain has doubled in size, it’s time to mix your donut dough.
Sourdough Discard Option: If you make this recipe with discard and yeast, skip this step.
Step 2: Make the Tangzhong
Before you get started on mixing your dough, you’ll make your tangzhong. Whisk milk and flour together in a small saucepan.
Cook the tangzhong over medium/low heat, stirring constantly, until it thickens into a paste that is similar to pudding (about 2–3 minutes). For precision, use your digital thermometer and heat to 148-155 F. Do not overheat the tangzhong, or your mixture will be too thick.
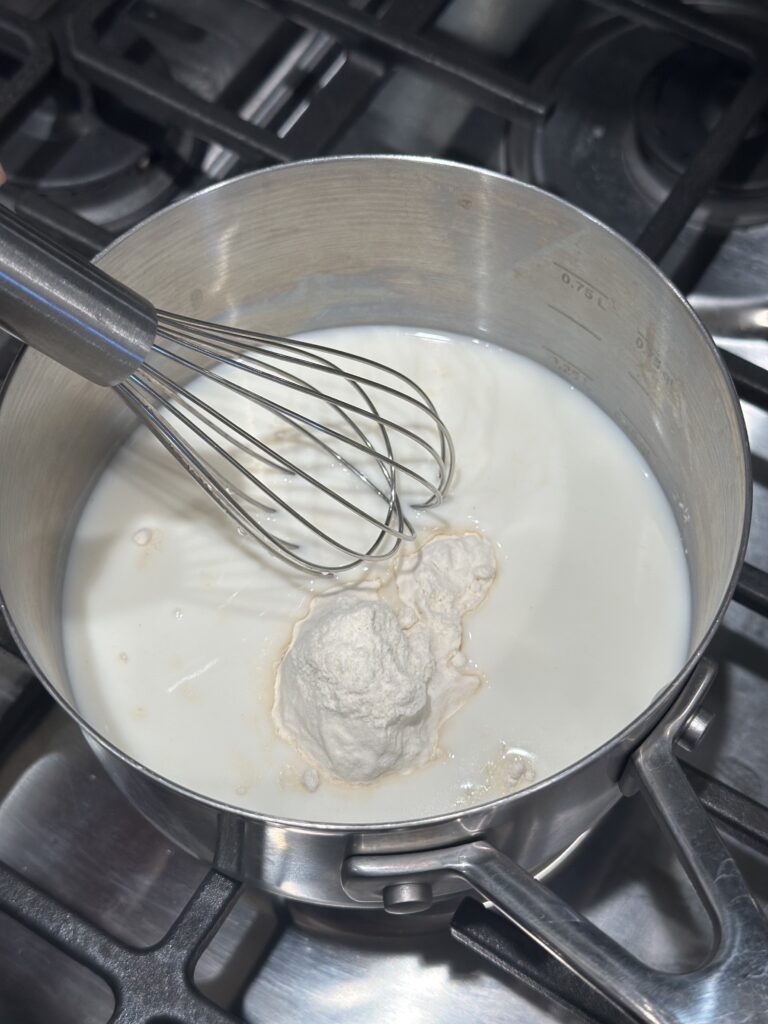
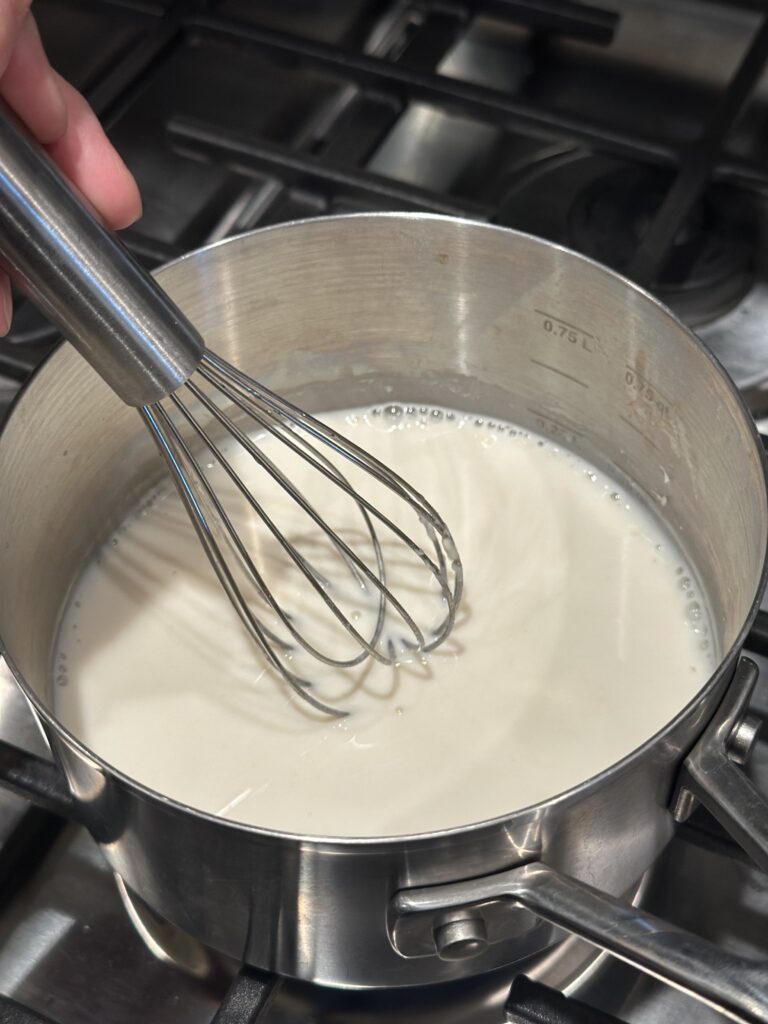
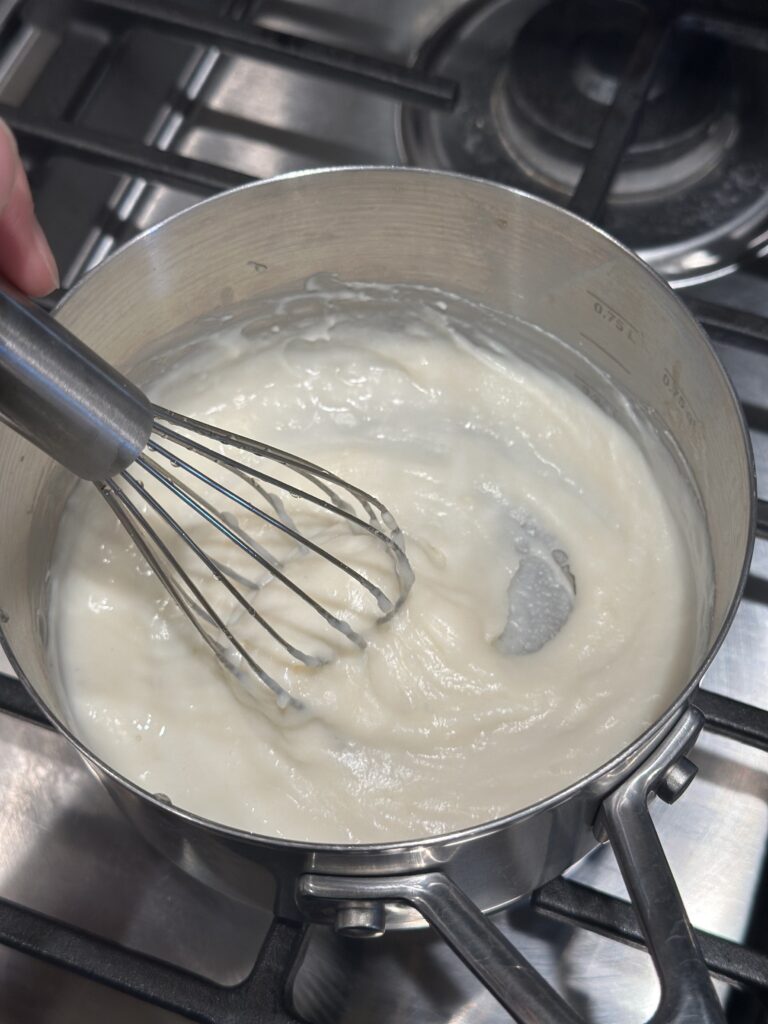
Scrape the tangzhong into a bowl immediately to prevent it from overcooking, cover it loosely, and let cool to room temperature before adding to your dough.
Prepare your dough while tangzhong cools.
Step 3: Mix the Dough
In a stand mixer fitted with a dough hook or large mixing bowl, add the whole milk, sweet levain, egg, sugar, vanilla, pumpkin puree, all of the tangzhong, cinnamon, ginger, and nutmeg.
Whisk ingredients together quickly, it’s okay if it’s lumpy.
Sourdough Discard Option: If you’re making this recipe with discard and yeast, add the discard and instant yeast instead of the sweet levain to the wet ingredients and whisk in.
Add your flour and salt into your wet ingredients.
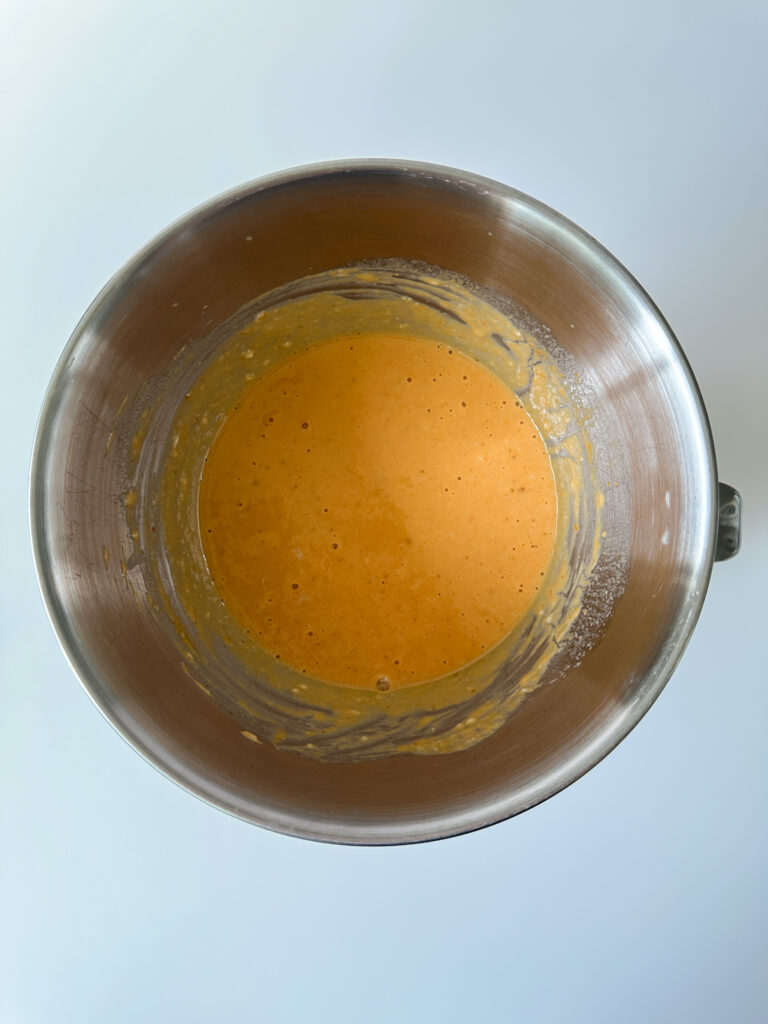
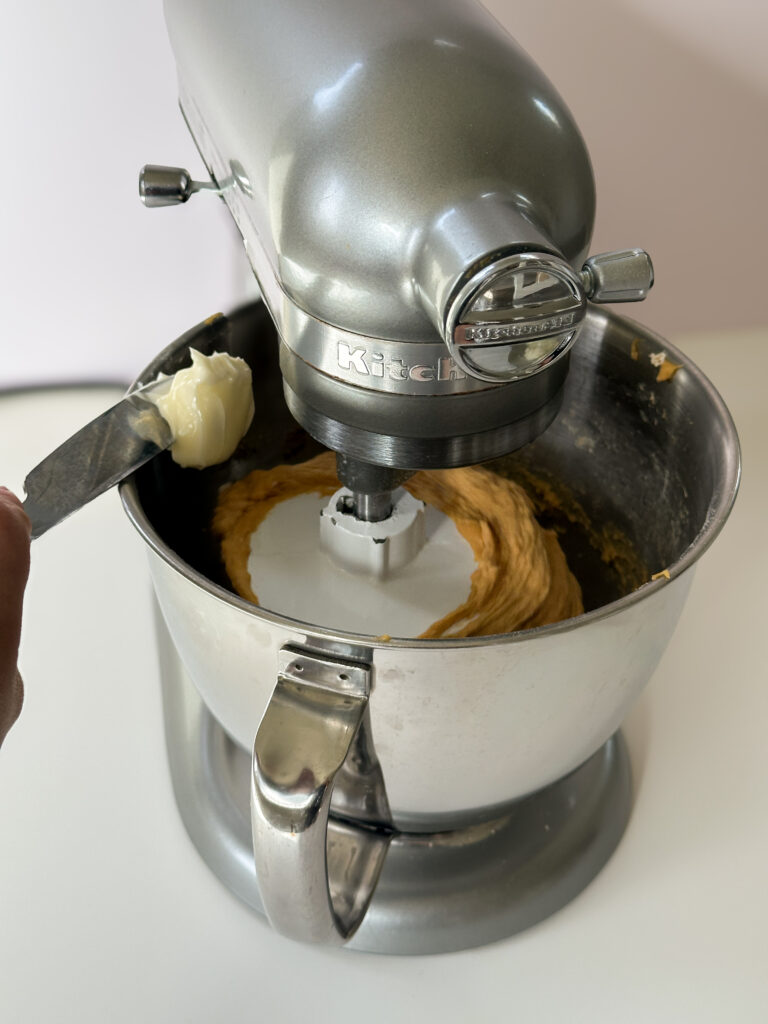
Mix the dough on low until a shaggy dough forms, about 2-3 minutes. Scrape down the bowl if needed. If you’re using your hands, knead the dough until it comes together.
This is a higher hydration dough from the pumpkin, so be aware it will be sticky!
Once the dough has come together, add the softened butter a tablespoon at a time mixing each tablespoon in until adding the next.
Use a dough scraper to scrape the edges of the bowl to make sure everything is getting mixed in.
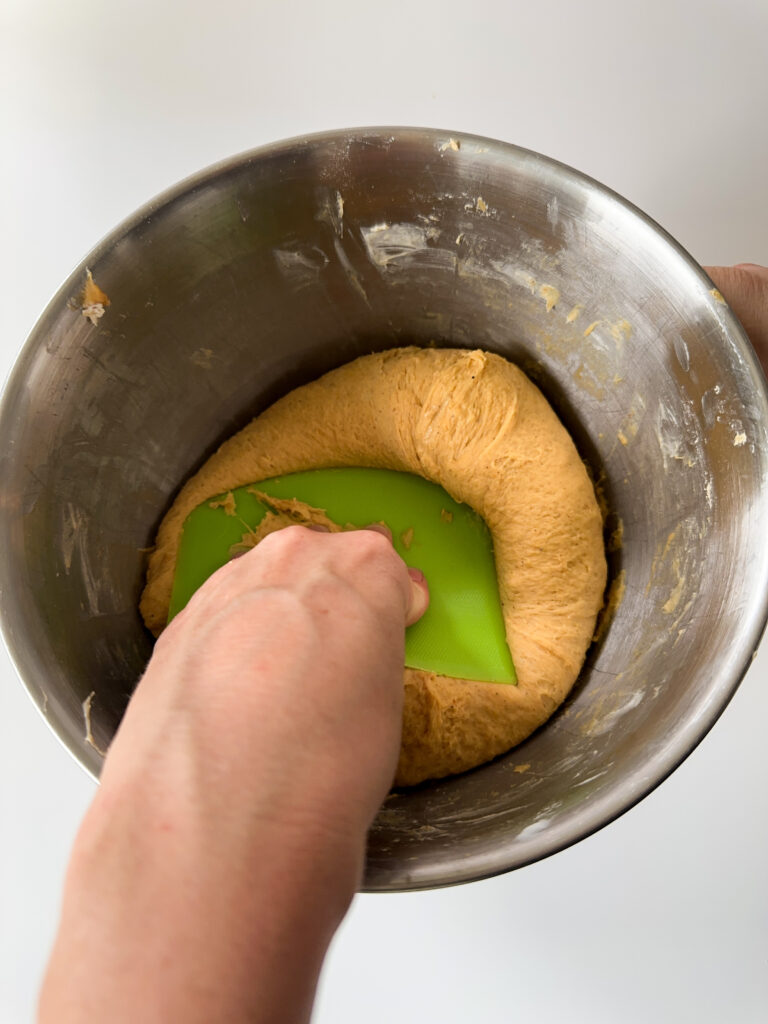
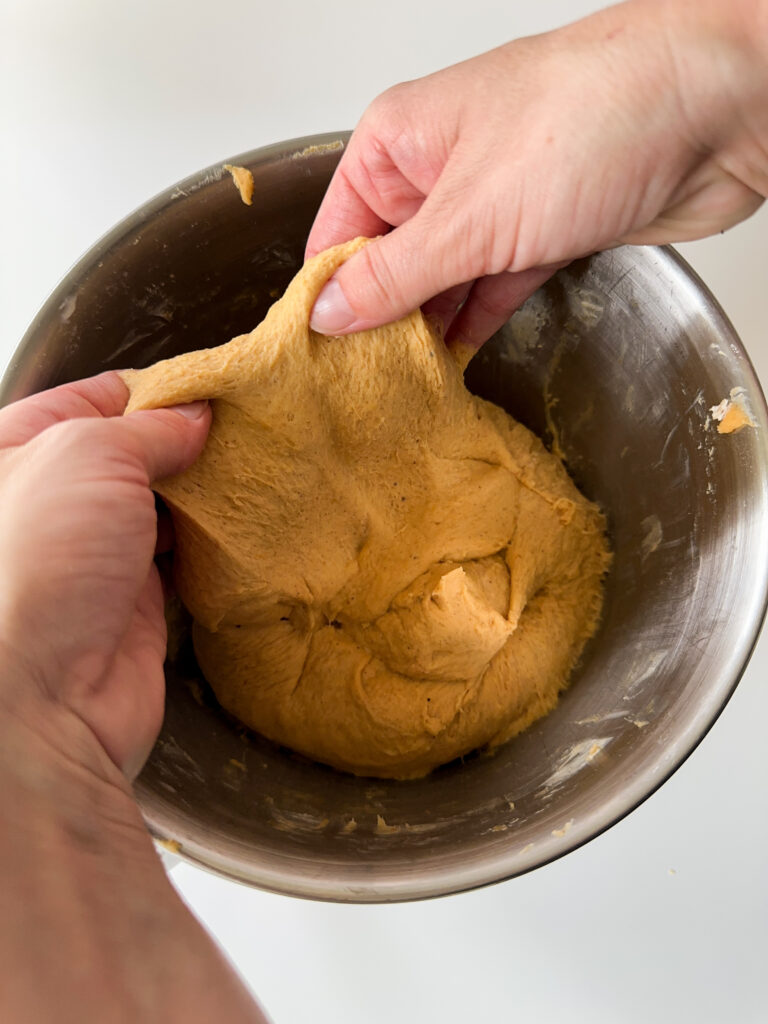
Continue mixing the dough on medium-low (speed 2–3) for 8–10 minutes, until the dough is smooth, elastic, and tacky but not sticky.
If you’re mixing by hand knead the dough until the butter has fully been incorporated, and the dough is smooth and tacky.
Mixing Notes: If kneading the dough in a mixer or if dough is very wet when mixing by hand, add an additional 25 grams (3 Tablespoons) of flour and mix into dough. Make sure to work flour in completely and assess if you need more flour.
Do not add more than 50 grams of flour at this stage, or you will lose the high hydration of the dough and end up with a dense donut.
If using a stand mixer, dough can become more warm and sticky and I have found kneading dough with my hand (perform a set of stretch and folds) for a minute after mixing in my stand mixer really helps bring the dough together.
Step 4: Bulk Fermentation
Spray a clean bowl with oil. Shape the dough into a smooth ball and place it in the bowl. Cover the bowl with plastic wrap.
Stand mixer directions: perform one set of stretch and folds after 30 minutes to strengthen your dough.
Hand mixing directions: perform 3 sets of stretch and folds at 30 minute intervals at the beginning of bulk fermentation. After stretch and folds are completed, cover dough and allow to continue proofing.
Sourdough Discard Option: After the 20 minute rest, knead the dough by hand for a minute or two to get the dough even softer and to work the gluten. Once you’ve finished this kneading step, cover the bowl again.
Let the dough rise at 75–80°F until doubled in size, this takes about 5–6 hours. If your house is very cold, you can put dough in the oven with the light on for a warmer atmosphere. This proofing time is a general guide, this process may take longer the key is to assess when the dough has nearly doubled that’s when it’s ready.
Sourdough Discard Option: Allow the dough to rest about 1 1/2 hours at room temperature and the dough is ~75–90% risen. You don’t want this dough to proof double fully at this rising point. If the dough proofs sooner than the time I mentioned, shape it. You want to watch the dough to make sure it doesn’t overproof at this stage!
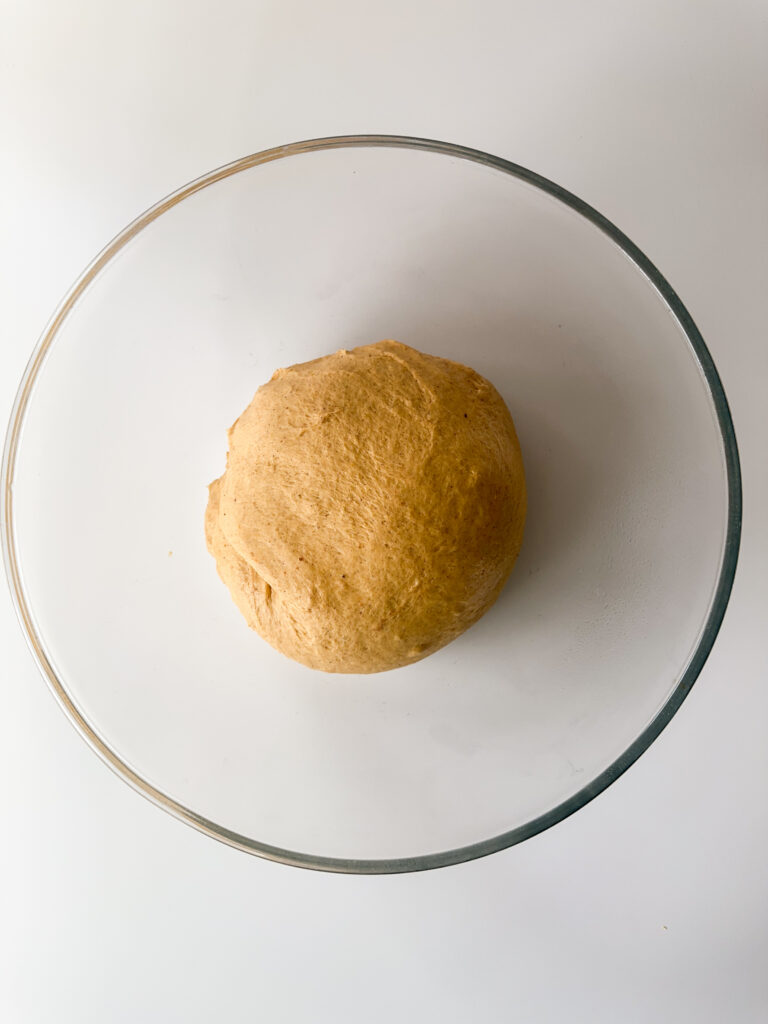
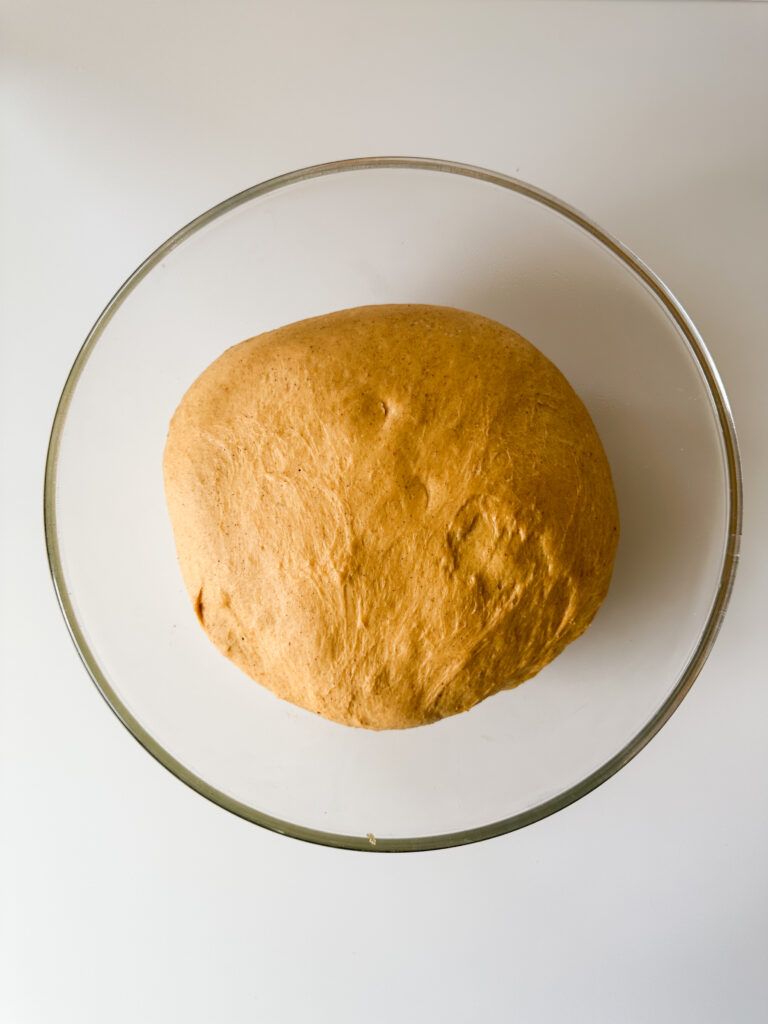
Overnight Fermentation: Once the dough has finished rising, you can cover and transfer to the refrigerator overnight for a longer ferment or you can skip this step and go straight to making your donuts.
Step 5: Shape the Donuts
Flour your work surface. Turn out the dough on your work surface and flour the top and the rolling pin to avoid sticking. Flouring is key to a clean transfer, don’t skip it.
Roll the dough into a 12 × 10-inch rectangle, approximately ¾ inch thick. Trim the edges if needed to create a clean rectangle.
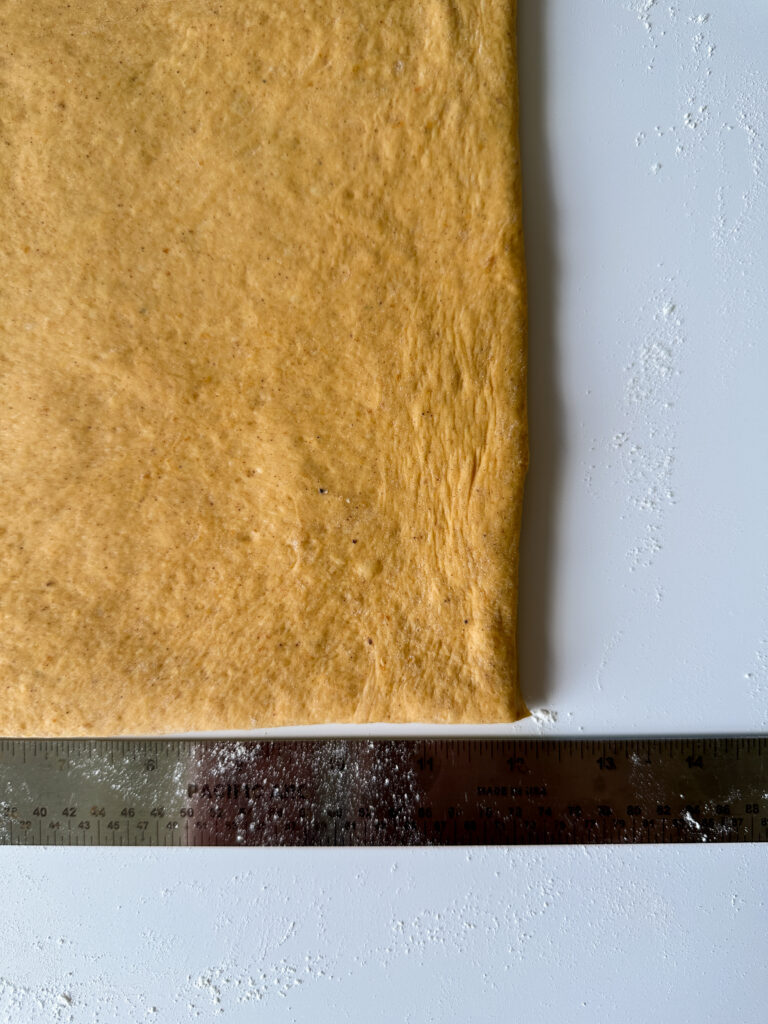
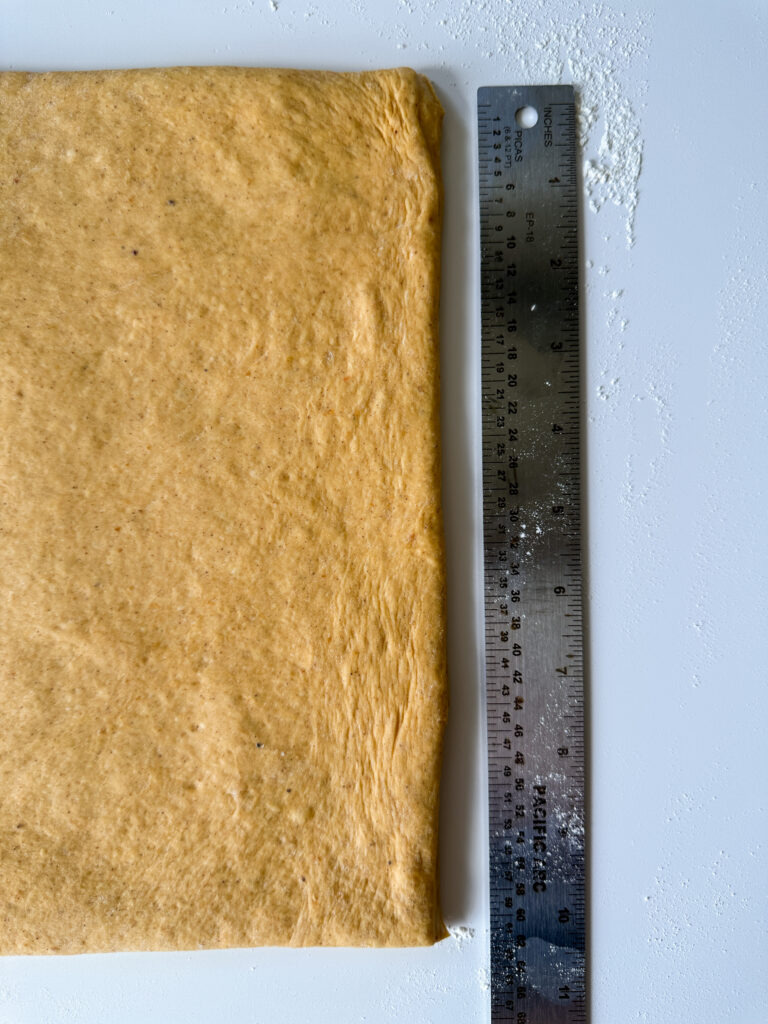
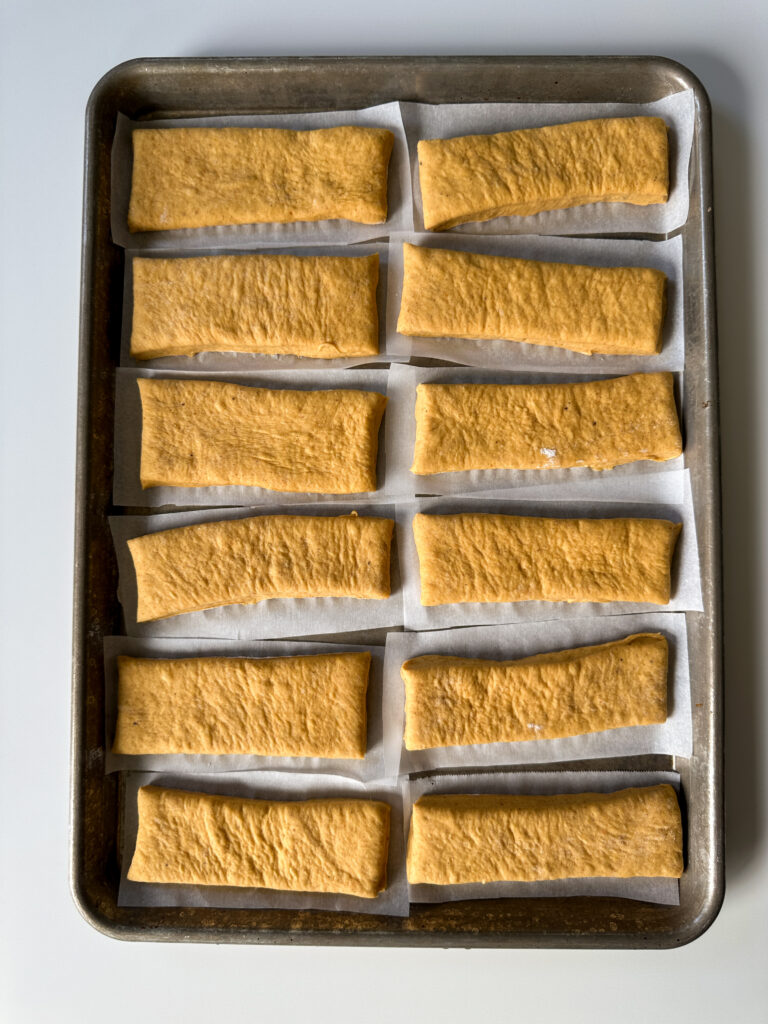
Cut the rectangle in half lengthwise to create two 5-inch long rows. Cut each row crosswise into six 2-inch wide pieces. You should have 12 maple bars approximately 5 × 2 inches each.
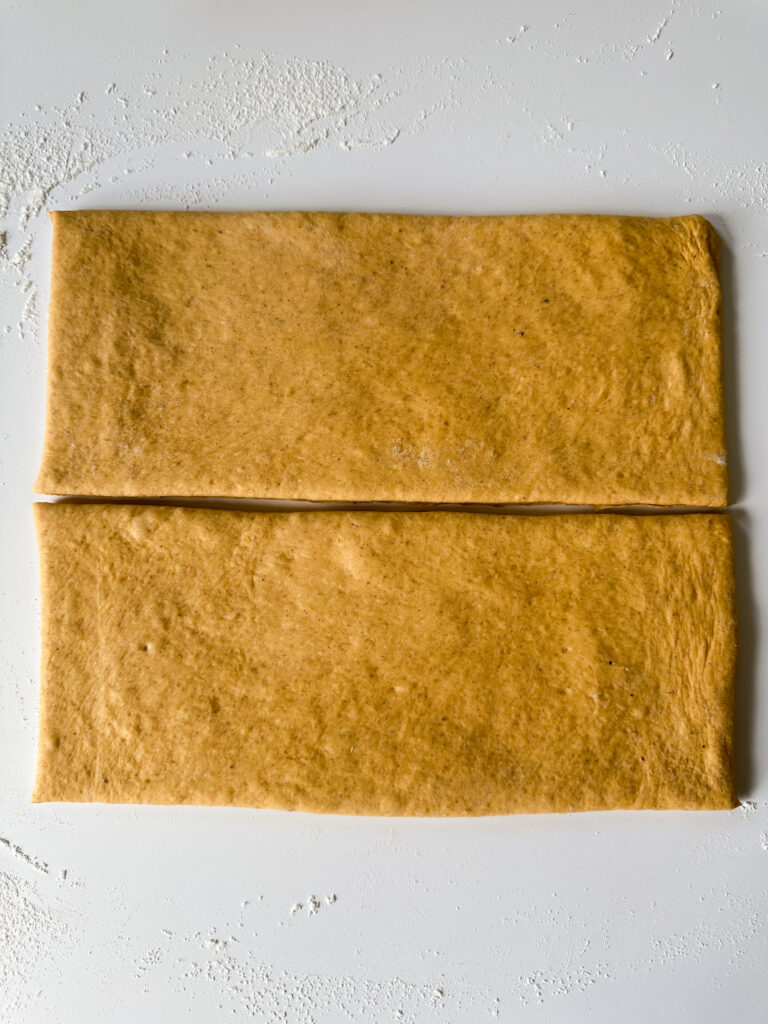
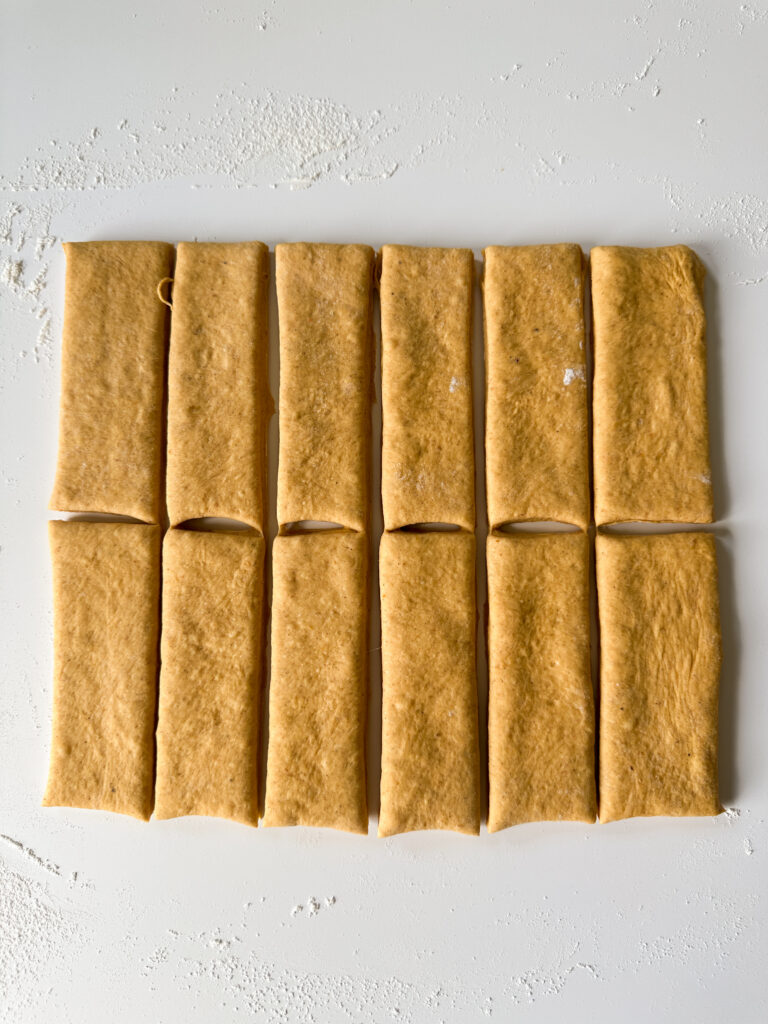
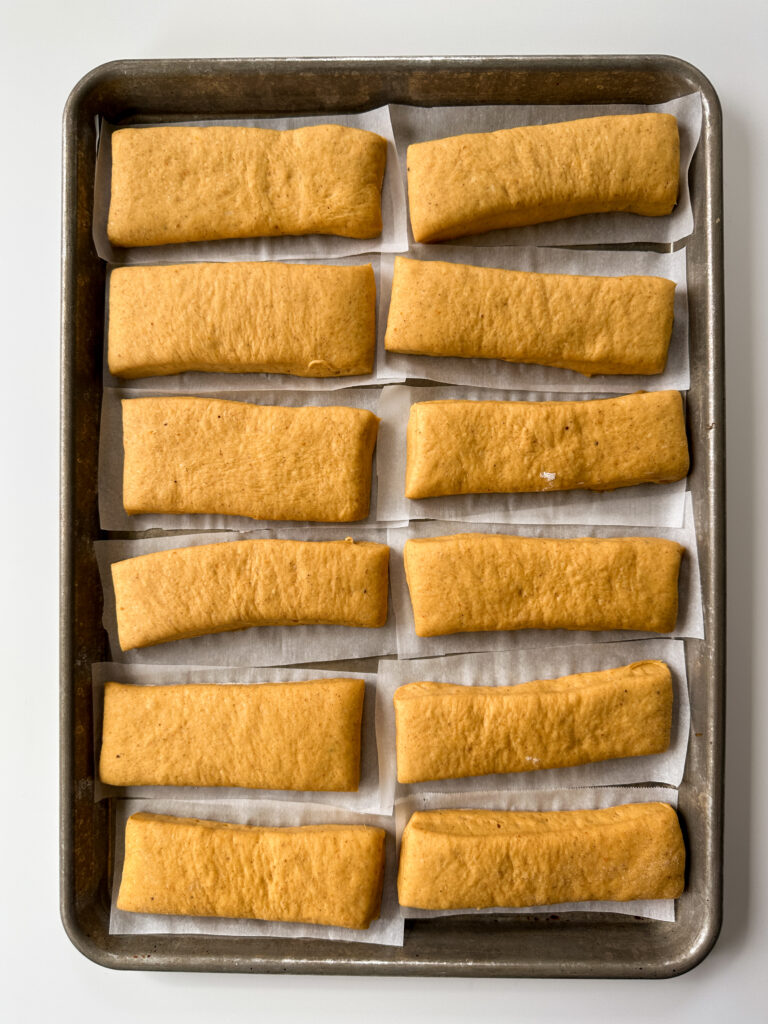
Place each maple bar onto an individual square of parchment paper about 7×4 inches. This makes it easier to transfer the delicate proofed dough into the hot oil without deflating it. Transfer to baking sheets to proof.
Step 6: Final Proof
Cover bars loosely with plastic sprayed with cooking oil and let them rise at room temperature for 1-2 hours, or until puffy and jiggly.
When poked gently with a fingertip, the dough should spring back slowly, not immediately. Because this dough has the tangzhong to provide stability to the dough, you can push your final proof a little longer to get a really airy donut.
Sourdough Discard Option: The second rise will be faster if you used discard and yeast, allow the donuts to proof about 45 minutes to an hour and then fry them. Avoid over proofing or you’ll end up with air pockets.
Step 7: Fry the Donuts
Line a cooling rack with paper towels. Fit your candy thermometer into your deep pot. Transfer 3–4 cups of organic coconut oil (or any neutral oil) to a deep pot or Dutch oven, and heat to 350°F on medium heat.
If the oil gets hotter than this, reduce the heat accordingly. Watch your temperatures very closely and adjust your heat as needed to avoid burning donuts.
When the oil is ready, transfer 2 donuts with parchment paper into oil (you can remove paper with tongs when it separates).
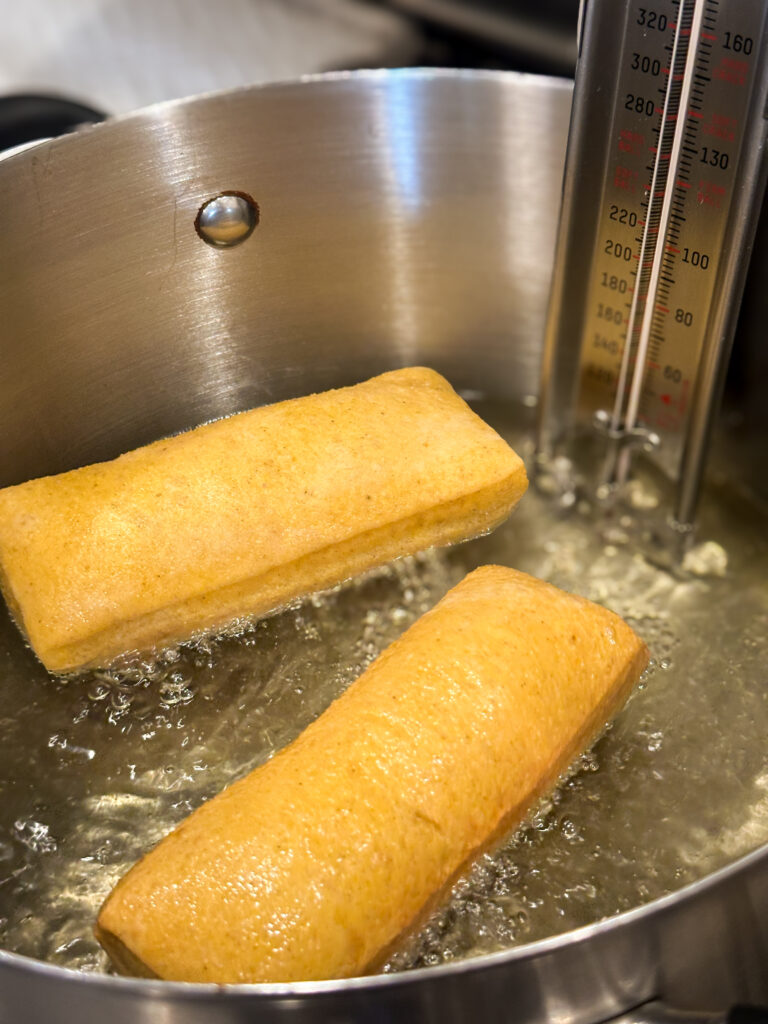
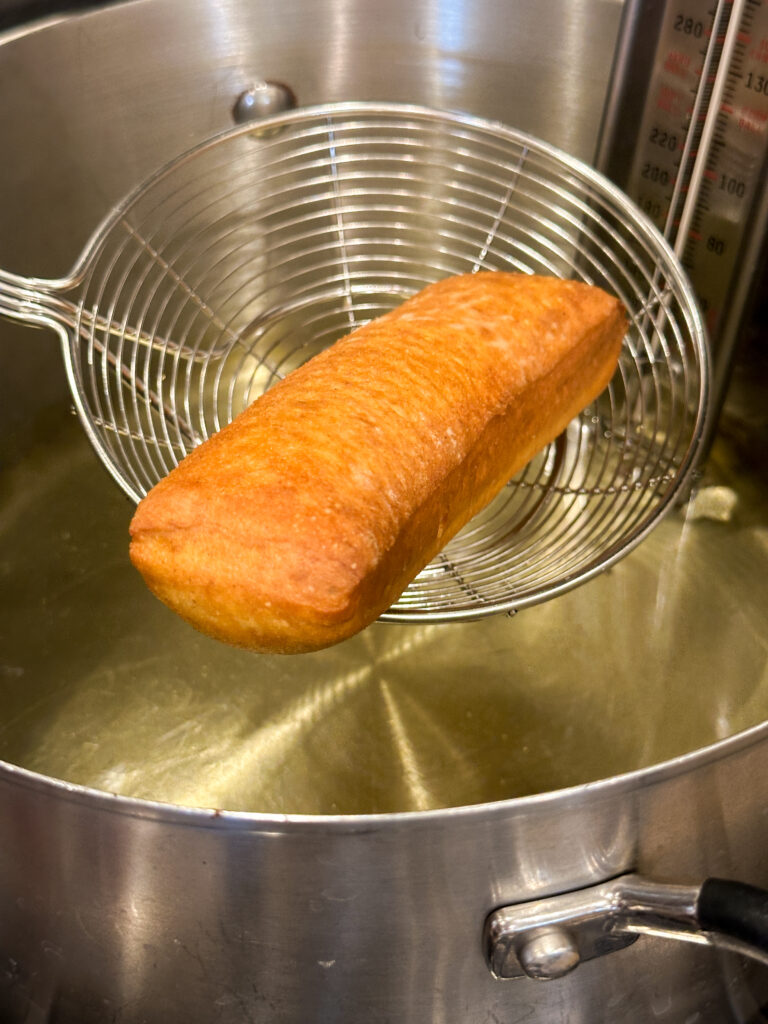
Fry each donut 30 seconds at a time per side, flipping donuts gently using chopsticks or a slotted spoon. I repeat this step a few times rotating the donuts to avoid burning one side.
Remove after frying 2-3 minutes with a slotted spoon or spider spoon and the donuts are a golden brown.
Transfer to a rack lined with paper towels to cool and to let the oil drip off.
Repeat this step until all donuts have been fried. Allow the donuts to cool while you prepare the maple glaze.
Step 8: Glaze the Donuts
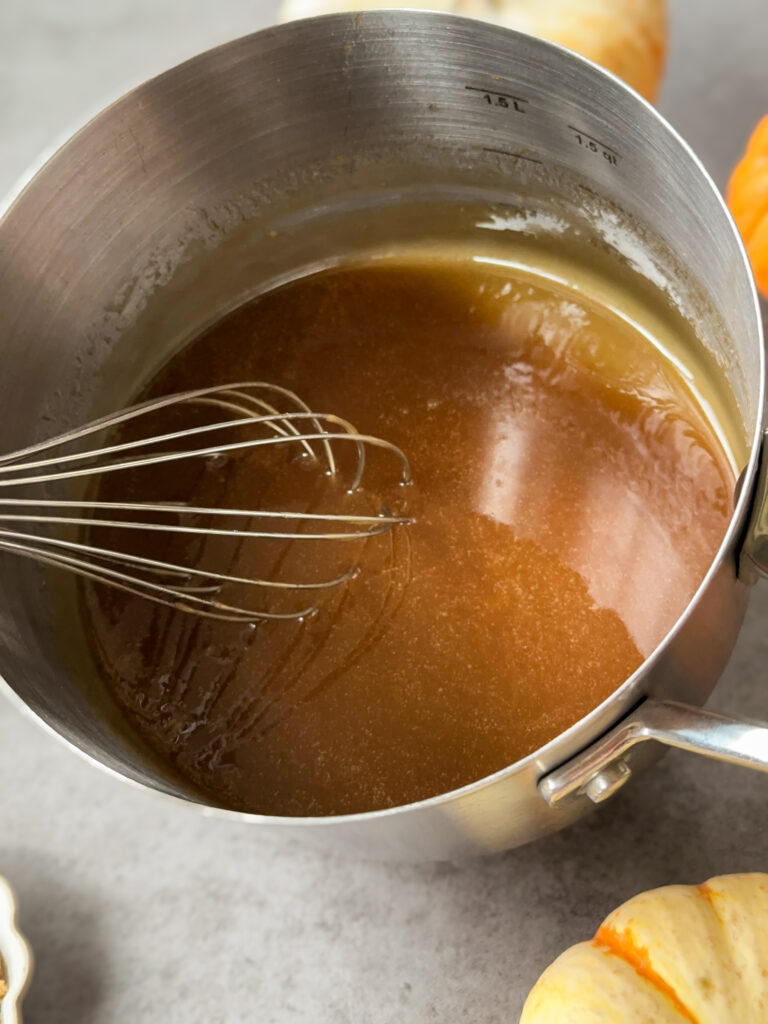
Melt the butter in a small saucepan over medium low heat for the glaze. Add the dark brown sugar and maple syrup and stir until smooth.
Once the mixture reaches a gentle bubble, cook for about 2-3 minutes, stirring constantly, until the brown sugar is dissolved. It’s very important to make sure the brown sugar has fully melted or the glaze will be grainy.
Remove the glaze from the heat and allow it to cool for a few minutes; check and make sure the sugar has dissolved. If you see any gritty grains of sugar, transfer back to the stove and cook a few more minutes.
Make sure the glaze cools slightly before you proceed.
Whisk in the sifted powdered sugar (this is key to a smooth glaze to sift it), maple extract if you’re using it, vanilla, and salt.
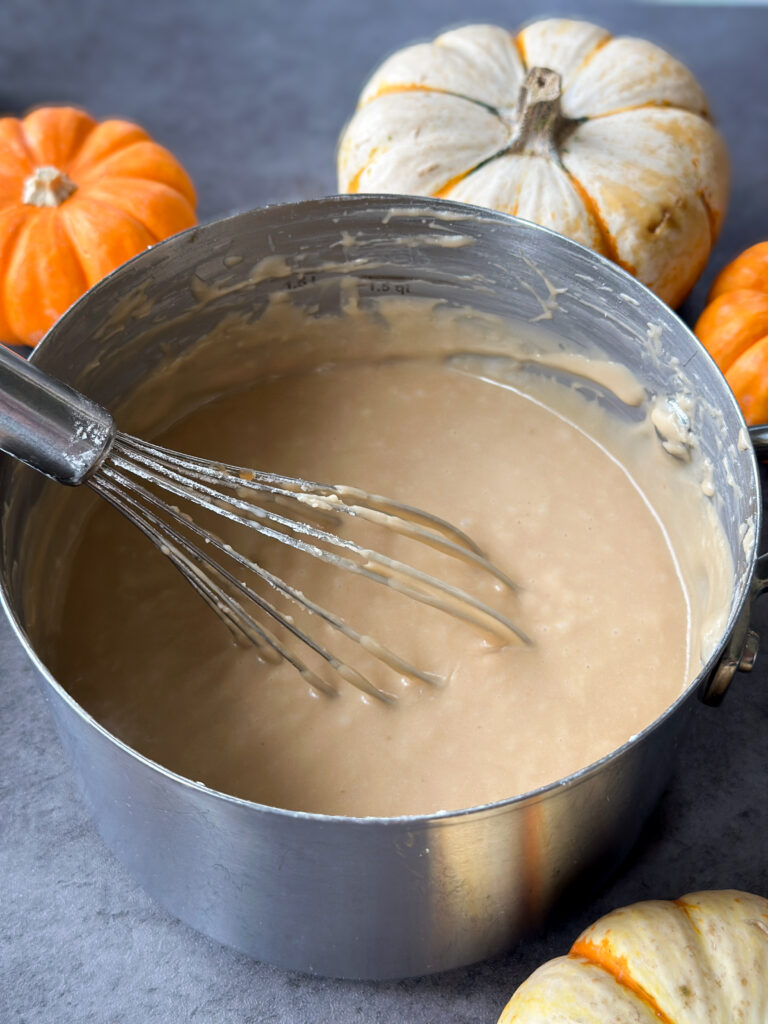
This glaze will be really thick; add the heavy cream slowly and whisk it gently until it’s smooth and the desired consistency. You may need less or more cream so go slow when you’re adding it.
The glaze should fall from the whisk in a thick ribbon and slowly settle back into itself rather than running like a thin icing.
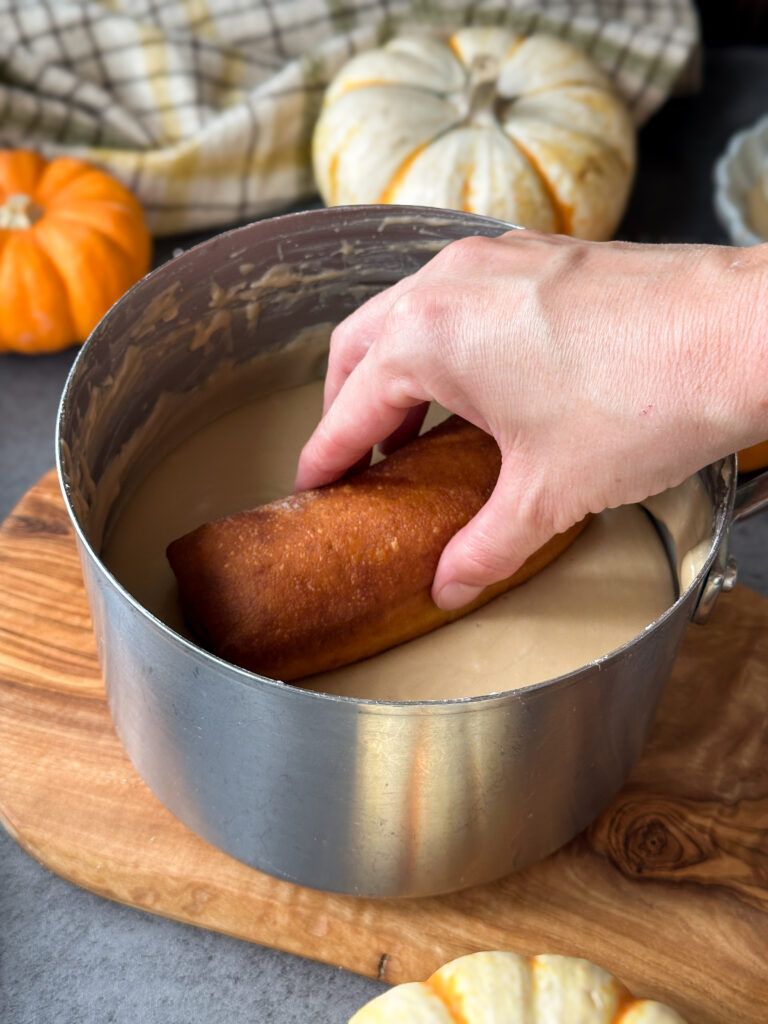
Dip the tops of the slightly warm maple bars into the warm glaze. Return them to the wire rack and allow the glaze to set before serving.
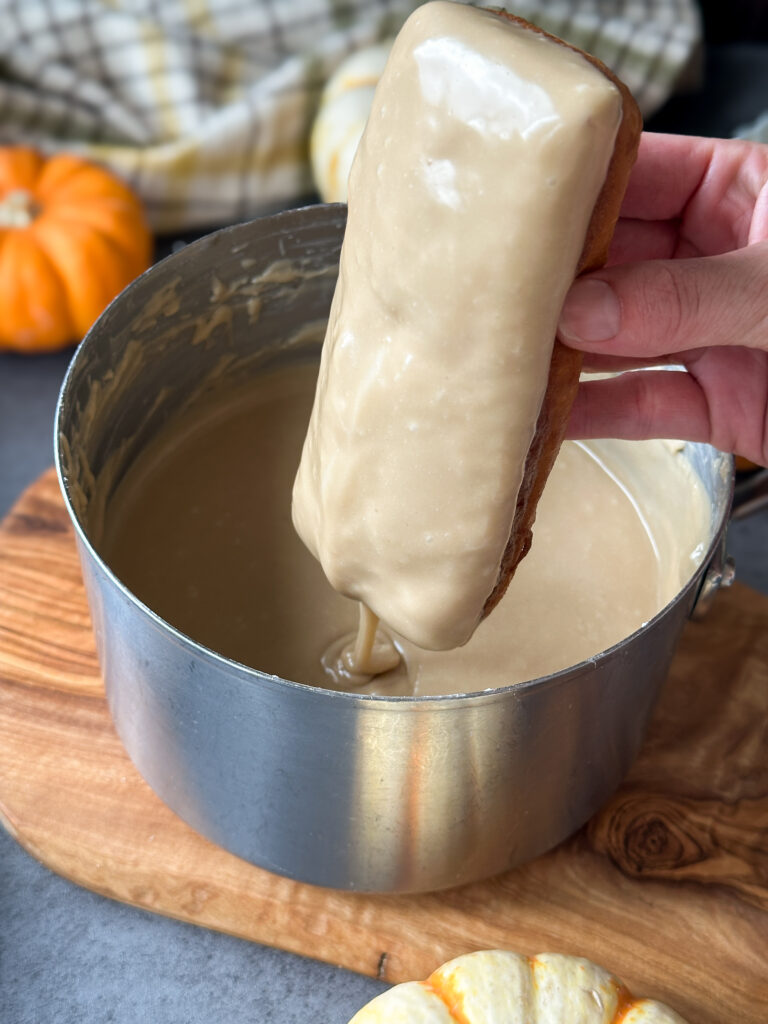
Note for icing: If the glaze starts to get too thick, gently warm for a minute on the stove and whisk until the glaze is smooth again. Resume glazing the donuts until all of them are topped.
Yields 12 donut bars
HOw to Store
Room Temperature: These are best served fresh, but you can store in a single layer in an airtight container for enjoying the next day.
FAQ’S
Tangzhong is a mixture of flour and milk that is cooked before being added to the dough. It allows the dough to hold onto more moisture, giving the finished maple bars an especially soft, fluffy texture.
Yes! After shaping, cover and refrigerate overnight. Let come to room temp and finish proofing before baking.
Yes! Swap it 1:1 (2 1/4 tsp or 7g). Bloom the active dry yeast first by mixing it with the milk from the recipe and a pinch of the sugar. Make sure you warm the milk first in the microwave until warm to touch. Add the yeast and whisk, then let it sit 5–10 minutes until foamy, then add it in with the wet ingredients and continue as written. The dough may take slightly longer to rise (about 15–30 minutes more), but the texture will still be soft and fluffy.
Keep the frying oil around 350°F. Oil that is too cool can make the maple bars greasy, while oil that is too hot can brown the outside before the center is fully cooked.
Yes, use a round donut cutter and cut out your donuts and proof and fry as directed.
For this recipe you’ll need to use pumpkin puree not pumpkin pie filling. Pumpkin pie filling has added ingredients that will change the end result of the donut/
If you loved this recipe, drop a comment and leave a star review and don’t forget to checkout more of my sourdough donut recipes!
Sourdough Donut Recipes:
- Sourdough Maple Bars
- Sourdough Apple Pie Donuts
- Sourdough Pumpkin Donuts (with brown sugar maple glaze)
- Sourdough Apple Fritters
- Sourdough Apple Cider Donuts
Sourdough Pumpkin Maple Bars
Ingredients
Sweet Levain:
- 2 (25g) Tbsp active sourdough starter
- 1 1/2 (20g) Tbsp granulated sugar
- ¾ (100g) cup all-purpose flour
- ⅓ (80g) cup water
Tangzhong:
- 2 (20g) Tbsp all-purpose flour
- ⅓ (100g) cup whole milk
Pumpkin Donut Dough:
- All of the tangzhong
- ¾ (200g) cup active sweet levain
- 3 (50g) Tbsp whole milk lukewarm
- 2 (25g) Tbsp water
- ¾ (175g) cup pumpkin purée
- ¼ (50g) cup granulated white sugar
- 1 large egg
- 1 tsp vanilla extract
- ¼ (57g) cup unsalted butter softened
- 4 (500g) cups all-purpose flour
- 1½ (10g) tsp fine sea salt
- 1½ tsp ground cinnamon
- ¼ tsp ground nutmeg
- ¼ tsp ground ginger
Sourdough Discard Swap:
- 3/4 (200g) cup sourdough discard
- 2 1/4 (7g) tsp instant yeast see FAQ for active dry yeast
Brown Sugar Maple Glaze:
- ¼ (57g) cup unsalted butter
- ½ (100g) cup brown sugar
- 3 (60g) Tbsp pure maple syrup
- 1¾ (225g) cups powdered sugar sifted
- 1½ tsp maple extract
- ½ tsp vanilla extract
- ⅛ tsp fine sea salt
- ¼ (60g) cup heavy cream or half-and-half
For Frying:
- 3-4 cups organic coconut frying oil or you can also use any neutral frying oil
Instructions
Step 1: Make the Sweet Levain (Night Before)
- In a clean jar, mix your mother starter with the flour, water, and sugar. Give it a good stir, and allow it to rest at room temperature (optimally 73-75 degrees F). I like to mark the volume in my jar with a rubber band so it’s easy to asses the rise the next morning. When the sweet levain has doubled in size, it’s time to mix your donut dough.2 (25g) Tbsp active sourdough starter, 1 1/2 (20g) Tbsp granulated sugar, ¾ (100g) cup all-purpose flour, ⅓ (80g) cup water
- Sourdough Discard Option: If you make this recipe with discard and yeast, skip this step.
Step 2: Make the Tangzhong
- Before you get started on mixing your dough, you’ll make your tangzhong. Whisk milk and flour together in a small saucepan.2 (20g) Tbsp all-purpose flour, ⅓ (100g) cup whole milk
- Cook the tangzhong over medium/low heat, stirring constantly, until it thickens into a paste that is similar to pudding (about 2–3 minutes). For precision, use your digital thermometer and heat to 148-155 F. Do not overheat the tangzhong, or your mixture will be too thick.
- Scrape the tangzhong into a bowl immediately to prevent it from overcooking, cover it loosely, and let cool to room temperature before adding to your dough.
Step 3: Mix the Dough
- In a stand mixer fitted with a dough hook or large mixing bowl, add the whole milk, sweet levain, egg, sugar, vanilla, pumpkin puree, all of the tangzhong, cinnamon, ginger, and nutmeg.All of the tangzhong, ¾ (200g) cup active sweet levain , 3 (50g) Tbsp whole milk, 2 (25g) Tbsp water, ¾ (175g) cup pumpkin purée, ¼ (50g) cup granulated white sugar, 1 large egg, 1 tsp vanilla extract, 1½ tsp ground cinnamon, ¼ tsp ground ginger, ¼ tsp ground nutmeg
- Whisk ingredients together quickly, it’s okay if it’s lumpy.
- Sourdough Discard Option: If you're making this recipe with discard and yeast, add the discard and instant yeast instead of the sweet levain to the wet ingredients and whisk in.3/4 (200g) cup sourdough discard, 2 1/4 (7g) tsp instant yeast
- Add your flour and salt into your wet ingredients.4 (500g) cups all-purpose flour, 1½ (10g) tsp fine sea salt
- Mix the dough on low until a shaggy dough forms, about 2-3 minutes. Scrape down the bowl if needed. If you’re using your hands, knead the dough until it comes together.
- This is a higher hydration dough from the pumpkin, so be aware it will be sticky!
- Once the dough has come together, add the softened butter a tablespoon at a time mixing each tablespoon in until adding the next.¼ (57g) cup unsalted butter
- Use a dough scraper to scrape the edges of the bowl to make sure everything is getting mixed in.
- Continue mixing the dough on medium-low (speed 2–3) for 8–10 minutes, until the dough is smooth, elastic, and tacky but not sticky.
- If you’re mixing by hand knead the dough until the butter has fully been incorporated, and the dough is smooth and tacky.
- Mixing Notes: If kneading the dough in a mixer or if dough is very wet when mixing by hand, add an additional 25 grams (3 Tablespoons) of flour and mix into dough. Make sure to work flour in completely and assess if you need more flour.
- Do not add more than 50 grams of flour at this stage, or you will lose the high hydration of the dough and end up with a dense donut.
- If using a stand mixer, dough can become more warm and sticky and I have found kneading dough with my hand (perform a set of stretch and folds) for a minute after mixing in my stand mixer really helps bring the dough together.
Step 4: Bulk Fermentation
- Spray a clean bowl with oil. Shape the dough into a smooth ball and place it in the bowl. Cover the bowl with plastic wrap.
- Stand mixer directions: perform one set of stretch and folds after 30 minutes to strengthen your dough.
- Hand mixing directions: perform 3 sets of stretch and folds at 30 minute intervals at the beginning of bulk fermentation. After stretch and folds are completed, cover dough and allow to continue proofing.
- Sourdough Discard Option: After the 20 minute rest, knead the dough by hand for a minute or two to get the dough even softer and to work the gluten. Once you've finished this kneading step, cover the bowl again.
- Let the dough rise at 75–80°F until doubled in size, this takes about 5–6 hours. If your house is very cold, you can put dough in the oven with the light on for a warmer atmosphere. This proofing time is a general guide, this process may take longer the key is to assess when the dough has nearly doubled that’s when it’s ready.
- Sourdough Discard Option: Allow the dough to rest about 1 1/2 hours at room temperature and the dough is ~75–90% risen. You don't want this dough to proof double fully at this rising point. If the dough proofs sooner than the time I mentioned, shape it. You want to watch the dough to make sure it doesn't overproof at this stage!
- Overnight Fermentation: Once the dough has finished rising, you can cover and transfer to the refrigerator overnight for a longer ferment or you can skip this step and go straight to making your donuts.
Step 5: Shape the Donuts
- Flour your work surface. Turn out the dough on your work surface and flour the top and the rolling pin to avoid sticking. Flouring is key to a clean transfer, don’t skip it.
- Roll the dough into a 12 × 10-inch rectangle, approximately ¾ inch thick. Trim the edges if needed to create a clean rectangle.
- Cut the rectangle in half lengthwise to create two 5-inch long rows. Cut each row crosswise into six 2-inch wide pieces. You should have 12 maple bars approximately 5 × 2 inches each.
- Place each maple bar onto an individual square of parchment paper about 7×4 inches. This makes it easier to transfer the delicate proofed dough into the hot oil without deflating it. Transfer to baking sheets to proof.
Step 6: Final Proof
- Cover bars loosely with plastic sprayed with cooking oil and let them rise at room temperature for 1-2 hours, or until puffy and jiggly.
- When poked gently with a fingertip, the dough should spring back slowly, not immediately. Because this dough has the tangzhong to provide stability to the dough, you can push your final proof a little longer to get a really airy donut.
- Sourdough Discard Option: The second rise will be faster if you used discard and yeast, allow the donuts to proof about 45 minutes to an hour and then fry them. Avoid over proofing or you'll end up with air pockets.
Step 7: Fry the Donuts
- Line a cooling rack with paper towels. Fit your candy thermometer into your deep pot. Transfer 3–4 cups of organic coconut oil (or any neutral oil) to a deep pot or Dutch oven, and heat to 350°F on medium heat.3-4 cups organic coconut frying oil
- If the oil gets hotter than this, reduce the heat accordingly. Watch your temperatures very closely and adjust your heat as needed to avoid burning donuts.
- When the oil is ready, transfer 2 donuts with parchment paper into oil (you can remove paper with tongs when it separates).
- Fry each donut 30 seconds at a time per side, flipping donuts gently using chopsticks or a slotted spoon. I repeat this step a few times rotating the donuts to avoid burning one side.
- Remove after frying 2-3 minutes with a slotted spoon or spider spoon and the donuts are a golden brown.
- Transfer to a rack lined with paper towels to cool and to let the oil drip off.
- Repeat this step until all donuts have been fried. Allow the donuts to cool while you prepare the maple glaze.
Step 8: Glaze the Donuts
- Melt the butter in a small saucepan over medium low heat for the glaze. Add the dark brown sugar and maple syrup and stir until smooth.¼ (57g) cup unsalted butter, ½ (100g) cup brown sugar, 3 (60g) Tbsp pure maple syrup
- Once the mixture reaches a gentle bubble, cook for about 2-3 minutes, stirring constantly, until the brown sugar is dissolved. It’s very important to make sure the brown sugar has fully melted or the glaze will be grainy.
- Remove the glaze from the heat and allow it to cool for a few minutes; check and make sure the sugar has dissolved. If you see any gritty grains of sugar, transfer back to the stove and cook a few more minutes.
- Make sure the glaze cools slightly before you proceed.
- Whisk in the sifted powdered sugar (this is key to a smooth glaze to sift it), maple extract if you’re using it, vanilla, and salt.1¾ (225g) cups powdered sugar, 1½ tsp maple extract, ½ tsp vanilla extract, ⅛ tsp fine sea salt
- This glaze will be really thick; add the heavy cream slowly and whisk it gently until it’s smooth and the desired consistency. You may need less or more cream so go slow when you’re adding it.¼ (60g) cup heavy cream
- The glaze should fall from the whisk in a thick ribbon and slowly settle back into itself rather than running like a thin icing.
- Dip the tops of the slightly warm maple bars into the warm glaze. Return them to the wire rack and allow the glaze to set before serving.
- Note for icing: If the glaze starts to get too thick, gently warm for a minute on the stove and whisk until the glaze is smooth again. Resume glazing the donuts until all of them are topped.
- Yields 12 donut bars