Sourdough Italian Herb and Cheese Bread (Subway Copycat)
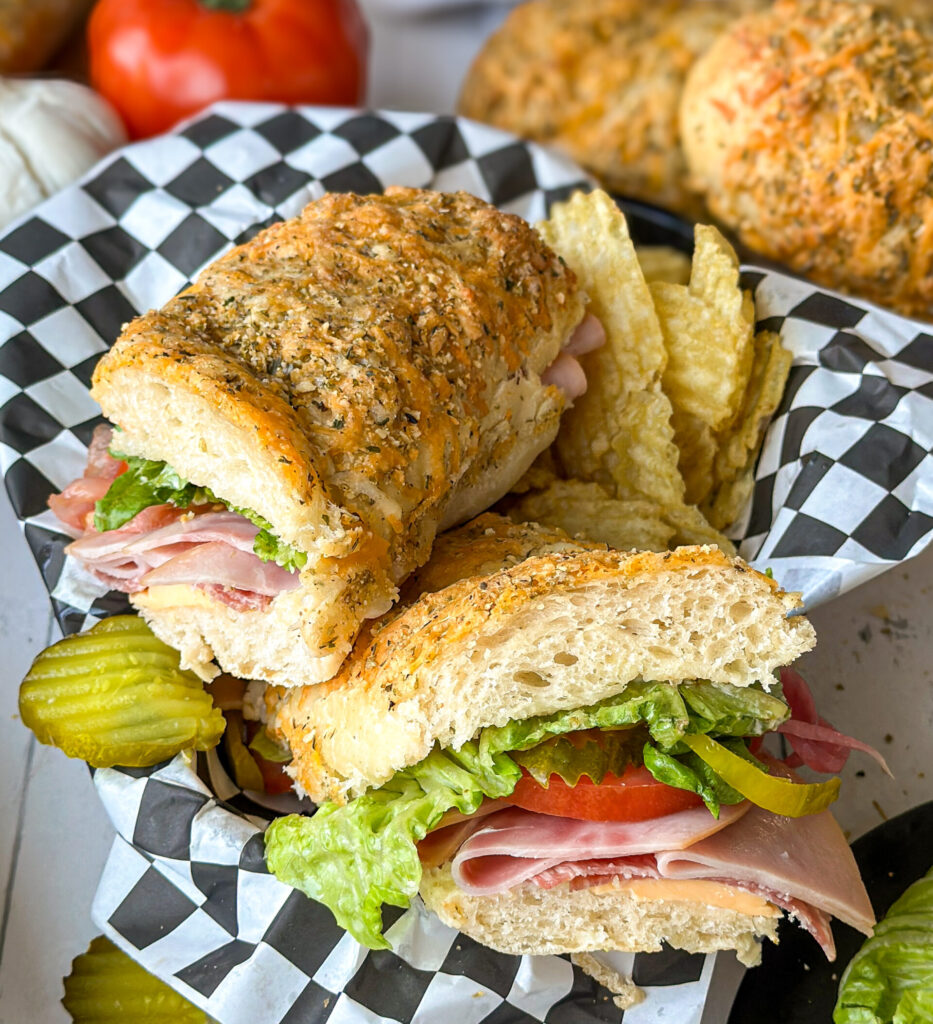
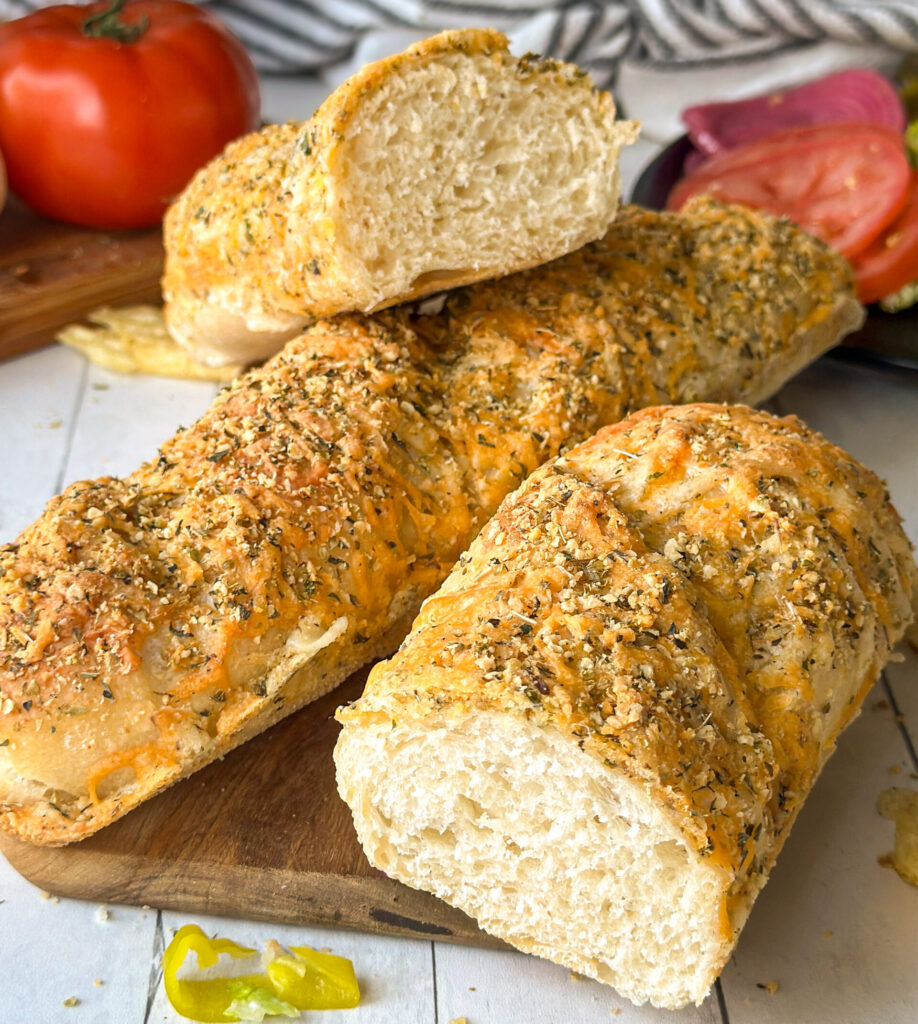
If you love Subway’s Italian Herb & Cheese sandwich rolls, wait until you try this sourdough version. This Sourdough Italian Herb and Cheese Bread (Subway Copycat) is incredibly soft, packed with savory herbs, topped with melty cheese, and has the perfect structure for everything from deli sandwiches to meatball subs. This recipe is on repeat in my house, and I know it will be in yours too.
Why You’ll Love This Recipe
- Subway copycat: All the flavor of the famous Italian Herb and Cheese Bread, made with sourdough.
- Soft and fluffy: Tender bakery style rolls with the perfect sandwich structure for all your favorite fillings.
- Same day friendly: You can make this recipe in a single day or ferment the dough overnight based on your needs and schedule.
- Perfect for sandwiches: This bread is perfect for deli subs, meatball sandwiches, and more!
- Easy to make: This recipe is easy to make and shape, and I’ve included photos of each step to make it that much more approachable if you’re new to baking.
Tools You’ll Need:
- Large mixing bowl or stand mixer bowl- for mixing your dough.
- Stand Mixer (optional)- for mixing dough.
- Digital kitchen scale (optional)– for accurate measuring, especially helpful with sourdough baking. I linked the one I like here.
- Measuring cups and spoons– for measuring ingredients.
- Whisk- to combine ingredients.
- Small Bowl- to mix garlic cheese mixture.
- Bench Knife- to cut dough into desired sizes. I love this one linked here.
- Pastry Brush- to brush bread with egg wash (you can also use a folded paper towel).
- Silicone Bread Molds (optional)- I used this silicone sandwich mold liner for shaping my bread and helping it turn out perfectly. You can skip this if you prefer and just use a parchment lined sheet.
- Bread Lame (or sharp knife)- to score the bread (you can skip this step if you want).
- Baking Sheets- for baking the bread.
- Parchment Paper- for lining the baking sheet if you don’t use the silicone bread molds.
Gather Your Ingredients:
- Cultured Sourdough Starter- A strong sourdough starter is key to making this bread. It should be recently fed and refreshed to use in this recipe.
- Eggs– Enriches the dough and helps bind the dough together and needed for the egg wash.
- Whole milk– Adds moisture and tenderness to the dough for that classic sub texture.
- Water- adding water to the dough helps lighten the crumb.
- Bread flour– Provides structure and stability. You can substitute all-purpose flour but I like the chew bread flour gives the bread.
- Sea salt– Enhances the overall flavor of the bread.
- Avocado Oil- Makes the rolls extra soft. You can substitute for any neutral oil.
- Granulated sugar– A bit of sugar balances the dough and gives a golden finish.
- Garlic powder, onion powder, and Italian seasoning- adds savory flavor to the cheese topping and dough.
- Dried Parsley- added to the cheese blend to enhance the seasonings.
- Shredded Sharp Cheddar- baked on top of the bread for that classic cheese flavor.
- Shredded Monterey Jack (optional)- adds extra flavor to the cheese topping. You can substitute this for more sharp cheddar.
- Parmesan- finely-grated parmesan is added to the cheese blend on top of the bread for extra flavor and crunch.
Instructions
Step 1: Mix the Dough
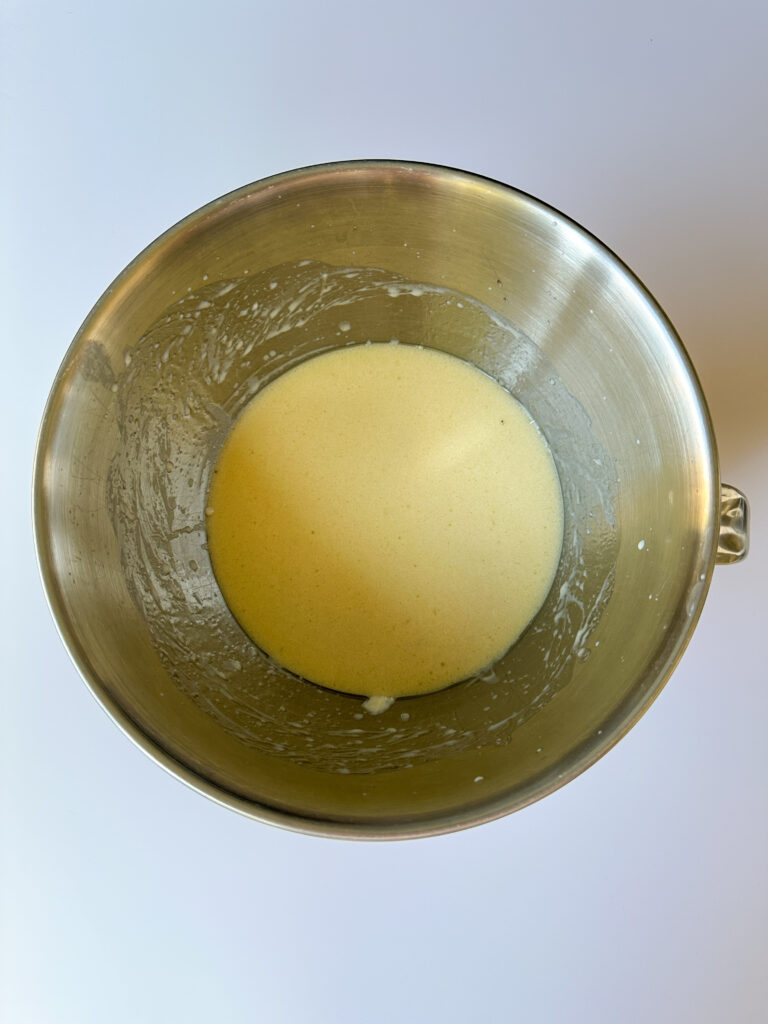
In your stand mixing bowl or a large mixing bowl, add the active sourdough starter, egg, milk, warm water (about 80 degrees), sugar, and oil to the bowl of a stand mixer. Give everything a whisk, it’s okay if it’s still a little lumpy.
After you combine the wet ingredients, add the bread flour, salt, garlic powder, and onion powder to the bowl.
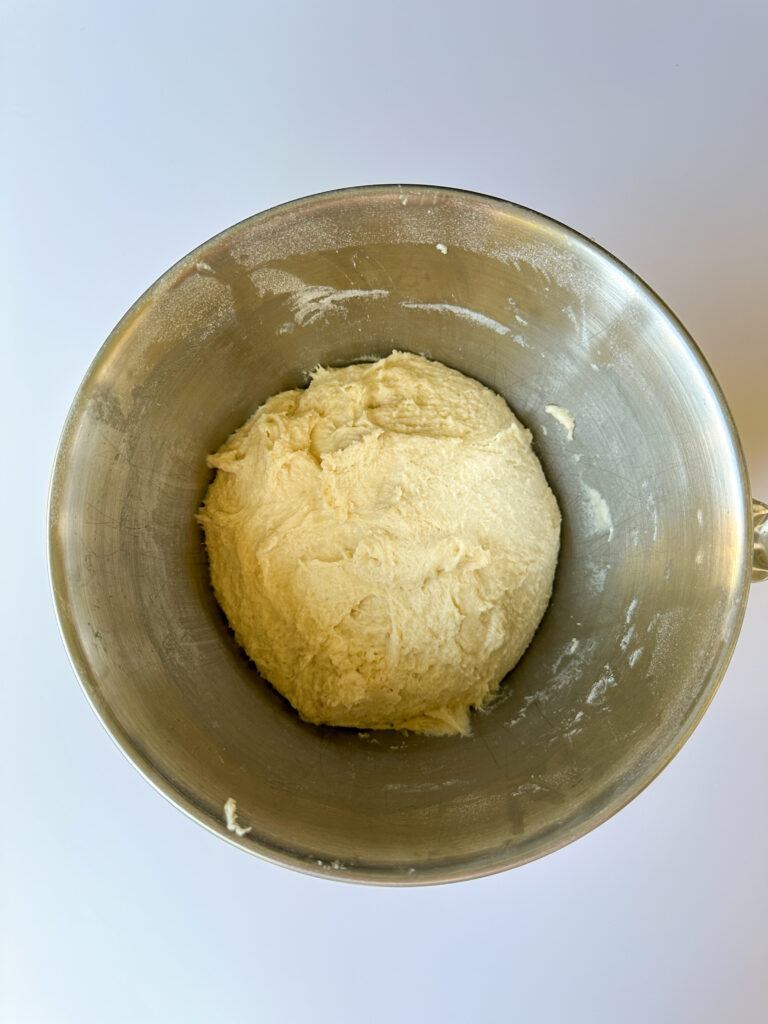
Mixing by hand: If you’re mixing this dough by hand, mix and knead the dough together until it’s a smooth ball. This should take about 6-8 minutes.
Mixing with a stand mixer: If you’re using a stand mixer, knead the dough on the lowest setting for 8-10 minutes, scraping the bowl halfway through to make sure everything is incorporated.
Once the dough is mixed, grease a bowl or container large enough for the dough to double with cooking spray and transfer the dough to the container. Cover the dough with plastic or a lint-free towel, and allow the dough to rest 30 minutes.
Step 2: Stretch and Folds and Bulk Fermentation
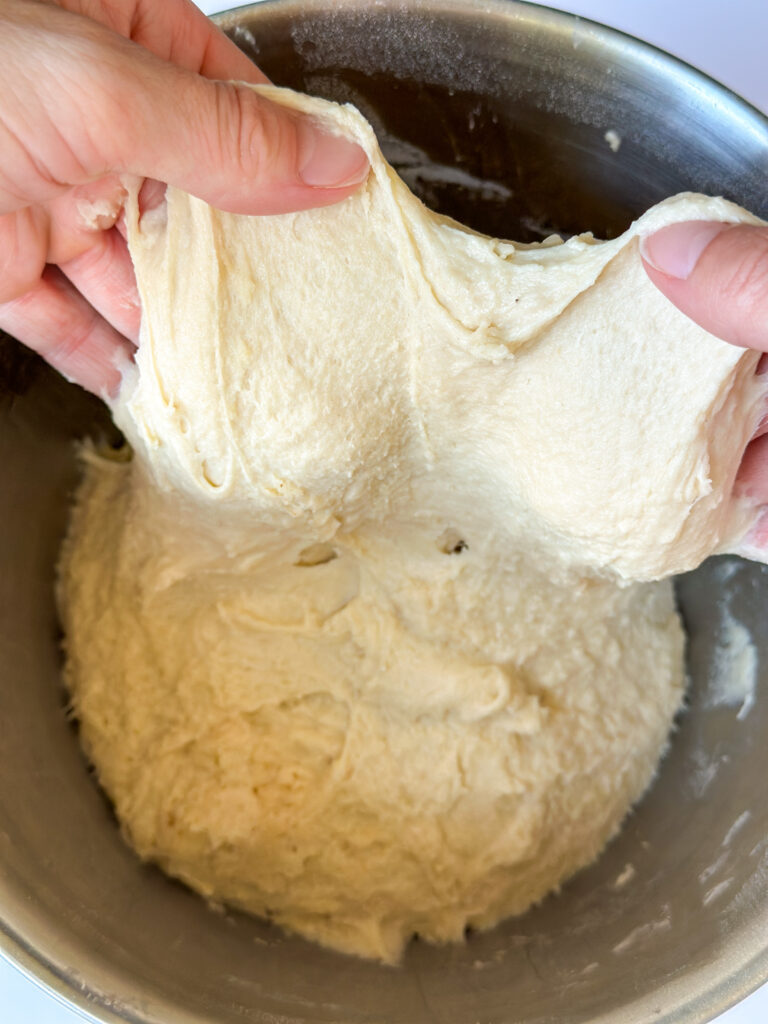
Once the 30 minute rest has finished, you’ll begin your stretch and folds. This helps build structure in your dough and strengthen the gluten.
How to do a stretch and fold: Starting at the edge of the dough with lightly wet hands, gently lift one edge of the dough, stretch it up, and fold it over the center. Rotate the bowl or container 90 degrees and repeat with the next side. Do this for all four sides of the dough to form a ball.
Cover the dough and let it rest for 30 minutes. Repeat this stretch-and-fold process one more time at 30-minute intervals for a total of 2 sets. Your dough should be smooth and silky after the stretch and folds.
Note on Temperature: Your dough loves a warmer climate, so aim to keep your dough between 73-78 degrees (you can use your digital thermometer to check the temperature). If you need to warm it up, try putting it in the oven with a light on, near a heater, or even on top of a dryer that’s on to conduct some heat!
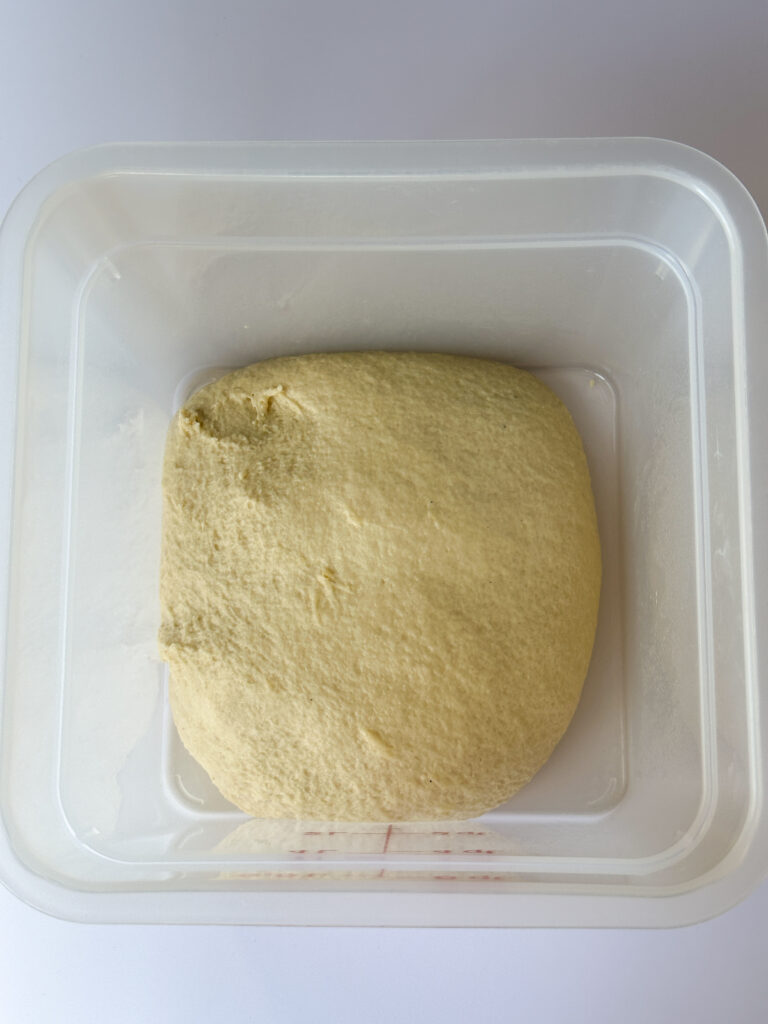
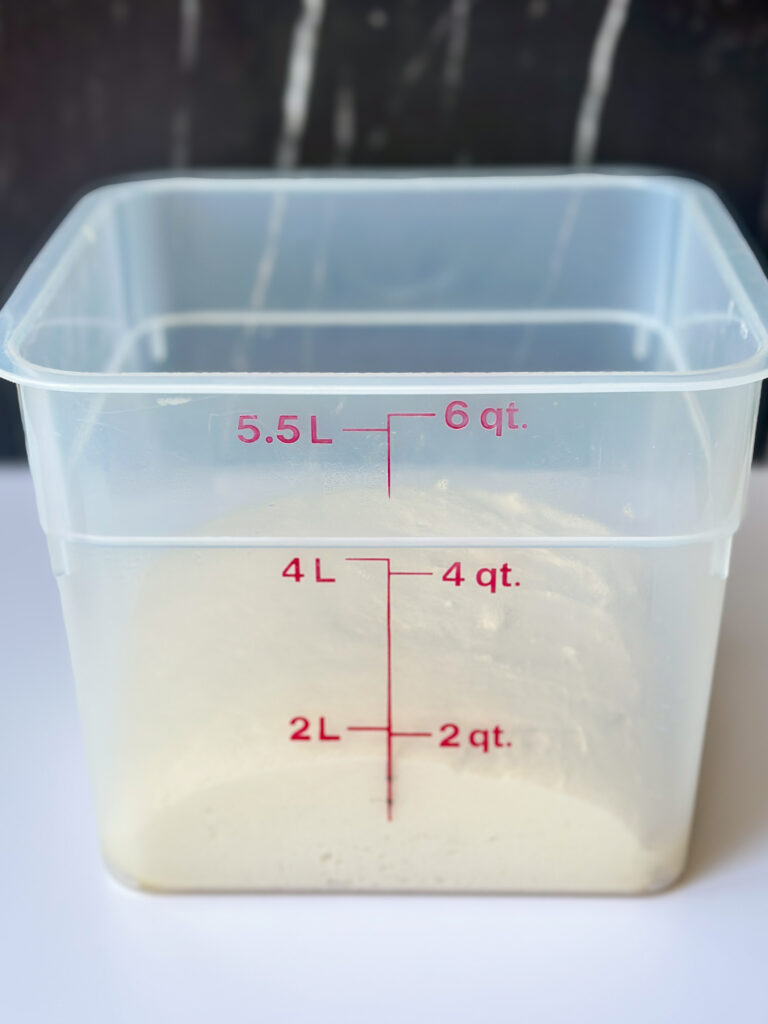
Cover the dough and allow it to rest in a warm spot until it has reached a 90 percent rise.
Optional Overnight Fermentation: If you want to extend the fermentation time on the dough or need to wait to shape the bread, cover the bowl well and transfer to the refrigerator and chill until you’re ready to shape the bread the next day.
Step 3: Shape the Bread
Overnight Chill: If your dough has chilled overnight, allow it to rest at room temperature for 30 minutes to take the chill off before shaping. Skip this step if the dough wasn’t chilled.
If you’re using the silicone bread mold, lay it out on a baking sheet and dust the top with flour to avoid the bread form sticking to the mat. If you are using baking sheets, line them with parchment paper and lightly spray with cooking oil.
Turn the dough onto a clean and lightly oiled or floured surface. Divide into 5 equal pieces (about 220g each).
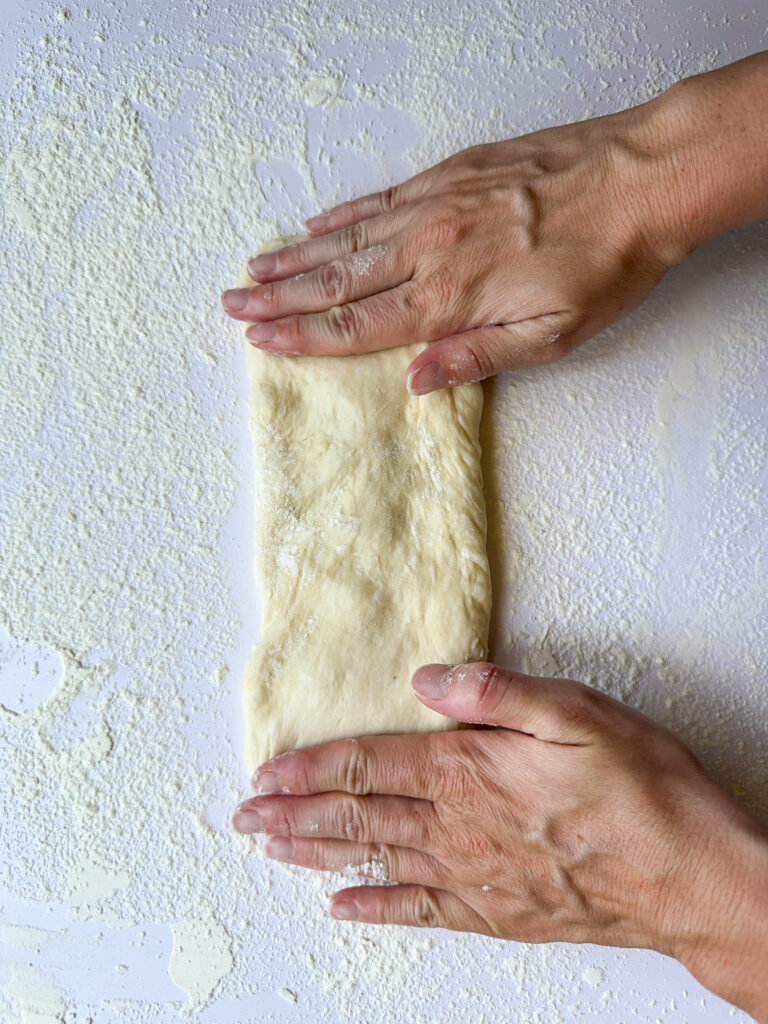
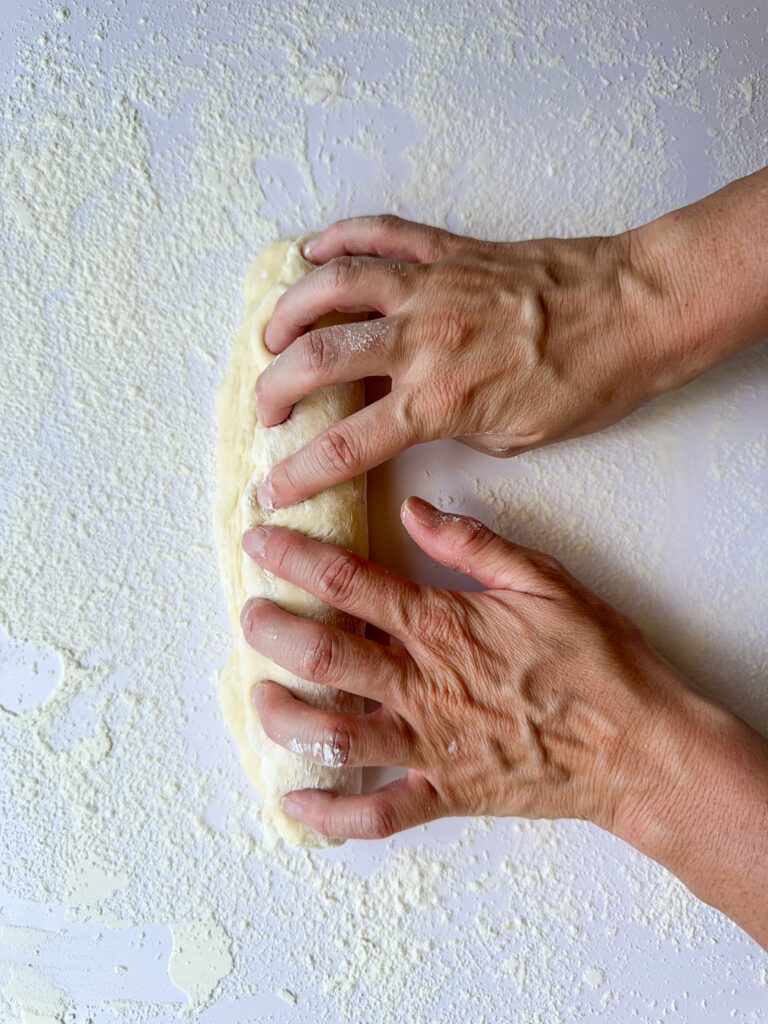
Working with one piece of dough at a time, gently stretch the dough into a rough rectangle, about 3 inches wide and 4 inches long. Roll the dough up tightly lengthwise, tucking as you go.
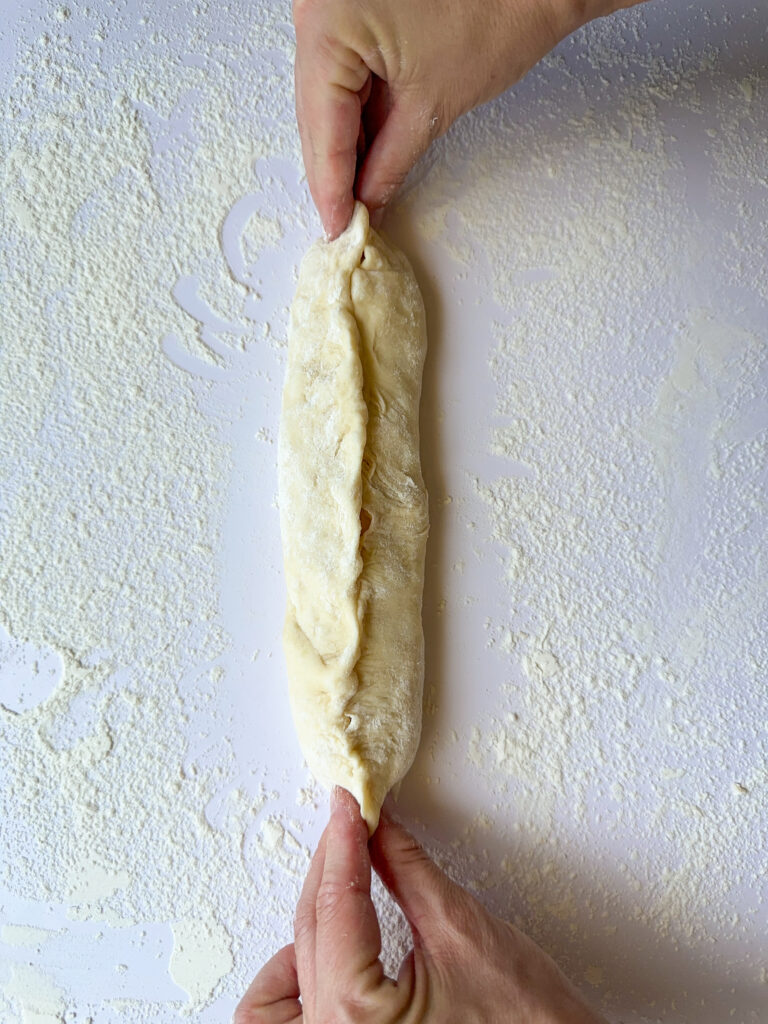
Place the seam side up and pinch the seam closed, then roll the dough over gently and taper and tuck the ends under to form a smooth long oval roll. Roll the dough gently to about 8 inches long.
Repeat with the remaining pieces until you have 5 rolls.
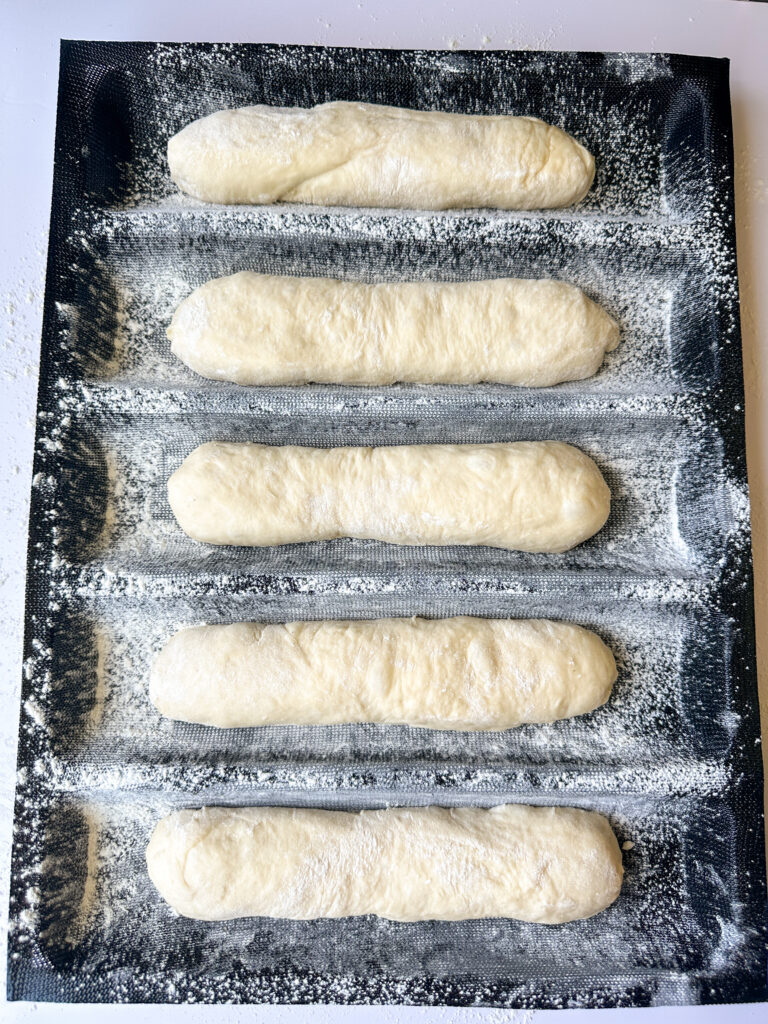
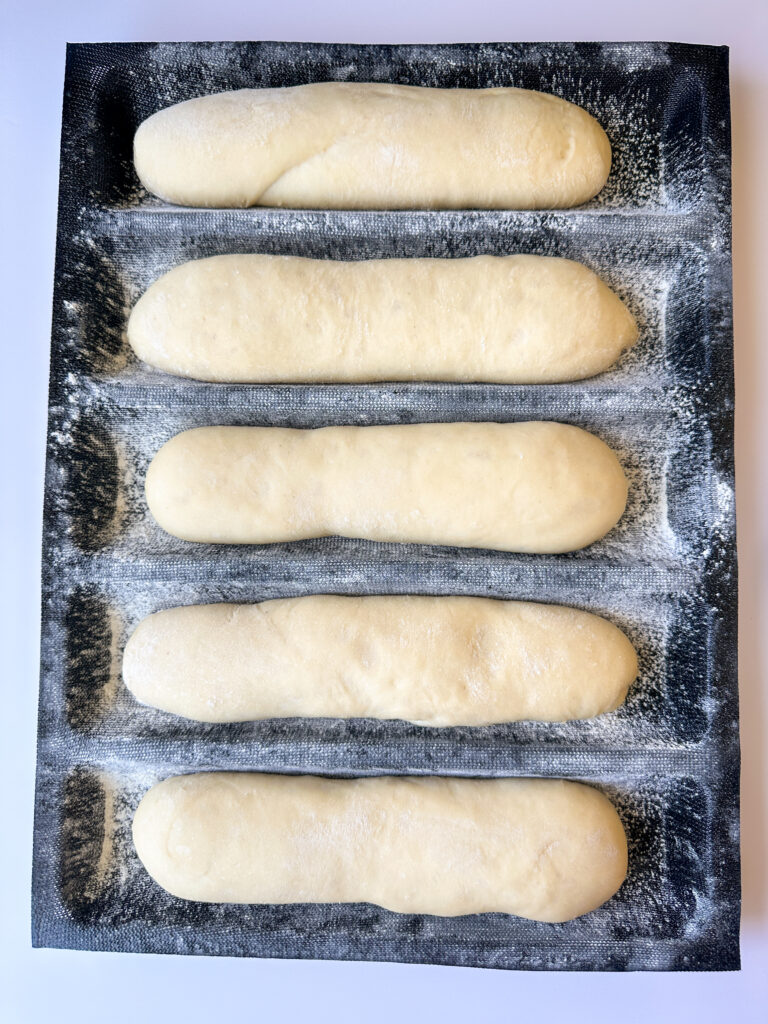
Transfer the rolls seam-side down onto the pan with the molds or a parchment-lined baking sheet to proof. Cover the rolls with a damp towel or plastic wrap.
Overnight Fermentation Option: If you want to shape and refrigerate the rolls to bake the next day, you can cover them with plastic and transfer them to the refrigerator at this point as long as you haven’t already refrigerated this dough once overnight. Proceed with the next step the following day.
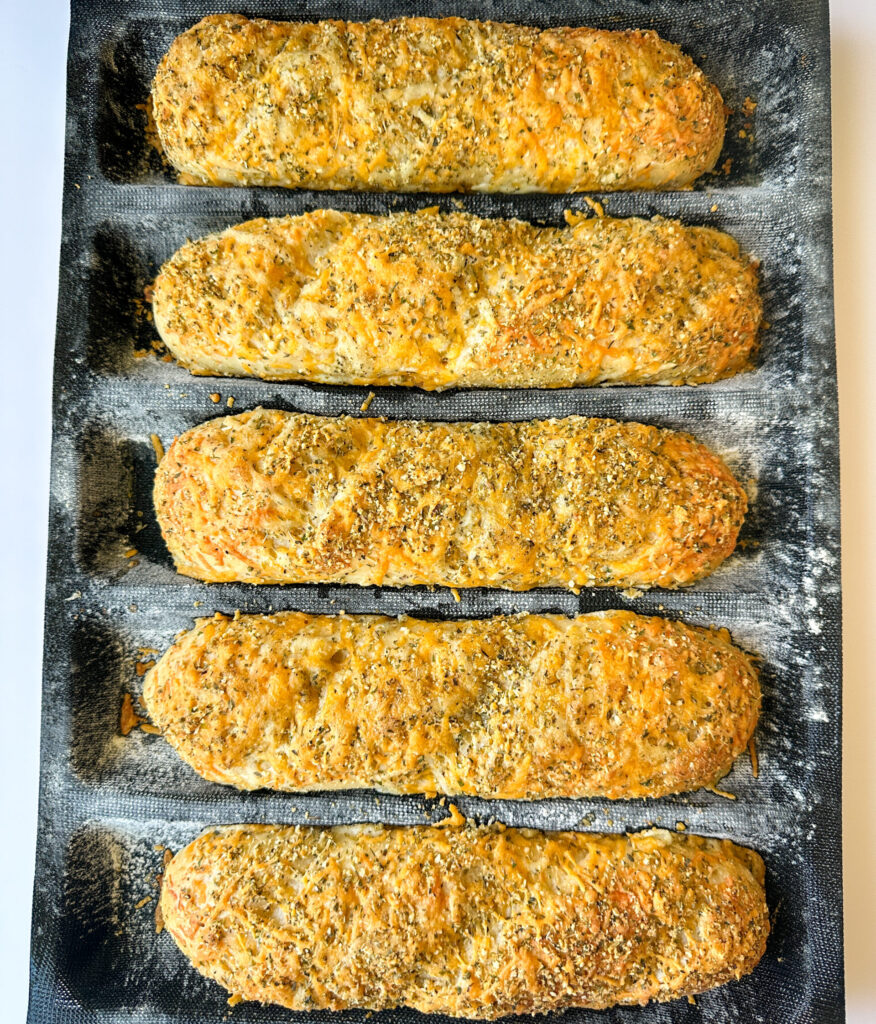
Allow the rolls to rise in a warm spot for 1 1/2 to 2 hours until puffy and jiggly. If you’re using the molds, the rolls should fill the molds side to side and come close to filling out the mold lengthwise.
Step 4: Top and Bake the Bread
Preheat the oven to 400°F (205°C).
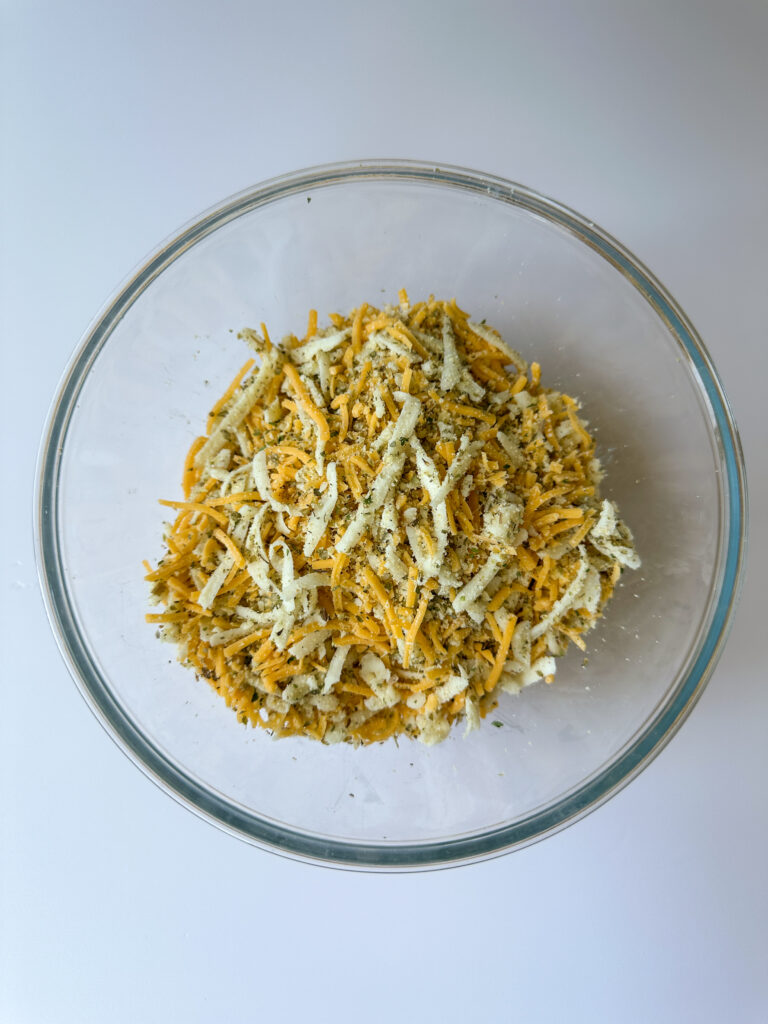
In a small bowl, combine the Italian seasoning, garlic powder, onion powder, dried parsley, finely grated parmesan, shredded sharp cheddar, and shredded Monterey Jack cheese (if using).
Beat one egg white with 2 teaspoons of water and set aside.
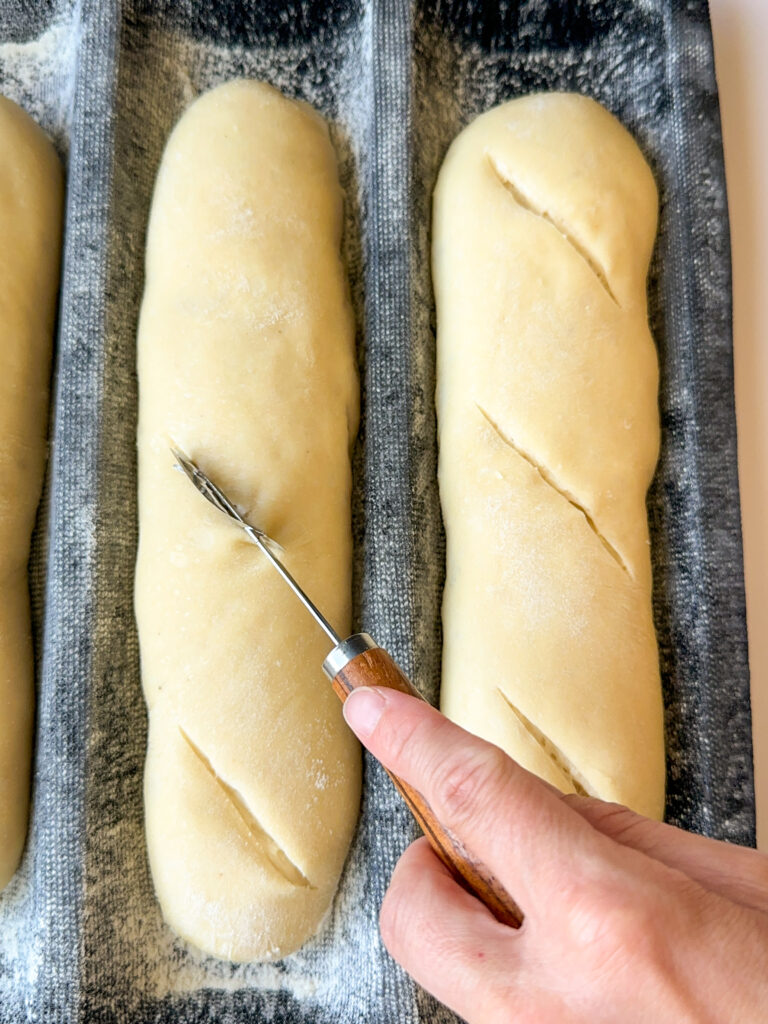
Using a bread lame or sharp knife, make three shallow diagonal slashes across the top of each roll.
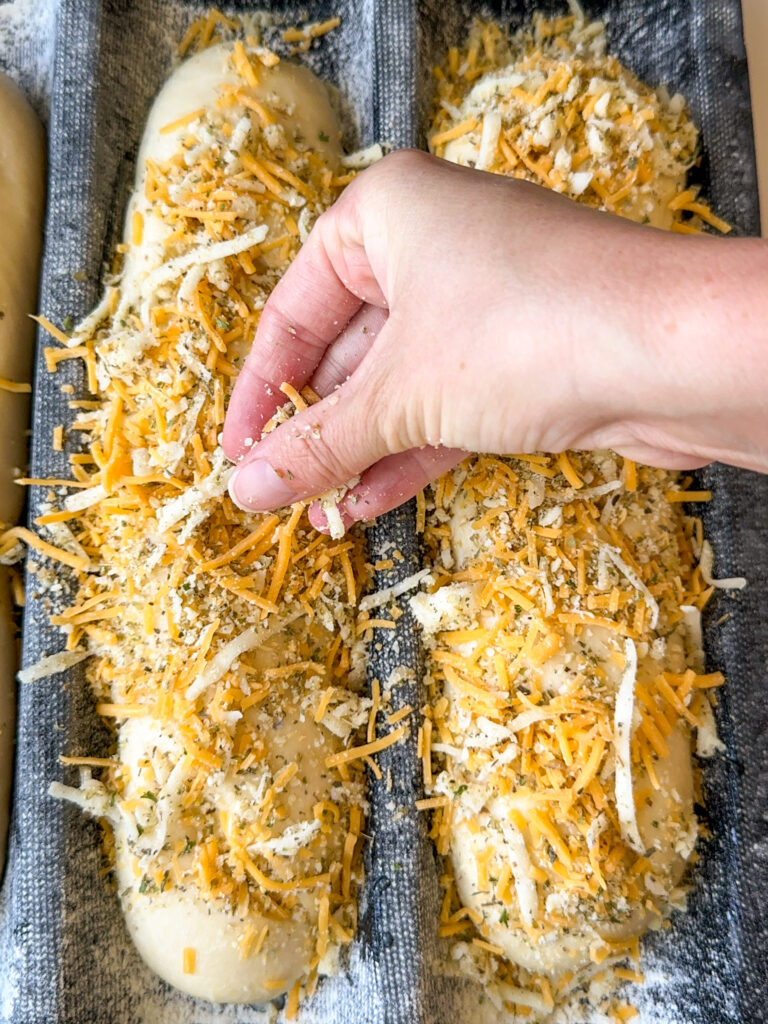
Brush the tops of the rolls with the egg white wash, and sprinkle all of the cheese and herb topping evenly over top of the five rolls.
Bake at 400°F (205°C) for 10 minutes. Reduce the oven temperature to 375°F (190°C) and continue baking for 15–20 minutes, or until deeply golden brown.
The internal temperature should reach 190–195°F (88–91°C).
Remove the rolls from the oven and allow to cool about 30 minutes. If you used the silicone baking molds, gently use a knife or spatula to remove the edges from the mat and transfer the bread to a cooling rack.
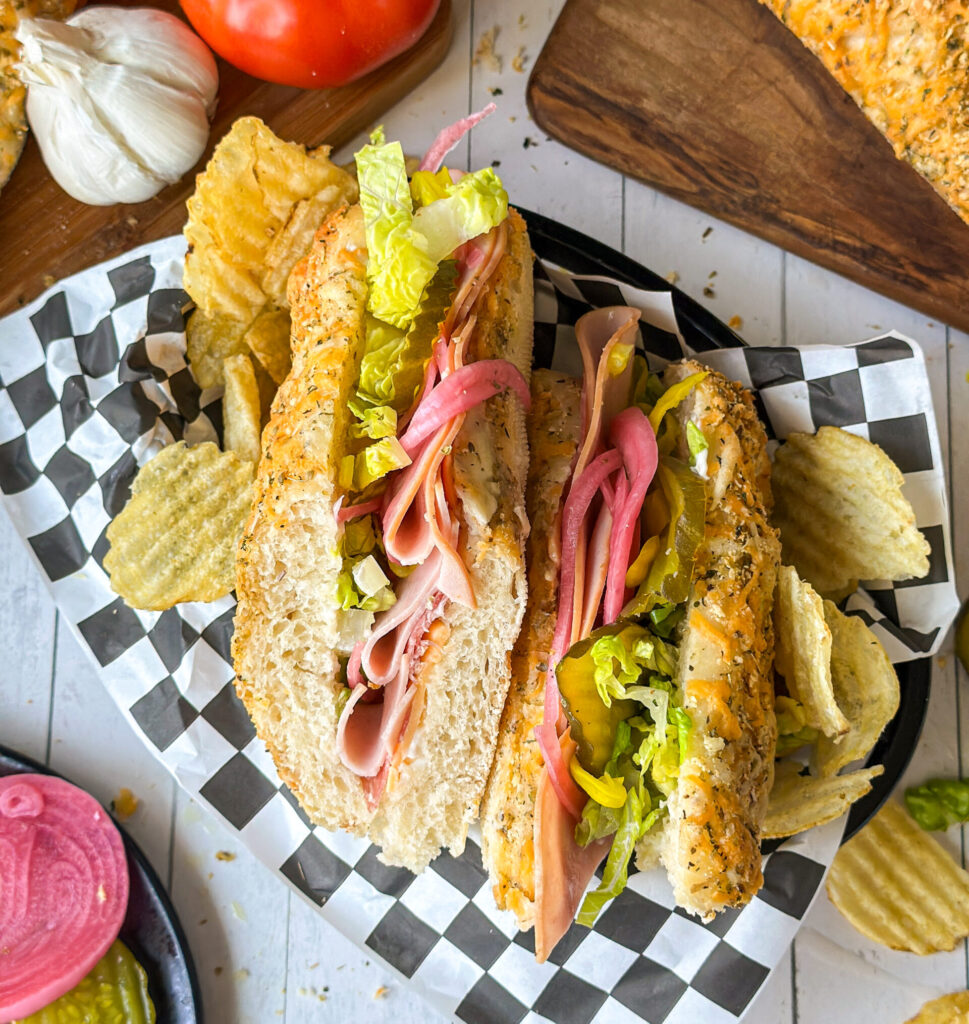
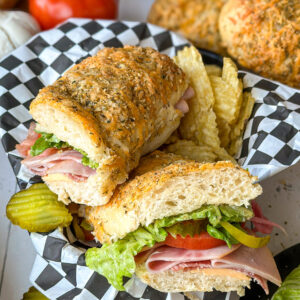
Once bread has cooled, slice and stuff with all of your favorite sandwich fixings. I used sliced ham, salami, American cheese, pickles, pickled red onions, tomatoes, and shredded lettuce to make the most unbelievable sandwich!
Yields 5 (225g) sub rolls

How to Store:
Room temperature: Store covered up to 3 days at room temperature.
Freezer: Up to 2 months tightly wrapped in plastic. Thaw overnight at room temperature. To reheat, warm at 300°F for 5–8 minutes for fresh-baked texture.
FAQ’S:
They’re perfect for Italian deli sandwiches, cheesesteaks, meatball subs, grilled sandwiches, French dips, and hoagies.
Absolutely. Freeze fully cooled rolls for up to 3 months.
For same-day success, use a very active, recently fed starter and keep the dough warm between 74-77 degrees F.
If you loved this recipe, drop a comment and leave a star review and don’t forget to checkout more of my yummy sourdough bread copycat recipes!
Sourdough Bread Copycat Recipes:
- Sourdough Cheesecake Factory Brown Bread
- Sourdough Rosemary Peasant Bread (Macaroni Grill Dupe)
- Sourdough Texas Roadhouse Rolls
Sourdough Italian Herb and Cheese Bread (Subway Copycat)
Equipment
- Large mixing bowl or stand mixer bowl – for mixing your dough.
- Stand mixer (optional) – for mixing dough.
- Digital kitchen scale (optional) – for accurate measuring, especially helpful with sourdough baking. I linked the one I like here.
- Measuring cups and spoons – for measuring ingredients.
- Whisk – to combine ingredients.
- Small Bowl – to mix garlic cheese mixture.
- Bench knife – to cut dough into desired sizes. I love this one linked here.
- Pastry brush – to brush bread with egg wash (you can also use a folded paper towel).
- Silicone Bread Molds (optional) – I used this silicone sandwich mold liner for shaping my bread and helping it turn out perfectly. You can skip this if you prefer and just use a parchment lined sheet.
- Bread Lame or sharp knife – to score the bread (you can skip this step if you want).
- Baking sheets – for baking the bread.
- Parchment paper – for lining the baking sheet if you don't use the silicone bread molds.
Ingredients
Dough:
- ¾ (200g) cup active sourdough starter
- 1 large egg
- ¾ (200g) cup whole milk
- ⅓ (100g) cup warm water 80 degrees
- ¼ (50g) cup white granulated sugar
- ¼ (55g) cup avocado oil or neutral oil
- 4¼ (510g) cups bread flour
- 2 (10g) teaspoons sea salt
- 1 teaspoon garlic powder
- ½ teaspoon onion powder
Herb & Cheese Topping:
- 2 tablespoons Italian seasoning
- 1 teaspoon garlic powder
- ½ teaspoon onion powder
- ½ teaspoon dried parsley
- 1 (115g) cup sharp cheddar cheese shredded
- ½ (55g) cup Monterey Jack cheese shredded
- 3 (15g) tablespoons finely shredded Parmesan cheese
Egg White Wash:
- 1 egg white
- 1 tablespoon water
Instructions
Step 1: Mix the Dough
- In your stand mixing bowl or a large mixing bowl, add the active sourdough starter, egg, milk, warm water (about 80 degrees), sugar, and oil to the bowl of a stand mixer. Give everything a whisk, it’s okay if it’s still a little lumpy.¾ (200g) cup active sourdough starter, 1 large egg, ¾ (200g) cup whole milk, ⅓ (100g) cup warm water, ¼ (50g) cup white granulated sugar, ¼ (55g) cup avocado oil
- After you combine the wet ingredients, add the bread flour, salt, garlic powder, and onion powder to the bowl.4¼ (510g) cups bread flour, 2 (10g) teaspoons sea salt, 1 teaspoon garlic powder, ½ teaspoon onion powder
- Mixing by hand: If you're mixing this dough by hand, mix and knead the dough together until it's a smooth ball. This should take about 6-8 minutes.
- Mixing with a stand mixer: If you're using a stand mixer, knead the dough on the lowest setting for 8-10 minutes, scraping the bowl halfway through to make sure everything is incorporated.
- Once the dough is mixed, grease a bowl or container large enough for the dough to double with cooking spray and transfer the dough to the container. Cover the dough with plastic or a lint-free towel, and allow the dough to rest 30 minutes.
Step 2: Stretch and Folds and Bulk Fermentation
- Once the 30 minute rest has finished, you’ll begin your stretch and folds. This helps build structure in your dough and strengthen the gluten.
- How to do a stretch and fold: Starting at the edge of the dough with lightly wet hands, gently lift one edge of the dough, stretch it up, and fold it over the center. Rotate the bowl or container 90 degrees and repeat with the next side. Do this for all four sides of the dough to form a ball.
- Cover the dough and let it rest for 30 minutes. Repeat this stretch-and-fold process one more time at 30-minute intervals for a total of 2 sets. Your dough should be smooth and silky after the stretch and folds.
- Note on Temperature: Your dough loves a warmer climate, so aim to keep your dough between 73-78 degrees (you can use your digital thermometer to check the temperature). If you need to warm it up, try putting it in the oven with a light on, near a heater, or even on top of a dryer that’s on to conduct some heat!
- Cover the dough and allow it to rest in a warm spot until it has reached a 90 percent rise.
- Optional Overnight Fermentation: If you want to extend the fermentation time on the dough or need to wait to shape the bread, cover the bowl well and transfer to the refrigerator and chill until you're ready to shape the bread the next day.
Step 3: Shape the Bread
- Overnight Chill: If your dough has chilled overnight, allow it to rest at room temperature for 30 minutes to take the chill off before shaping. Skip this step if the dough wasn't chilled.
- If you’re using the silicone bread mold, lay it out on a baking sheet and dust the top with flour to avoid the bread form sticking to the mat. If you are using baking sheets, line them with parchment paper and lightly spray with cooking oil.
- Turn the dough onto a clean and lightly oiled or floured surface. Divide into 5 equal pieces (about 220g each).
- Working with one piece of dough at a time, gently stretch the dough into a rough rectangle, about 3 inches wide and 4 inches long. Roll the dough up tightly lengthwise, tucking as you go.
- Place the seam side up and pinch the seam closed, then roll the dough over gently and taper and tuck the ends under to form a smooth long oval roll. Roll the dough gently to about 8 inches long.
- Repeat with the remaining pieces until you have 5 rolls.
- Transfer the rolls seam-side down onto the pan with the molds or a parchment-lined baking sheet to proof. Cover the rolls with a damp towel or plastic wrap.
- Overnight Fermentation Option: If you want to shape and refrigerate the rolls to bake the next day, you can cover them with plastic and transfer them to the refrigerator at this point as long as you haven't already refrigerated this dough once overnight. Proceed with the next step the following day.
- Allow the rolls to rise in a warm spot for 1 1/2 to 2 hours until puffy and jiggly. If you’re using the molds, the rolls should fill the molds side to side and come close to filling out the mold lengthwise.
Step 4: Top and Bake the Bread
- Preheat the oven to 400°F (205°C).
- In a small bowl, combine the Italian seasoning, garlic powder, onion powder, dried parsley, finely grated parmesan, shredded sharp cheddar, and shredded Monterey Jack cheese (if using).2 tablespoons Italian seasoning, 1 teaspoon garlic powder, ½ teaspoon onion powder, ½ teaspoon dried parsley, 1 (115g) cup sharp cheddar cheese, ½ (55g) cup Monterey Jack cheese, 3 (15g) tablespoons finely shredded Parmesan cheese
- Beat one egg white with 2 teaspoons of water and set aside.1 egg white, 1 tablespoon water
- Using a bread lame or sharp knife, make three shallow diagonal slashes across the top of each roll.
- Brush the tops of the rolls with the egg white wash, and sprinkle all of the cheese and herb topping evenly over top of the five rolls.
- Bake at 400°F (205°C) for 10 minutes. Reduce the oven temperature to 375°F (190°C) and continue baking for 15–20 minutes, or until deeply golden brown.
- The internal temperature should reach 190–195°F (88–91°C).
- Remove the rolls from the oven and allow to cool about 30 minutes. If you used the silicone baking molds, gently use a knife or spatula to remove the edges from the mat and transfer the bread to a cooling rack.
- Once bread has cooled, slice and stuff with all of your favorite sandwich fixings. I used sliced ham, salami, American cheese, pickles, pickled red onions, tomatoes, and shredded lettuce to make the most unbelievable sandwich!
- Yields 5 (225g) sub rolls
This sammy is delicious 😋
Much better than Subway!
This recipe is DIVINE! Perfect instructions, it’s impossible to mess up. The subs came out so perfect, my family is obsessed!
Hi Tori, so happy this recipe was easy and well loved 🙂
Need some advice…
I made these recently and the dough was very wet after I kneaded in a stand mixer. I went through the rest of the process thinking that the stretch and folds might help, but it remained that way and was too wet to shape. I do live in a humid climate. Should I reduce the liquid? Thanks in advance!
Hi Jeana, humidity will certainly affect the dough. I would add an additional 25-50g slowly of flour and wait for the dough to resemble the photos.
Thanks! I’ll give that a try. I still baked the original batch and my husband loved them. He is a Subway fan so that says a lot. 😁
Made them again and the extra flour worked perfect. Thank you! Husband approved! 😁
Hi Jeana, glad they were a success and you loved them!
Let me say these are flavor bombs! OMG, so delicious! Fair warning!
Hi Mandy! Thank you for your comment, so happy you loved this recipe!
These are perfect! Much better than subway.
Easy to make and so delicious! Obsessed!
So I made half of the recipe I did mess up by adding in the full hundred grams of water by fix up by adding in some extra flour and I actually made a five big subs and all very surprised they didn’t have all the cheese you asked for I just use cheddar the same amount of seasonings that you recipe called for and so far so good and they look amazing. Can’t wait till I actually try the full recipe and I think I will probably get more than five and I weighed them each about 175 g each before baking.