Sourdough Cinnamon Raisin Swirl Loaf
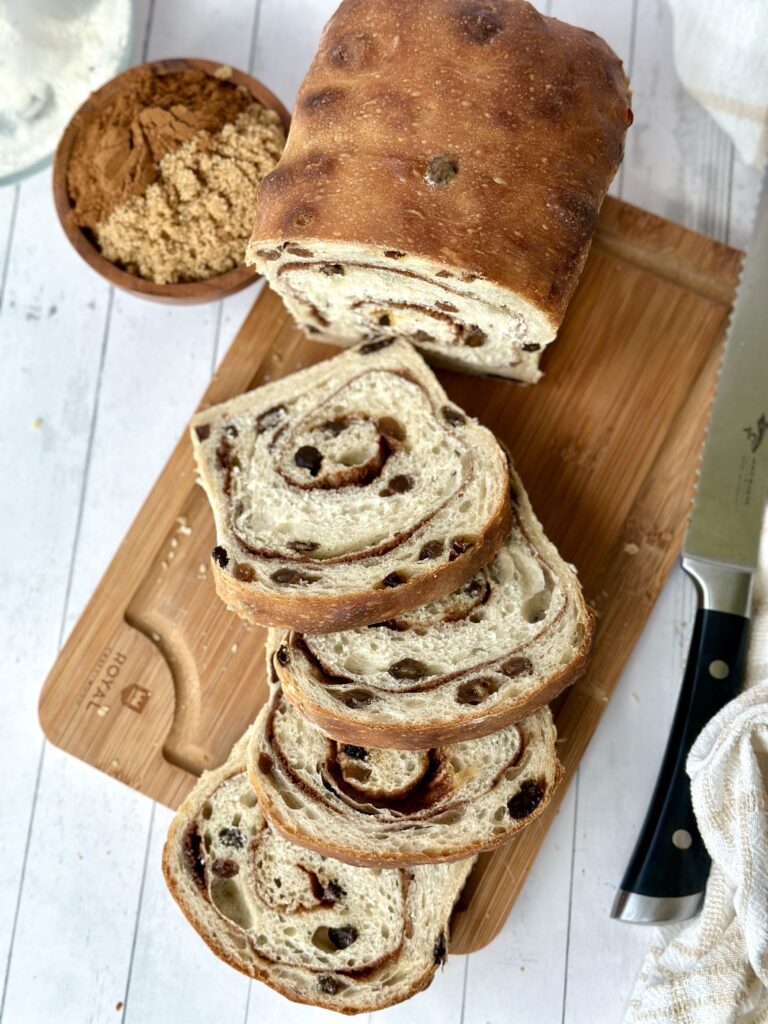
Cinnamon raisin bread has always been a nostalgic favorite—loved by both kids and adults for its sweet, spiced comfort. The chewy bursts of raisin, the warm swirl of cinnamon sugar, and the soft, tender crumb make it a timeless treat. This Sourdough Cinnamon Raisin Swirl Loaf takes that classic loaf to the next level, blending the deep flavor of natural fermentation with the familiar coziness of cinnamon and brown sugar.
Naturally leavened and easy to make, this bread is soft yet sturdy—ideal for everything from breakfast toast to a truly unforgettable French toast. And thanks to the long fermentation, it’s not just delicious—it’s easier on your digestion, too.
Why I Love This Recipe:
This dough is wonderfully approachable, with hydration adjusted to account for the raisins—no need to soak them ahead of time. Just mix the dried raisins straight into the dough and let the fermentation do the rest. It’s a one-bowl, no-fuss method that still delivers soft, flavorful results every time.
Swirled loaves can be tricky, but I’ve simplified the process to make achieving that perfect cinnamon spiral easy and foolproof. I’ll guide you through each step so your swirl turns out picture-perfect and evenly distributed.
And let’s talk about the perfect filling—my little secret is adding a touch of flour to the brown sugar and cinnamon. It thickens the paste just enough to keep it from oozing or getting gummy during baking, so every slice stays neat, rich, and packed with flavor.
As an amazon affiliate, this post may contain affiliate links. Which means I may receive a commission for qualifying purchases. I will only recommend products that I personally love and use.
Tools You’ll Need:
- Digital kitchen scale – for precise measurements
- Measuring cups and spoons – for ingredients like oil, honey, cinnamon, etc.
- Large mixing bowl or straight-sided container – for mixing and bulk fermentation. I like this container that comes with a lid https://amzn.to/3Cy0KZr and is clear to easily see how my dough is rising.
- 9×5” loaf pan – standard size for shaping and baking the final loaf. I love this loaf pan from USA Bakeware https://amzn.to/3WzgaUi linked here.
- Silicone spatula or dough scraper– to mix and shape the loaf
- Plastic wrap or reusable cover – for covering dough during proofing
- Instant-read thermometer (optional) – to check temperature of dough during proofing and internal temperature of loaf to ensure its proper baked
- Cooling rack – to cool your loaf evenly after baking
- Serrated bread knife – for clean, even slicing. This is my favorite bread knife https://amzn.to/4jr2jcl linked here.
Gather your Ingredients:
- Water – Hydrates the flour, supports gluten development, and activates fermentation.
- Sourdough starter – Provides natural leavening and deep flavor through wild fermentation.
- Honey – Adds natural sweetness, promotes browning, and keeps the crumb soft.
- Avocado oil – Enhances moisture and tenderness in the dough.
- All-purpose flour – Forms the structure of the loaf with a soft, balanced crumb. You can also use bread flour. Binds the swirl mixture to prevent leaking and create a clean spiral.
- Salt – Strengthens the gluten network and enhances flavors.
- Raisins – Add sweetness, chewiness, and bursts of flavor throughout the loaf.
- Ground cinnamon – Delivers warm, spiced flavor that defines the swirl.
- Brown sugar – Adds sweetness and caramel flavor that melts into the cinnamon swirl.
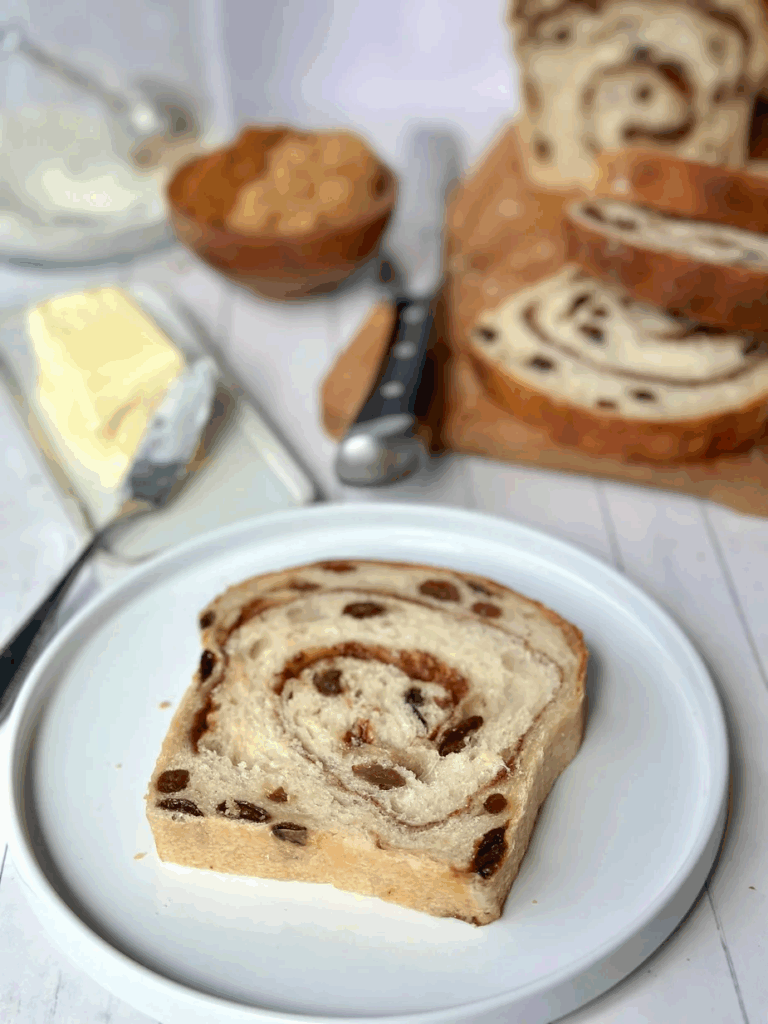
The Night Before: Feed Your Starter
Baker’s Schedule: Day before making bread- 8:00 PM
To ensure a bubbly and active starter, feed it the night before baking.
Use a 1:5:5 ratio to feed your starter (this means one part ripe starter, five times the water, five times the flour as listed below)
Mix the starter:
• 20g (1 tablespoon) mother starter
• 100g (1/2 cup) water
• 100g (3/4 cup) flour
Mix these together in a jar with a spatula, cover loosely with lid, and mark the volume of the starter in your jar with a rubber band or piece of tape and marker. Let starter sit at room temperature (70-75 degrees) overnight until bubbly and doubled in size.

The Next Day: Making the Dough
Baker’s Schedule: Day 1- 8:00 AM
For the Dough:
- 380g water (1 2/3 cups)
- 100g active sourdough starter (scant 1/2 cup) fed from night before
- 25g honey (1 tbsp)
- 25g avocado oil (2 tbsp)
- 500g all-purpose or bread flour (4 cups)
- 10g salt (1 3/4 tsp)
- 100g raisins (2/3 cup)
For the Cinnamon Swirl:
- 1 tbsp ground cinnamon (7g)
- 1/3 cup brown sugar, packed (67g)
- 2 tbsp all-purpose flour (16g)
1. Combine Ingredients
In a large bowl or straight edged container, mix the active starter, flour, honey, avocado oil, water, salt, and raisins. Stir and knead with your hand until all ingredients are combined into a shaggy dough. Cover with a damp towel or plastic and let it rest for 30 minutes at room temperature (70-77 degrees).
2. Stretch and Folds
After the rest, begin your stretch and folds. This helps build structure in your dough.
Starting at the edge of the dough with wet hands, gently lift one edge of the dough, stretch it up, and fold it over the center. Rotate the bowl 90 degrees and repeat with the next side. Do this for all four sides of the dough to form a ball.
Cover the dough and let it rest for 30 minutes. Repeat this stretch-and-fold process two more times at 30-minute intervals for a total of 3 sets. Your dough should go from being rough and clumpy to smooth and silky.

3. Bulk Fermentation
After the stretch and folds, cover the dough and let it bulk ferment for 5-6 hours. Keep the dough at a temperature of 75–78°F (24–26°C) for best results. The dough should rise by 80%, stopping just shy of doubling in size.
The best way to measure dough has proofed 80 percent in volume is to mark the volume of the dough in your container or bowl when you first mix your dough, then as the dough ferments you can more accurately assess how much it has risen in volume and when it’s ready to shape. Other signs of dough being properly fermented and ready for shaping include fermentation bubbles, a domed top, and springs back when you poke it with your finger.
Note: if dough proofs over 80%, it’s best to bake same day. Over proofed dough won’t sustain an overnight refrigeration and runs the risk of being flat.
Shaping & Filling the Cinnamon Swirl Loaf
In a small bowl, prepare your cinnamon swirl filling by whisking together the brown sugar, cinnamon, and flour until well combined. Set aside.
Lightly flour your work surface to prevent sticking, and grease your loaf pan with a light coat of oil or nonstick spray.
Gently turn your dough out onto the floured surface. Using a rolling pin, roll the dough into a large rectangle, approximately 10×20 inches. The width should match the length of your loaf pan; the longer the rectangle, the more distinct the swirl will be.
Evenly sprinkle the cinnamon sugar mixture over the surface of the dough, leaving a ½-inch border along the edges to help seal the roll.
Starting at the bottom (the edge closest to you), gently roll the dough up into a tight log using your hands or a dough scraper to help lift and tuck as you go. Once rolled, pinch the seam closed along the bottom and seal the ends by tucking them under slightly.
Carefully transfer the rolled dough into the greased loaf pan, seam side down. Cover loaf pan with plastic.

NOTE FOR OVERNIGHT REFRIGERATION AFTER SHAPING:
At this point you have the option to cover the loaf in the pan with plastic and refrigerate overnight for optional fermentation, or proceed with proofing and baking.
If you choose to refrigerate overnight, do not proof after shaping. Dough will proof in refrigerator in pan, but will need additional proofing time at room temperature. Allow loaf to come to room temperature the next morning and proof 1-2 hours or until dough is risen over the edge of the pan and proceed with baking instructions as listed below.
If skipping overnight fermentation:
Let it proof at room temperature for about 1 hour, or until the dough is just peeking over the edge of the pan. See guide below for more shaping details.
Baking the Loaf

1. Preheat the Oven
Preheat your oven to 400°F (200°C) on convection bake.
2. Bake
When the oven is preheated, place the loaf in the oven and bake for 45-50 minutes or the internal temperature of the loaf reads 200-205 F. You can use a digital thermometer inserted into the loaf to check this.
3. Finish the Loaf
While the loaf is still warm, brush the top with a cold butter stick for a soft and shiny crust. Allow the bread to cool completely on a wire rack before slicing.
Final Tips:
• Cooling is Key: Cooling the bread fully ensures the interior sets properly and slices beautifully.
• Storage: Wrap in plastic or store in a bread bag for up to 3 days at room temperature, or slice and freeze for longer storage for up to 2 months.
Enjoy your homemade sourdough cinnamon raisin swirl loaf—perfectly soft, flavorful, and easy to master!
Makes 1 loaf
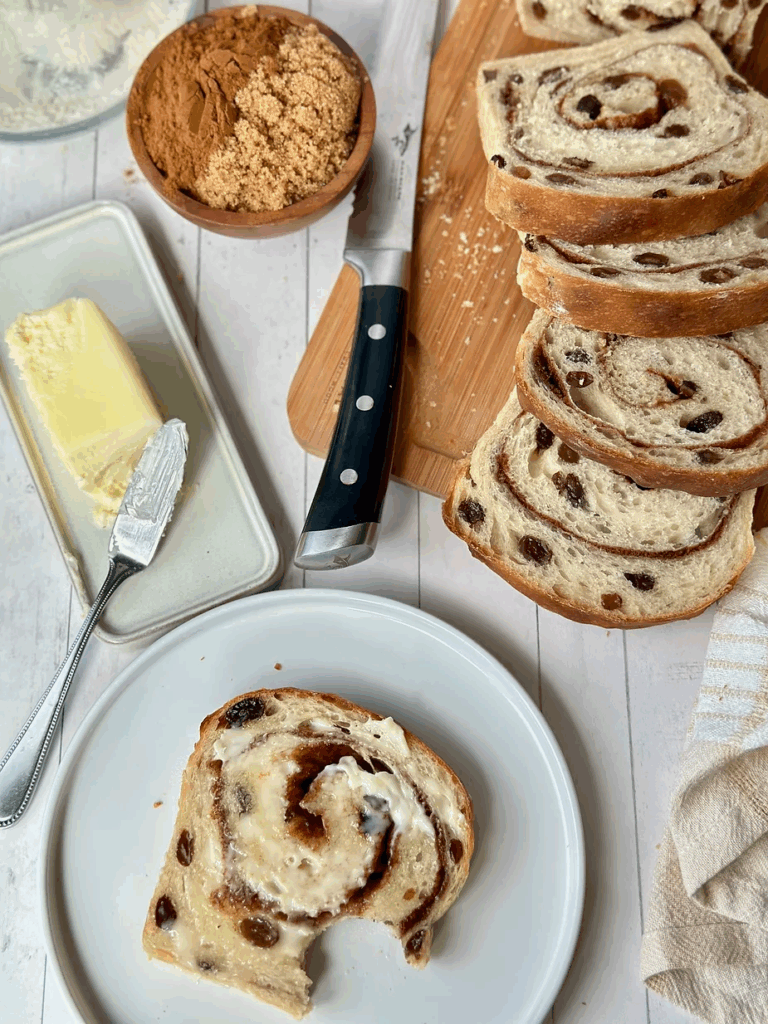
Sourdough Cinnamon Raisin Swirl Loaf
Equipment
- Digital scale
- Measuring cups and spoons
- Large mixing bowl or straight edged clear container
- 9×5 loaf pan
- Silicone spatula
- Dough scraper
- Plastic wrap
- Instant read thermometer
- Cooling rack
- Serrated bread knife
Ingredients
Main Dough:
- 1 2/3 cups (380g) water room temperature
- 1/2 cup (100g) active sourdough starter fed from the night before
- 1 Tablespoon (25g) raw honey
- 2 Tablespoons (25g) avocado oil
- 4 cups (500g) all-purpose flour bread flour
- 1 teaspoon (10g) sea salt
- 2/3 cup (100g) raisins
Cinnamon Swirl:
- 1/3 cup (67g) brown sugar, packed
- 2 Tablespoons (16g) all-purpose flour
- 1 Tablespoon (7g) ground cinnamon
Instructions
Feed Your Starter (the night before)
- To ensure a bubbly and active starter, feed it the night before baking. Mix in a jar with a spatula:• 20g (1 tablespoon) mother starter• 100g (1/2 cup) water• 100g (3/4 cup) flourcover loosely with lid, and mark the volume of the starter in your jar with a rubber band or piece of tape and marker. Let starter sit at room temperature (70-75 degrees) overnight until bubbly and doubled in size.
Mix Your Main Dough:
- In a large bowl or straight edged container, mix the active starter, flour, honey, avocado oil, water, salt, and raisins. Stir and knead with your hand until all ingredients are combined into a shaggy dough. Cover with a damp towel or plastic and let it rest for 30 minutes at room temperature (70-77 degrees).1 2/3 cups (380g) water, 1/2 cup (100g) active sourdough starter, 1 Tablespoon (25g) raw honey, 2 Tablespoons (25g) avocado oil, 4 cups (500g) all-purpose flour, 1 teaspoon (10g) sea salt, 2/3 cup (100g) raisins
- Starting at the edge of the dough with wet hands, gently lift one edge of the dough, stretch it up, and fold it over the center. Rotate the bowl 90 degrees and repeat with the next side. Do this for all four sides of the dough to form a ball.
- Cover the dough and let it rest for 30 minutes. Repeat this stretch-and-fold process two more times at 30-minute intervals for a total of 3 sets. Your dough should go from being rough and clumpy to smooth and silky.
Bulk Fermentation:
- After the stretch and folds, cover the dough and let it bulk ferment for 5-6 hours. Keep the dough at a temperature of 75–78°F (24–26°C) for best results. The dough should rise by 80%, stopping just shy of doubling in size.
- The best way to measure dough has proofed 80 percent in volume is to mark the volume of the dough in your container or bowl when you first mix your dough, then as the dough ferments you can more accurately assess how much it has risen in volume and when it's ready to shape. Other signs of dough being properly fermented and ready for shaping include fermentation bubbles, a domed top, and springs back when you poke it with your finger.
- Note: if dough proofs over 80%, it’s best to bake same day. Over proofed dough won’t sustain an overnight refrigeration and runs the risk of being flat.
Shaping & Filling the Cinnamon Swirl Loaf
- In a small bowl, prepare your cinnamon swirl filling by whisking together the brown sugar, cinnamon, and flour until well combined. Set aside.1/3 cup (67g) brown sugar, packed, 2 Tablespoons (16g) all-purpose flour, 1 Tablespoon (7g) ground cinnamon
- Lightly flour your work surface to prevent sticking, and grease your loaf pan with a light coat of oil or nonstick spray.
- Gently turn your dough out onto the floured surface. Using a rolling pin, roll the dough into a large rectangle, approximately 10×20 inches. The width should match the length of your loaf pan; the longer the rectangle, the more distinct the swirl will be.
- Evenly sprinkle the cinnamon sugar mixture over the surface of the dough, leaving a ½-inch border along the edges to help seal the roll.
- Starting at the bottom (the edge closest to you), gently roll the dough up into a tight log using your hands or a dough scraper to help lift and tuck as you go. Once rolled, pinch the seam closed along the bottom and seal the ends by tucking them under slightly.
- Carefully transfer the rolled dough into the greased loaf pan, seam side down. Cover loaf pan with plastic.
NOTE FOR OVERNIGHT REFRIGERATION AFTER SHAPING:
- At this point you have the option to cover the loaf in the pan with plastic and refrigerate overnight for optional fermentation, or proceed with proofing and baking.
- If you choose to refrigerate overnight, do not proof after shaping. Dough will proof in refrigerator in pan, but will need additional proofing time at room temperature. Allow loaf to come to room temperature the next morning and proof 1-2 hours or until dough is risen over the edge of the pan and proceed with baking instructions as listed below.
- If skipping overnight fermentation:
- Let it proof at room temperature for about 1 hour, or until the dough is just peeking over the edge of the pan.
Baking The Loaf:
- Preheat your oven to 400°F (200°C) on convection bake.
- When the oven is preheated, place the loaf in the oven and bake for 45-50 minutes or the internal temperature of the loaf reads 200-205 F. You can use a digital thermometer inserted into the loaf to check this.
- While the loaf is still warm, brush the top with a cold butter stick for a soft and shiny crust. Allow the bread to cool completely on a wire rack before slicing.

Okay let me start off by saying that I have tried to nail an amazing swirled cinnamon raisin loaf for so long now!! This recipe is the only reason I was able to achieve that!! Make sure to roll up the dough exactly how she has pictured and you will get the perfect swirl!! This is hands down the best loaf I’ve made! perfect swirl 😍
This review makes my heart happy! I’m so glad this was successful for you!
What adjustment needs to made if we don’t use raisins and just do the cinnamon sugar?
HI! No adjustments necessary just leave them out! I’ve made it that way too!
Girl I am sooooo excited to cute in to this but I couldn’t wait to share with you how easy it was to work with. One question it did get a little darker on top then I had Hope for but i did the butter trick and it softened right up. Check her out
Gorgeous loaf! You cant tent with foil in the future if you are concerned about the top burning prior to the loaf being done!
Thank you I was wondering if I should but actually I put the butter on top afterwards and sliced it open and it was perfect thank you thank you thank you
This was really good! Easy process, I love that I have the option to bake the same day. I ended up using 3 cups of bread flour and 1 cup of all purpose flour and agave instead of honey(I thought I had honey in the pantry) and vegetable oil instead of the avocado oil. Bread still came out amazing. This will be my go to cinnamon raisin bread.
I’m glad you were able to make this loaf easily and adapt it to fit your needs! Thank you for your comment!