Buttery Sourdough Pie Crust Recipe (Flaky and Easy)
A solid pie crust recipe is the base of every good pie, and this Buttery Sourdough Pie Crust Recipe (Flaky and Easy) is going to make all of your pies stand out. This is the pie crust that makes every filling shine- it’s buttery, crisp, and tender with a subtle tang from sourdough discard. The acidity from the starter and lemon juice keeps it delicate while cold butter bakes into flaky layers, making for the perfect golden pie crust.
Why You’ll Love This Recipe:
Below, I’ll walk you through each step to making this pie crust with a mix by hand method and how to make this crust in a food processor if that’s easier.
From mixing, rolling, fluting, blind-baking, par-baking and even adding a top crust to a par-baked pie- this is really more of a guide to pie crust so you can master this bakery-style crust at home and adjust it to fit your needs. Prepare this dough ahead for easy prep for dinner or holidays!
What is par-baking a pie crust?
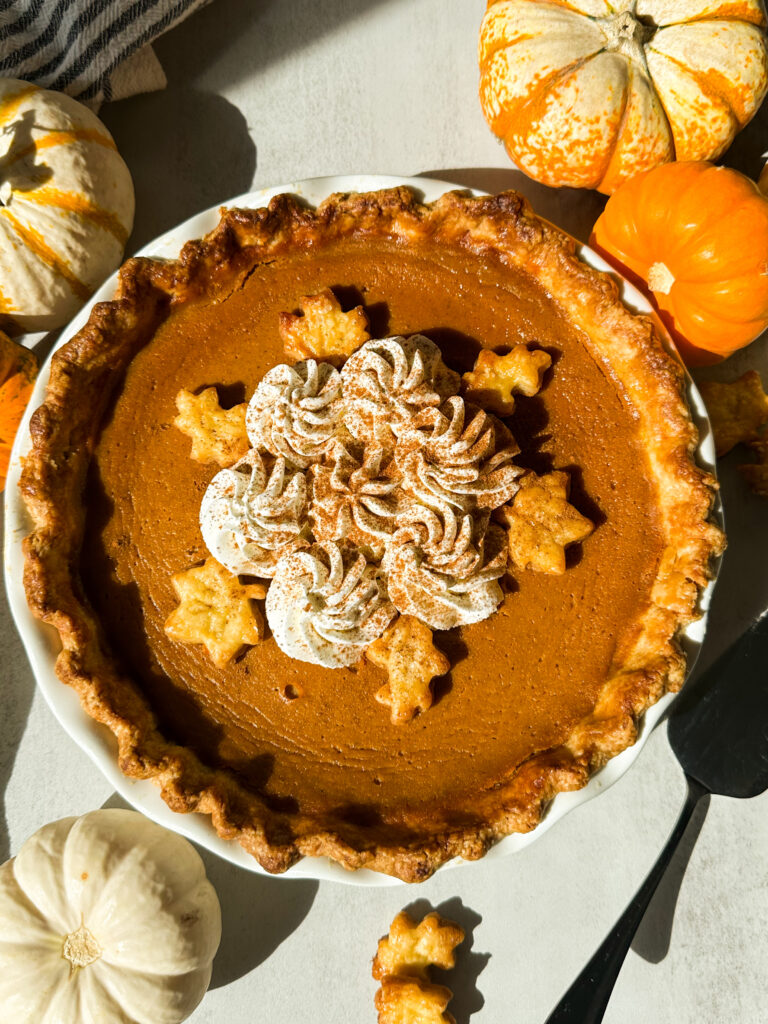
“Par-baking” is short for partially baking your pie crust. This is commonly done for pies that have a filling that requires less baking time than the crust such as pecan or pumpkin pie, and this partial bake avoids a soggy bottom. One thing to keep in mind with sourdough pie crust, is the moisture content is higher than other pie crusts meaning most pies can benefit from this partial bake to avoid sogginess. No one likes soggy bottoms!
What is blind baking a pie crust?
Blind baking a pie crust is when you bake the entire crust prior to adding your filling. This is most commonly done with cream pies, or any pie that doesn’t require the filling to be baked.
This knowledge is helpful to understand to select the best course of action for your pie to turn out perfectly.
Can I still add a top crust to a par-baked pie crust?
Yes! I found an excellent blog that refers to this exact topic, and implemented some of the methods found there to par-bake my pie crust and then add a top crust. You can find the article linked here.
Why Use Sourdough Starter in Pie Crust?
Using sourdough starter (or discard) in this Buttery Sourdough Pie Crust Recipe allows the fermentation of sourdough to help break down gluten in the flour while it rests, making this pie crust easier to digest for those sensitive to gluten as well as more tender and flaky. It’s also a great way to use up discard!
As an amazon affiliate this post may contain affiliate links, which means I may receive a commission for qualifying purchases. I will only recommend products that I personally love and use.
Tools You’ll Need:
- 9-inch Pie Pan– to bake your pie crust. Metal pans will create a more crispy crust, Glass pans allow you to see the bottom to assess when the crust is done, and ceramic bakes crusts evenly. I love this ceramic pie pan with a fluted edge linked here.
- Mixing bowl-to combine pie crust if mixing dough by hand.
- Pastry Blender (optional)- helpful to mix and combine the pie crust when mixing by hand. I love this pastry blender linked here but this is entirely optional and I’ll show you how to make the crust without it.
- Digital kitchen scale (optional)– for accurate measuring especially helpful with sourdough baking.
- Cheese Grater (if mixing by hand)- if you’re mixing this crust by hand, I highly recommend using a cheese grater to grate your butter into even pieces. If you don’t have one, you can also cut the butter. This is the cheese grater I use linked here.
- Food Processor (if using food processor method)- If you want to make this crust using a food processor, you’ll need a food processor with the chopping attachment.
- Rolling Pin- to roll out your pie crust. I like this rolling pin linked here.
- Fork- to “dock” pie crust.
- Sharp knife- to vent pie crust.
- Kitchen Scissors- easiest way to trim pie crust. You can also use a a sharp knife.
- Parchment Paper- if par-baking or blind baking the pie crust, you’ll need to line the pie crust with parchment paper for the pie weights.
- Pie Weights (optional)– Ceramic pie weights are easy to use and make a perfectly par or blind baked pie crust, I’ve linked the weights I use here. f you don’t want to use pie weights, you can also use a disposable pie pan with a ramekin on top or beans as a weight.
- Pastry brush (optional)- for applying egg wash.
Gather Your Ingredients:
- All-purpose Flour- Creates the base of the pie crust. I like all-purpose flour for the tenderness but you can use bread flour if you need to.
- Sourdough discard– Adds flavor and moisture and is the magic that ferments your pie crust. You can use starter or discard that is straight from the fridge, just make sure it’s cold so the dough stays cold.
- Unsalted Butter- You want to use very cold butter, I really love Kerrygold butter for the flavor and texture but any butter will work.
- White Sugar- adds a touch of sweetness to the crust.
- Sea Salt- balances the sweetness.
- Baking Powder- the secret ingredient I add to give a little extra lift to my pie crust.
- Lemon Juice- the acid from the lemon juice breaks down the gluten and makes the crust so tender.
- Ice Water- binds the crust without activating the gluten too much.
- Egg- for the egg wash.
- Coarse Sugar (optional)- for decoration on sweet pies and adds a visual touch. I like the Wilton sugar crystals linked here.
- Flaky Sea Salt (optional)- for garnishing savory pies.
Step-by-step Instructions
Method A: Mixing By Hand
Mixing this pie crust by hand is so easy, and I’m going to walk you through it!
First make sure your butter is straight from the refrigerator, you can even pop it into the freezer for 15 minutes prior to grating it.
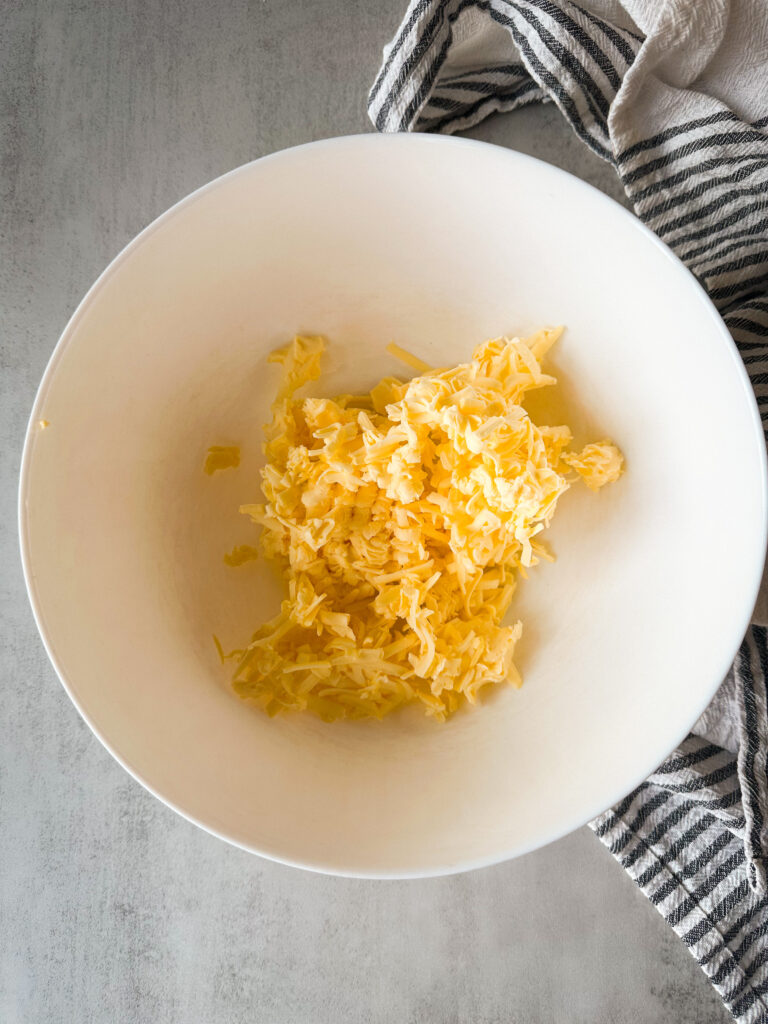
Using a cheese grater on the largest setting, grate your butter and transfer to a bowl.
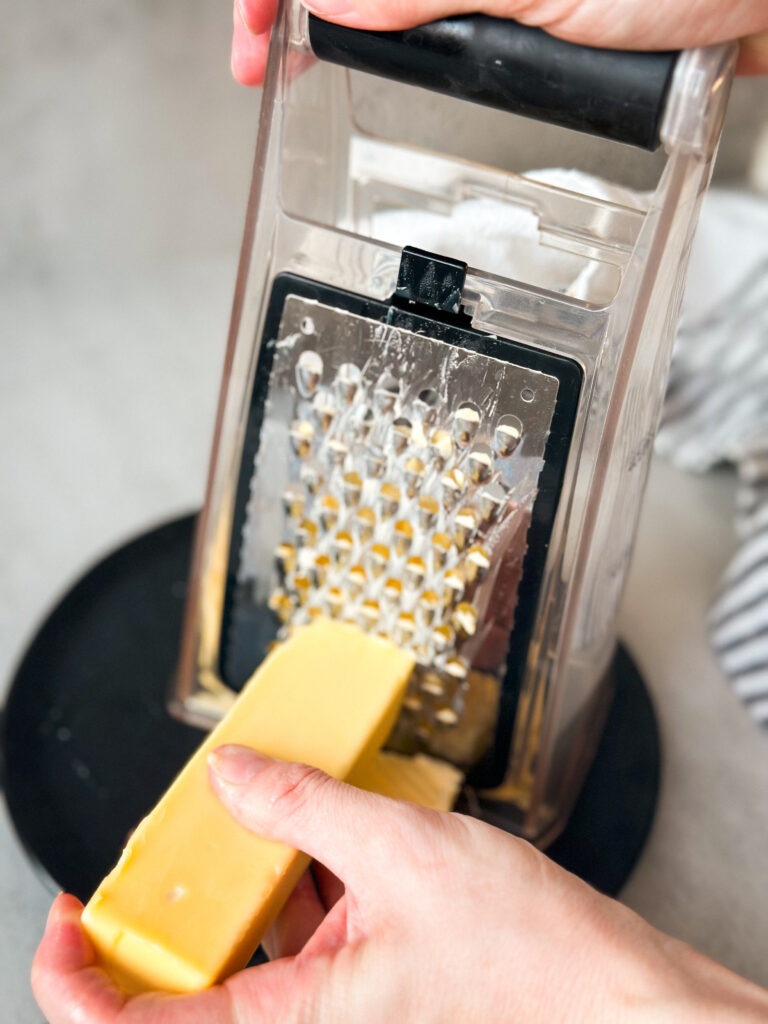
Note: You can also cut your butter up into 1/4 inch cubes if you don’t have a cheese grater.
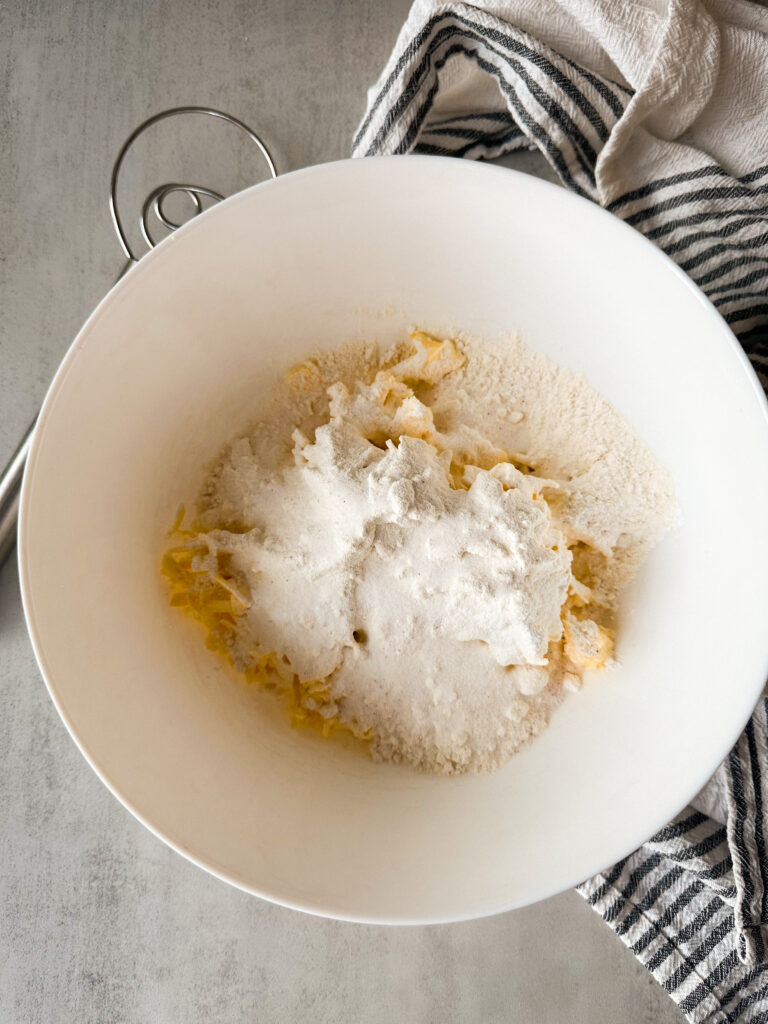
Add the flour, sugar, salt, and baking powder to the butter. Combine the ingredients until all of the butter coated.
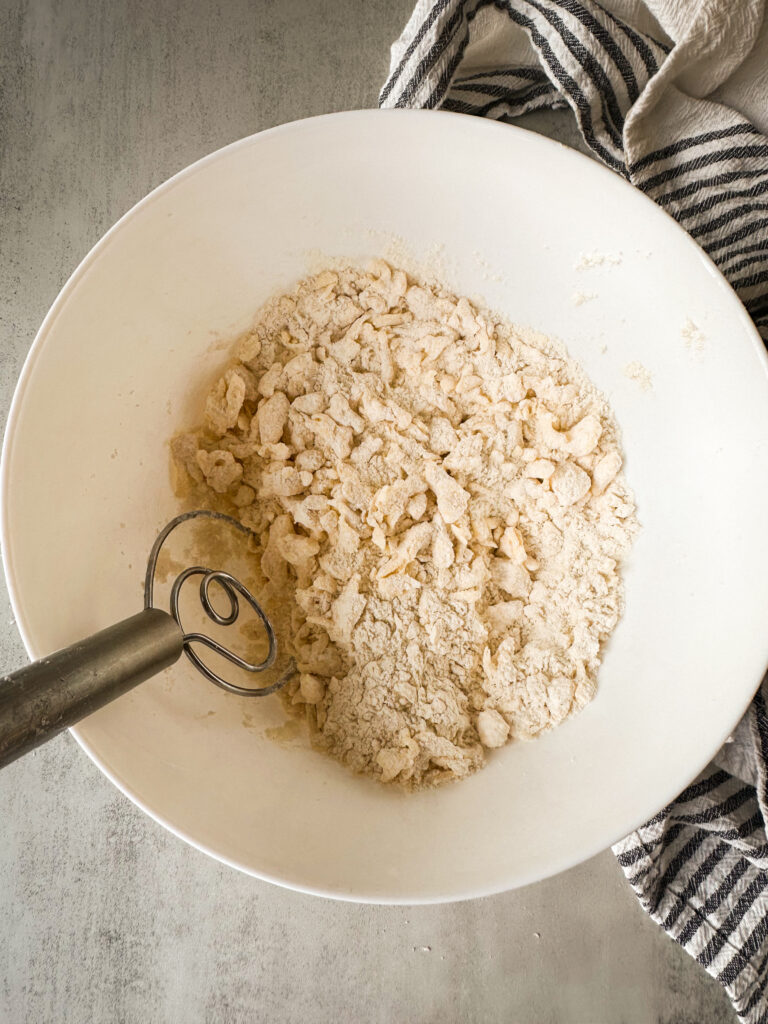
If the butter is sticking together or the chunks are too large, use a fork or pastry blender to help break them up. You want little blueberry sized chunks of butter.
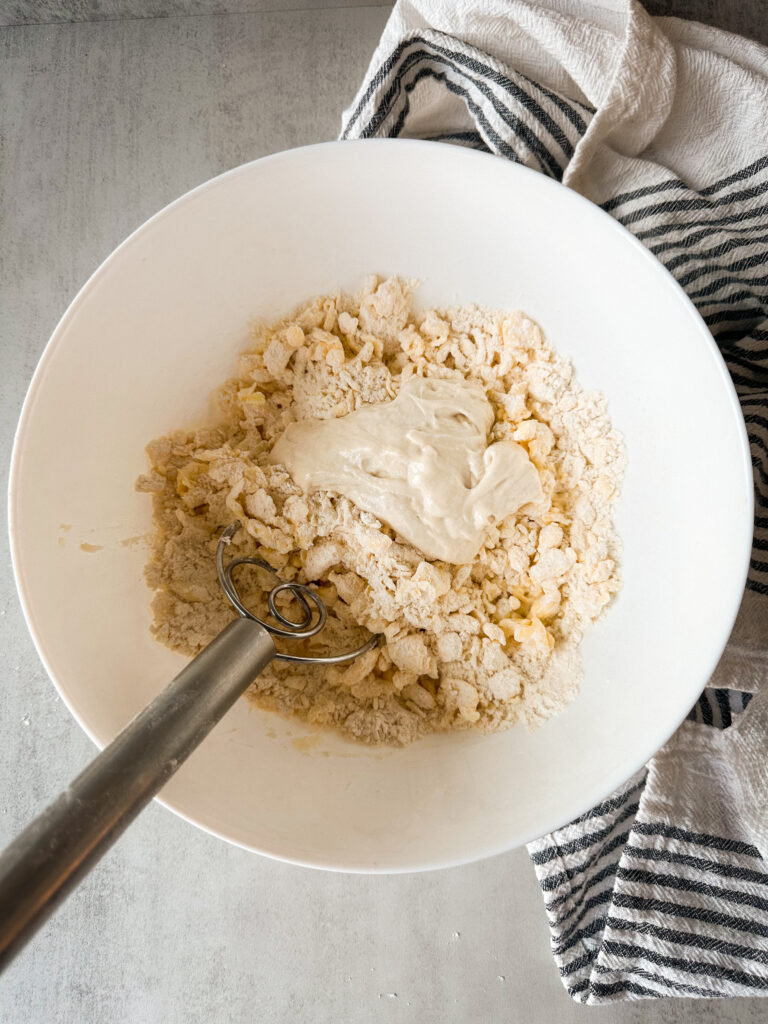
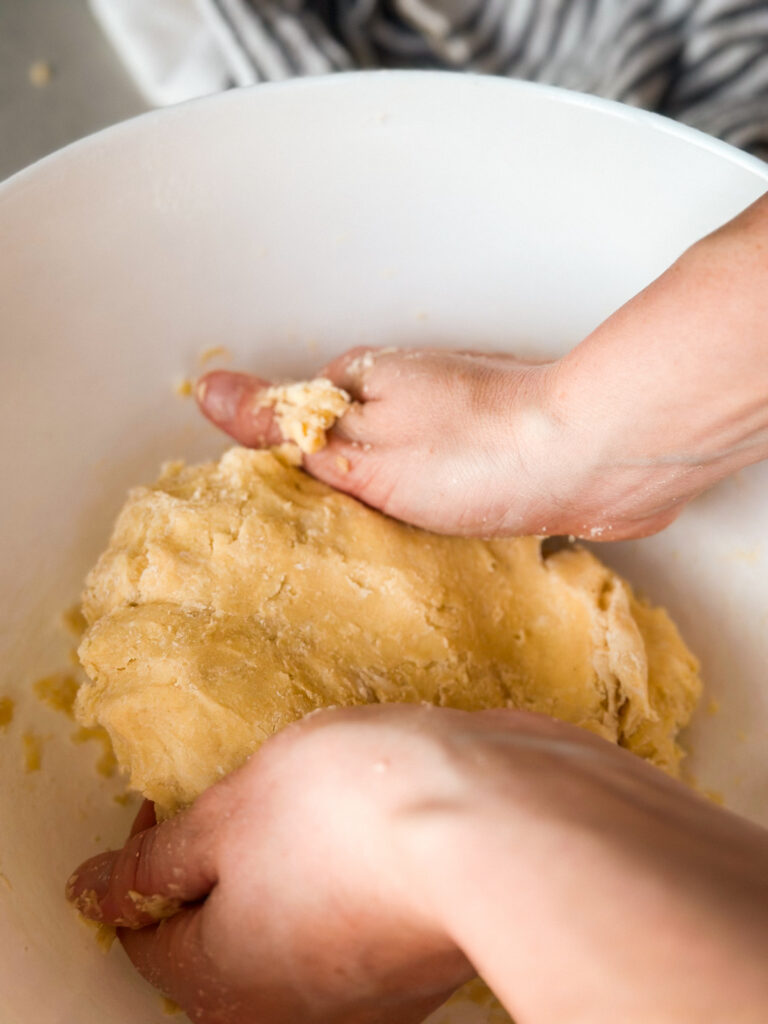
Add the sourdough discard and lemon juice to the bowl.
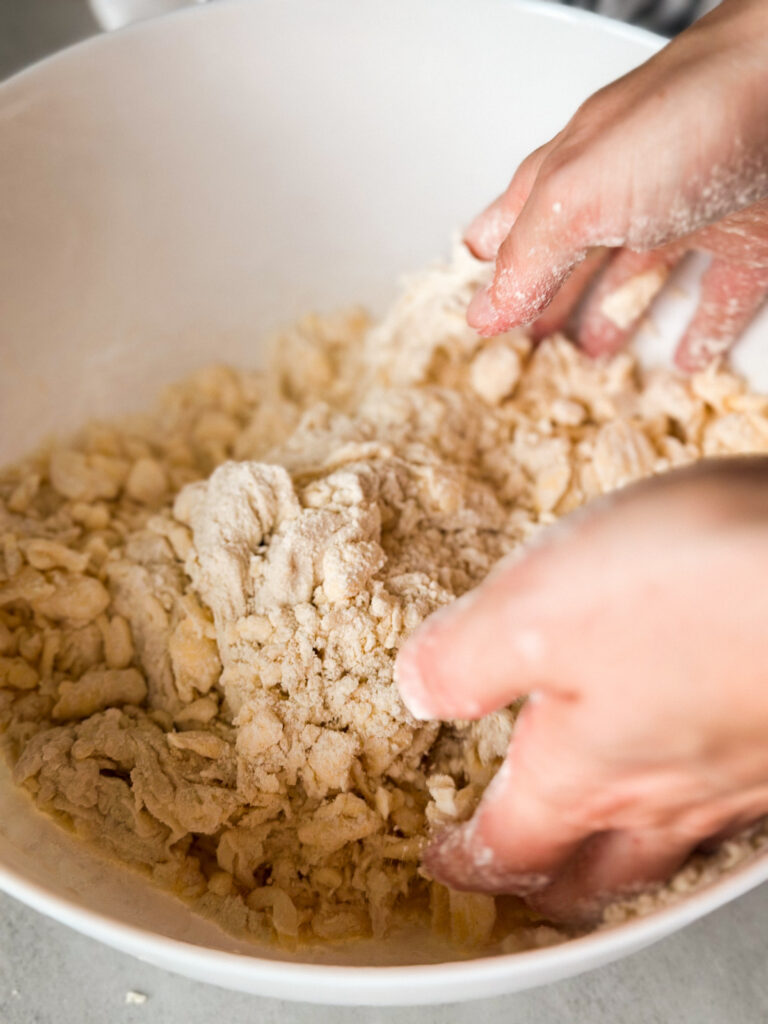
Begin to mix with a pastry whisk or your hands to bring the dough together. If you need to, you can turn your dough out on a clean surface to mix it with your hands.
The ball of dough should come together easily, if it’s too dry add a teaspoon of cold ice water at a time until your dough just comes together.
If the dough is too wet or sticky, sprinkle with a little flour and continue to bring the dough together.
I typically don’t even need to use water, but it’s okay and normal if you do!
Because your hands can melt the butter, it’s important to just bring the dough together and then stop mixing. You want chunks of butter and overworking the dough isn’t the goal.
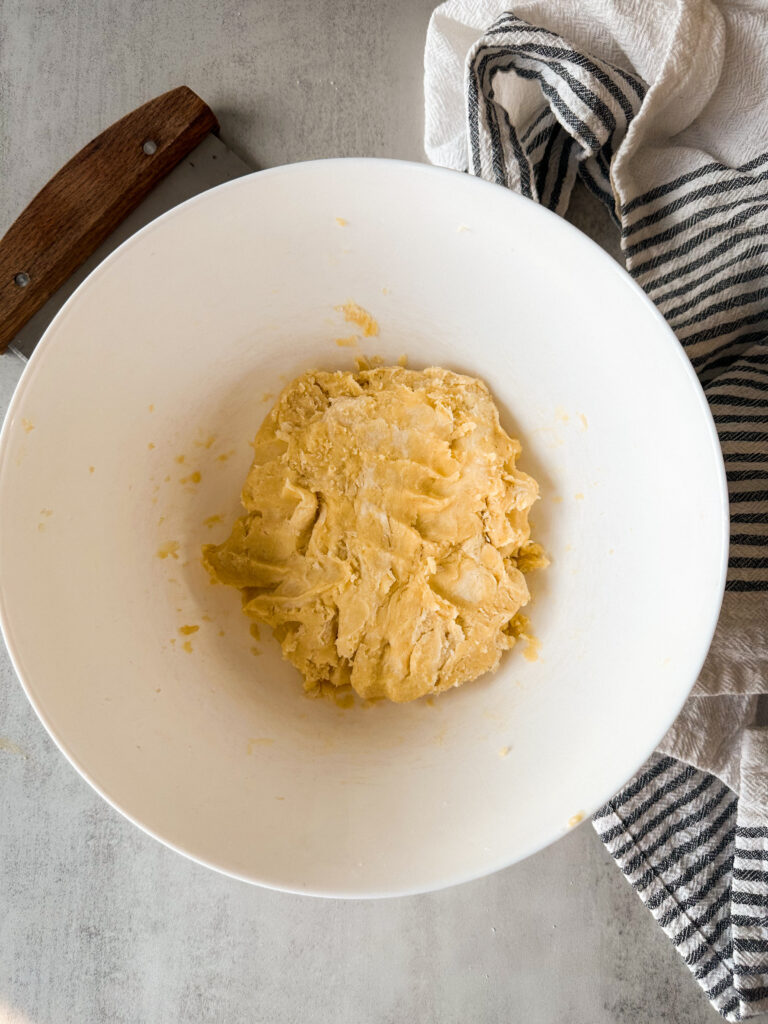
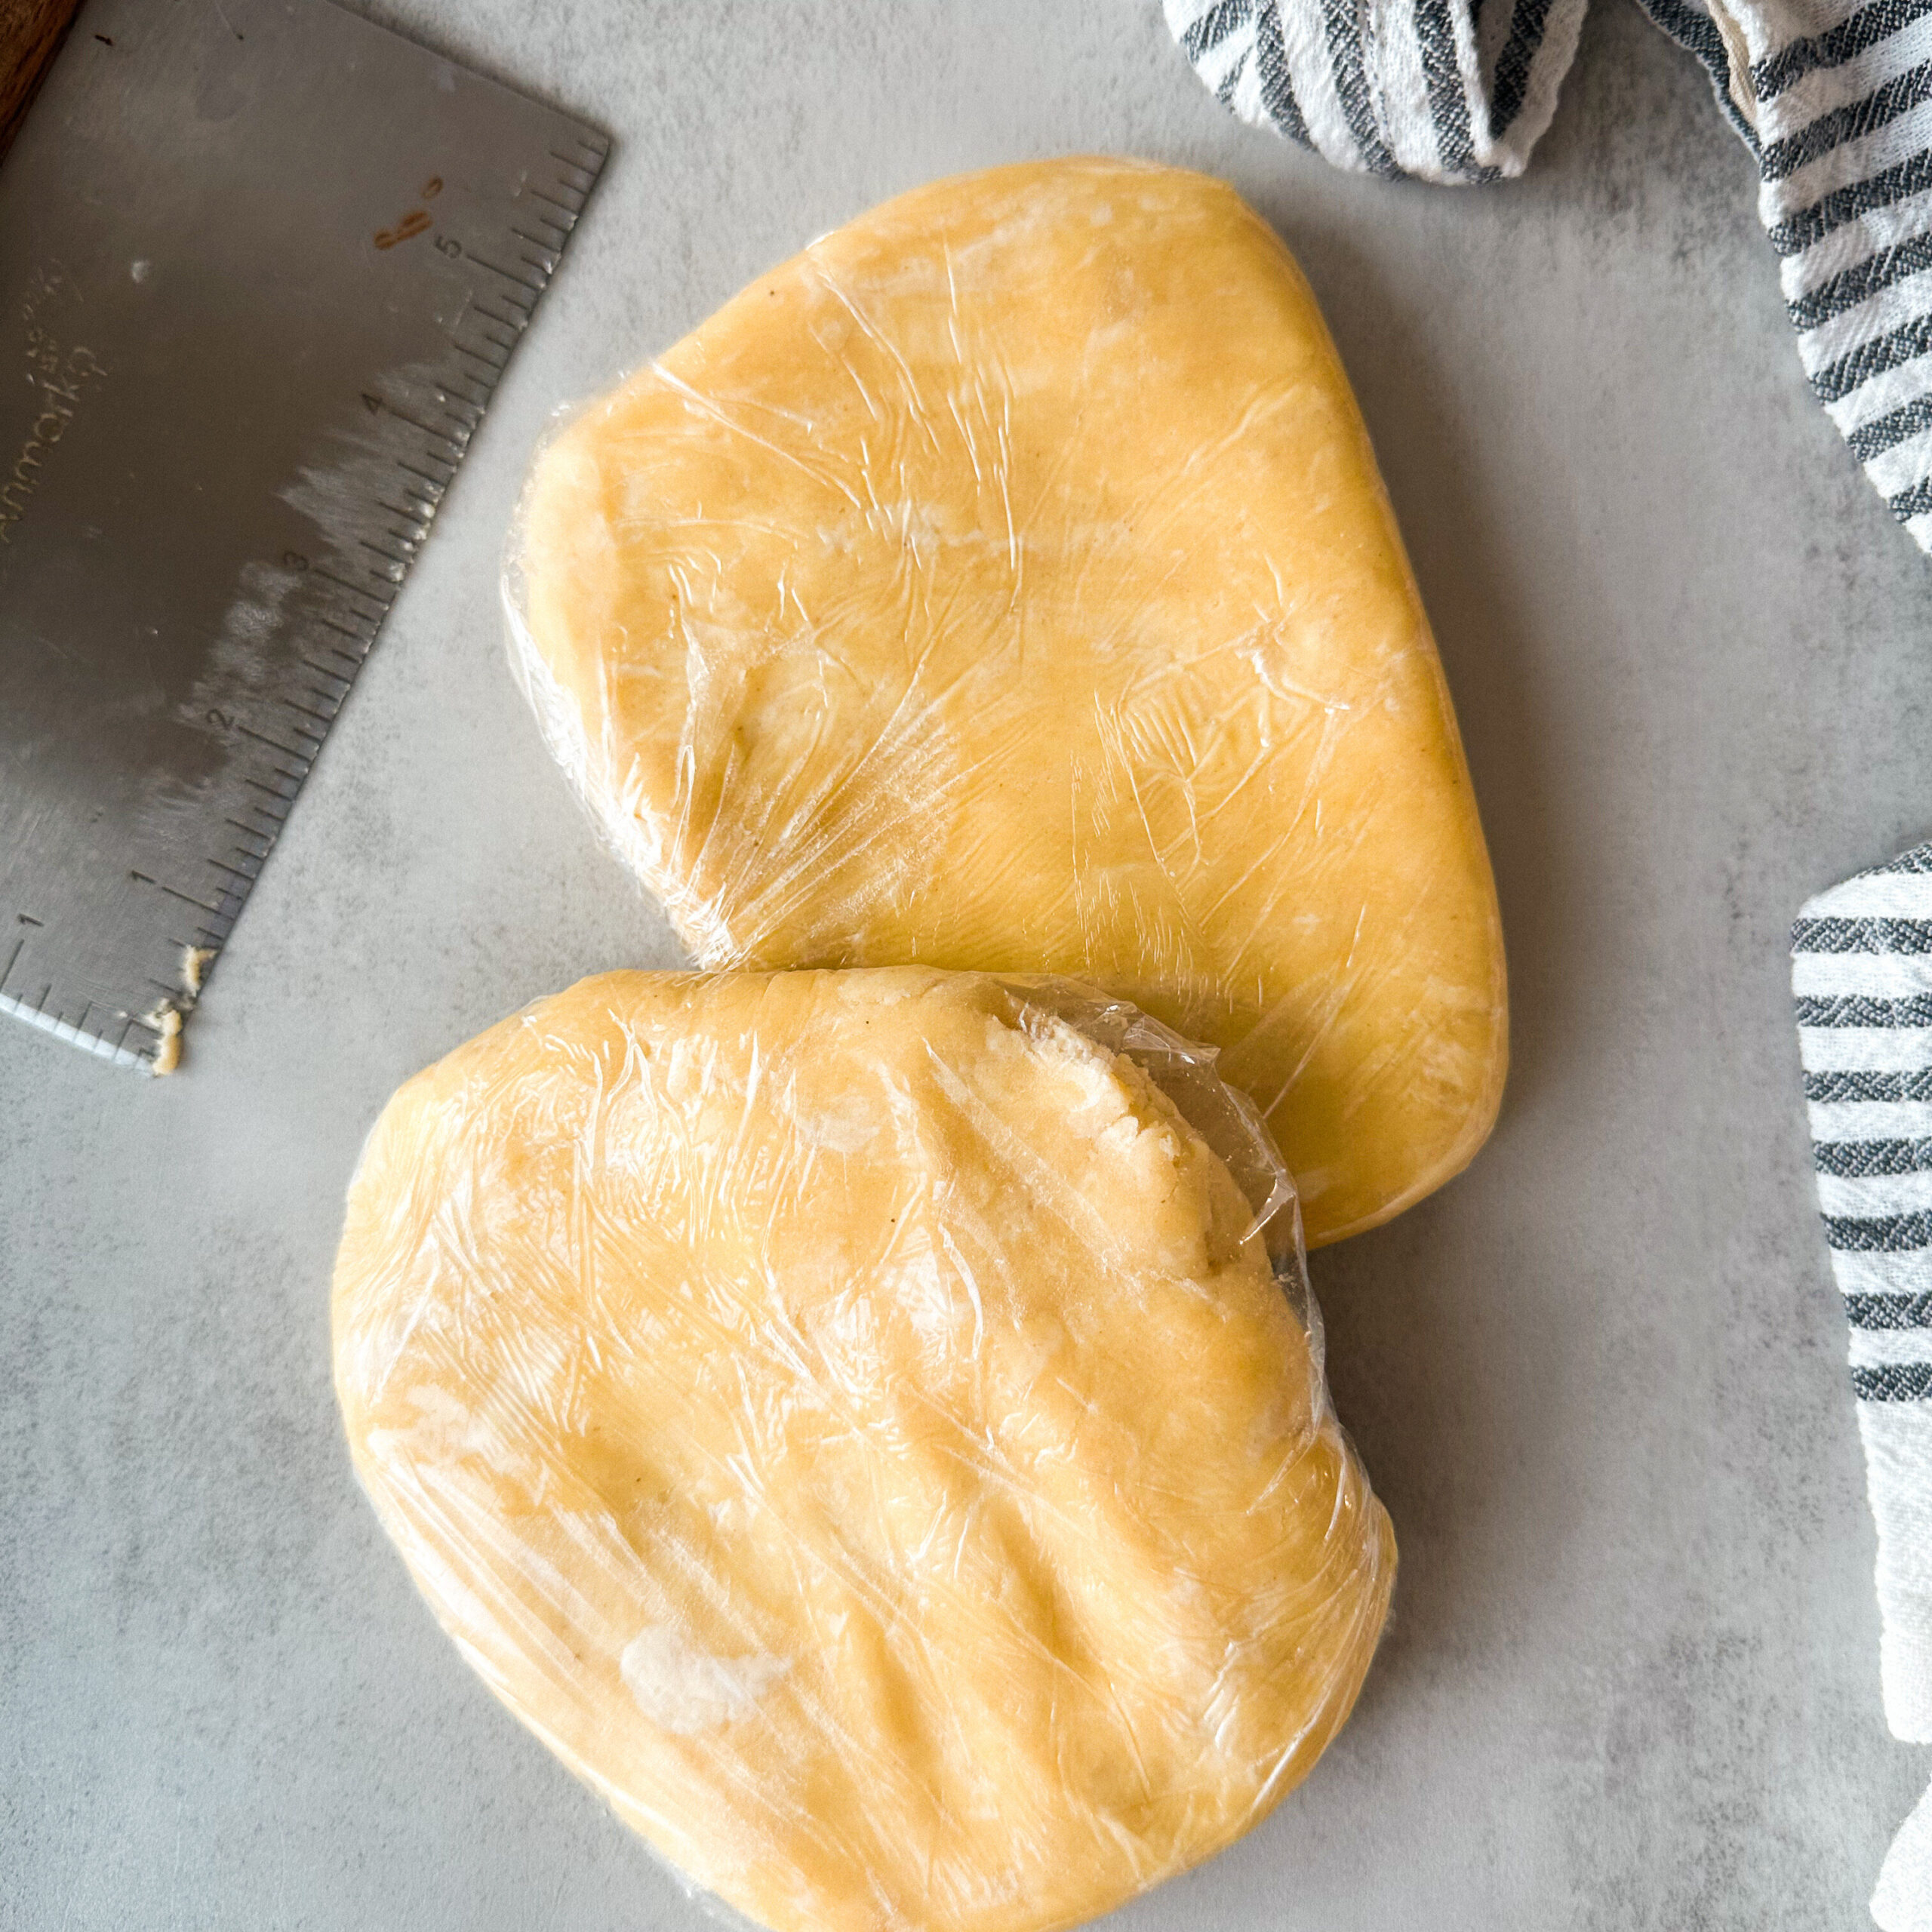
Flatten the dough into a disc, and cut the dough in half (this doesn’t have to be perfect just guess). You want to see the bits of butter throughout your dough, this is what makes those flakey layers!
Flatten each half into a round, then wrap tightly in plastic wrap and refrigerate at least 2 hours but optionally overnight for the best fermentation and the flakiest pie crust.
Method B: Mixing with a food processor
Using a food processor to mix your pie dough is easy and great for baking in bulk, especially during the holidays. You’ll want to use the blade attachment on your food processor for this process.
Start by assembling your food processor with the blade attachment.
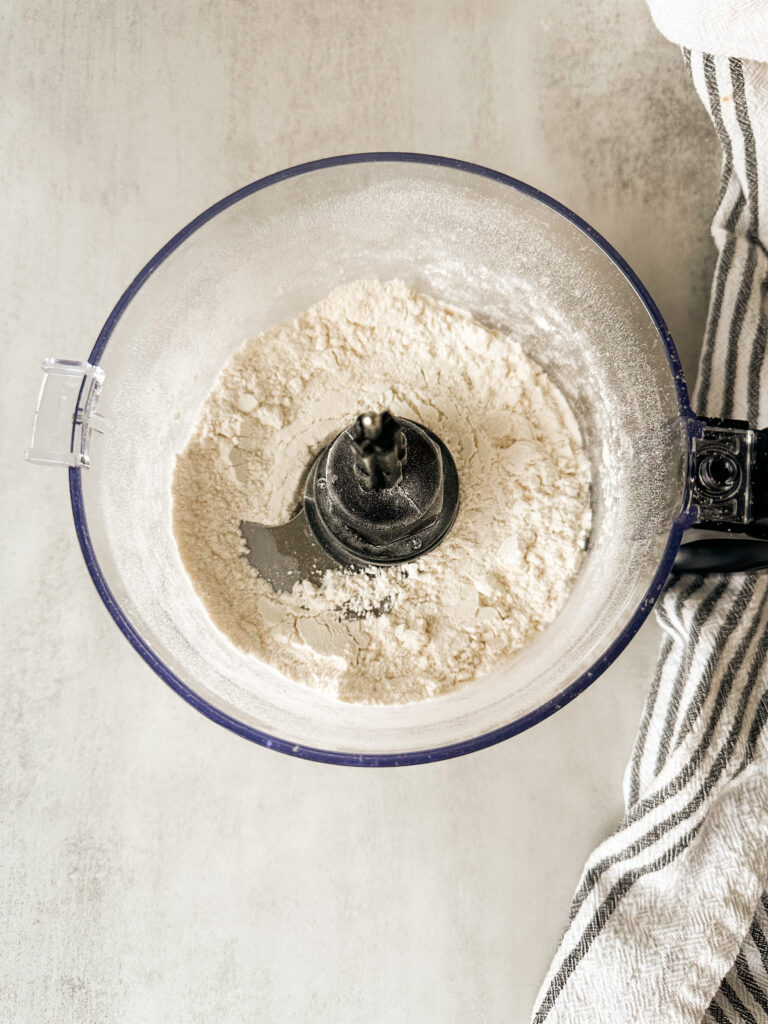
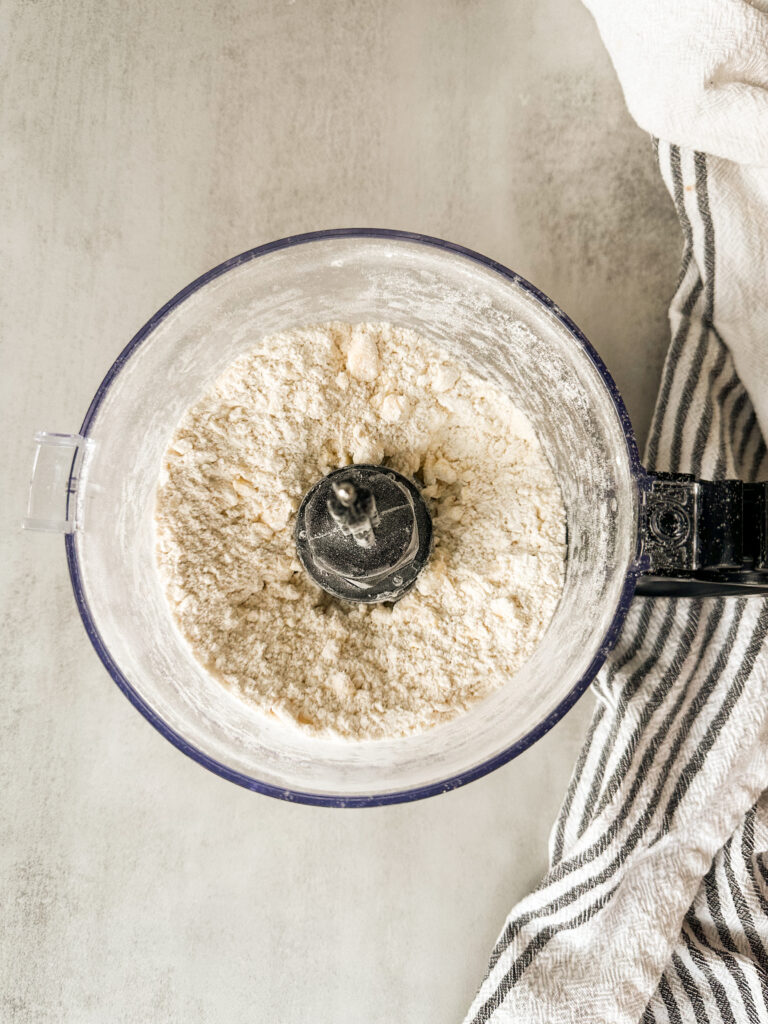
Measure the flour, sugar, baking powder, and salt into the work bowl of your food processor. Pulse these ingredients together a few times to incorporate them.
Cut up your butter (make sure it’s very cold), into 1/4 inch cubes. Add the butter to the dry ingredients.
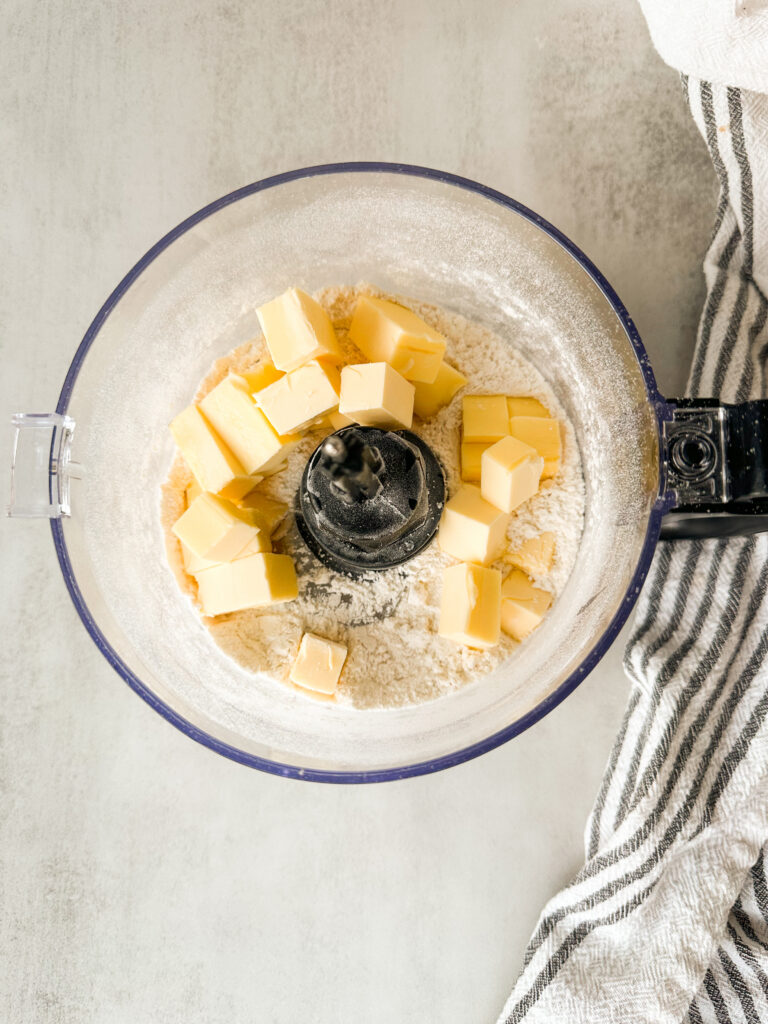
Pulse the butter until you have blueberry sized balls of butter cut up into the flour mixture. Don’t over blend the butter into the flour at this stage! Go slow and stop when you see the butter is chopped up to the desired size.
Add the sourdough discard and the lemon juice to the work bowl.
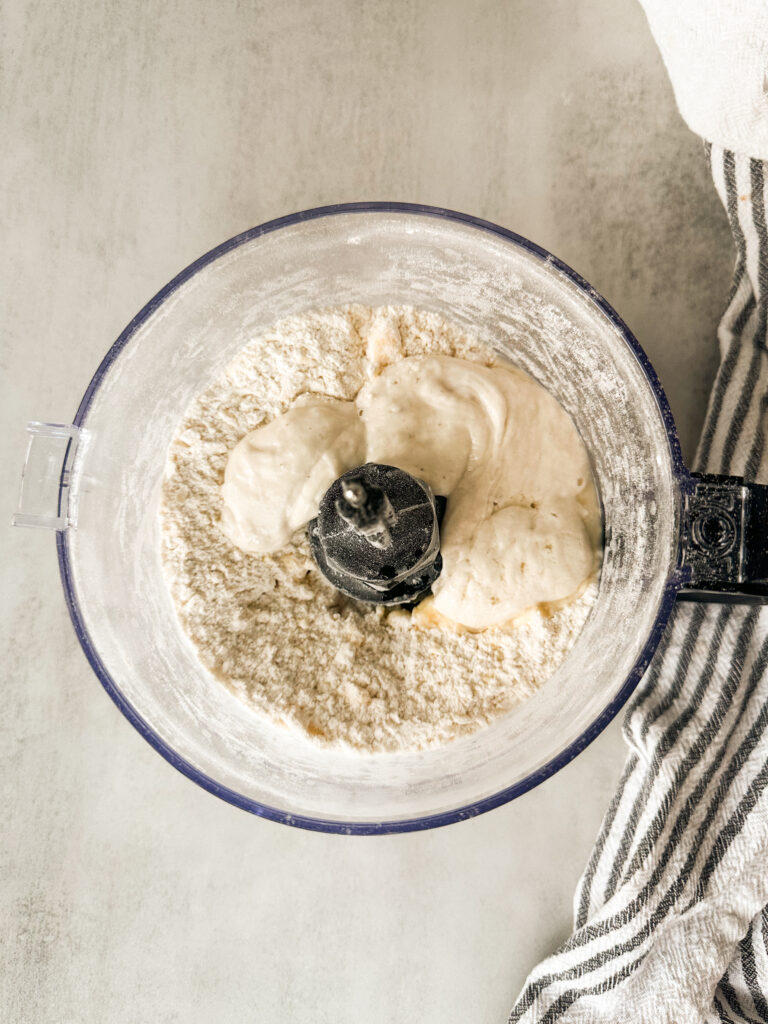
Pulse together the ingredients slowly until a dough starts to form. If the dough is very dry, you can add 1 teaspoon of ice water at a time until the dough just comes together.
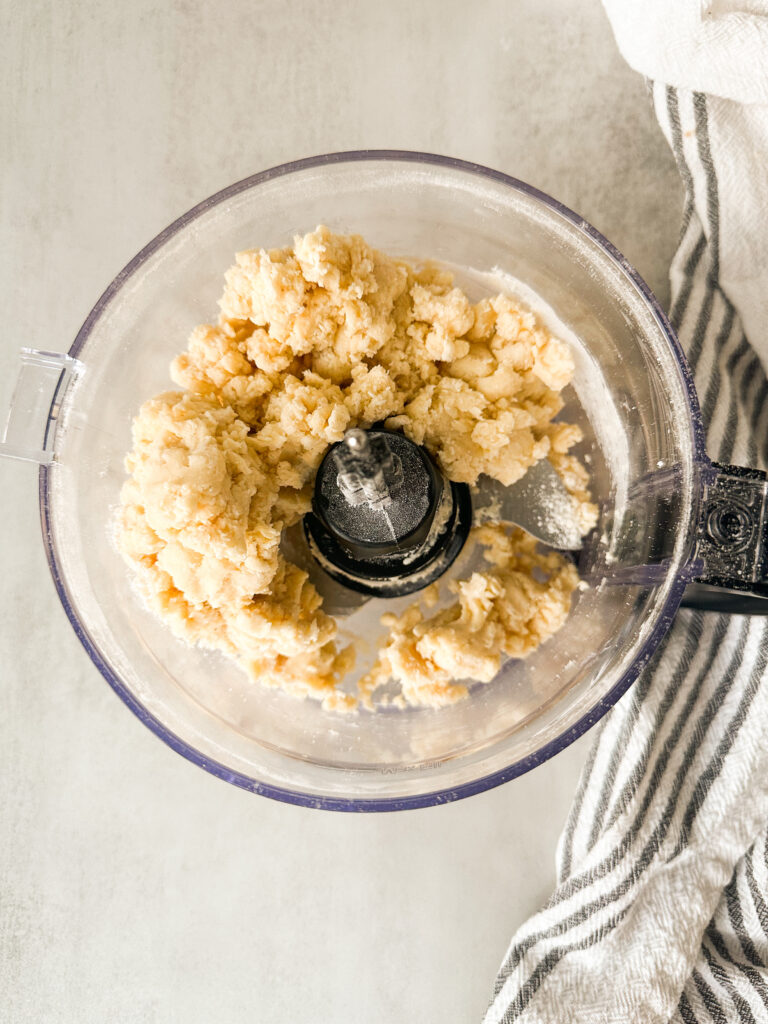
Once a pie dough is forming, dump out the dough onto a clean work surface and use your hands to bring the dough together. You want to see the bits of butter throughout your dough, this is what makes those flakey layers!
Divide the dough, and flatten both sections into discs and wrap tightly in plastic wrap.
Refrigerate the pie crust at least 2 hours but optionally overnight for the best fermentation and the flakiest pie crust.
Step 1: How to roll out and shape your pie crust
Now that you’ve made your pie crust and it’s chilled, it’s time to roll and shape your crust!
Allow your pie crust to sit at room temperature about ten minutes, to take the chill off so you’re able to roll it out. Gather your rolling pin, flour, and pie pan while your dough rests and prepare a clean work surface. This is optional, but I like to spray a little cooking spray on a paper towel and gently wipe my pie pan to ever so lightly grease it at this point. Another option is to flour your pan, to help with a clean release of your pie crust.
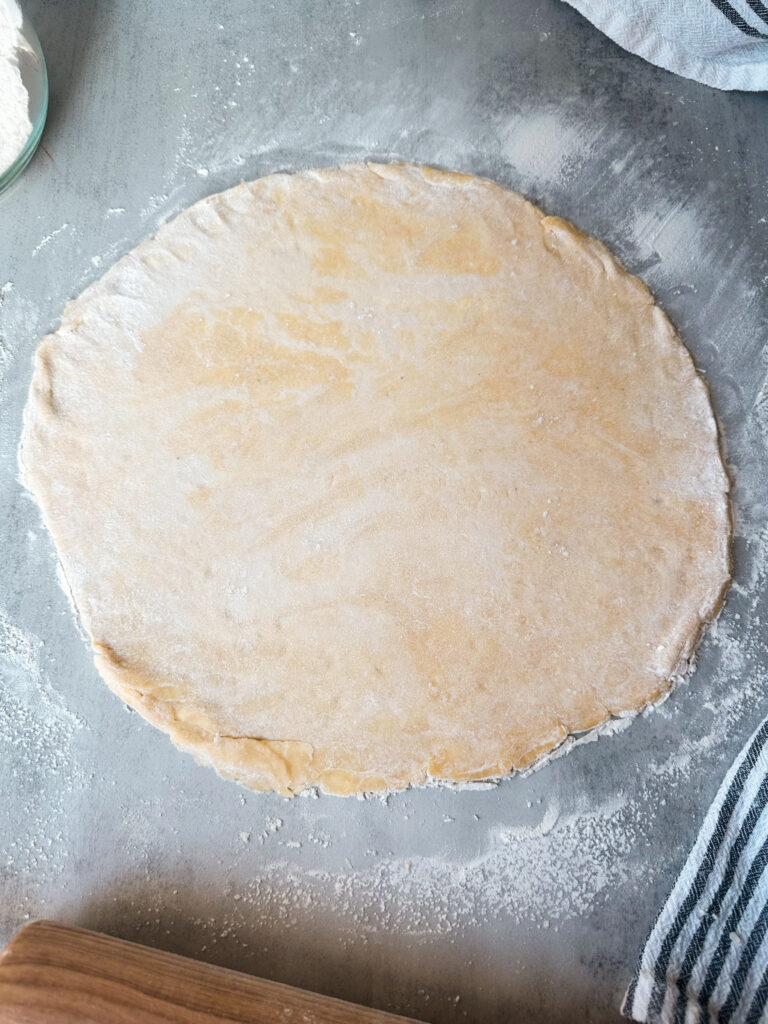
Flour your work surface and rolling pin, and starting at the center of your dough disc begin to roll your crust out. This is a gentle process, you don’t want to have cracking dough. You want slow even steady pressure on your dough.
Continue to roll out your dough, aiming for a a 12-inch circle which is going to fit a 9-inch pie pan perfectly. If your circle starts to become uneven, use your hands to gently press the dough back into the shape you want. Your crust will be about 1/8 inch thickness.
Tip: I like to lift my dough and flip it over occasionally to avoid the dough sticking to my surface. If your edges are cracking, dip your fingers in a little ice water and press the dough back together before resuming rolling it out.
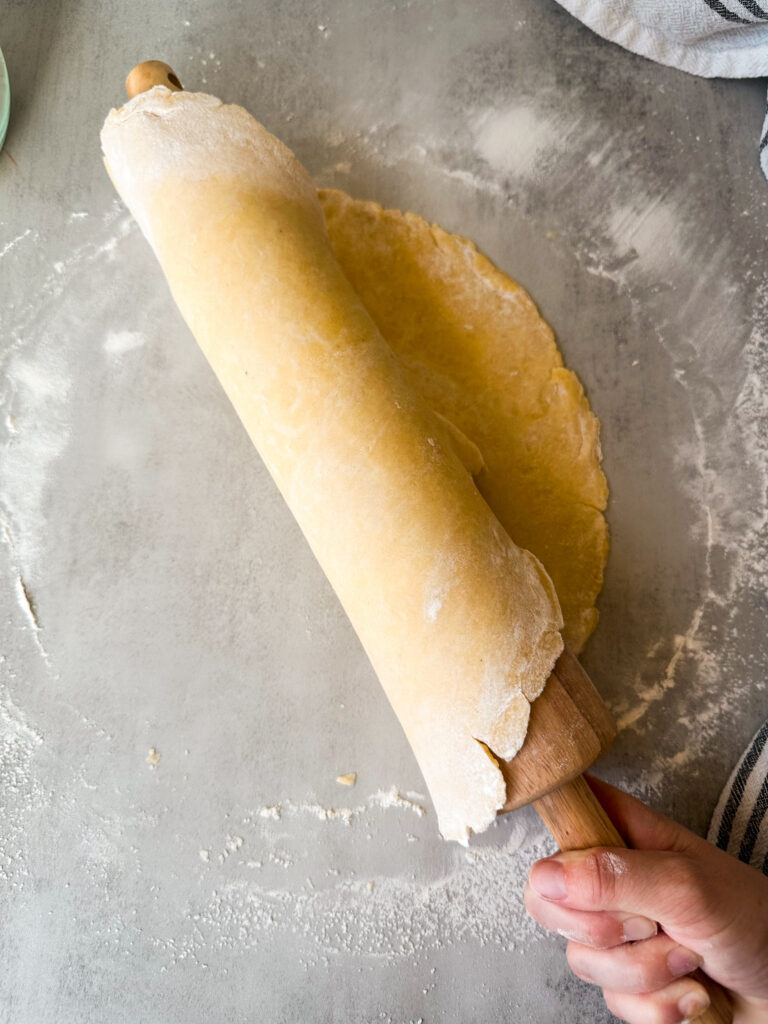
Once you’ve rolled out your circle of pie dough, you can use your rolling pin to gently roll the pie crust up on the rolling pin and unroll it over the pie pan. Don’t roll the pie crust too tightly when you do this, or it’ll stick together. Think a loose roll. This makes for an easy transfer!
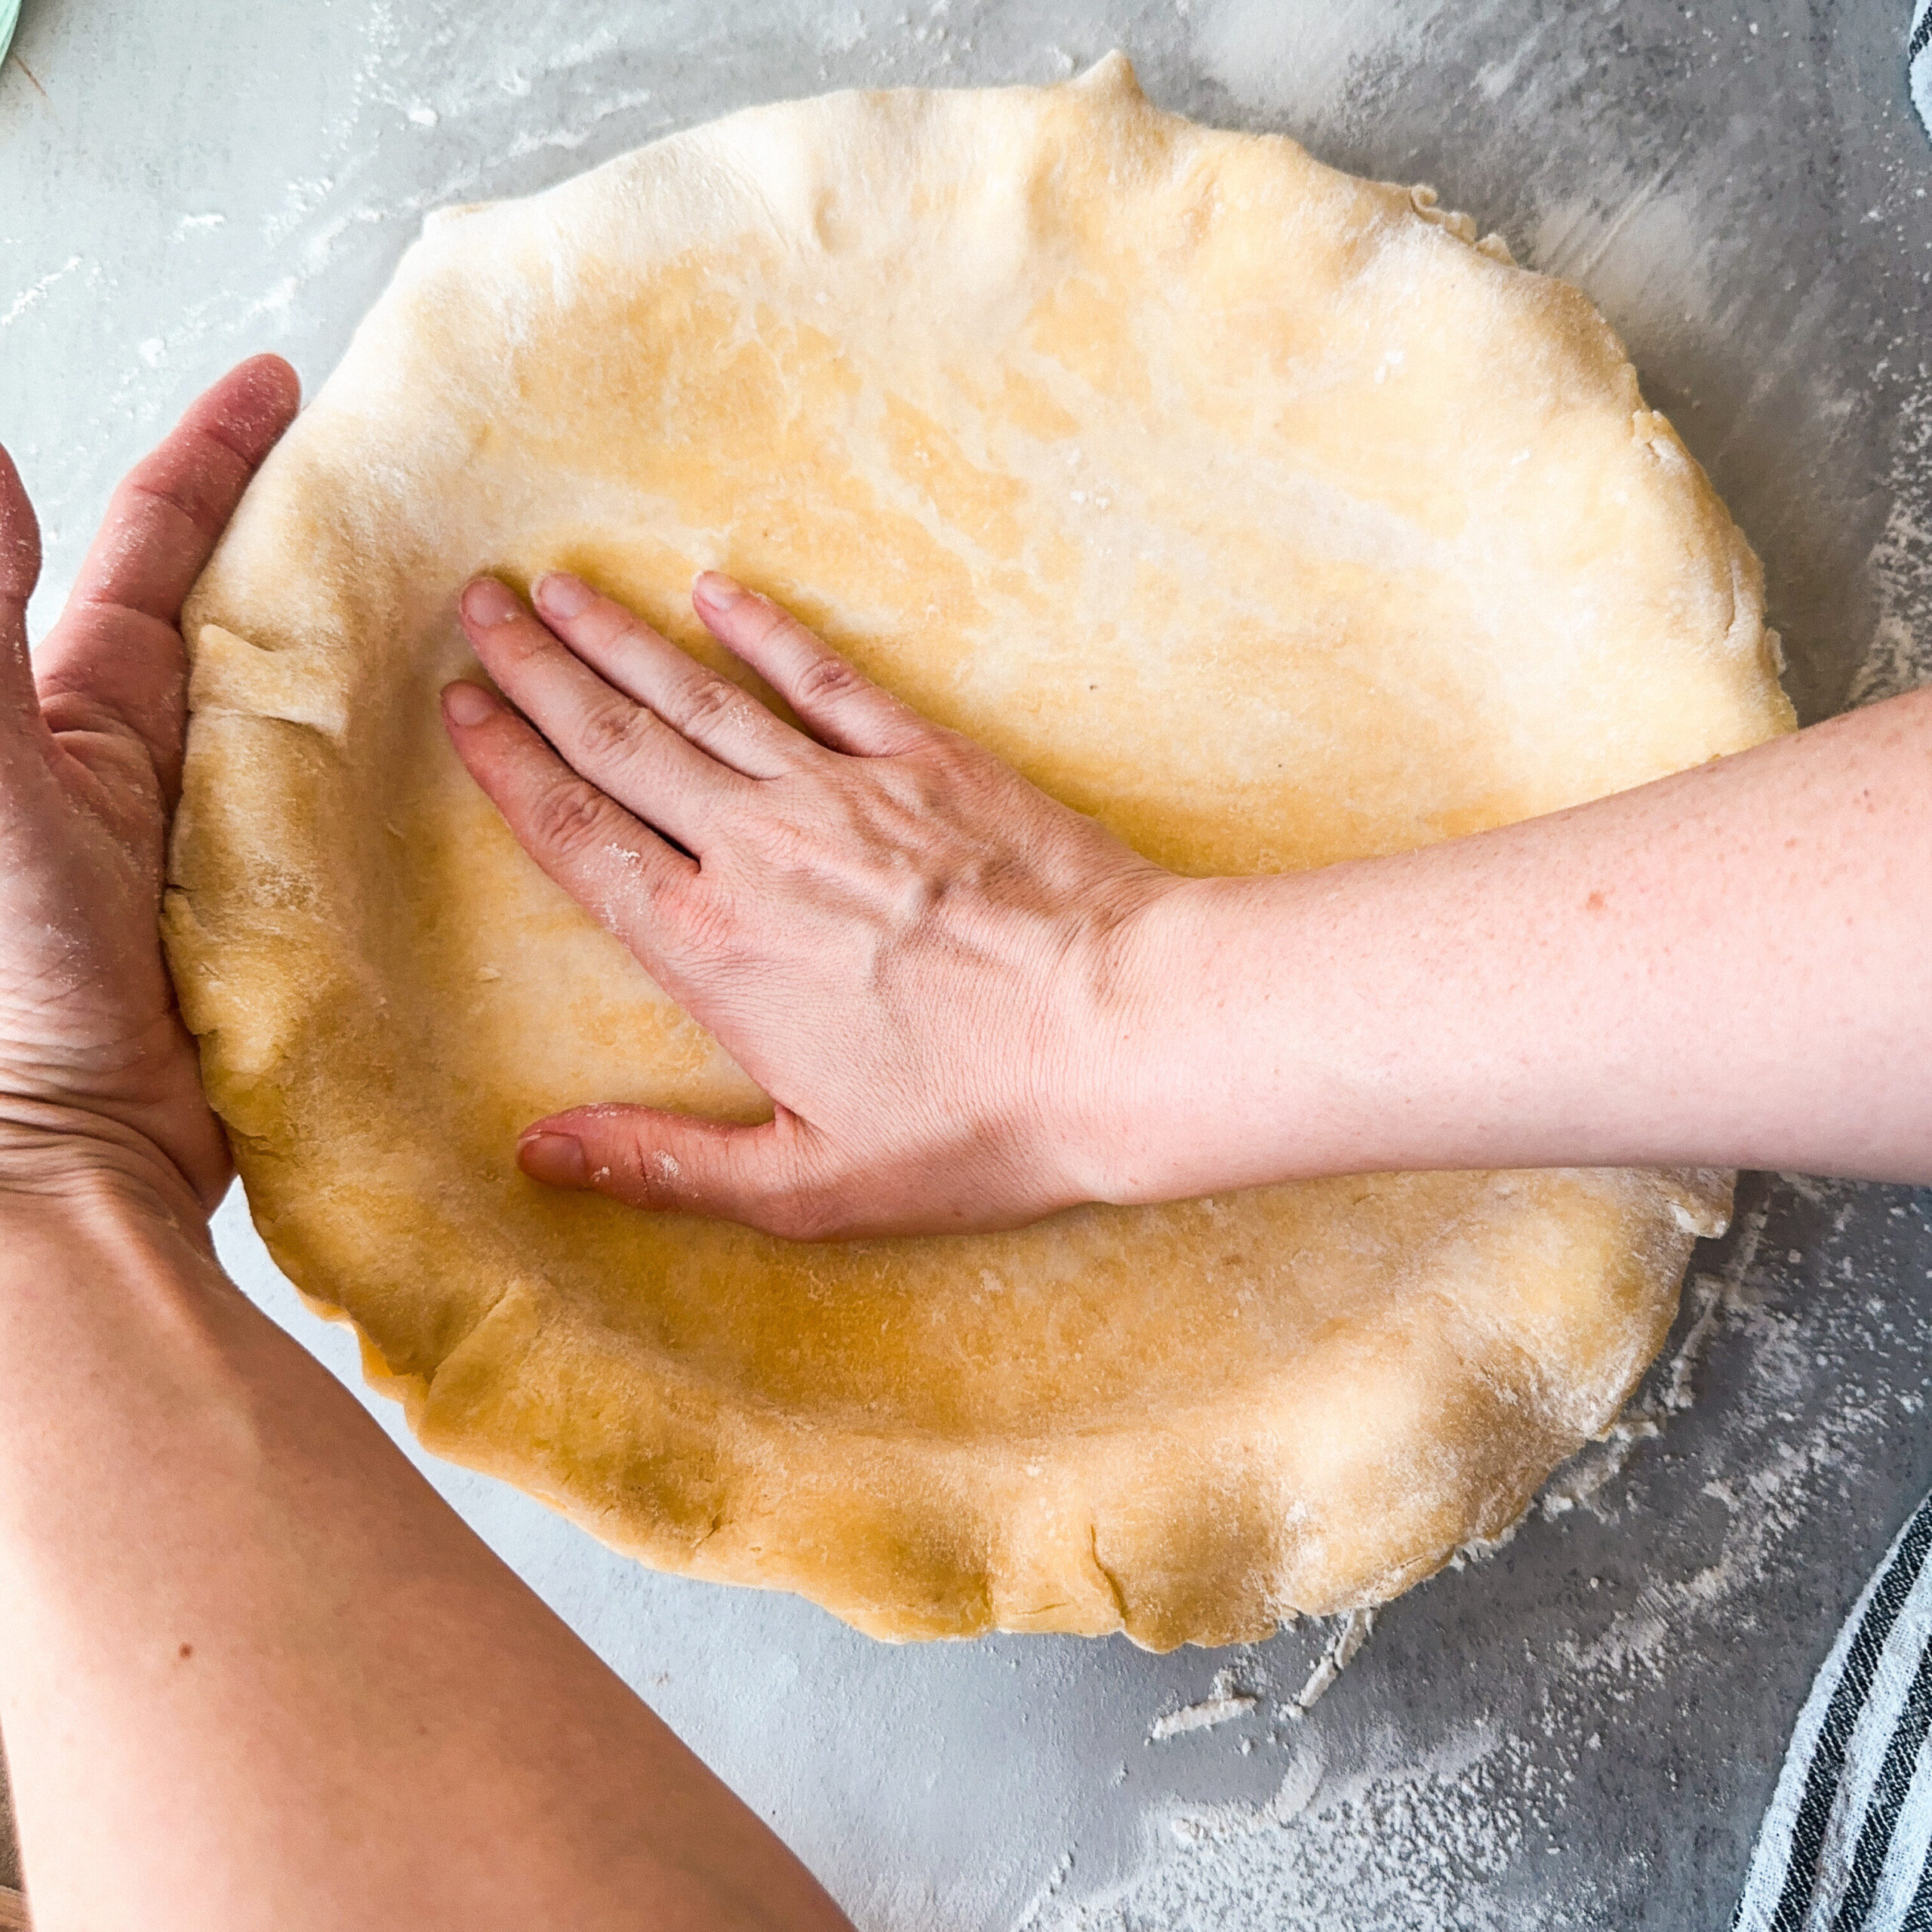
Try to center your crust over the pie pan as much as possible gently unrolling the crust over the pie pan.

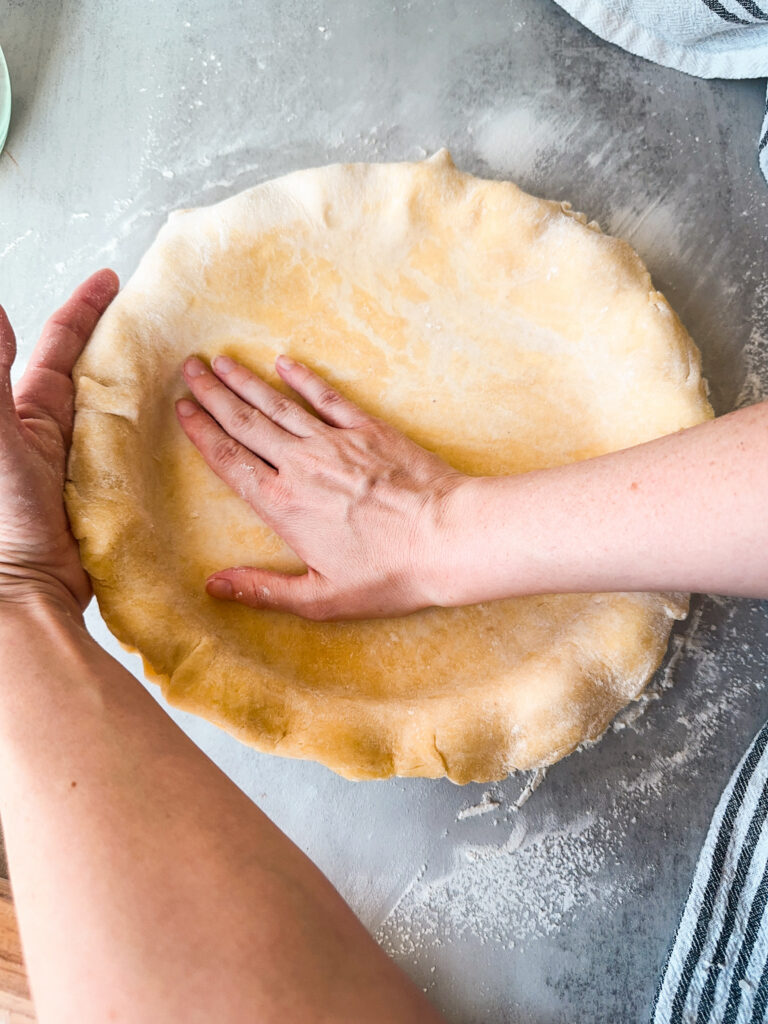
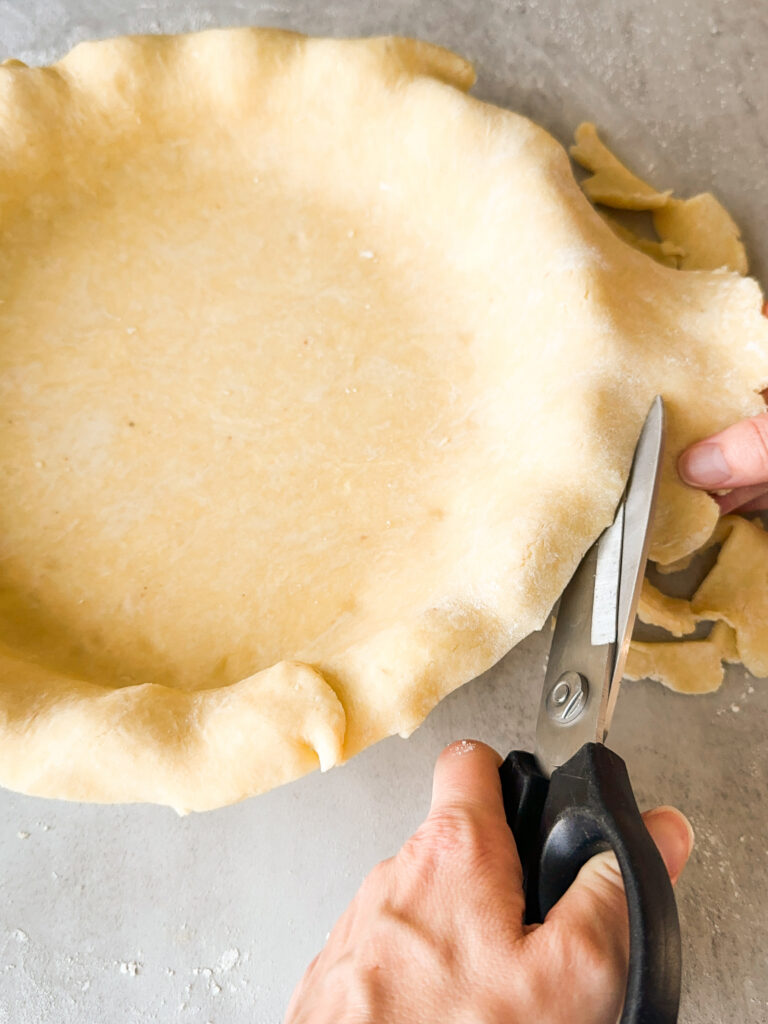
Use one hand to lift the crust, and one hand to press the crust into the edges of the pie pan fitting the dough to the pan. Using kitchen scissors, trim any excess crust to create a 1-inch overhang of pie crust all around the pie pan. Make sure no air bubbles are under the crust.
Once you’ve trimmed your crust and have that 1-inch overhang of pie dough, you’ll want to decide based on your pie recipe if you want to flute, crimp, or add a top crust or lattice to your pie. If you’re recipe doesn’t call for a top crust or lattice, you can proceed with crimping or fluting the pie crust edges as directed below. If you’re adding a top crust or a lattice, you can jump to that section and proceed.
Step 2: How to Crimp or Flute your pie crust
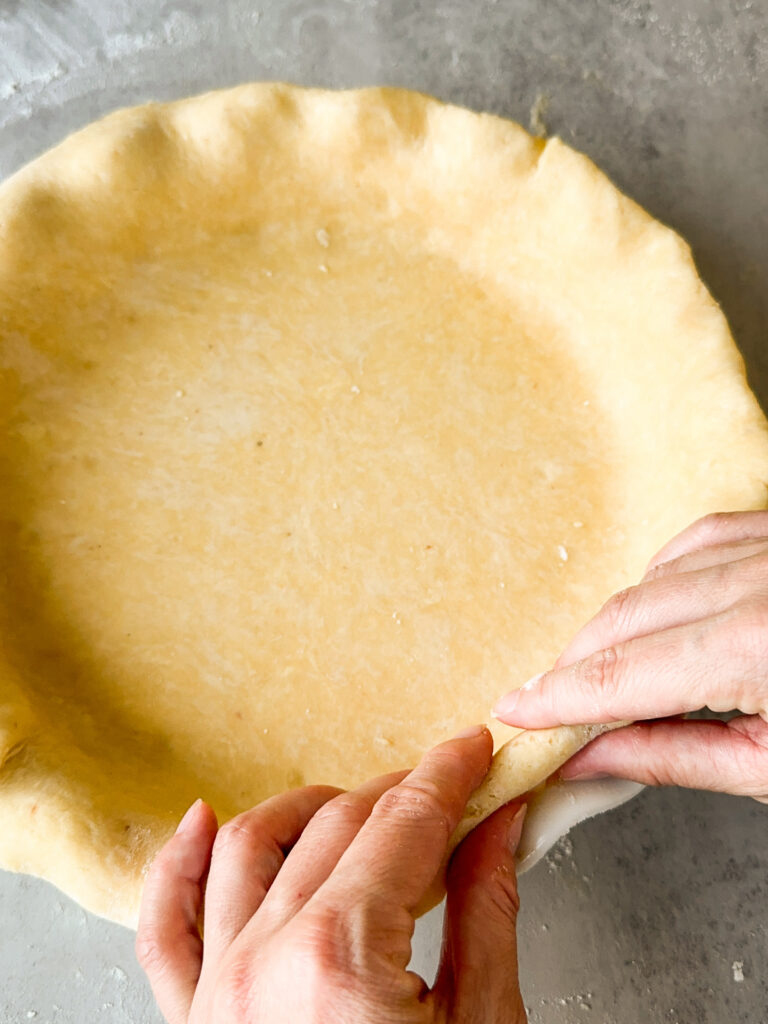
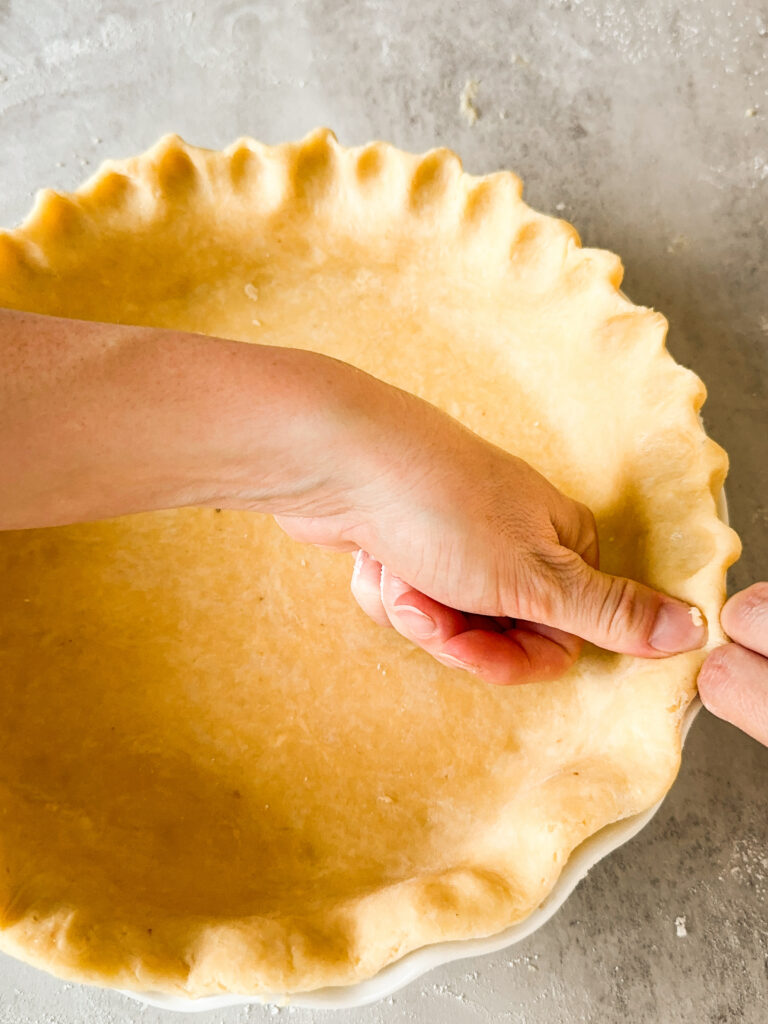
First to prepare your pie crust edge for shaping, tuck the 1-inch overhang of pie dough under itself and work around the pie pan making the crust flesh with the pie pan. Then choose how you want to shape your edge.
Crimping your edges- Using a fork, push down around the edges of the pie until you’ve worked your way around the entire edge of the pie pan. This will give a lovely crimped edge to your crust.
Fluting your edges- Using two knuckles and one thumb, press with your thumb between your two knuckles to form a ‘V” shape around the entire edge of the pie crust.

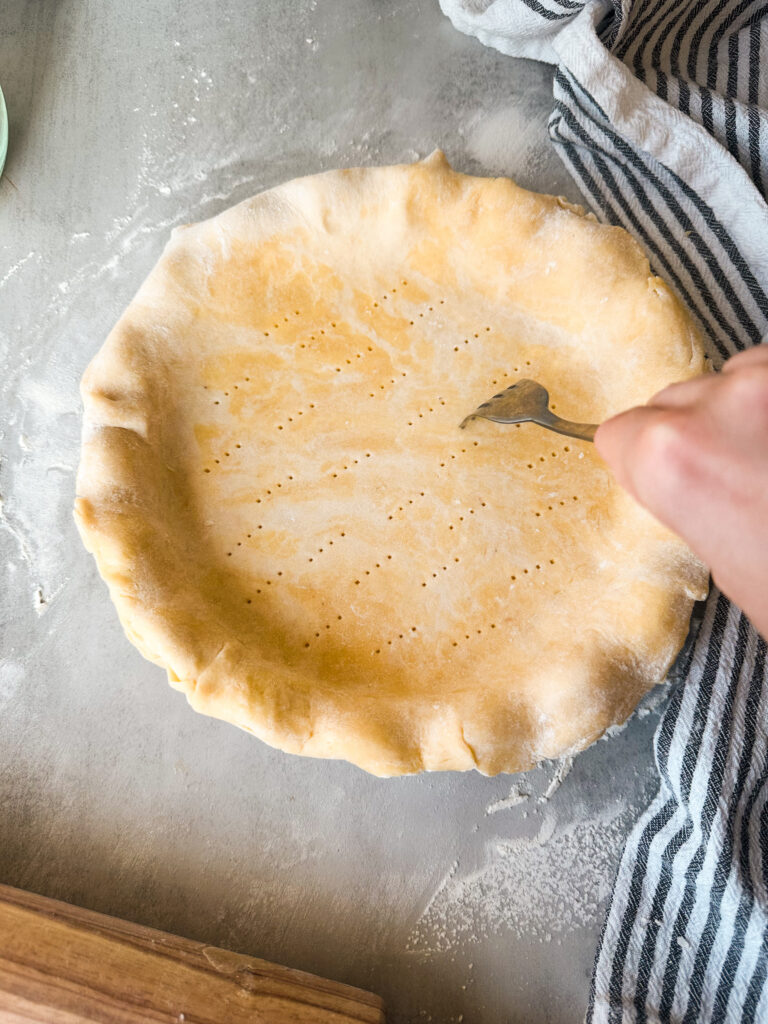
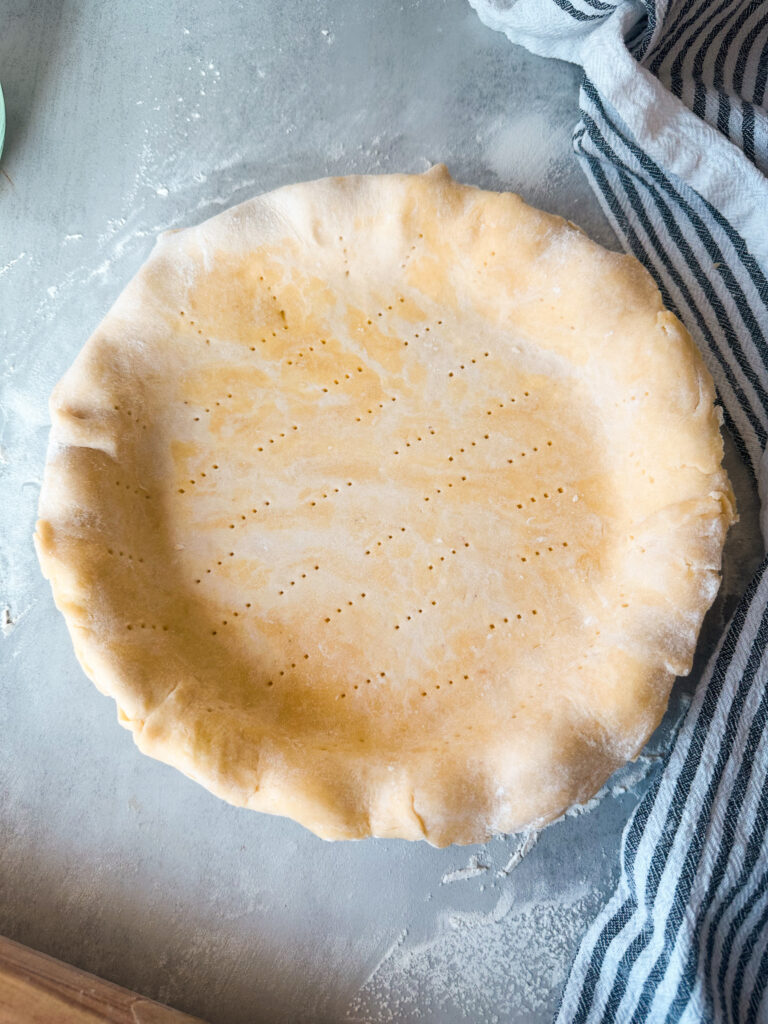
Next, you’ll use a fork to “dock” or press holes into the pie crust all over the pie crust bottom. You can also do this to the sides if you’d like. This prevents the pie crust from puffing up and helps with an even bake.
Step 3: How to add a top crust to your pie
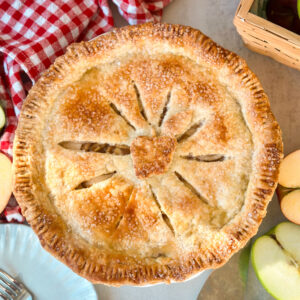
Adding a top crust to your pie is very easy, and is commonly done with fruit pies that have an unbaked bottom crust and the filling is added after you roll out and shape the bottom pie crust. Because the pie crust and filling need the same amount of baking time, you don’t have to par-bake the crust and you can add the top crust right away.
Grab your 2nd disc of pie dough you prepared, and flour your work surface and your rolling pin.
Gently roll out your pie dough to about 1/4-1/8 inch thickness, and roughly a 10 inch wide circle.
Using your rolling pin again to gently roll up the crust, transfer the dough to the top of the pie trying to get it as evenly over the top of the pie dish as possible.
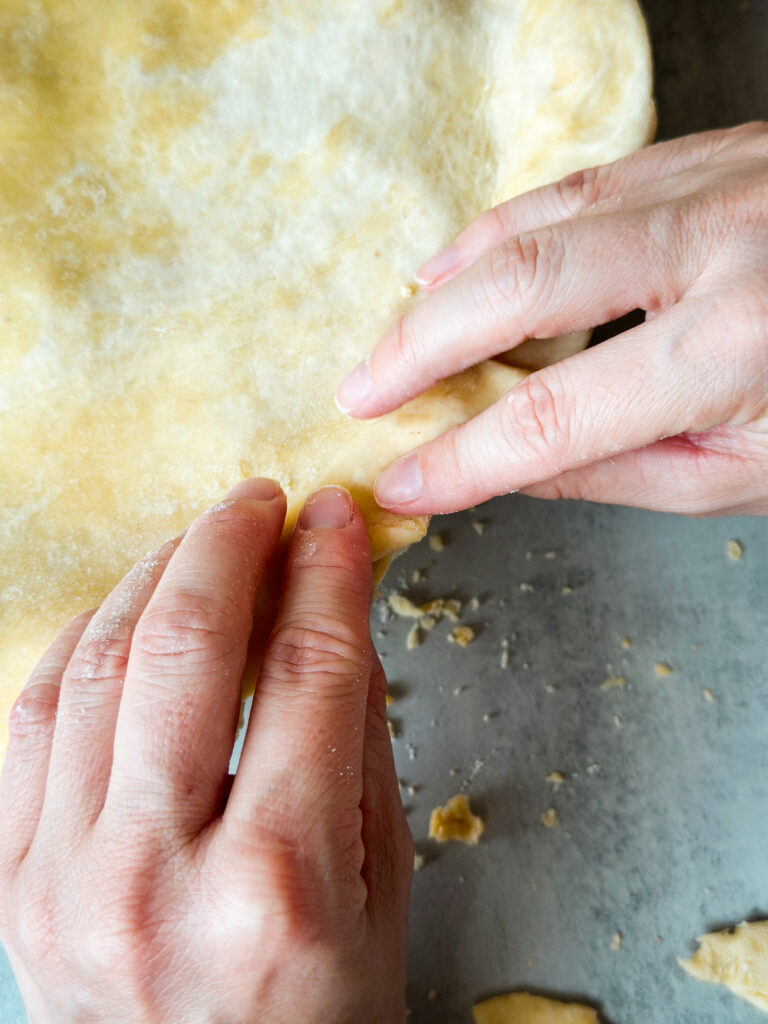
Trim your top crust to match your bottom crust, leaving about 1-inch of overhang. Now that you have both crusts trimmed and in place, pinch the dough together and roll and tuck the dough under itself to create a thick edge that is flesh with the pie pan. See below on how I did this.
I find the best way to seal the edges on pies with a top crust is to crimp the edge using a fork. Work your way around the edge of the pie pressing down with a fork on the edge of the crust to seal the two crusts together and make the edge pretty.


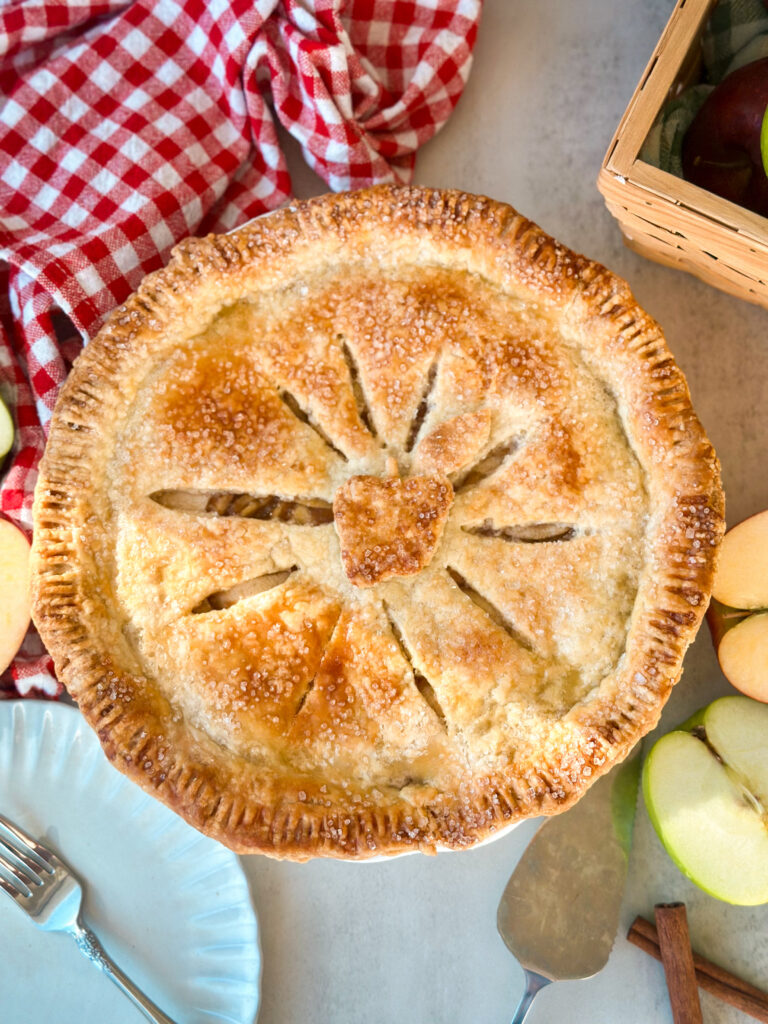
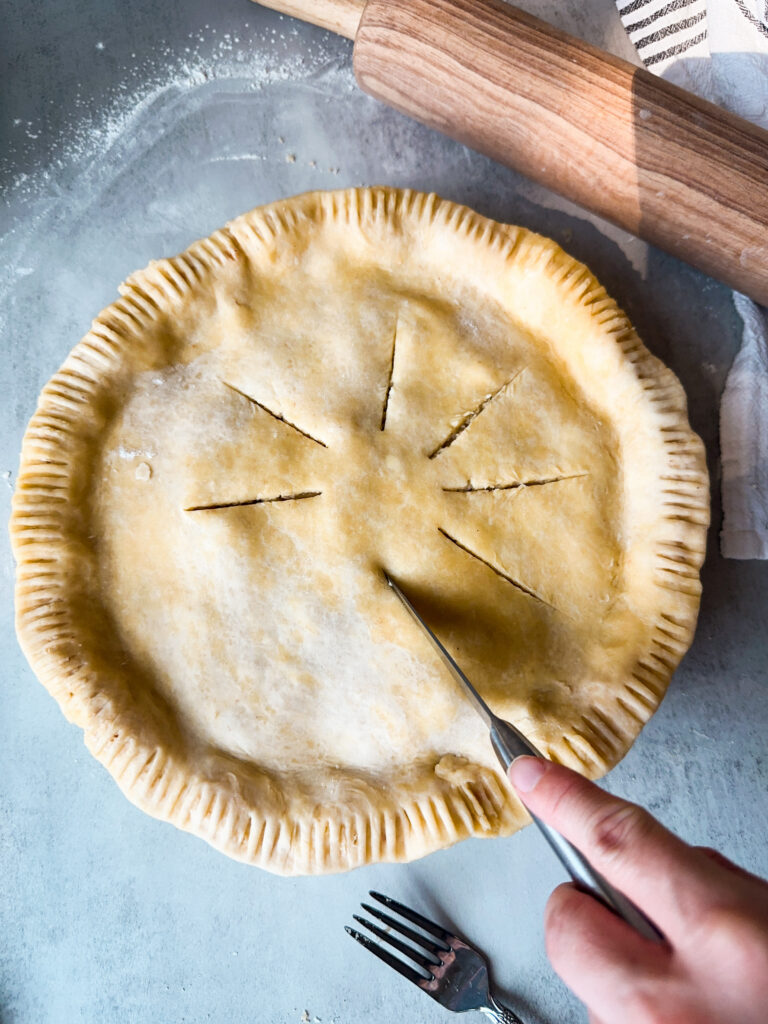
With pies that have a top crust that aren’t latticed, I recommend cutting vent holes for steam to escape so your pie doesn’t puff up and ooze. Using a sharp knife, cut slits or “spokes” around the pie in a circular pattern as pictured below.
Step 4: How to par-bake pie crust
Par-baking pie crust is an excellent option to pre-bake your crust when it has a filling that is very wet or doesn’t need as much baking time.
Preheat your oven to 375 F.
You’ll need a piece of parchment paper, pie weights, and a baking sheet. Cut a piece of parchment paper large enough to line your pie, and crumple it up in your hands. This will keep the parchment from rolling up on you.
If you don’t have ceramic pie weights, you can also use dried beans to hold the parchment paper in place. Filling the pie with weights or beans avoids the pie crust from slipping down the side and the crust loosing it’s shape. The weights should mostly fill up the pie dish for this to work properly.
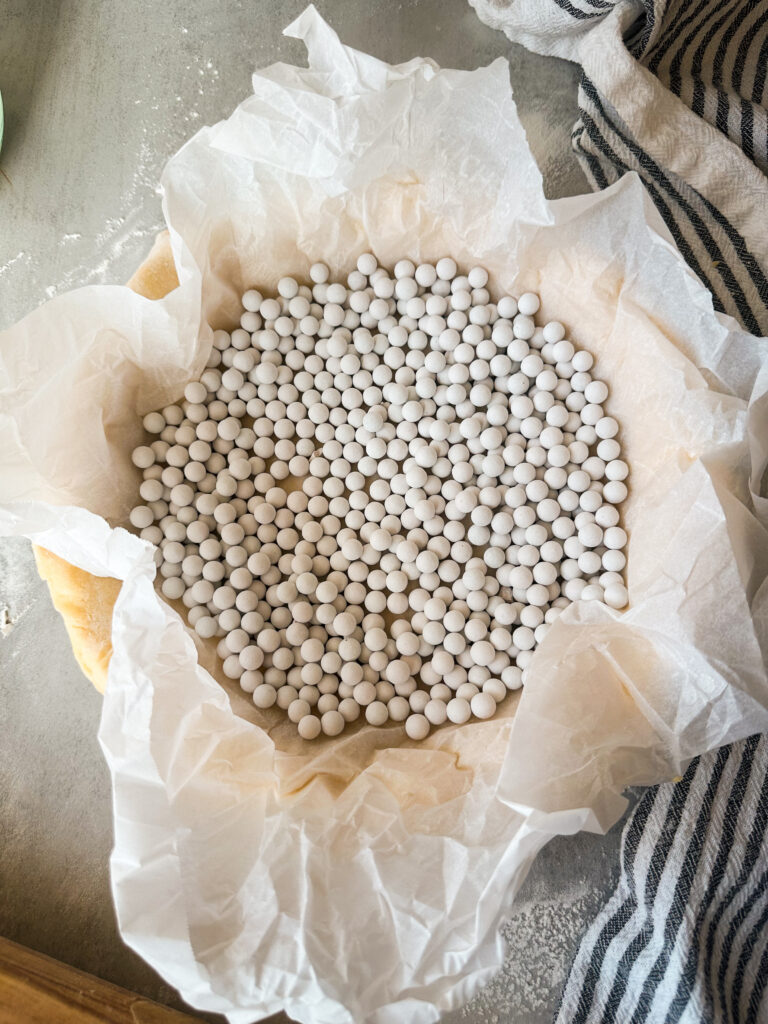
Pour the ceramic weights or beans (about 2 cups) into the parchment-lined pie dish, and transfer the pie dish to a cookie sheet. This makes for easy removal when removing the pie, and avoids the crust being destroyed by the oven mitts.
Tip: Freeze the shaped pie crust for 30 minutes prior to baking to help the crust hold it’s shape during baking. Don’t skip this!
Bake the pie crust for 18 minutes at 375 F, then remove the parchment paper and pie weights.
Return the pie crust to the oven without the parchment and weights for another 5-10 minutes. The bottom of the crust should look dry and golden.
And that’s it! You’re pie crust is now perfectly par-baked. Fill and bake your pie as the recipe directs.
Step 5: How to fully blind bake pie crust
For pies that require a fully baked crust, simply follow the instructions above for par-baking your pie crust.
Instead of baking for 5-10 minutes after removing the weights like the par-baked pie crust, bake 15-18 minutes for the crust to be fully done.
Allow the crust to cool and proceed as the recipe directs.
Step 6: How to add a top crust to a par-baked pie crust
Because of the moisture content in fruit, a common complaint can be that a double-crust pie ends up with a soggy bottom. I personally like to par-bake my pie crust, add my filling, and then add the top crust like I do in my Sourdough Apple Pie Recipe. The only issue with this, is that the bottom crust has already set from the par-bake making this process a little more technical but I’m going to walk you through it.
I’m a firm believer in this extra step, and if you love your pie crust to be perfectly done then I recommend giving it a try!
Start with your pie dough rolled and fitted into your pan and as listed under Step 1: How to roll out and shape your pie crust.
Follow the steps to shape your pie crust, but instead of trimming the 1-inch overhang of crust par-bake the pie crust without trimming the edges at all.

Proceed with Step 4: How to par-bake pie crust, and allow the crust to cool for about 5-10 minutes.
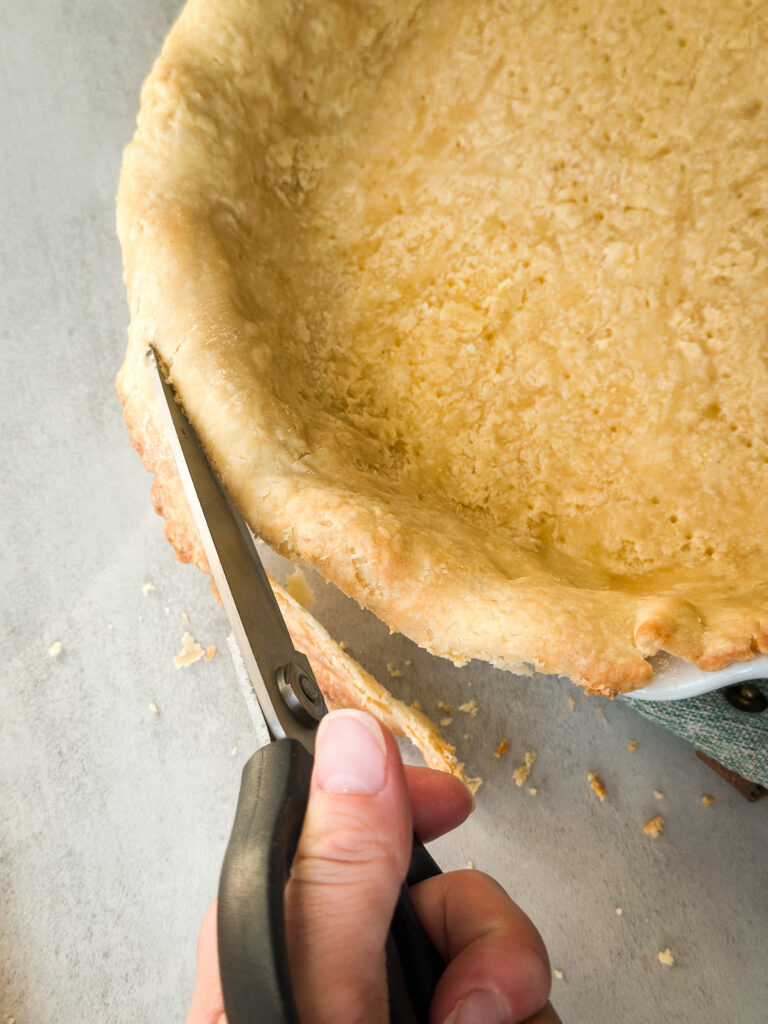
Once the crust has partially cooled, use kitchen shears or a sharp knife to trim the par-baked crust to make the crust flesh and even with the pie pan. Allow the crust to cool fully after trimming before adding the top crust.
Grab the second disc of pie dough, and flour your work surface and a rolling pin. Roll out the second disc of pie dough to about a 12 inch circle, roughly 1/8 inch thickness.
Using your rolling pin, roll up the second crust and transfer the crust over the top of your pie. Center the crust as much as possible. Trim your top crust to leave a 1-inch overhang. You can use any extra bits of pie dough for decoration if desired.
Now you’re going to use the 1-inch overhang of pie crust and tuck it UNDER the bottom crust that is par-baked. If you need to, use a fork or knife to gently lift the bottom crust to help you tuck the top crust under the bottom crust as pictured below. If a bit of the bottom crust is crumbly, that’s okay just keep tucking and working your way around the pie.
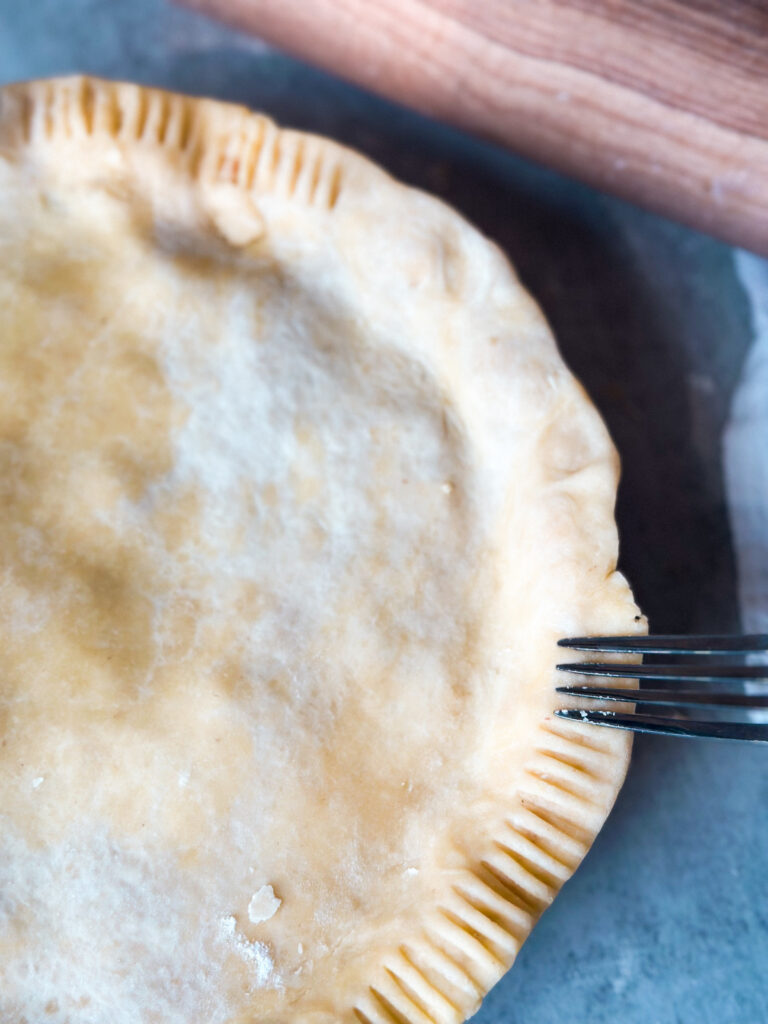

Crimp the edges of the pie with a fork to seal the top crust down to the bottom crust. Cut vents in the top of the pie to release steam as pictured in a circular pattern.
And that’s all there is to it! You’ve just added a top crust to a par-baked pie shell. Follow the recipe baking directions to complete your pie.
Step 7: Adding an Egg wash
The final step for the perfect pie crust, is to add an egg wash.
I like to use one egg beaten with 1 teaspoon of water in a small bowl. The egg wash is generally applied after par-baking the pie crust to the rim of the crust (after adding filling) or to the top of a pie after adding the top crust.
Adding an egg wash is an excellent way to encourage shine and a golden color to your pie, and can also help adhere common garnishes or decorations like coarse sugar for sweet pies and flaky sea salt for savory pies.
For crusts with a lattice or top crust- Add the egg wash using a pastry brush or paper towel liberally over the top of the pie and the edges before baking the pie.
For par-baked pie crusts- Add the egg wash using a pastry brush or paper towel to the rim or top of the pie crust after par-baking and after adding filling.
For fully blind baked pie crusts- add the egg wash to the rim of the pie crust after removing the pie weights using a pastry brush or paper towel.
After adding the egg wash you can sprinkle the top of your pie with any garnish you like, or use the egg wash to help hold any decorations you add to your pie using left over pie crust. Make sure to also brush any decorations with egg before baking the pie.
Yields 2 9-inch pie shells or 1 9-inch double crust pie
How to Store:
Room Temperature- Store baked pie shells up to two days at room temperature well covered with plastic.
Refrigerator- Keep pie dough wrapped tightly in plastic wrap and stored in the refrigerator for up to one week.
Freezer- Freeze shaped pie shells (unbaked) for up to 3 months wrapped tightly in plastic then foil. Bake straight from frozen, adding 3-5 minutes to the bake time.
Tip: Freeze unbaked pie shells uncovered for 30 minutes to set then wrap in plastic to store.
Troubleshooting Common Issues and FAQ’s:
Why did the edges of my pie crust slid down while it was par-baking or blind baking?
If your edges slide down, the dough was too warm or under-weighted. Always freeze for 30 minutes before baking and fill weights to the top.
Why did my crust shrink up?
If your crust shrinks, it wasn’t rested long enough or was over-handled. Chill for at least 2 hours and try to be gently when rolling out the dough.
Why was my bottom crust still wet after par-baking?
A soggy bottom means it wasn’t baked long enough after removing weights. Bake until the bottom looks dry and golden.
How do I fix my edges cracking when I roll out my dough?
If your dough is cracking, moisten your fingers with cold water and use your hands to press the dough back together before resuming rolling out or shaping.
My dough is getting greasy when I roll it out and shape it, why?
When your pie dough gets too warm, the butter begins to melt and starts to get greasy. Return the dough to the refrigerator to chill another hour before proceeding if you notice this happening.
Can I use salted butter?
Yes, just reduce the added salt to ¼ teaspoon.
What can I use instead of ceramic pie weights?
Dried beans or rice work beautifully. Let them cool before storing for reuse.
Which pie dish is best?
I find ceramic pie pans bake the most evenly, you can find the pie dish I use under tools.
Do I grease the pie pan?
I like to gently and ever so lightly grease the pie dish, I find it has a cleaner release. You can also lightly flour the pie dish to help the crust release.
How thick should I roll the pie crust?
About ⅛ inch (3 mm). Slightly thicker for top crusts or lattice (around ⅙ inch).
Why does my crust bubble during baking?
Not enough pie weights or docking. Don’t forget to prick your crust with a fork prior to baking, and make sure you use enough pie weights to fill the pan.
If you enjoyed this recipe, don’t forget to leave a star rating and drop a comment! Happy pie baking!
Buttery Sourdough Pie Crust Recipe
Equipment
- 9-inch Pie Pan – to bake pie crust.
- Mixing Bowl -to combine pie crust if mixing dough by hand.
- Pastry Blender (optional) – helpful to mix and combine the pie crust when mixing by hand.
- Digital kitchen scale (optional) – for accurate measuring especially helpful with sourdough baking.
- Cheese Grater (if mixing by hand) – if you're mixing this crust by hand, I highly recommend using a cheese grater to grate your butter into even pieces.
- Food Processor (if using food processor method) -If you want to make this crust using a food processor, you'll need a food processor with the chopping attachment.
- Rolling Pin – to roll out your pie crust.
- Fork – to vent pie crust.
- Kitchen Scissors – easiest way to trim pie crust. You can also use a a sharp knife.
- Parchment paper – if par-baking or blind baking the pie crust, you'll need to line the pie crust with parchment paper for the pie weights.
- Pie Weights (optional) or use beans and rice.
- Pastry brush (optional) – for applying egg wash.
Ingredients
Pie Crust:
- 3 cups (360g) all-purpose flour
- 1 ½ cups (340g) unsalted butter cold
- 1 ½ teaspoons (7g) fine sea salt
- 1 ½ tablespoons (18g) granulated sugar
- 1/4 teaspoon baking powder
- ¾ cup (180g) sourdough discard cold
- 1 ½ teaspoons (7g) lemon juice
- 1-2 Tablespoons ice water only if needed see notes
Egg Wash:
- 1 egg
- 1 teaspoon water
Optional Garnishes:
- Coarse sugar for sweet pies
- Flaky sea salt for savory pies
Instructions
Mixing By Hand:
- First make sure your butter is straight from the refrigerator, you can even pop it into the freezer for 15 minutes prior to grating it.
- Using a cheese grater on the largest setting, grate your butter and transfer to a bowl.1 ½ cups (340g) unsalted butter
- Note: You can also cut your butter up into 1/4 inch cubes if you don't have a cheese grater.
- Add the flour, sugar, salt, and baking powder to the butter. Combine the ingredients until all of the butter coated.3 cups (360g) all-purpose flour, 1 ½ teaspoons (7g) fine sea salt, 1 ½ tablespoons (18g) granulated sugar, 1/4 teaspoon baking powder
- If the butter is sticking together or the chunks are too large, use a fork or dough blender to help break them up. You want little blueberry sized chunks of butter.
- Add the sourdough discard and lemon juice to the bowl.¾ cup (180g) sourdough discard, 1 ½ teaspoons (7g) lemon juice
- Begin to mix with a pastry whisk or your hands to bring the dough together. If you need to, you can turn your dough out on a clean surface to mix it with your hands.
- The ball of dough should come together easily, if it’s too dry add a teaspoon of cold ice water at a time until your dough just comes together.1-2 Tablespoons ice water
- If the dough is too wet or sticky, sprinkle with a little flour and continue to bring the dough together.
- I typically don’t even need to use water, but it’s okay and normal if you do!
- Because your hands can melt the butter, it’s important to just bring the dough together and then stop mixing. You want chunks of butter and overworking the dough isn’t the goal.
- Flatten the dough into a disc, and cut the dough in half (this doesn’t have to be perfect just guess). You want to see the bits of butter throughout your dough, this is what makes those flakey layers!
- Flatten each half into a round, then wrap tightly in plastic wrap and refrigerate at least 2 hours but optionally overnight for the best fermentation and the flakiest pie crust.
Mixing with a food processor:
- Using a food processor to mix your pie dough is easy and great for baking in bulk, especially during the holidays. You’ll want to use the blade attachment on your food processor for this process.
- Start by assembling your food processor with the blade attachment.
- Measure the flour, sugar, baking powder, and salt into the work bowl of your food processor. Pulse these ingredients together a few times to incorporate them.
- Cut up your butter (make sure it’s very cold), into 1/4 inch cubes. Add the butter to the dry ingredients.
- Pulse the butter until you have blueberry sized balls of butter cut up into the flour mixture. Don’t over blend the butter into the flour at this stage! Go slow and stop when you see the butter is chopped up to the desired size.
- Add the sourdough discard and the lemon juice to the work bowl.
- Pulse together the ingredients slowly until a dough starts to form. If the dough is very dry, you can add 1 teaspoon of ice water at a time until the dough just comes together.
- Once a pie dough is forming, dump out the dough onto a clean work surface and use your hands to bring the dough together. You want to see the bits of butter throughout your dough, this is what makes those flakey layers!
- Divide the dough, and flatten both sections into discs and wrap tightly in plastic wrap.
- Refrigerate the pie crust at least 2 hours but optionally overnight for the best fermentation and the flakiest pie crust.
Step 1: How to roll out and shape your pie crust
- Allow your pie crust to sit at room temperature about ten minutes, to take the chill off so you’re able to roll it out. Gather your rolling pin, flour, and pie pan while your dough rests and prepare a clean work surface. This is optional, but I like to spray a little cooking spray on a paper towel and gently wipe my pie pan to ever so lightly grease it at this point. Another option is to flour your pan, to help with a clean release of your pie crust.
- Flour your work surface and rolling pin, and starting at the center of your dough disc begin to roll your crust out. This is a gentle process, you don’t want to have cracking dough. You want slow even steady pressure on your dough.
- Continue to roll out your dough, aiming for a a 12-inch circle which is going to fit a 9-inch pie pan perfectly. If your circle starts to become uneven, use your hands to gently press the dough back into the shape you want. Your crust will be about 1/8 inch thickness.
- Tip: I like to lift my dough and flip it over occasionally to avoid the dough sticking to my surface. If your edges are cracking, dip your fingers in a little ice water and press the dough back together before resuming rolling it out.
- Once you’ve rolled out your circle of pie dough, you can use your rolling pin to gently roll the pie crust up on the rolling pin and unroll it over the pie pan. Don’t roll the pie crust too tightly when you do this, or it’ll stick together. Think a loose roll. This makes for an easy transfer!
- Try to center your crust over the pie pan as much as possible gently unrolling the crust over the pie pan.
- Use one hand to lift the crust, and one hand to press the crust into the edges of the pie pan fitting the dough to the pan. Using kitchen scissors, trim any excess crust to create a 1-inch overhang of pie crust all around the pie pan. Make sure no air bubbles are under the crust.
- Once you’ve trimmed your crust and have that 1-inch overhang of pie dough, you’ll want to decide based on your pie recipe if you want to flute, crimp, or add a top crust or lattice to your pie. If you’re recipe doesn’t call for a top crust or lattice, you can proceed with crimping or fluting the pie crust edges as directed below. If you’re adding a top crust or a lattice, you can jump to that section and proceed.
Step 2: How to Crimp or Flute your pie crust
- First to prepare your pie crust edge for shaping, tuck the 1-inch overhang of pie dough under itself and work around the pie pan making the crust flesh with the pie pan. Then choose how you want to shape your edge.
- Crimping your edges– Using a fork, push down around the edges of the pie until you've worked your way around the entire edge of the pie pan. This will give a lovely crimped edge to your crust.
- Fluting your edges- Using two knuckles and one thumb, press with your thumb between your two knuckles to form a 'V" shape around the entire edge of the pie crust.
- Next, you’ll use a fork to “dock” or press holes into the pie crust all over the pie crust bottom. You can also do this to the sides if you’d like. This prevents the pie crust from puffing up and helps with an even bake.
Step 3: How to add a top crust to your pie
- Adding a top crust to your pie is very easy, and is commonly done with fruit pies that have an unbaked bottom crust and the filling is added after you roll out and shape the bottom pie crust. Because the pie crust and filling need the same amount of baking time, you don’t have to par-bake the crust and you can add the top crust right away.
- Grab your 2nd disc of pie dough you prepared, and flour your work surface and your rolling pin.
- Gently roll out your pie dough to about 1/4-1/8 inch thickness, and roughly a 10 inch wide circle.
- Using your rolling pin again to gently roll up the crust, transfer the dough to the top of the pie trying to get it as evenly over the top of the pie dish as possible.
- Trim your top crust to match your bottom crust, leaving about 1-inch of overhang. Now that you have both crusts trimmed and in place, pinch the dough together and roll and tuck the dough under itself to create a thick edge that is flesh with the pie pan. See below on how I did this.
- I find the best way to seal the edges on pies with a top crust is to crimp the edge using a fork. Work your way around the edge of the pie pressing down with a fork on the edge of the crust to seal the two crusts together and make the edge pretty.
- Pinch the dough together and roll the crust under itself to make the pie crust flesh with the pie pan.
- With pies that have a top crust that aren’t latticed, I recommend cutting vent holes for steam to escape so your pie doesn’t puff up and ooze. Using a sharp knife, cut slits or “spokes” around the pie in a circular pattern as pictured below.
Step 4: How to par-bake pie crust
- Par-baking pie crust is an excellent option to pre-bake your crust when it has a filling that is very wet or doesn’t need as much baking time.
- Preheat your oven to 375 F.
- You’ll need a piece of parchment paper, pie weights, and a baking sheet. Cut a piece of parchment paper large enough to line your pie, and crumple it up in your hands. This will keep the parchment from rolling up on you.
- If you don’t have ceramic pie weights, you can also use dried beans to hold the parchment paper in place. Filling the pie with weights or beans avoids the pie crust from slipping down the side and the crust loosing it’s shape. The weights should mostly fill up the pie dish for this to work properly.
- Pour the ceramic weights or beans (about 2 cups) into the parchment-lined pie dish, and transfer the pie dish to a cookie sheet. This makes for easy removal when removing the pie, and avoids the crust being destroyed by the oven mitts.
- Tip: Freeze the shaped pie crust for 30 minutes prior to baking to help the crust hold it's shape during baking. Don't skip this!
- Bake the pie crust for 18 minutes at 375 F, then remove the parchment paper and pie weights.
- Return the pie crust to the oven without the parchment and weights for another 5-10 minutes. The bottom of the crust should look dry and golden.
- And that’s it! You’re pie crust is now perfectly par-baked. Fill and bake your pie as the recipe directs.
Step 5: How to fully blind bake pie crust
- For pies that require a fully baked crust, simply follow the instructions above for par-baking your pie crust.
- Instead of baking for 5-10 minutes after removing the weights like the par-baked pie crust, bake 15-18 minutes for the crust to be fully done.
- Allow the crust to cool and proceed as the recipe directs.
Step 6: How to add a top crust to a par-baked pie crust
- Start with your pie dough rolled and fitted into your pan and as listed under Step 1: How to roll out and shape your pie crust.
- Follow the steps to shape your pie crust, but instead of trimming the 1-inch overhang of crust par-bake the pie crust without trimming the edges at all.
- Proceed with Step 4: How to par-bake pie crust, and allow the crust to cool for about 5-10 minutes.
- Once the crust has partially cooled, use kitchen shears or a sharp knife to trim the par-baked crust to make the crust flesh and even with the pie pan. Allow the crust to cool fully after trimming before adding the top crust.
- Grab the second disc of pie dough, and flour your work surface and a rolling pin. Roll out the second disc of pie dough to about a 12 inch circle, roughly 1/8 inch thickness.
- Using your rolling pin, roll up the second crust and transfer the crust over the top of your pie. Center the crust as much as possible. Trim your top crust to leave a 1-inch overhang. You can use any extra bits of pie dough for decoration if desired.
- Now you're going to use the 1-inch overhang of pie crust and tuck it UNDER the bottom crust that is par-baked. If you need to, use a fork or knife to gently lift the bottom crust to help you tuck the top crust under the bottom crus. If a bit of the bottom crust is crumbly, that's okay just keep tucking and working your way around the pie.
- Crimp the edges of the pie with a fork to seal the top crust down to the bottom crust. Cut vents in the top of the pie to release steam as pictured in a circular pattern.
- And that’s all there is to it! You’ve just added a top crust to a par-baked pie shell. Follow the recipe baking directions to complete your pie.
Step 7: Adding an Egg wash
- The final step for the perfect pie crust, is to add an egg wash.
- I like to use one egg beaten with 1 teaspoon of water in a small bowl. The egg wash is generally applied after par-baking the pie crust to the rim of the crust (after adding filling) or to the top of a pie after adding the top crust.1 egg, 1 teaspoon water
- Adding an egg wash is an excellent way to encourage shine and a golden color to your pie, and can also help adhere common garnishes or decorations like coarse sugar for sweet pies and flaky sea salt for savory pies.
- For crusts with a lattice or top crust- Add the egg wash using a pastry brush or paper towel liberally over the top of the pie and the edges before baking the pie.
- For par-baked pie crusts- Add the egg wash using a pastry brush or paper towel to the rim or top of the pie crust after par-baking and after adding filling.
- For fully blind baked pie crusts- add the egg wash to the rim of the pie crust after removing the pie weights using a pastry brush or paper towel.
- After adding the egg wash you can sprinkle the top of your pie with any garnish you like, or use the egg wash to help hold any decorations you add to your pie using left over pie crust.Coarse sugar, Flaky sea salt
- Make sure to also brush any pie dough decorations with egg before baking the pie.
- Yields 2 9-inch pie shells or 1 9-inch double crust pie