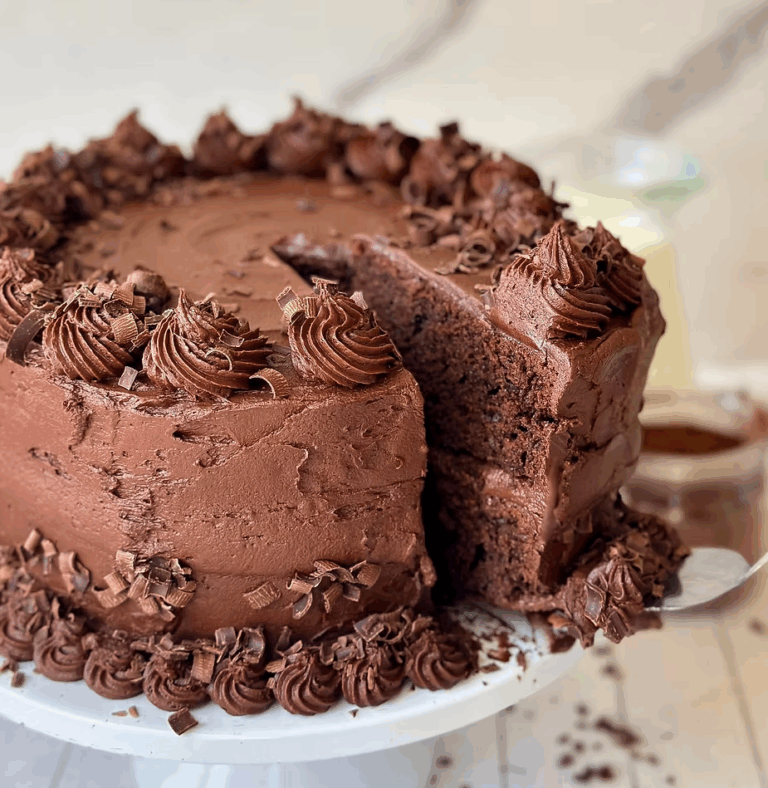
Sourdough Chocolate Cupcakes
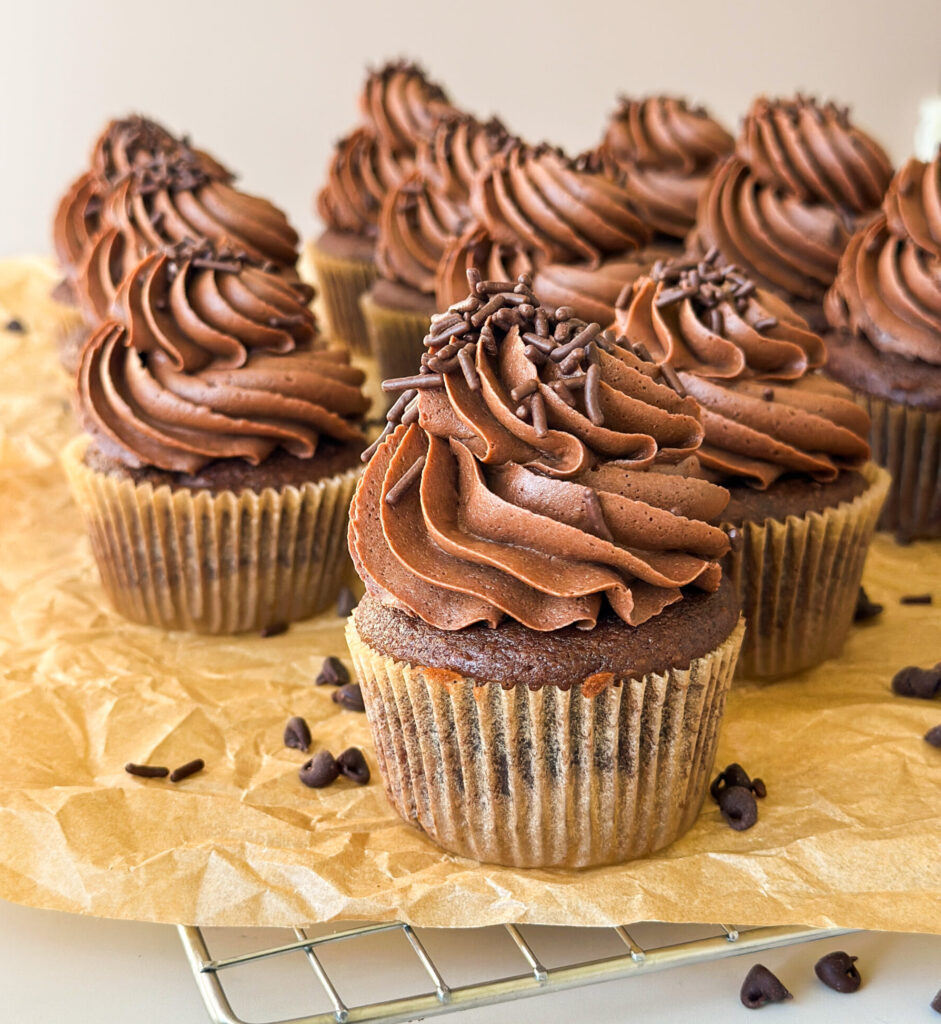
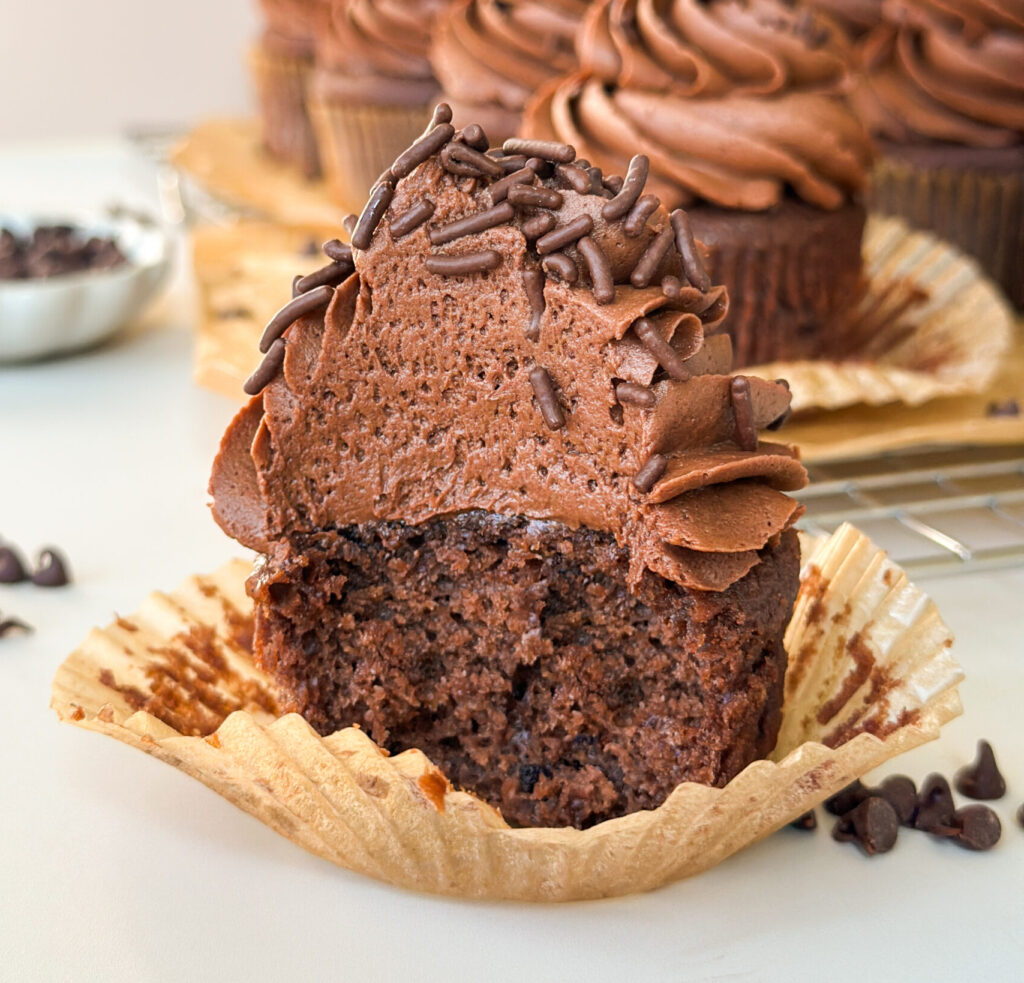
Cupcakes are what I make when I want a cake without committing to a full layered production. These Sourdough Chocolate Cupcakes are rich, plush, deeply chocolatey, and unbelievably soft. They bake up with tall domes and a velvety crumb that stays tender for days, and you can ferment the batter overnight for added benefits of fermentation. Frost them with an easy, indulgent chocolate buttercream for the perfect little indulgence. These are the cupcakes that make a room go quiet!
Why You’ll Love This Recipe
- Ultra-moist crumb: The sourdough discard and optional overnight fermentation keep these cupcakes soft and plush for days.
- Deep chocolate flavor: Rich. intense chocolate that we love without being too sweet.
- Easy chocolate buttercream: A simple indulgent frosting that pairs perfectly and pipes beatifully.
- Fermentation option: Let the batter rest overnight for extra flavor and digestibility, or bake same day if you need cupcakes fast.
- Instant crowd favorite: East to prep ahead, transport, and serve! These are going to be the hit of the party.
Why Use Sourdough Starter in Chocolate Cupcakes?
Using sourdough discard in these cupcakes adds flavor, enhances moisture retention, and makes the crumb softer and more tender. The optional fermentation process also helps break down gluten, making these cupcakes easier to digest.
Do I have to long-ferment these Sourdough Chocolate Cupcakes?
No! You can mix up this batter and bake immediately if you want cupcakes quickly. Just skip the fermentation step!
As an amazon affiliate this post may contain affiliate links, which means I may receive a commission for qualifying purchases. I will only recommend products that I personally love and use.
Tools You’ll Need:
- 2 standard 12-cup cupcake tin- for baking cupcakes. I love these pans from USA Bakeware linked here.
- Cupcake liners- to avoid burned edges. I love these bakery style parchment cupcake liners linked here that are non-stick.
- Measuring cups and spoons- if not using a scale and for smaller ingredients.
- Digital kitchen scale (optional)– for accurate measuring, especially helpful with sourdough baking. I linked the one like here.
- 2 Tablespoon scoop – for scooping batter. I love this scoop for cupcakes linked here.
- Whisk + spatula- for combining ingredients.
- Mixing bowls- for mixing the batter and frosting.
- Hand mixer or stand mixer- for mixing the chocolate buttercream.
- Cooling rack– to cool cupcakes.
- Toothpick or cake tester- to test when cupcakes is done.
- Fine-mesh sieve or sifter- for sifting cocoa and powdered sugar to avoid grainy frosting.
- Pastry bags and decorating tips (optional)– for piping frosting on the cupcakes. If you’re new to cake decoration, this set linked here has pastry bags and an assortment of classic tips to choose from.
Gather Your Ingredients:
- Sourdough starter- (flat or past peak, can be cold or room temperature). Adds depth of flavor and moisture without making the cupcakes “sour”. Key for fermentation.
- All-purpose flour- Gives cupcakes structure and keeps the crumb tender.
- Buttermilk or milk- Lightens the batter and keeps the crumb soft. I personally highly recommend using buttermilk, the texture and tenderness is so lovely. If you don’t have it though, you can substitute with whole milk.
- White sugar– Sweetens the cupcakes and balances out the chocolate.
- Vanilla extract– Enhances the flavor and brings warmth. Used in the cupcakes and the icing.
- Eggs + egg yolks (room temperature)– provide structure and lift with moisture, works as a binder for ingredients. The extra yolks work as a fat binder and bring extra richness to the cupcakes.
- Baking powder + Baking soda– Ensures the right rise and tenderness.
- Salt- Balances sweetness and enhances all the other flavors.
- Sour Cream– Adds moisture and richness while balancing acidity.
- Avocado Oil- Adds moisture and keeps the cupcakes soft and tender. You can substitute for any neutral cooking oil.
- Unsalted Butter- Adds flavor and richness to the cupcakes. Works as the base of the buttercream frosting.
- Dutch-Process Cocoa- The cocoa in these cupcakes is how I achieve that rich chocolate flavor. I recommend Dutch-process for that rich chocolate taste, but you can use dark cocoa if needed to substitute.
- Espresso Powder or Coffee– Intensifies the chocolate without tasting like coffee. You’ll use this in the cupcakes and the frosting, but you can skip this if you’re sensitive to caffeine. Simply omit from the frosting and use warm water in the cake instead. I love this espresso powder linked here from King Arthur for all my baking needs.
- Semi-Sweet Chocolate Chips- Brings that glossy, fudge-like richness to the frosting.
- Powdered Sugar- Sweetens and stabilizes the buttercream. Do not use granulated sugar or your icing will be grainy.
- Heavy Cream- Whips into the buttercream for a silky finish.
- Chocolate Sprinkles (optional)- you don’t have to add sprinkles, but they really do dress these up! I used Supernatural Chocolate Softies for a healthier option linked here.
Instructions
Step 1: Mix Fermented Base
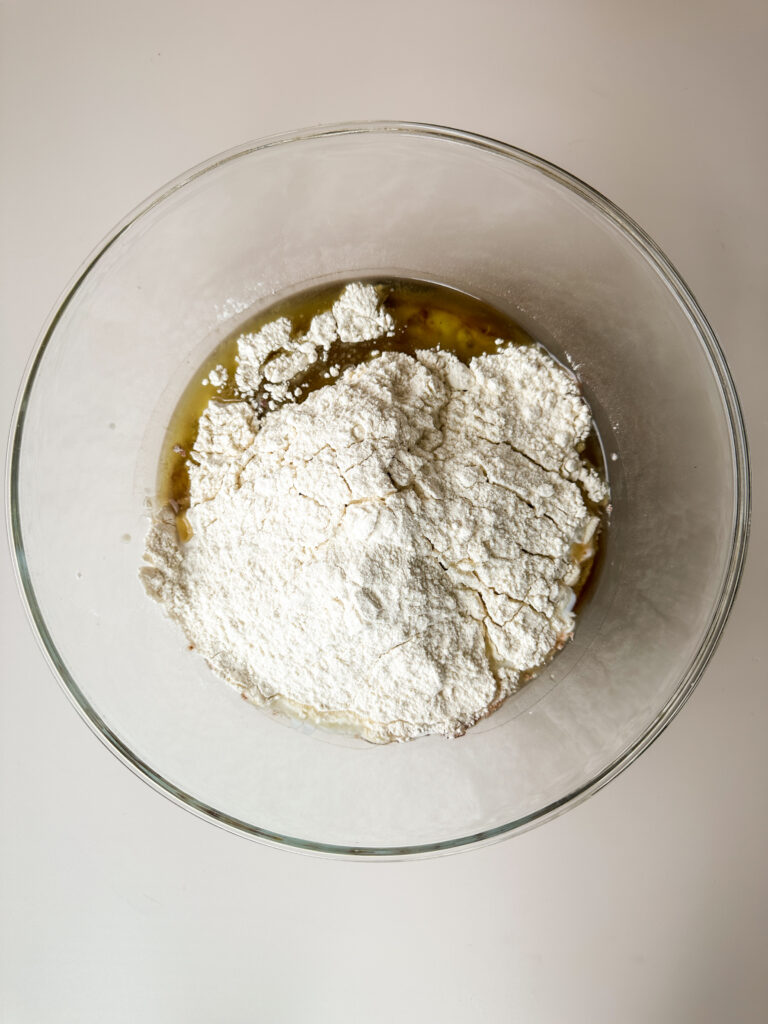
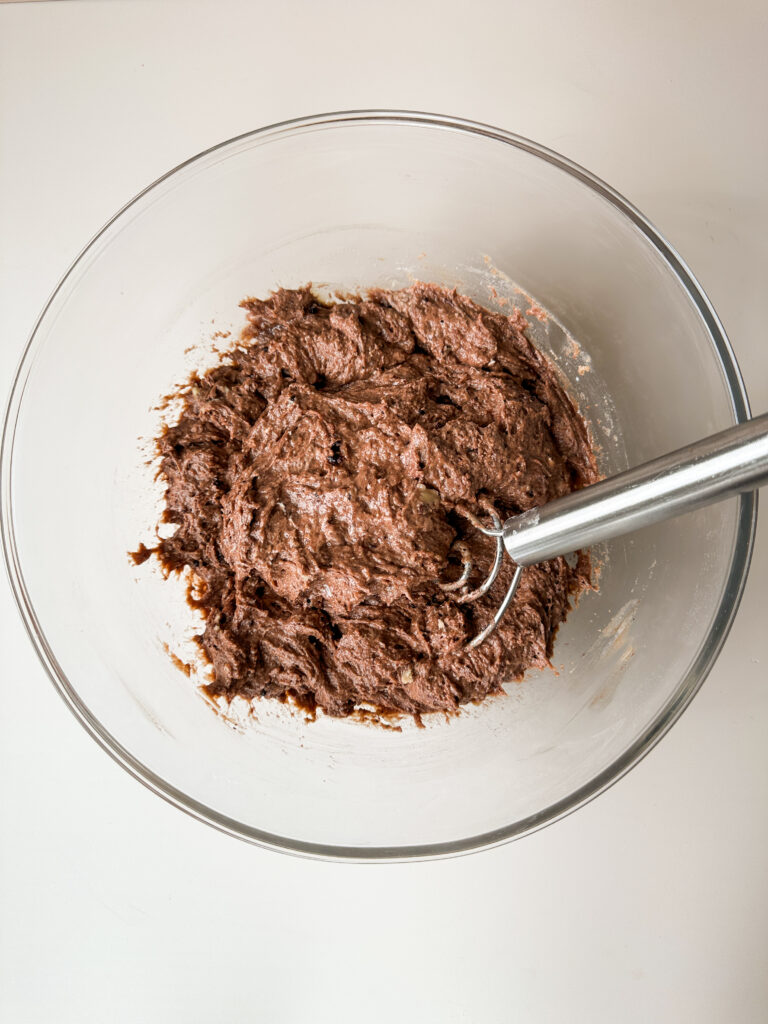
The night before you want to bake your cupcakes, ferment the base of your batter. In a bowl, combine with a whisk the flour, cocoa powder, sourdough discard, white sugar, sour cream, buttermilk or milk, and 1/2 cup of avocado oil (reserve 1/4 cup for later).
Optional Overnight Fermentation: Cover the bowl with plastic wrap, and refrigerate overnight. This step is key in your fermentation process. If you want to shorten your fermentation time, you can allow the batter to rest for 4 hours at room temperature for a same day bake. I don’t advise leaving this batter at room temperature overnight, its too hydrated and will overproof.
Step 2: Finish Mixing Batter
Continued Overnight Fermentation: The next day, remove bowl of batter from refrigerator and allow to rest on the counter for roughly 2 hours. This is a key step to achieving a tender crumb, don’t skip this step! If you like temperature cues, the temperature of the batter should read roughly 70 F before proceeding. If you allowed batter to rest on the counter and did not refrigerate or you’re doing a quick bake, skip this step of resting.
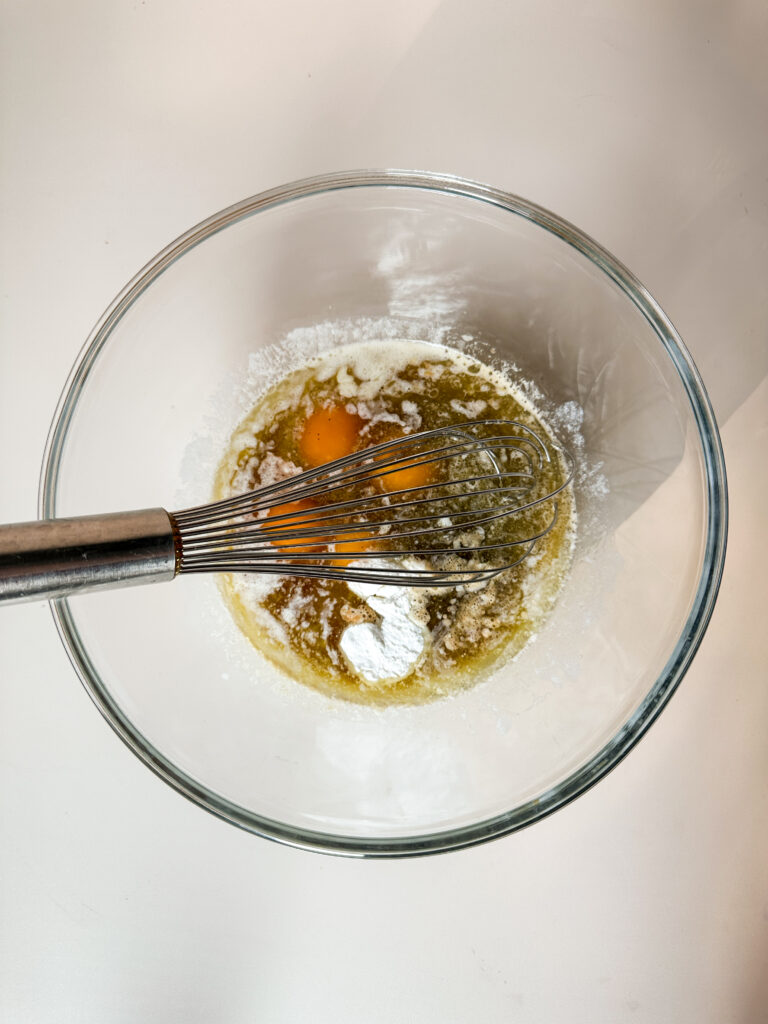
Next, brew the amount of coffee you need or mix your hot water and espresso powder together. Set this aside to cool slightly.
Melt the butter in a microwave safe bowl and allow to cool slightly.
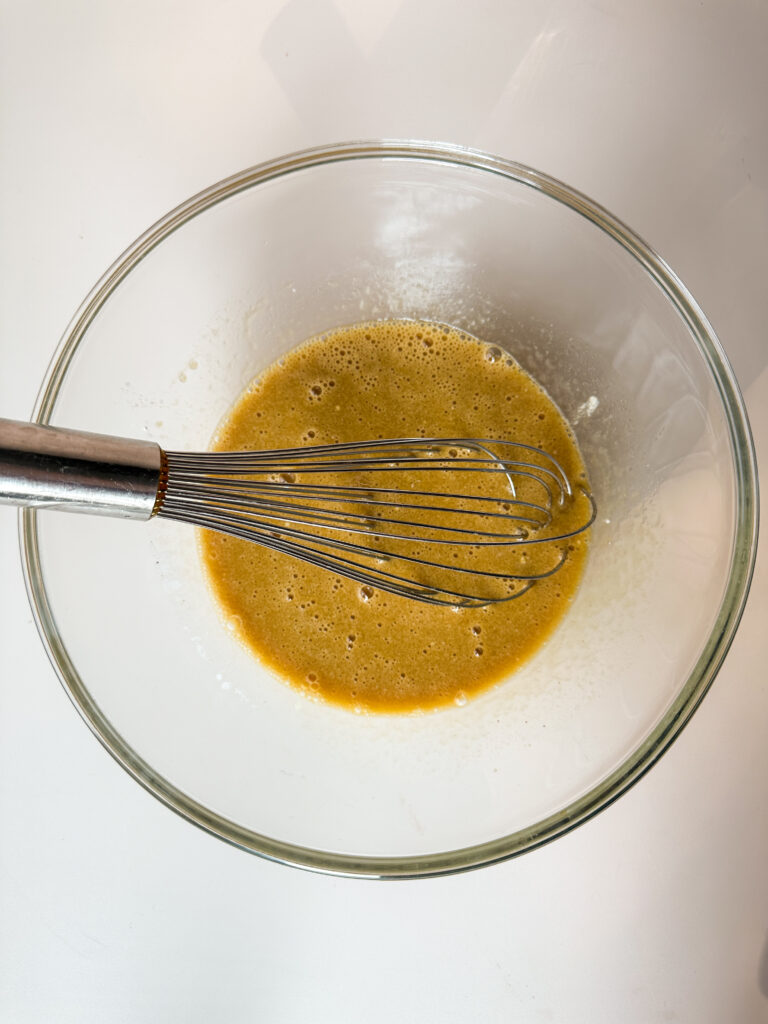
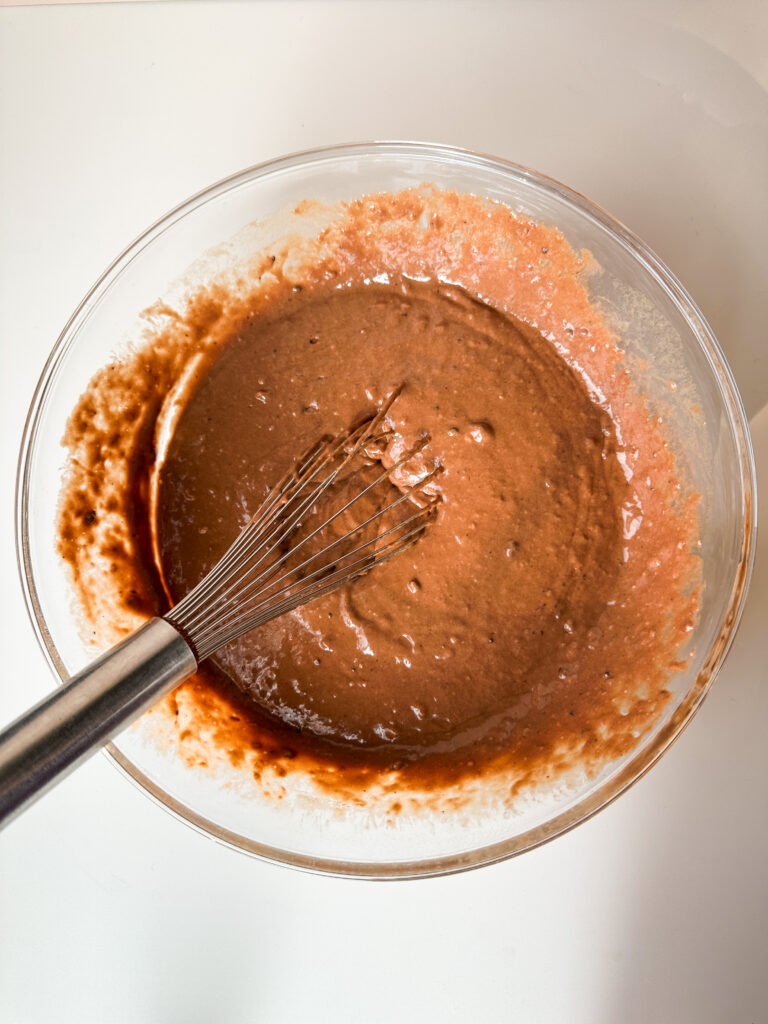
In a medium mixing bowl, add your eggs, egg yolks, the remaining 1/4 cup (57g) of avocado oil, melted butter, the coffee mixture, vanilla extract, baking soda, baking powder, and salt to the bowl. Whisk this mixture together until it’s smooth and combined.
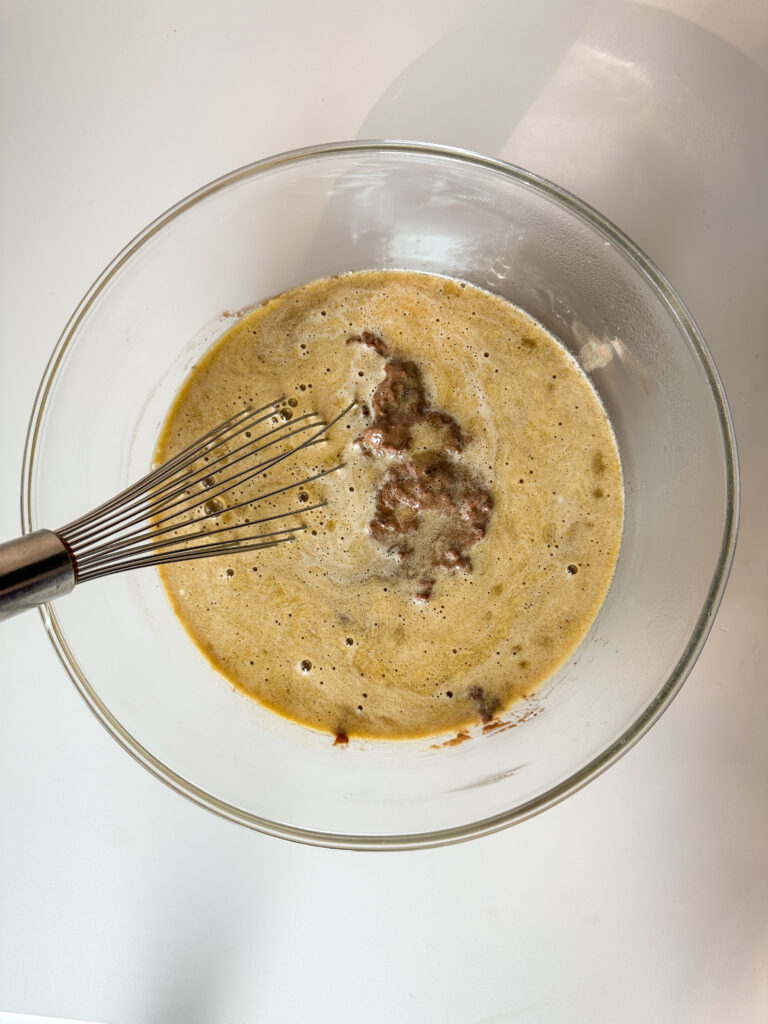
To the bowl with your fermented batter, add the egg mixture. Whisk until smooth or use hand mixers ON LOW to incorporate the batter. To avoid a tight and tough cupcake, mix ingredients as gently as possible. This means mix until just incorporated and if using hand beaters, use the lowest setting.
Step 3: Bake Cupcakes
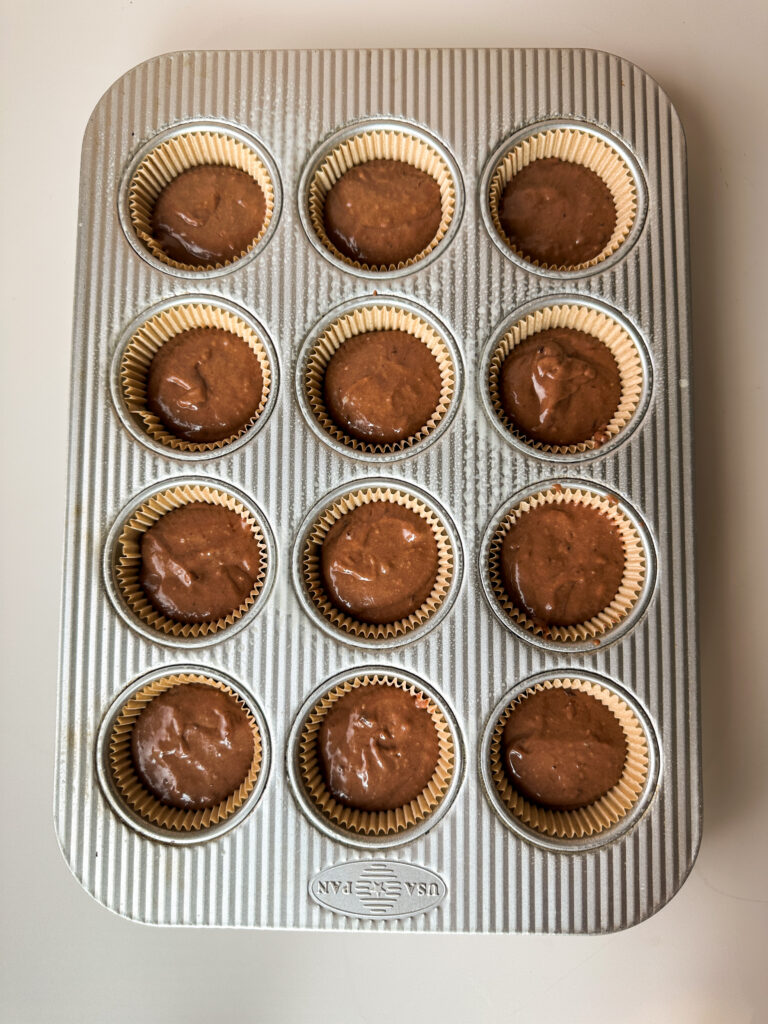
Preheat oven to 375°F (190°C). Line 2 12-cup cupcake pans with parchment cupcake liners, and spray well with cooking spray to avoid the cupcakes sticking to the paper. This is important, don’t skip this step.
Using a spoon or batter scoop, scoop the batter into the cupcake tins until the cups are 2/3 of the way full. Avoid overfilling the cups or the cupcakes will spill over!
Bake the cupcakes at 375°F (190°C) for 5 minutes (this gives you a nice round top), then without opening oven reduce temperature to 350°F (175°C). Bake the cupcakes for another 15 minutes before checking them with a toothpick for doneness.
When the cupcakes are done, a toothpick should come out with a few moist crumbs but not with wet batter. When you touch the top of the center of the cupcake, it should be firm and not overly glossy. Internal temperature should be between 195-200 F in the center.
Note: If chocolate cupcakes are under done, when the cupcakes are removed from heat the center will fall. If you overbake the cupcakes, it will err on the side of being dry. Go slow and check frequently if you need to extend the bake time after the 15 minutes at 350°F (175°C).
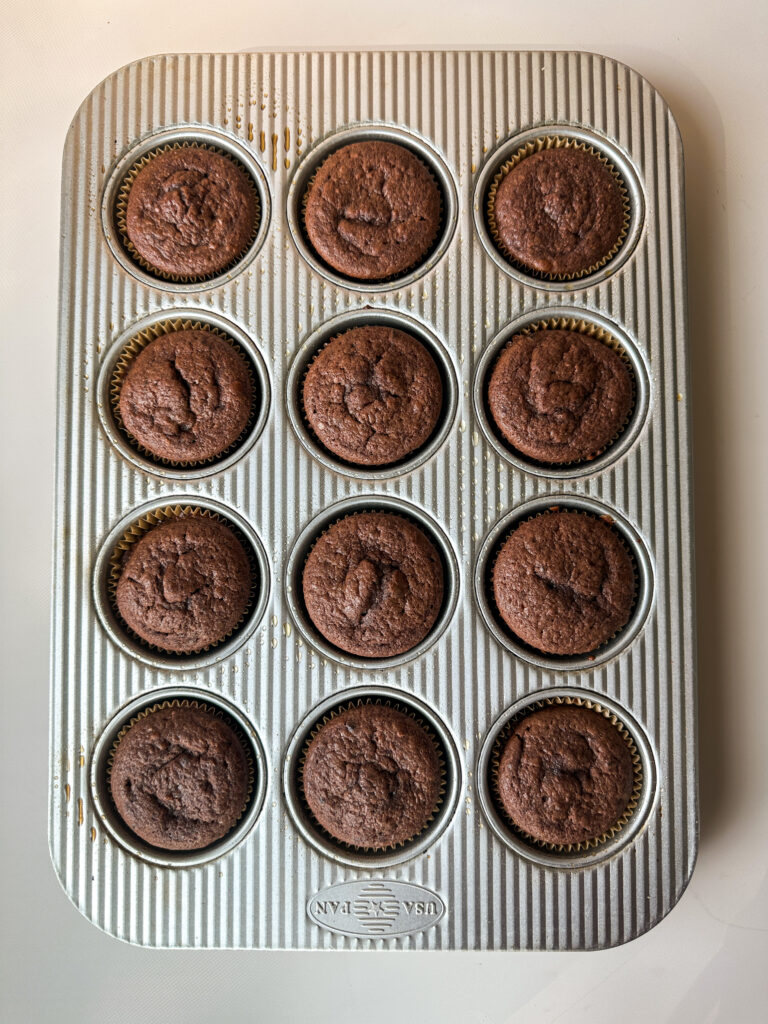
When cupcakes are done cool slightly in pans, then transfer to a cooling rack to cool and avoid the cupcake liners form getting soggy. Prepare the chocolate buttercream while the cupcakes cool.
Cooling Tip: If you want to speed up the cooling process, you can transfer the cupcakes to the refrigerator after transferring to the cooling rack to help cool them off while you prepare the frosting.
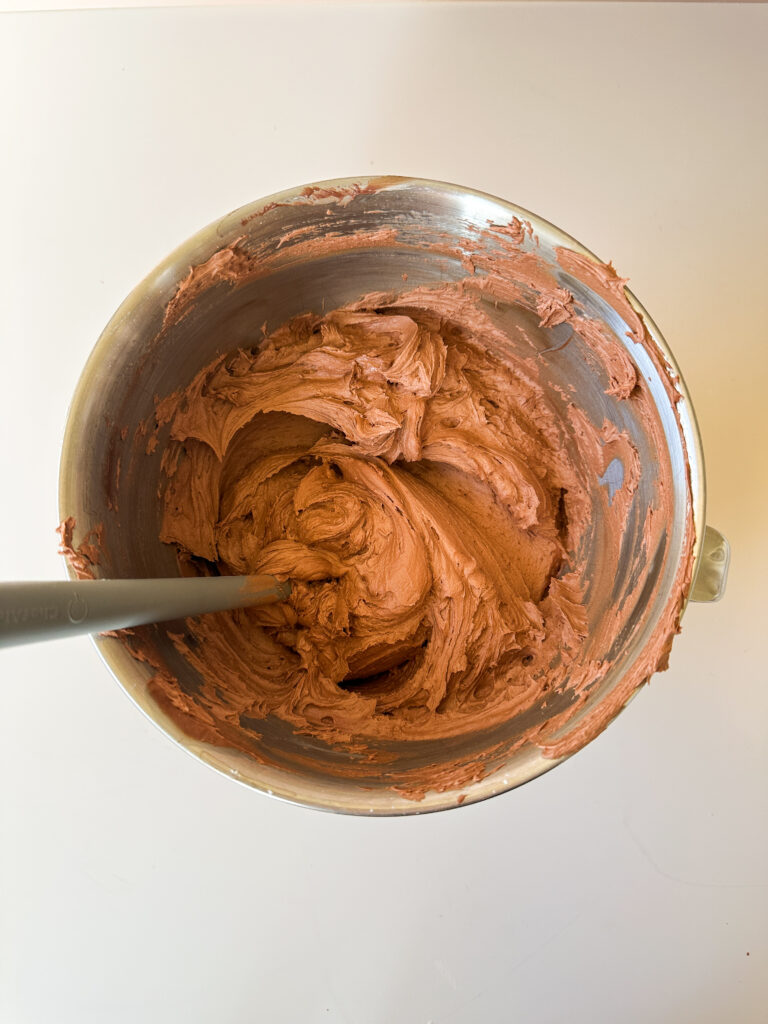
Step 4: Make Chocolate Buttercream
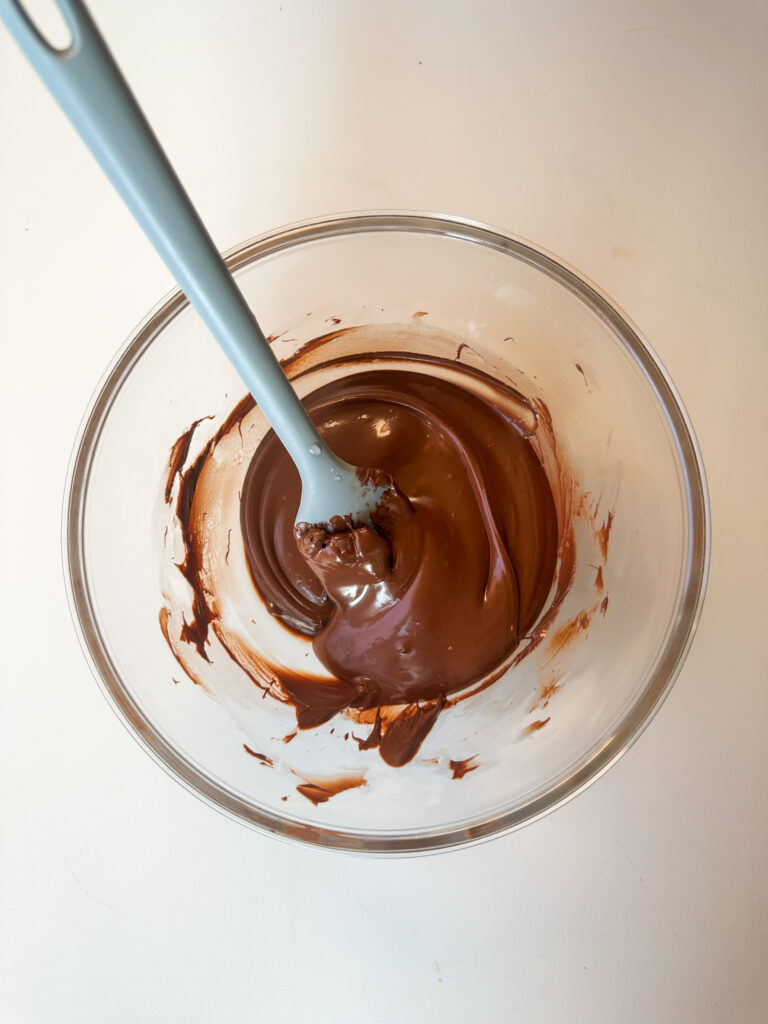
In a microwave safe bowl, melt chocolate chips. Heat at 30 second intervals, stirring between. You want chocolate to be melted and smooth. I achieved this consistency with 3 30-second intervals in the microwave. Be careful overheating your chocolate or it will stiffen and be hard to work with. Allow to cool.
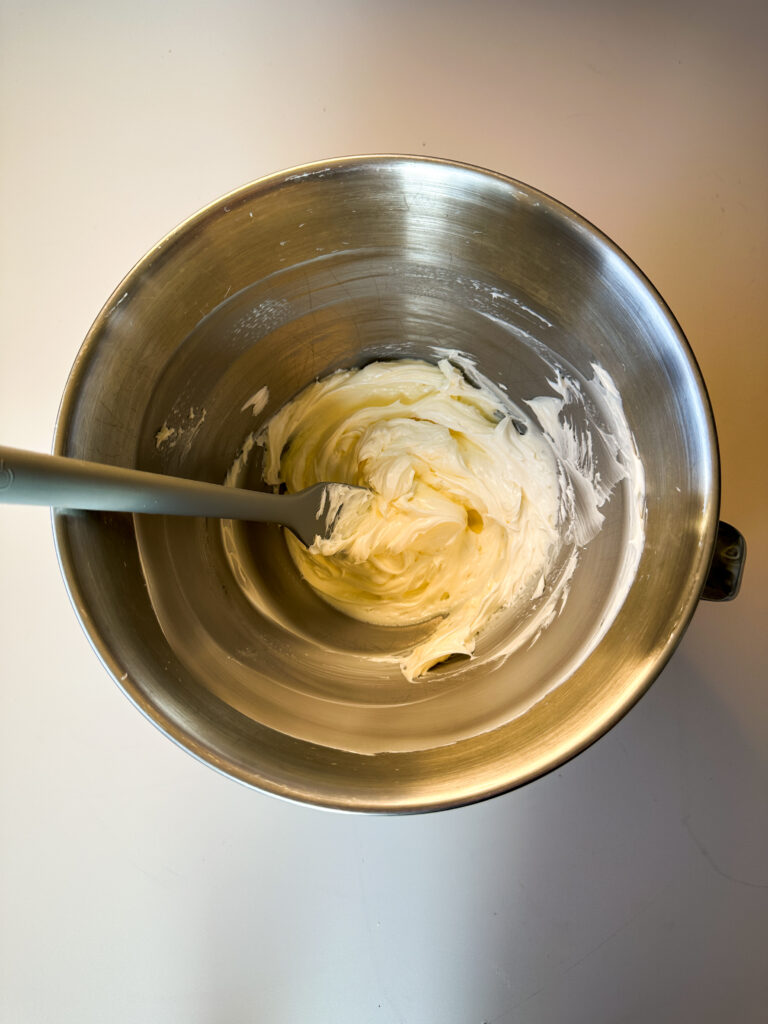
In a stand mixer or a large bowl, add your butter. Cream on high for 3-4 minutes until pale and fluffy.
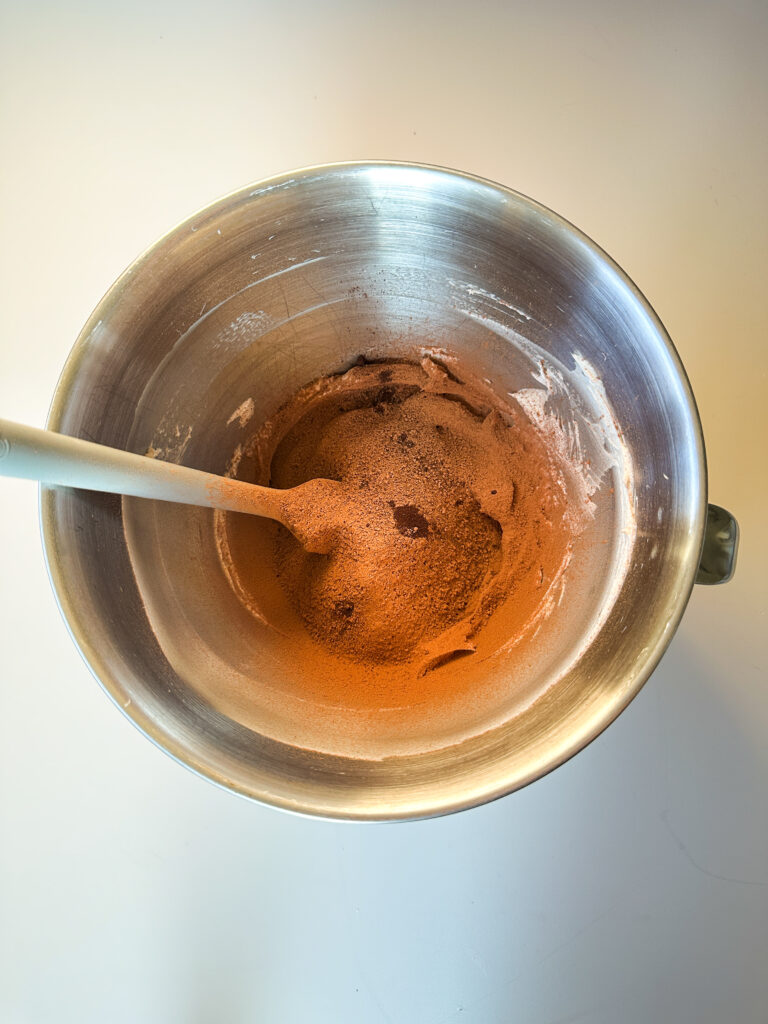
Sift in cocoa powder, and add salt and espresso powder to frosting if using. Whip on medium high until frosting is smooth.
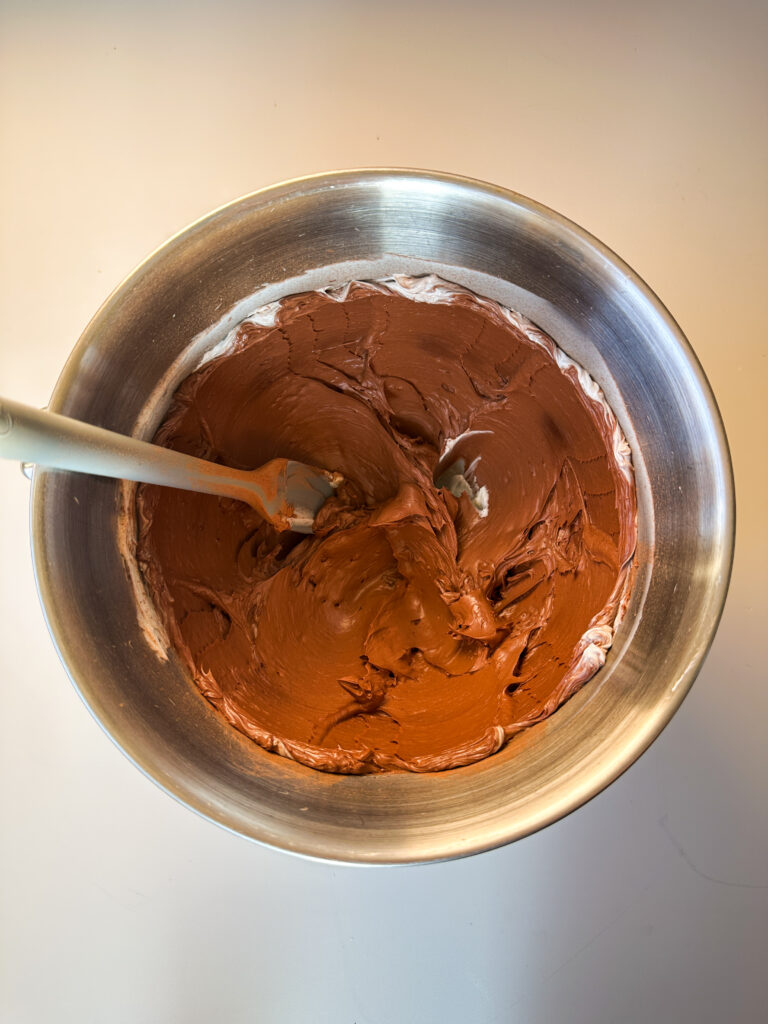
Add cooled melted chocolate to the frosting. Whip on high until frosting is glossy and smooth.
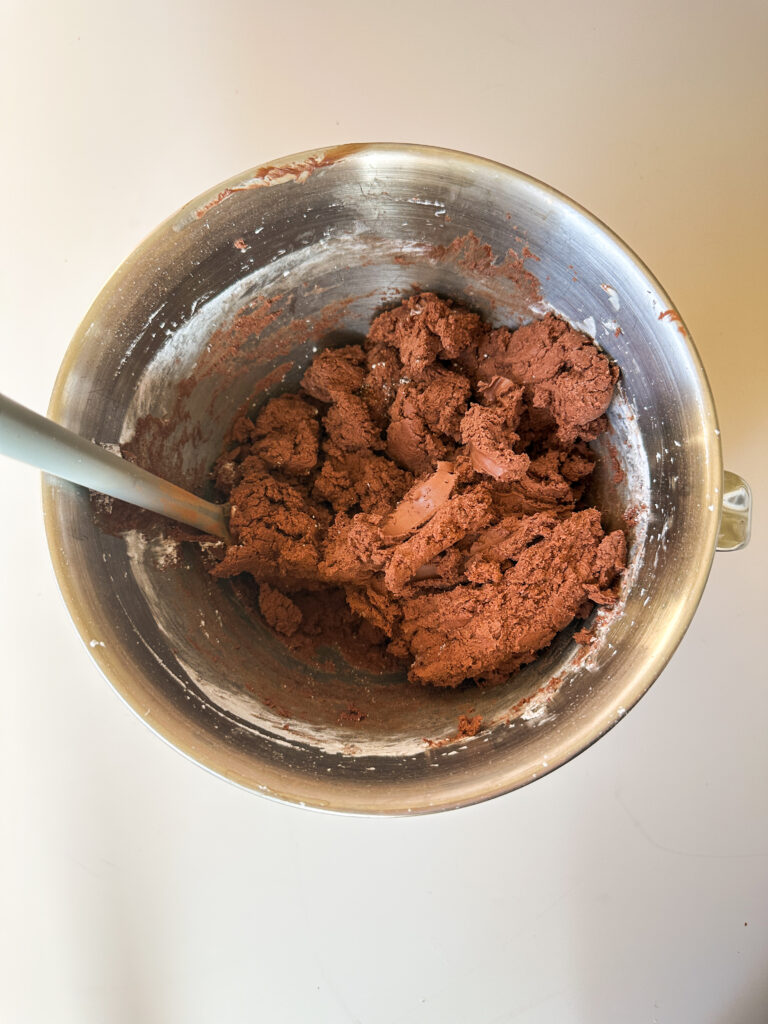
Add sifted powdered sugar to icing. Beat sugar into icing. At this point the icing may look very stiff. Don’t worry!
Add vanilla and half of the cream to the icing. Whip on high until frosting starts to become light and fluffy. Add remaining cream in 1 Tablespoon intervals until the frosting has achieved your desired consistency. Chill for a few minutes in the refrigerator if icing is very soft. It won’t need long, so keep an eye on it.
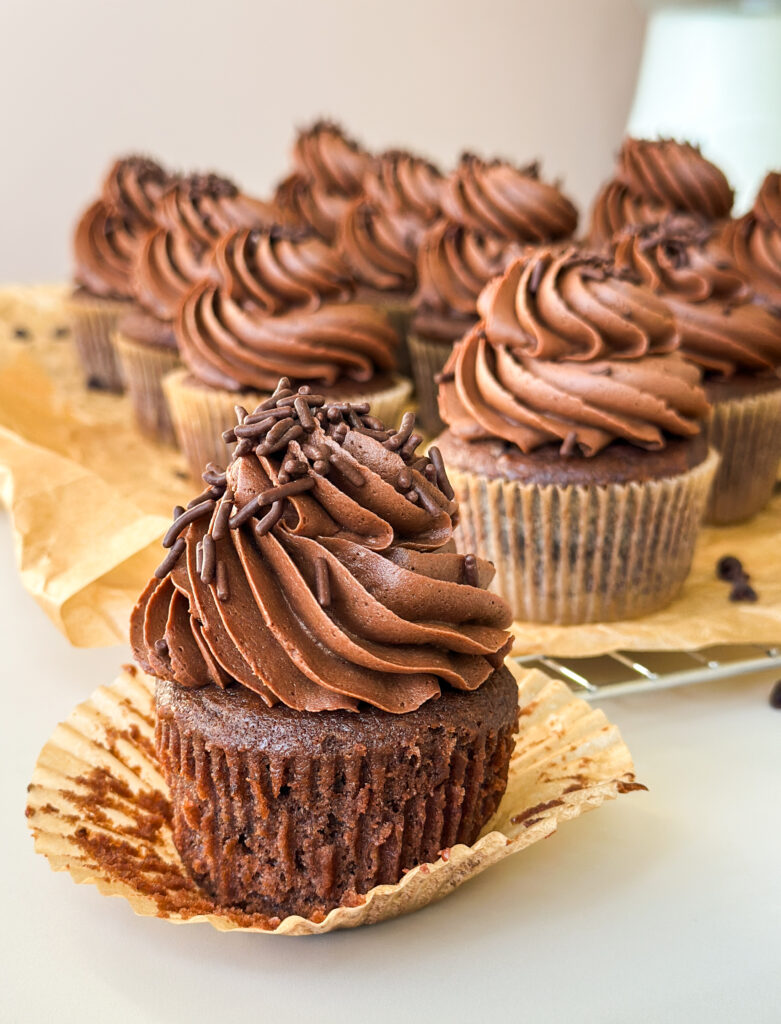
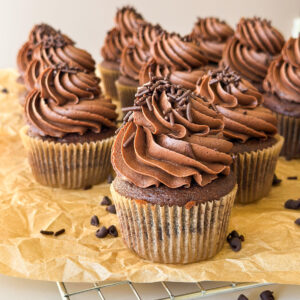
Step 5: Frost Cupcakes
Make sure your cupcakes are cooled before your frost them, or the icing will melt right off.
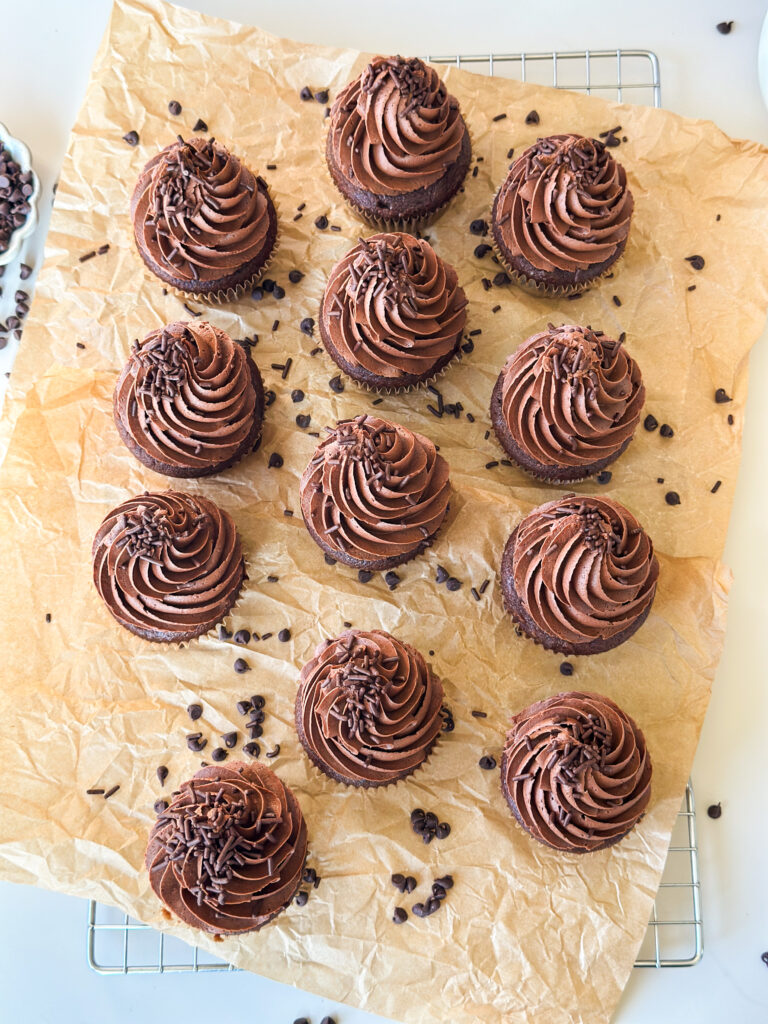
Transfer the chocolate buttercream to a piping bag fitted with a large star tip, and pipe the chocolate buttercream in swirls on top of the cooled cupcakes. Sprinkle with chocolate sprinkles for extra cuteness, and serve!
Enjoy your Sourdough Chocolate Cupcakes!
Yields 24 cupcakes
How to Store:
Room Temperature: store at room temperature in airtight container or stand with lid for up to 3 days.
Refrigerator:
Unfrosted cupcakes: Store in airtight container or tightly covered for up to 5 days. Bring to room temperature and frost before serving.
Frosted Cupcakes: Store in an airtight container for up to 4 days. Allow to come to room temperature before enjoying.
Freezer: Cover unfrosted cupcakes tightly in plastic, freeze up to 1 month. Thaw overnight in refrigerator when ready to use. Frost and serve cupcakes.
FAQ’S
Yes! You can bake same-day, just skip the fermentation step and proceed with Day 2. But the overnight rest improves texture, flavor, and digestion.
You can use natural cocoa, but the flavor will be sharper and the color lighter.
No, sourdough enhances chocolate without sour flavor.
It forces the cupcakes to rise better.
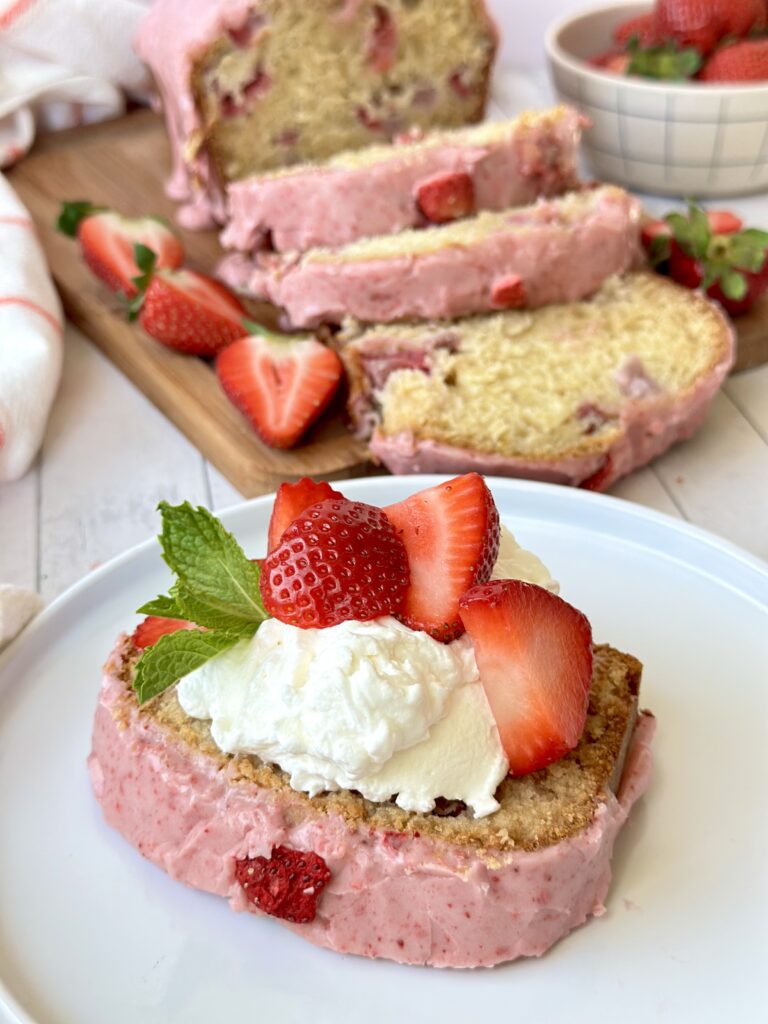
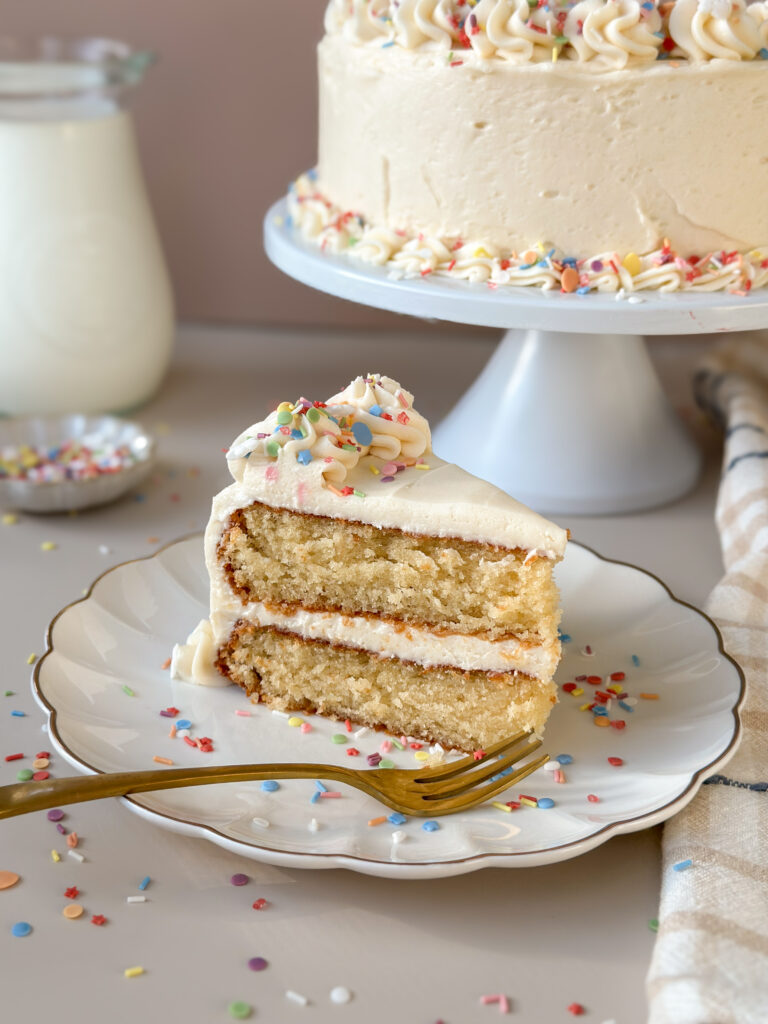
Drop a comment and leave a review if you loved this recipe! Want to make these cupcakes with vanilla frosting? Check out my Sourdough Vanilla Cake with Vanilla Buttercream and swap the frosting!
Sourdough Chocolate Cupcakes
Equipment
- 2 standard 12-cup cupcake tin – for baking cupcakes. I love these pans from USA Bakeware linked here.
- Cupcake liners – to avoid burned edges. I love these bakery style parchment cupcake liners linked here that are non-stick.
- Measuring cups and spoons – if not using a scale and for smaller ingredients.
- Digital kitchen scale (optional) – for accurate measuring, especially helpful with sourdough baking. I linked the one like here.
- 2 Tablespoon scoop – for scooping batter. I love this scoop for cupcakes linked here.
- Whisk + spatula – for combining ingredients.
- Mixing bowls – for mixing the batter and frosting.
- Hand mixer or stand mixer – for mixing the chocolate buttercream.
- Cooling rack – to cool cupcakes.
- Toothpick or cake tester – to test when cupcakes is done.
- Fine-mesh sieve or sifter – for sifting cocoa and powdered sugar to avoid grainy frosting.
- Pastry bags and decorating tips (optional) – for piping frosting on the cupcakes. If you're new to cake decoration, this set linked here has pastry bags and an assortment of classic tips to choose from.
Ingredients
Wet Ingredients:
- 1/2 (120g) cup sourdough discard
- 2 (240g) cups granulated white sugar
- ⅔ (160g) cup full-fat sour cream
- 1 (240g) cup whole milk or buttermilk
- 3/4 (165g) cup avocado oil (hold back 1/4 cup ((57g)) for egg emulsion)
- 2 large eggs room temp
- 2 large egg yolks room temp
- ¼ (56g) cup unsalted butter melted
- 2 teaspoons vanilla extract
- ¼ (80g) cup hot water or brewed coffee slightly cooled
- ¼ teaspoon instant espresso powder
Dry Ingredients:
- 2 ¾ (325g) cups all-purpose flour
- ¾ (64g) cup Dutch-process cocoa powder
- 1 ½ teaspoons baking powder
- ½ teaspoon baking soda
- 1 teaspoon fine sea salt
Chocolate Buttercream:
- 8 (226g) oz good-quality dark or semisweet chocolate chips
- 1 (226g) cup unsalted butter room temp
- ½ (50g) cup Dutch-process cocoa powder
- ½ teaspoon fine sea salt
- ¼ teaspoon espresso powder optional
- 3 ½ (420g) cups powdered sugar sifted
- ½ (120g) cup heavy cream cold
- 2 teaspoons vanilla extract
Instructions
Step 1: Mix Fermented Base
- The night before you want to bake your cupcakes, ferment the base of your batter. In a bowl, combine with a whisk the flour, cocoa powder, sourdough discard, white sugar, sour cream, buttermilk or milk, and 1/2 cup of avocado oil (reserve 1/4 cup for later).1/2 (120g) cup sourdough discard, 2 (240g) cups granulated white sugar, ⅔ (160g) cup full-fat sour cream, 1 (240g) cup whole milk or buttermilk, 3/4 (165g) cup avocado oil, 2 ¾ (325g) cups all-purpose flour, ¾ (64g) cup Dutch-process cocoa powder
- Optional Overnight Fermentation: Cover the bowl with plastic wrap, and refrigerate overnight. This step is key in your fermentation process. If you want to shorten your fermentation time, you can allow the batter to rest for 4 hours at room temperature for a same day bake. I don't advise leaving this batter at room temperature overnight, its too hydrated and will overproof.
Step 2: Finish Mixing Batter
- Continued Overnight Fermentation: The next day, remove bowl of batter from refrigerator and allow to rest on the counter for roughly 2 hours. This is a key step to achieving a tender crumb, don't skip this step! If you like temperature cues, the temperature of the batter should read roughly 70 F before proceeding. If you allowed batter to rest on the counter and did not refrigerate or you're doing a quick bake, skip this step of resting.
- Next, brew the amount of coffee you need or mix your hot water and espresso powder together. Set this aside to cool slightly.¼ (80g) cup hot water or brewed coffee slightly cooled, ¼ teaspoon instant espresso powder
- Melt the butter in a microwave safe bowl and allow to cool slightly.¼ (56g) cup unsalted butter
- In a medium mixing bowl, add your eggs, egg yolks, the remaining 1/4 cup (57g) of avocado oil, melted butter, vanilla extract, the coffee mixture, baking soda, baking powder, and salt to the bowl. Whisk this mixture together until it's smooth and combined.2 large eggs , 2 large egg yolks, 2 teaspoons vanilla extract, 1 ½ teaspoons baking powder, ½ teaspoon baking soda, 1 teaspoon fine sea salt
- To the bowl with your fermented batter, add the egg mixture. Whisk until smooth or use hand mixers ON LOW to incorporate the batter. To avoid a tight and tough cupcake, mix ingredients as gently as possible. This means mix until just incorporated and if using hand beaters, use the lowest setting.
Step 3: Bake Cupcakes
- Preheat oven to 375°F (190°C). Line 2 12-cup cupcake pans with parchment cupcake liners, and spray well with cooking spray to avoid the cupcakes sticking to the paper. This is important, don’t skip this step.
- Using a spoon or batter scoop, scoop the batter into the cupcake tins until the cups are 2/3 of the way full. Avoid overfilling the cups or the cupcakes will spill over!
- Bake the cupcakes at 375°F (190°C) for 5 minutes (this gives you a nice round top), then without opening oven reduce temperature to 350°F (175°C). Bake the cupcakes for another 15 minutes before checking them with a toothpick for doneness.
- When the cupcakes are done, a toothpick should come out with a few moist crumbs but not with wet batter. When you touch the top of the center of the cupcake, it should be firm and not overly glossy. Internal temperature should be between 195-200 F in the center.
- Note: If chocolate cupcakes are under done, when the cupcakes are removed from heat the center will fall. If you overbake the cupcakes, it will err on the side of being dry. Go slow and check frequently if you need to extend the bake time after the 15 minutes at 350°F (175°C).
- When cupcakes are done cool slightly in pans, then transfer to a cooling rack to cool and avoid the cupcake liners form getting soggy. Prepare the chocolate buttercream while the cupcakes cool.
- Cooling Tip: If you want to speed up the cooling process, you can transfer the cupcakes to the refrigerator after transferring to the cooling rack to help cool them off while you prepare the frosting.
Step 4: Make Chocolate Buttercream
- In a microwave safe bowl, melt chocolate chips. Heat at 30 second intervals, stirring between. You want chocolate to be melted and smooth. I achieved this consistency with 3 30-second intervals in the microwave. Be careful overheating your chocolate or it will stiffen and be hard to work with. Allow to cool.8 (226g) oz good-quality dark or semisweet chocolate chips
- In a stand mixer or a large bowl, add your butter. Cream on high for 3-4 minutes until pale and fluffy.1 (226g) cup unsalted butter
- Sift in cocoa powder, and add salt and espresso powder to frosting if using. Whip on medium high until frosting is smooth.½ (50g) cup Dutch-process cocoa powder, ½ teaspoon fine sea salt, ¼ teaspoon espresso powder
- Add cooled melted chocolate to the frosting. Whip on high until frosting is glossy and smooth.
- Add sifted powdered sugar to icing. Beat sugar into icing. At this point the icing may look very stiff. Don’t worry!3 ½ (420g) cups powdered sugar
- Add vanilla and half of the cream to the icing. Whip on high until frosting starts to become light and fluffy. Add remaining cream in 1 Tablespoon intervals until the frosting has achieved your desired consistency. Chill for a few minutes in the refrigerator if icing is very soft. It won’t need long, so keep an eye on it.2 teaspoons vanilla extract, ½ (120g) cup heavy cream
Step 5: Frost Cupcakes
- Make sure your cupcakes are cooled before your frost them, or the icing will melt right off.
- Transfer the chocolate buttercream to a piping bag fitted with a large star tip, and pipe the chocolate buttercream in swirls on top of the cooled cupcakes. Sprinkle with chocolate sprinkles for extra cuteness, and serve!
- Yields 24 cupcakes