
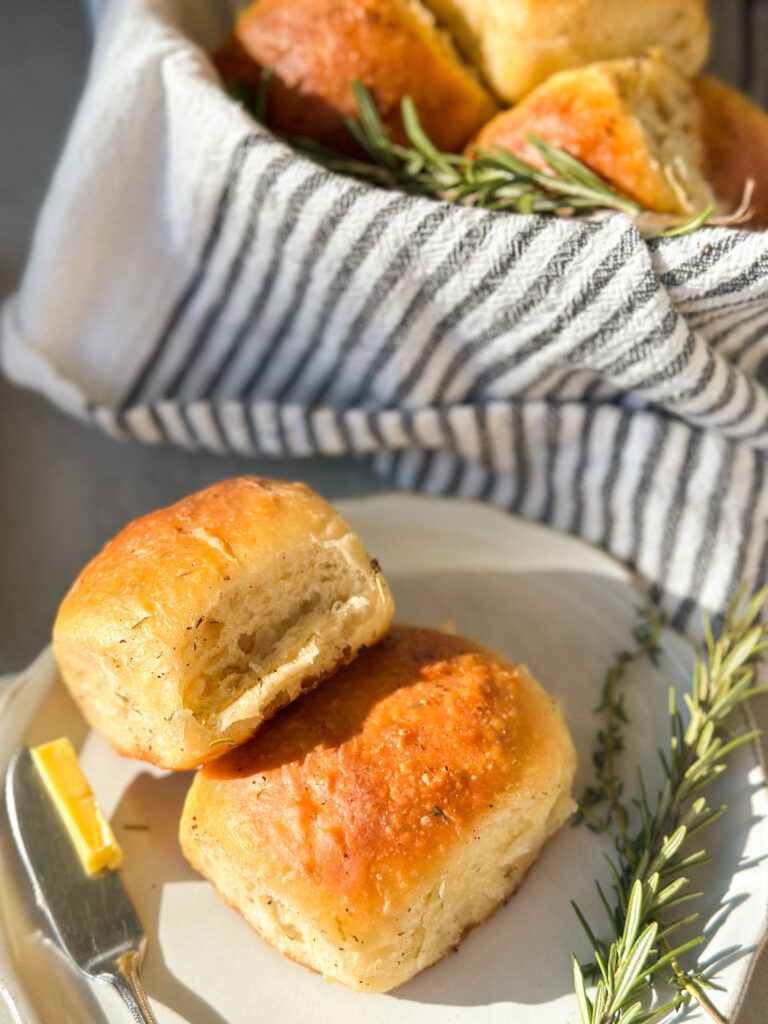
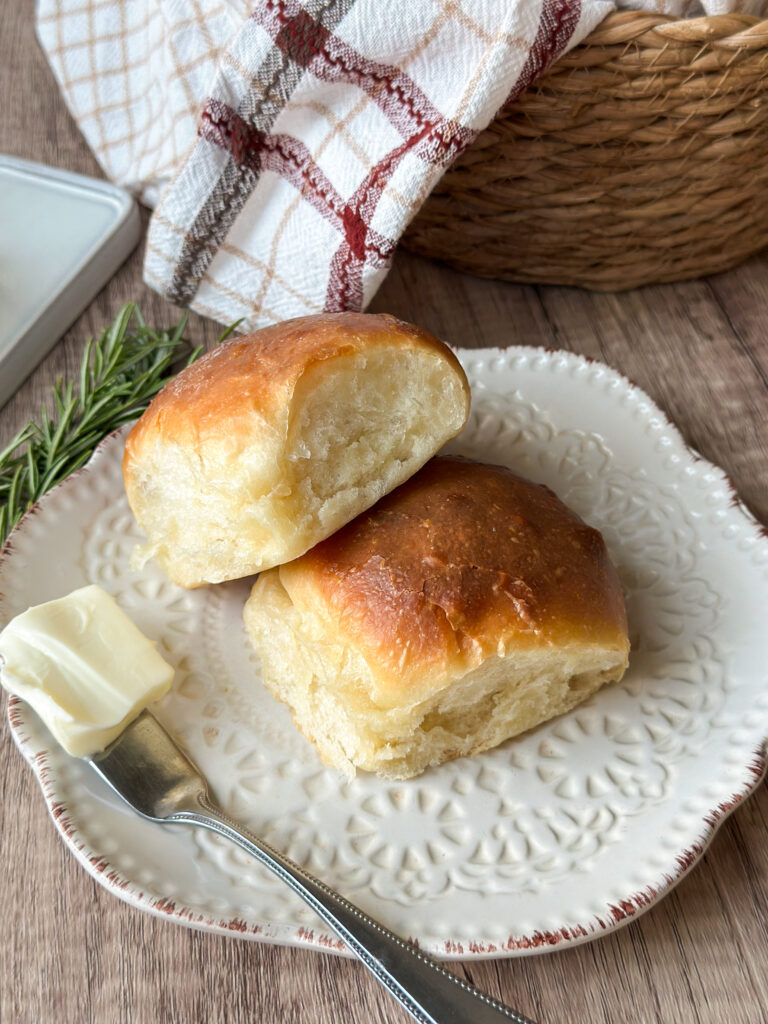
Fluffy Brioche Sourdough Burger Buns
The summer is here, which means we are firing up our grills and will be found pool side most of the time! And what do we need to go with that juicy burger? The perfect bun! Rich, buttery, and impossibly soft — these fluffy sourdough brioche burger buns are the base to make the most amazing burgers or sandwiches.
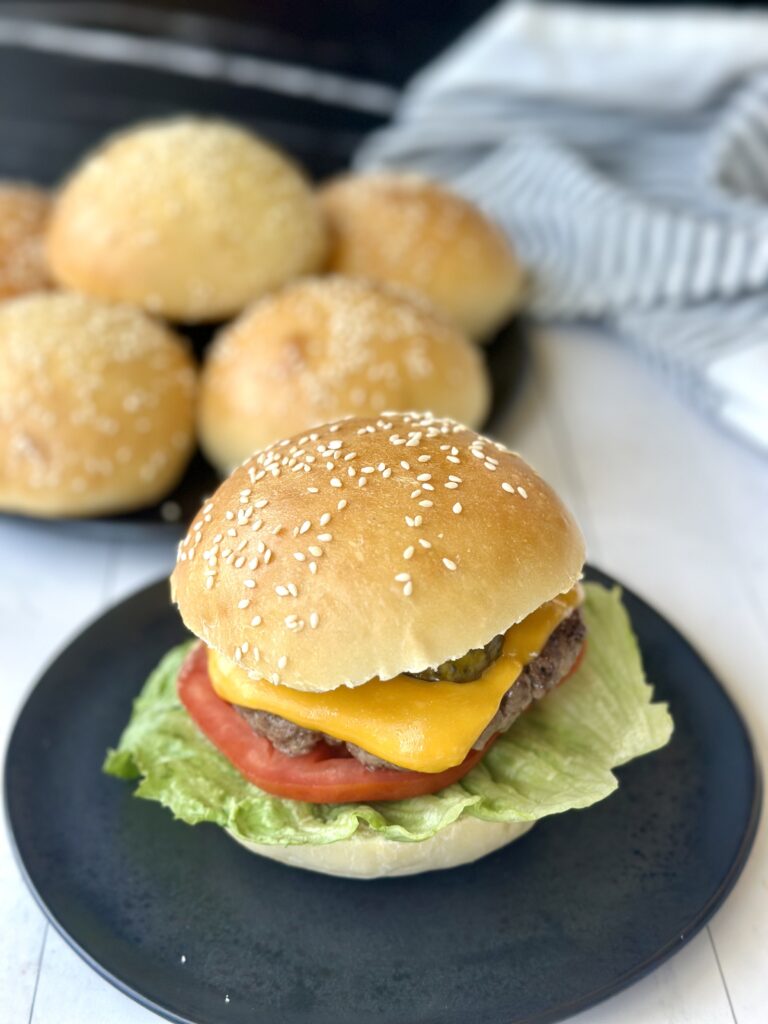
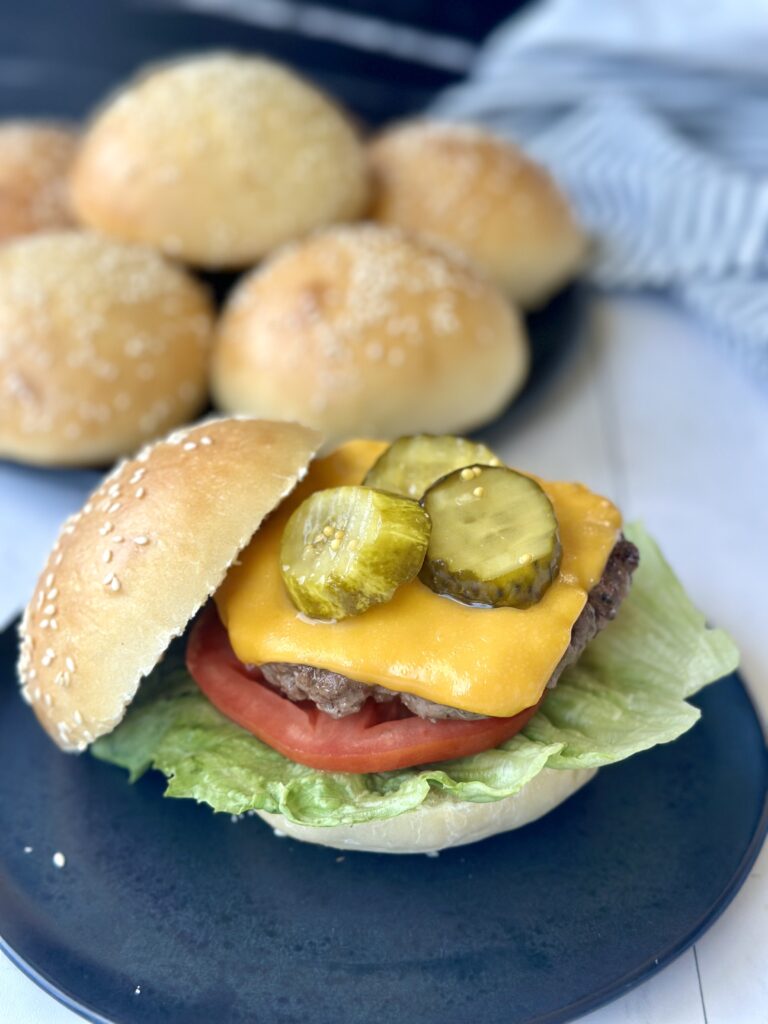
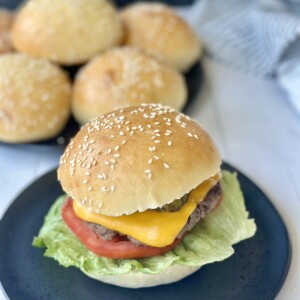
There’s nothing quite like biting into a juicy burger only to have the whole experience elevated by the bun — pillowy soft, golden, slightly sweet, and just sturdy enough to handle all the fixings. These Fluffy Brioche Sourdough Burger Buns are exactly that. They’re naturally leavened with sourdough for subtle tang and complex flavor, enriched like a classic brioche for tenderness, and perfectly shaped to make every sandwich feel like it came straight from a gourmet kitchen.
Why You’ll Love This Recipe:
- Unbeatable texture: Soft, fluffy interior with a buttery richness that melts in your mouth. These buns will be just as good the next day too!
- Naturally leavened: The sourdough starter gives each bun depth of flavor and a light tang — no commercial yeast needed.
- Versatile timing: Choose between same-day or overnight proofing to fit your schedule.
- Better than store-bought: These buns don’t just match the bakery ones — they beat them. You’ll have everyone asking for you to bring the buns to the BBQ!
As an amazon affiliate, this post may contain affiliate links. Which means I may receive a commission for qualifying purchases. I will only recommend products that I personally love and use.
Tools You’ll Need:
- Stand mixer with dough hook (optional) – For hands-free kneading of this enriched dough. You can also knead this dough by hand if needed! My favorite dough mixer I have is the White Bosch Universal Plus mixer from Nutrimill linked here. You can use my code JOSELYN20 at checkout to take $20.00 off your purchase.
- Digital Kitchen scale (optional) – For accurate flour and starter measurements.
- 2 Mixing bowls – One for mixing, one for proofing.
- Bench scraper – To divide and handle sticky dough easily.
- Baking sheets– For baking your buns.
- Parchment Paper or Silicone Mats– To line pans to avoid sticking to pan. I like these mats linked here https://amzn.to/4kqncEG.
- Pastry brush or paper towel – For a glossy egg wash finish.
- Digital Thermometer – To ensure the buns reach 195–200°F inside. I like this one linked here https://amzn.to/43qcQPa.
- Plastic wrap or damp towel – For covering dough during proofing without drying it out.
Next, gather your ingredients!
Gather Your Ingredients:
- Sourdough starter – Recently fed within the past 24 hours so it is bubbly and active. This is the natural leavening agent that also adds complexity to the flavor.
- Whole Milk – Adds moisture, fat, and softness to the crumb.
- Water – Helps control hydration and texture balance. I prefer filtered.
- Honey + sugar – Enhance browning, flavor, and fermentation.
- Egg – Enriches the dough and adds structure and softness. Used in egg wash to give buns a golden finish.
- Olive oil + butter – Make the dough tender and flavorful.
- Bread flour – Higher protein content supports the rich dough and creates a mores structured bun. All-purpose flour can also be used for a more tender crumb.
- Salt – Balances sweetness and strengthens gluten.
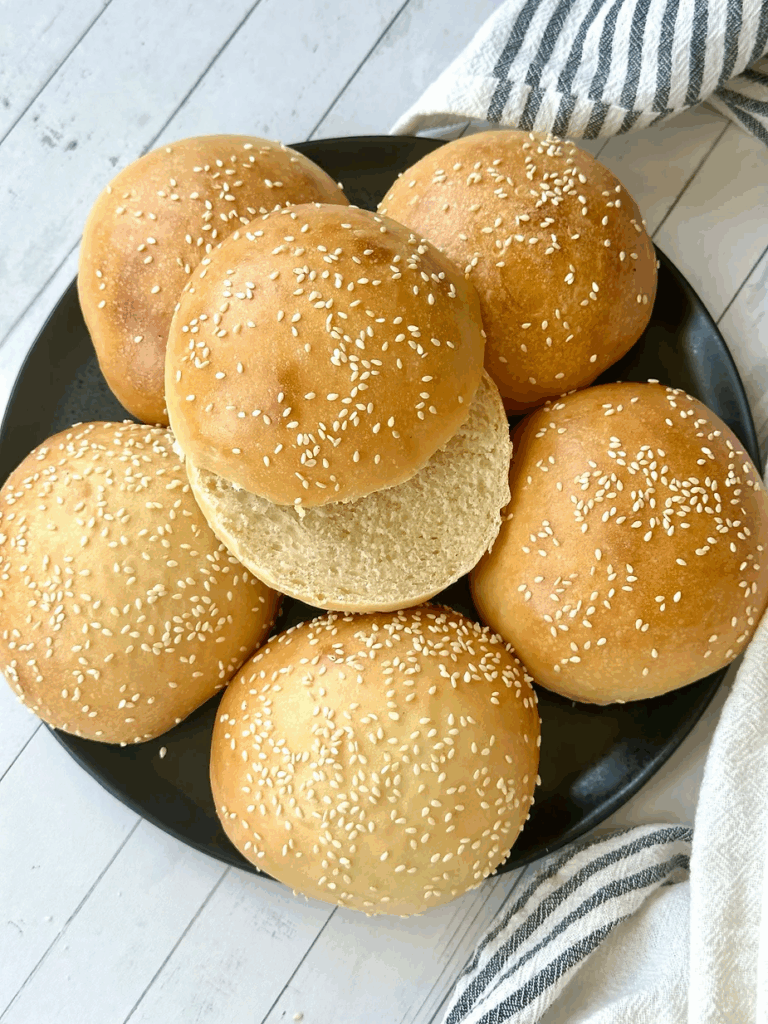
- Sesame Seeds (optional)– Adds texture to buns and a nutty flavor. Gives buns traditional hamburger bun appearance.
Fluffy Brioche Sourdough Burger Buns
Yields: 8 buns
Wet Ingredients:
- ¾ cup + 1 tbsp (200g) active sourdough starter (100% hydration)
- ¾ cup + 3 tbsp (190g) whole milk, warmed to 75°F
- ¼ cup + 1 tbsp (70g) water, warmed to 75°F
- 1 tbsp + 1 tsp (25g) raw honey
- ¼ cup (50g) granulated sugar
- 1 large egg (50g)
- 2 tsp (10g) olive oil
- 4 tbsp (57g) unsalted butter, softened
Dry Ingredients:
- 4¼ cups (550g) bread flour
- 1½ tsp (10g) fine sea salt
Garnish (optional):
- sesame seeds
Instructions:
1. Make the Dough
Warm milk and water in a small saucepan or microwave to reach 80 F. Don’t overheat or starter will be killed when adding it to dough.
In a large mixing bowl (or stand mixer bowl), combine the active sourdough starter, milk, water, raw honey, sugar, egg, and olive oil.
Whisk until mixture is pale and fully emulsified.
Add bread flour and salt. Stir until a shaggy dough forms. It should be slightly sticky but cohesive.
Add 1/4 cup softened butter into dough in 1 Tablespoon pats. Knead butter into dough slowly with mixer set on low fitted with a dough hook, or by hand for 8-10 minutes. Dough should be smooth and elastic.
Check for the windowpane test — stretch a small piece and see if it forms a thin, see-through membrane. This means your gluten is strong and ready.
Tip: If sticky, avoid adding more flour. Instead, wet your hands or give the dough a short rest before continuing.
2. Bulk Fermentation
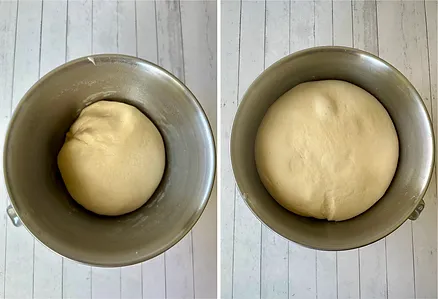
Transfer dough to a lightly greased bowl or container and loosely cover. Perform 1 set of stretch-and-folds at the 1-hour mark to build strength.
Cover and ferment at 74–78°F for 6-8 hours, or until nearly doubled.
Cold Fermentation (Optional): At this point, you have the option to shape and bake the buns the same-day, or you can cover well and transfer dough to refrigerator for overnight cold ferment. This step will improve gluten breakdown but can be skipped if desired.
3. Shape Buns
If dough was refrigerated overnight, remove from refrigerator and allow to rest on counter 30 minutes to warm. If you did not refrigerate dough, you can skip this step.
Turn dough out onto a lightly floured or oiled surface. Divide into 8 equal portions (about 150g each).
Let rest 10–15 minutes to relax gluten. Then shape each into a taut ball by cupping your hand and rolling it on the counter in a circular motion.
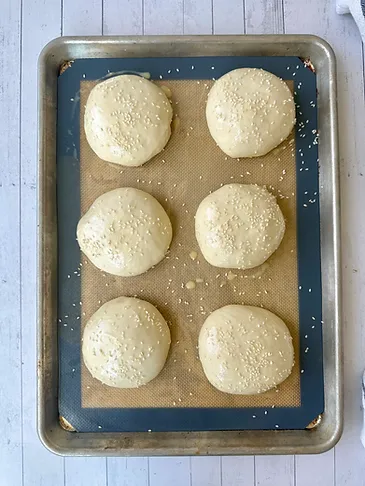
Transfer to a parchment or silicone mat lined baking sheet, spacing evenly. I usually do 4-6 buns per baking sheet. Cover buns with a damp lint-free towel or oiled plastic wrap for final proof.
4. Final Proof
Let buns proof at room temp for 2–3 hours, or until buns are noticeably puffy and pass the poke test (a gentle press leaves a slow-filling dent).
Beat 1 egg yolk with 2 Tablespoons of water in a small bowl.
Brush buns with egg wash using a pastry brush or a paper towel. If using the paper towel method, just dip in egg mixture and brush all over the buns. This avoids an eggy rim around the base of the buns.
Sprinkle buns with sesame seeds if desired.
5. Bake Buns
Preheat oven to 375°F (190°C).
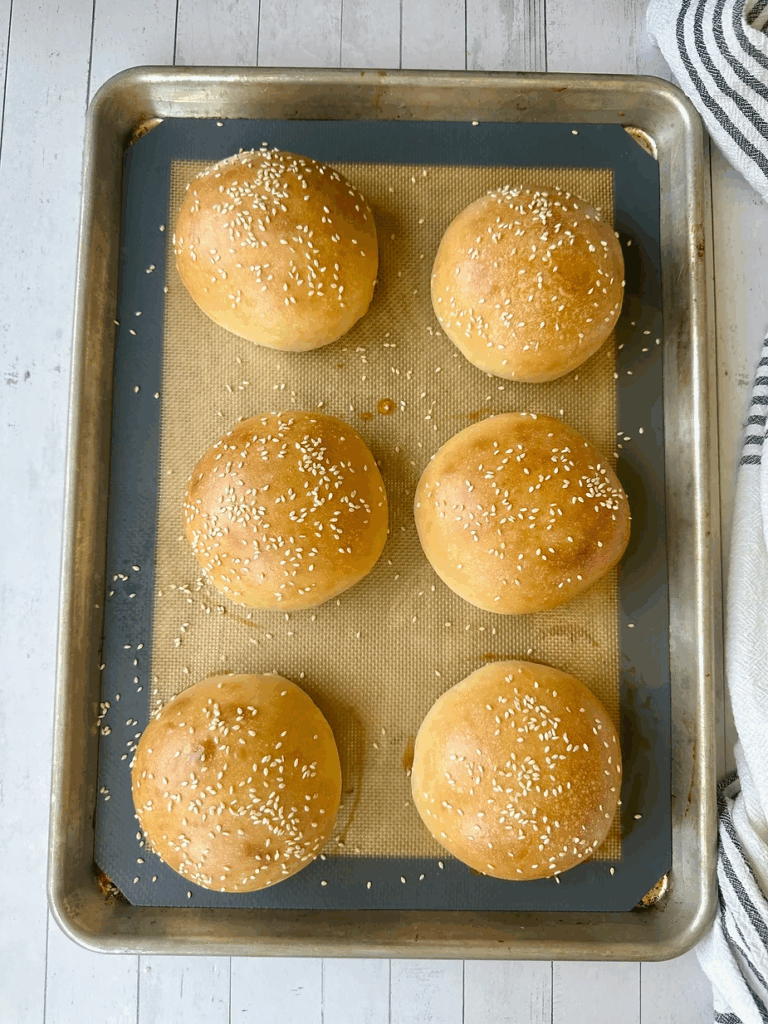
Bake for 20-24 minutes, rotating halfway through. Internal temp should reach 195–200°F. The tops should be deeply golden.
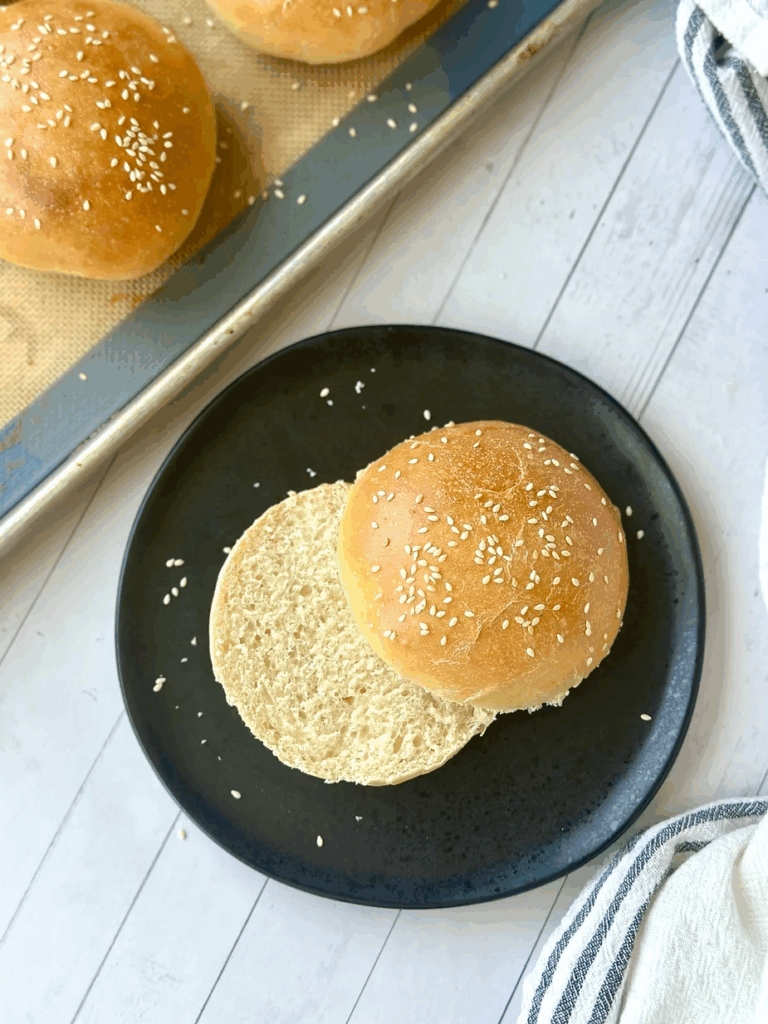
Cool on a wire rack at least 20 minutes before slicing.
How to Store:
- Buns are best stored in airtight packaging at room temperature for 2-3 days.
- Freeze buns for up to 2 months in airtight container, gently thaw and reheat when ready to use.
FAQ’s:
- Can I use all-purpose flour instead of bread flour?
You can, but your buns may be slightly less chewy and structured. Stick with bread flour for best results.
- Can I freeze them?
Yes! Once completely cooled, freeze in an airtight bag for up to 2 months. Thaw and toast before serving.
- Do I have to do the cold proof?
No — it’s optional! Cold proofing develops deeper flavor, improve digestibility, and can be more convenient, but the same-day method works perfectly too.
- Why are my buns flat?
They may have over proofed or were under-kneaded. Check for a strong windowpane and proof until just doubled in size and puffy.
These buns bring that special “bakery magic” to your own kitchen — buttery, tender, and just the right balance of chew and fluff. They’re a celebration of slow fermentation, enriched doughs, and making everyday meals feel luxurious. Whether you’re stacking them with a burger, grilled veggies, or pulled pork, these sourdough brioche buns are about to become a new favorite. Enjoy!
Fluffy Brioche Sourdough Burger Buns
Equipment
- Stand mixer with a dough hook optional
- Mixing Bowl for proofing
- Bench scraper
- Baking sheets
- Parchment paper or silicone mats
- Pastry Brush or paper towel for egg wash
- Digital Food Thermometer
- Plastic wrap or damp towel
Ingredients
Dough:
Wet Ingredients:
- 3/4 cup (200g) bubbly active sourdough starter 100% hydration
- 3/4 cup + 3 Tablespoons (190g) whole milk warmed to 80 degrees
- 1/4 cup + 1 Tablespoon (70g) water warmed to 80 degrees
- 1 Tablespoon (25g) honey
- 1/4 cup (50g) granulated white sugar
- 1 (50g) egg room temperature
- 2 teaspoons (10g) olive oil
- 1/4 cup (57g) unsalted butter, softened
Dry Ingredients:
- 4 1/4 cups (550g) bread flour or all-purpose flour
- 1 1/2 teaspoon (10g) sea salt
Garnish (optional):
- 1 Tablespoon sesame seeds
Instructions
Instructions:
Make The Dough:
- Warm milk and water in a small saucepan or microwave to reach 80 F. Don't overheat or starter will be killed when adding it to dough.3/4 cup + 3 Tablespoons (190g) whole milk, 1/4 cup + 1 Tablespoon (70g) water
- In a large mixing bowl (or stand mixer bowl), combine the active sourdough starter, milk, water, raw honey, sugar, egg, and olive oil.3/4 cup (200g) bubbly active sourdough starter, 1 Tablespoon (25g) honey, 1/4 cup (50g) granulated white sugar, 1 (50g) egg, 2 teaspoons (10g) olive oil
- Whisk until mixture is pale and fully emulsified.
- Add bread flour and salt. Stir until a shaggy dough forms. It should be slightly sticky but cohesive.4 1/4 cups (550g) bread flour, 1 1/2 teaspoon (10g) sea salt
- Add 1/4 cup softened butter into dough in 1 Tablespoon pats. Knead butter into dough slowly with mixer set on low fitted with a dough hook, or by hand for 8-10 minutes. Dough should be smooth and elastic.1/4 cup (57g) unsalted butter, softened
- Check for the windowpane test — stretch a small piece and see if it forms a thin, see-through membrane. This means your gluten is strong and ready.
- Tip: If sticky, avoid adding more flour. Instead, wet your hands or give the dough a short rest before continuing.
Bulk Fermentation:
- Transfer dough to a lightly greased bowl or container and loosely cover. Perform 1 set of stretch-and-folds at the 1-hour mark to build strength.
- Cover and ferment at 74–78°F for 6-8 hours, or until nearly doubled.
- Cold Fermentation (Optional): At this point, you have the option to shape and bake the buns the same-day, or you can cover well and transfer dough to refrigerator for overnight cold ferment. This step will improve gluten breakdown but can be skipped if desired.
Shape Buns:
- If dough was refrigerated overnight, remove from refrigerator and allow to rest on counter 30 minutes to warm. If you did not refrigerate dough, you can skip this step.
- Turn dough out onto a lightly floured or oiled surface. Divide into 8 equal portions (about 150g each).
- Let rest 10–15 minutes to relax gluten. Then shape each into a taut ball by cupping your hand and rolling it on the counter in a circular motion.
- Transfer to a parchment or silicone mat lined baking sheet, spacing evenly. I usually do 4-6 buns per baking sheet. Cover buns with a damp lint-free towel or oiled plastic wrap for final proof.
Final Proof:
- Let buns proof at room temp for 2–3 hours, or until buns are noticeably puffy and pass the poke test (a gentle press leaves a slow-filling dent).
- Beat 1 egg yolk with 2 Tablespoons of water in a small bowl.
- Brush buns with egg wash using a pastry brush or a paper towel. If using the paper towel method, just dip in egg mixture and brush all over the buns. This avoids an eggy rim around the base of the buns.
- Sprinkle buns with sesame seeds if desired.1 Tablespoon sesame seeds
Bake Buns:
- Preheat oven to 375°F (190°C).
- Bake for 20-24 minutes, rotating halfway through. Internal temp should reach 195–200°F. The tops should be deeply golden.
- Cool on a wire rack at least 20 minutes before slicing.
Notes
- Buns are best stored in airtight packaging at room temperature for 2-3 days.
- Freeze buns for up to 2 months in airtight container, gently thaw and reheat when ready to use.
FAQ’s:
- Can I use all-purpose flour instead of bread flour?
- Can I freeze them?
- Do I have to do the cold proof?
- Why are my buns flat?

I baked these today for my family. I knew it was a good recipe when the dough felt so soft when I was shaping.
I’m so glad you enjoyed these hamburger buns!
I made these for our Labor Day BBQ and they were perfection. So fluffy and the taste was incredible. They were gone quick! Another thing I loved is that Joselyn included the measurements with each recipe step, which made it easier for me to follow so that I didn’t have to keep scrolling from the ingredients list to the instructions!
Hi Christian! I’m so happy you found this easy to follow and that you had great results! Thank you for your comment!