
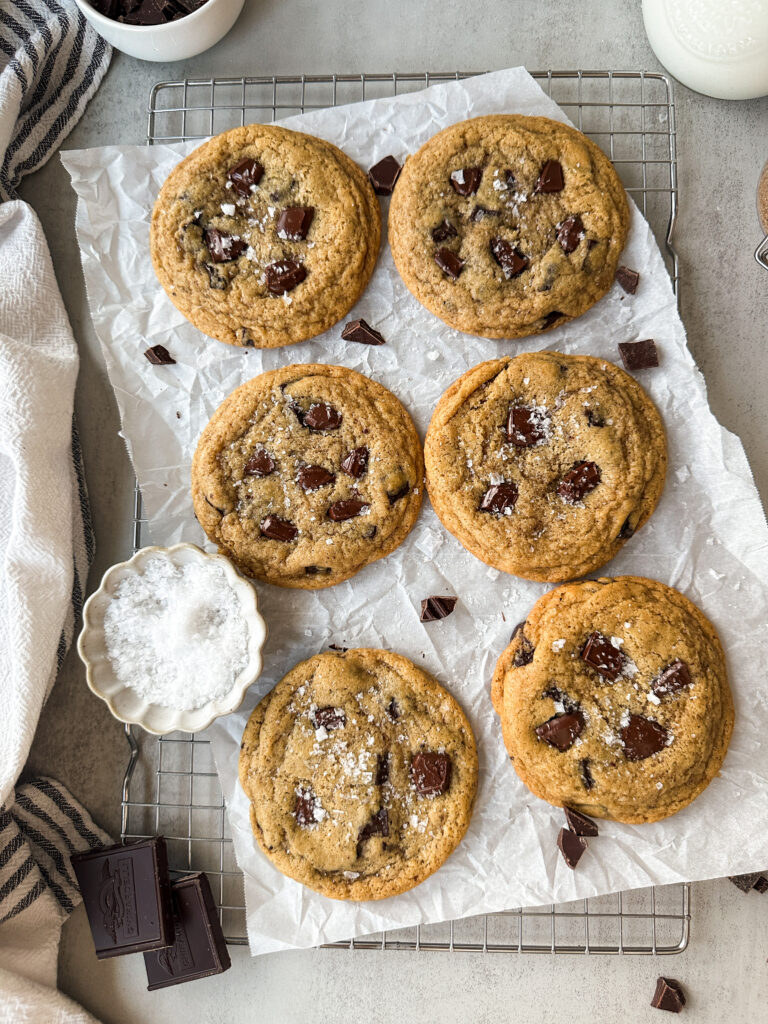
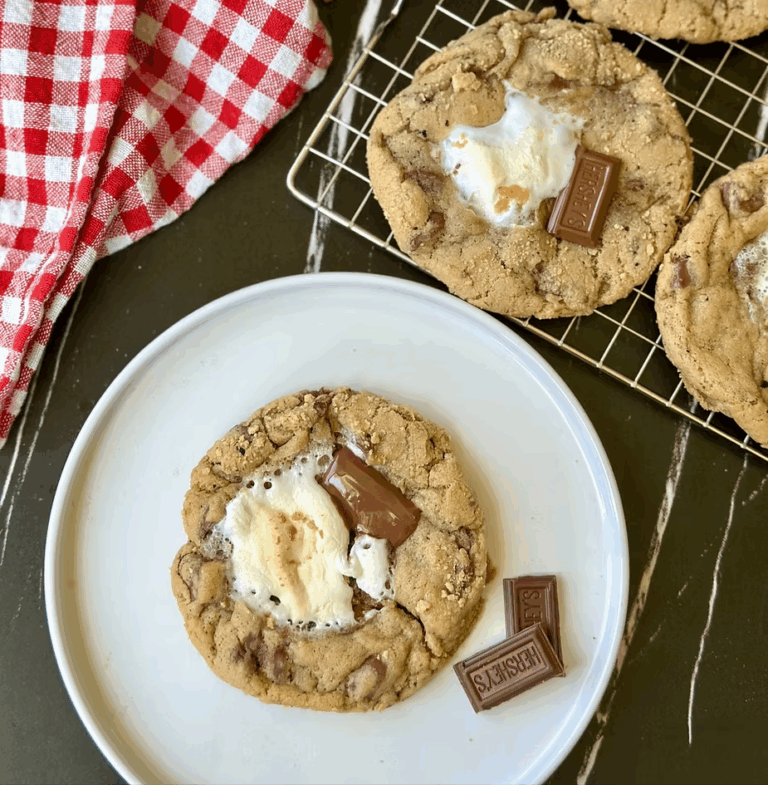
Chewy Sourdough Brown Butter Chocolate Chip Cookies
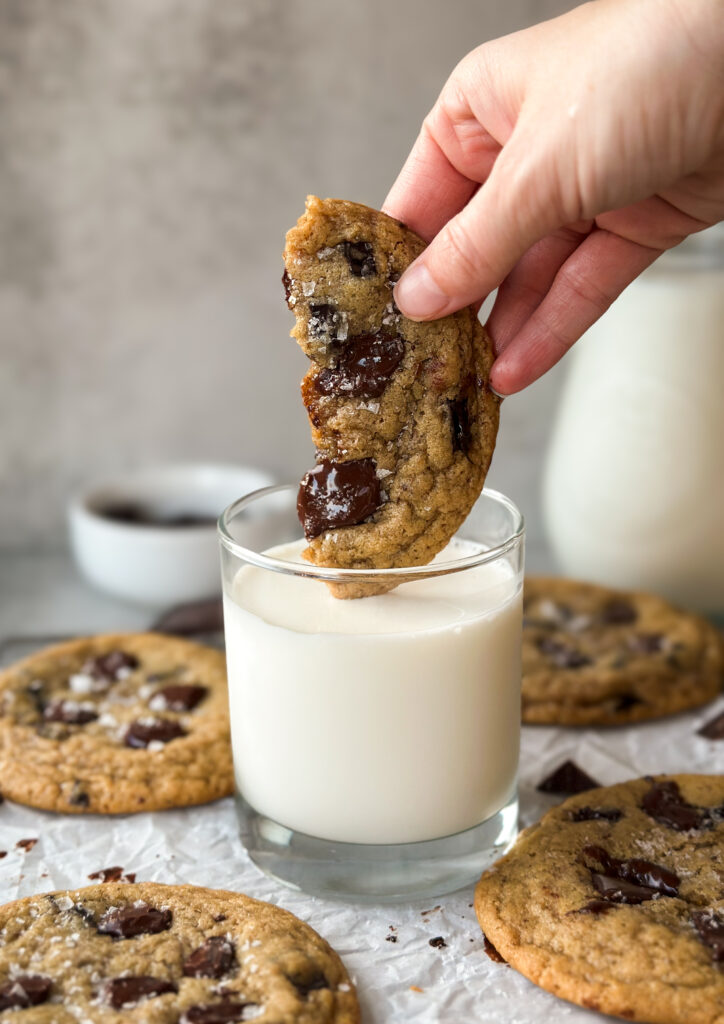
If you’re looking for a cookie with a crisp edge, chewy center, and pockets of melty chocolate then you need to try these Chewy Sourdough Brown Butter Chocolate Chip Cookies. They’re everything you want in a classic chocolate chip cookie- and a little more. Browning the butter reduces the moisture in the cookies to give them a deep toffee-like flavor and perfect cookie texture. The result is a cookie that feels bakery worthy but still cozy and familiar. It’s the cookie you make when you’re craving agood chocolate chip cookie and don’t want to settle.
Why You’ll Love This Recipe
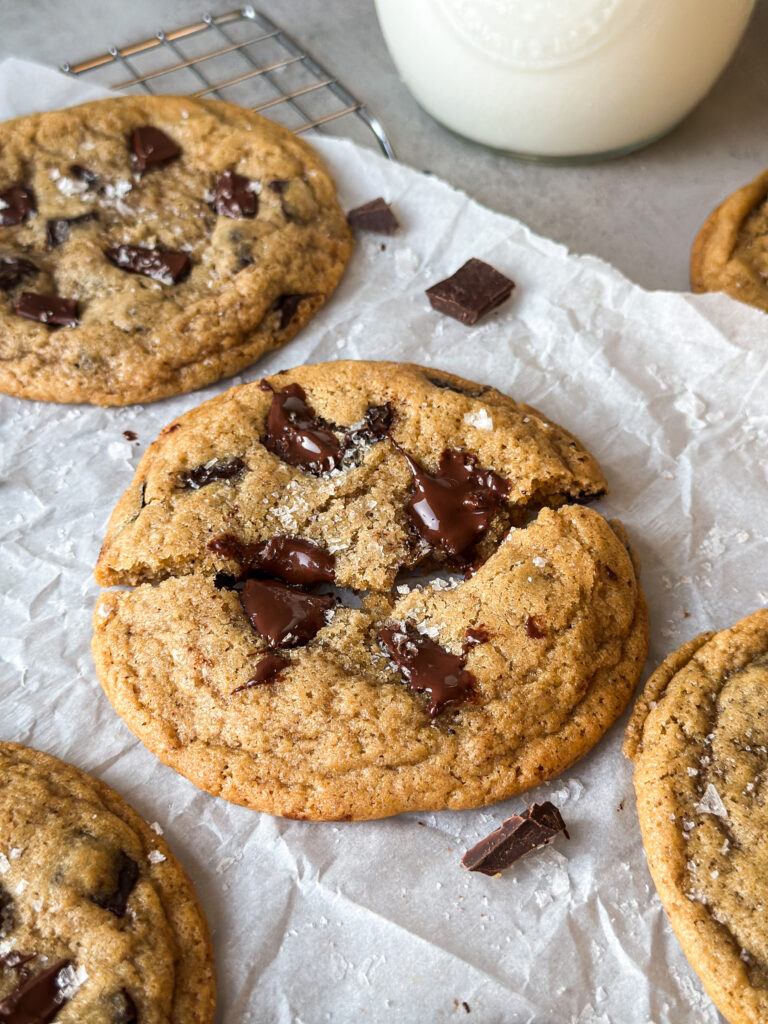
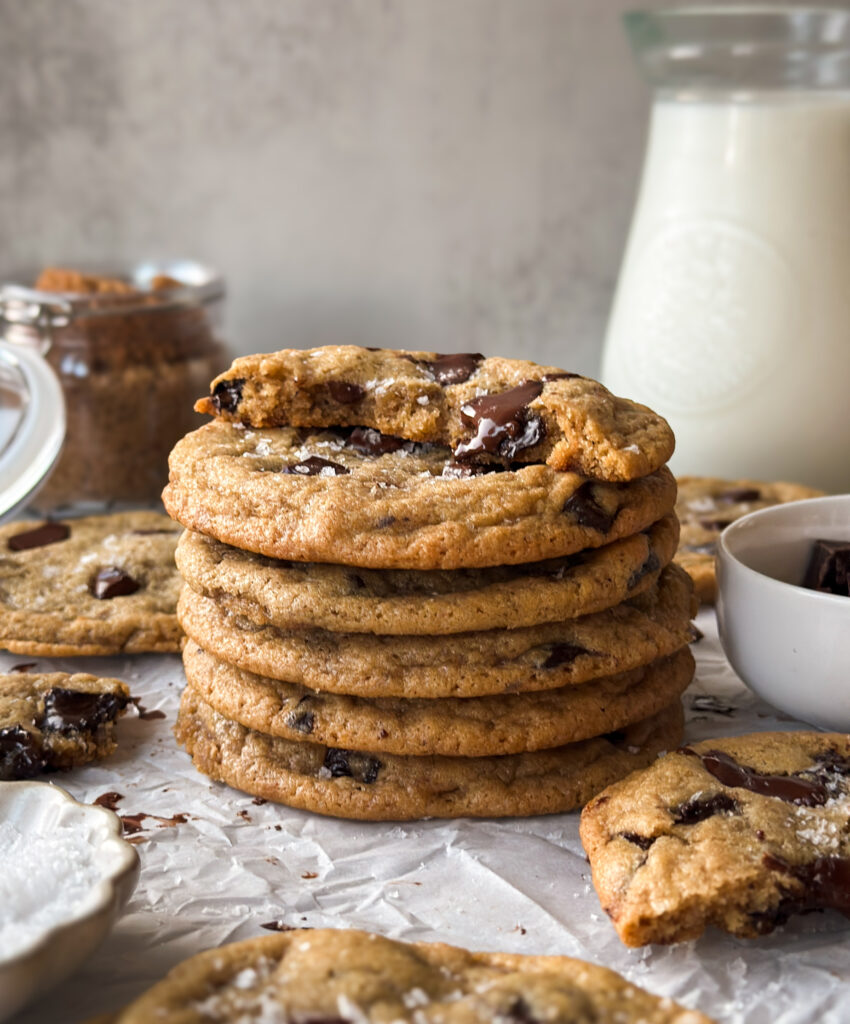
- Thick + chewy texture- These cookies bake up with crisp edges and soft, chewy centers, with just enough structure to hold their shape. The texture is the real star here.
- Bakery worthy flavor- Browned butter adds a toffee like flavor to these cookies, and a touch of espresso powder works to really bring out that chocolate.
- A great way to use up discard– Have discard hanging out in the frig? This recipe puts it to good use. You can also let this cookie dough rest overnight in the frig for extra fermentation benefits!
- Make-ahead friendly- this cookie dough benefits from a longer chill, making it perfect for prepping ahead and baking when the craving hits.
Why Should I Add Sourdough Starter to my Cookies?
Incorporating sourdough starter discard into your cookie dough not only adds a unique depth of flavor but also introduces a fermentation process that enhances the dough’s complexity. Allowing the dough to rest in the refrigerator overnight facilitates this fermentation, as the natural bacteria and yeasts in the sourdough starter continue to develop the dough’s fermentation.
*As an amazon affiliate, this post may contain affiliate links which means I may receive a commission for qualifying purchases. I will only recommend products that I personally love and use.*
Tools You’ll Need:
- Medium-sized pot- for browning the butter.
- Large mixing bowl or stand mixer bowl- for mixing your cookie dough.
- Electric mixer (stand or hand-held)– for combining dough.
- Digital kitchen scale (optional)- for weighing ingredients and dough out. I linked the scale I use here.
- Spatula– for scraping down bowl.
- Parchment paper or silicone mats– to line cookie sheet to avoid burning.
- Baking sheets– to bake cookies.
- 2-ounce (approximately 2 tablespoons) cookie scoop– for shaping large cookies linked here.
- Large circular cookie cutter (optional)– for perfectly shaped cookies. I use this set linked here. You can also use a small bowl for this.
- Wire cooling rack- for allowing cookies to rest properly.
Next, Gather Your Ingredients:
- Unsalted Butter – Creates your brown butter to make that nutty toffee taste.
- Eggs – Adds richness and moisture to the cookie.
- Sourdough discard – Adds tangy flavor and moisture and is the magic that ferments your dough. Can be used fed, past peak, or straight from the fridge.
- White Granulated Sugar- Sweetens cookies. Helps give cookies that crackly top and crisp edge.
- Brown Sugar – Adds sweetness and caramel notes to cookies.
- Vanilla Extract – Adds depth and warmth to cookies.
- All-purpose flour – Provides structure and lift to the cookies. You can substitute bread flour but I like the softness all-purpose gives the cookies.
- Baking Powder – Helps with lift and rise with too much doming in the center.
- Baking Soda – Creates the perfect spread without overpuffing the cookies.
- Sea Salt – Enhances overall flavor and sweetness.
- Semi-Sweet Chips– to give cookies pockets of rich chocolate throughout. You can substitute for caramel chips or milk chocolate to change up the flavor of the cookie, or if you want chunks you can chop up any chocolate bar you like to replace the chips.
- Espresso Powder – The secret ingredient that really unlocks the flavors of the brown sugar and chocolate chips. I love this espresso powder from King Arthur linked here.
- Flaky Sea Salt (optional) – I love adding Maldon sea salt flakes on top of my cookies for that extra flair. If you haven’t tried this, I highly suggest it! You can find it link here.
Now let’s bake Chewy Sourdough Brown Butter Chocolate Chip Cookies!
Instructions
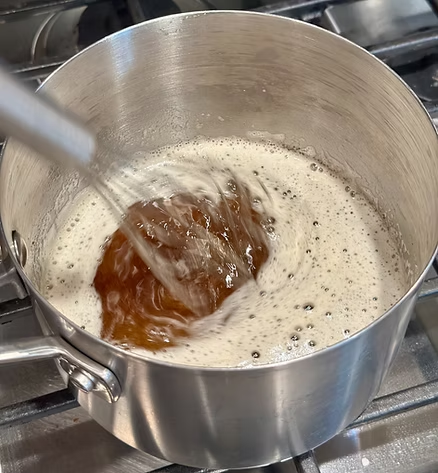
Step 1: Brown the Butter
In a medium saucepan, melt the butter over low heat. Continue cooking, stirring frequently, until the butter foams and turns a rich amber color with brown specks at the bottom, emitting a nutty aroma. Remove from heat immediately. This process typically takes about 5-7 minutes. I like to do this the night before.
Once butter is browned, remove the saucepan from heat and transfer the butter to a the stand mixer bowl to cool to and become thicker again. You can pop the butter in the frig for 30 minutes to speed this process up if need just avoid it becoming solid, it should be soft.
Step 2: Prepare the Dough
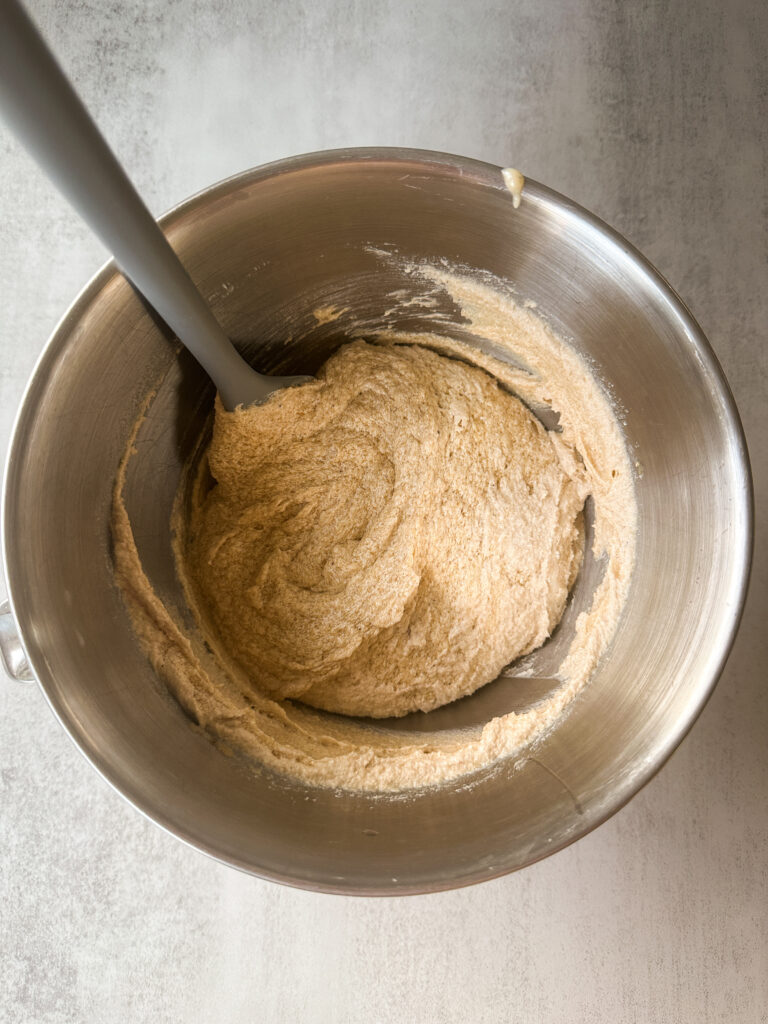
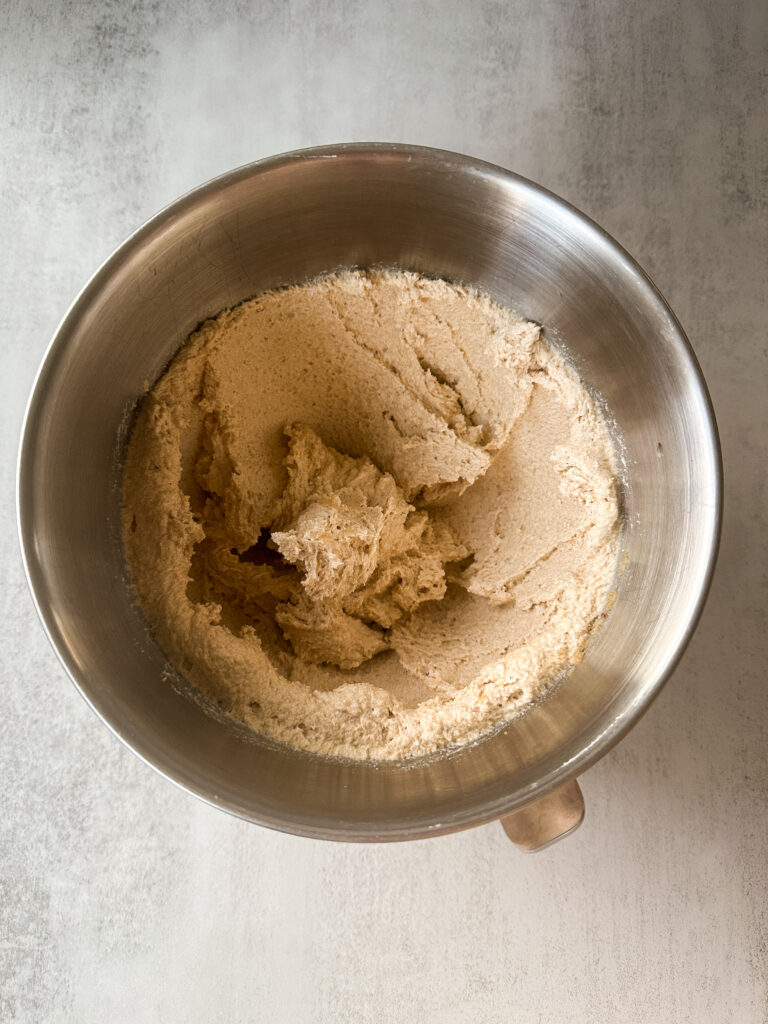
In a large mixing bowl, combine the cooled browned butter, brown sugar, and granulated white sugar. Using an electric mixer or stand mixer on medium speed, cream together for approximately 2 minutes until the mixture is light and fluffy. It’ll be a bit crumbly, that’s okay!
Add the eggs, sourdough discard, vanilla extract, and espresso powder (if using) to the bowl. Continue to mix on medium speed for another 2 minutes, ensuring all ingredients are well incorporated and fluffy. Remember to scrape down the sides of the bowl and mix everything at the bottom. This insures all your cookies come out evenly.
Step 3: Incorporate Dry Ingredients
In a separate bowl, sift together with a whisk the all-purpose flour, salt, baking soda, and baking powder. This is important to make sure your ingredients are evenly distributed.
Gradually add the dry ingredients to the wet mixture, mixing on low speed until just combined. Avoid overmixing to ensure a tender cookie texture.
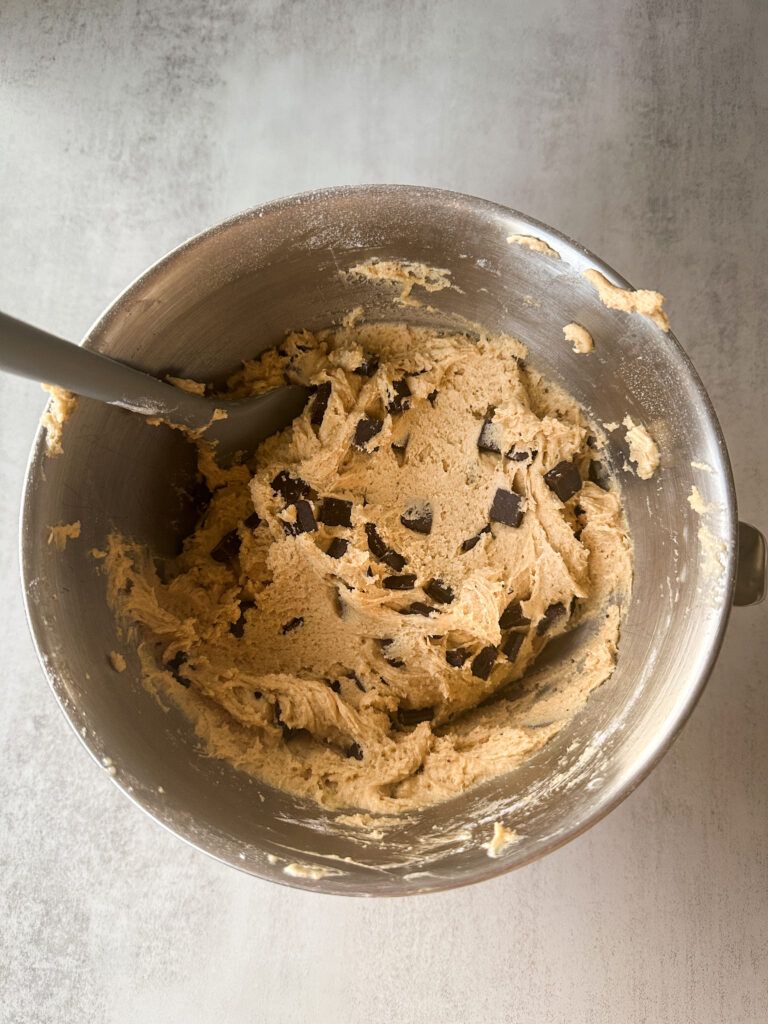
Step 4: Add Chocolate Chips
Fold in the semi-sweet chocolate chips (or chopped up chocolate bars for chunks), ensuring they are evenly distributed throughout the dough. You can add them to the mixer if using, and pulse them through the dough for ease. Always use a spatula to scrape the bottom of the bowl and fold in any batter that hasn’t been mixed as your last step when making cookies.
Step 5: Chill the Dough
Cover the mixing bowl with plastic wrap or a lid and refrigerate the dough for at least 1 hour. For optimal fermentation, consider chilling the dough overnight. If chilling overnight, allow the dough to rest at room temperature for about 20 minutes before baking to make scooping easier and ensure the right consistency of your cookies.
Note about refrigerating dough: If you want to scoop and refrigerate dough as balls, I recommend chilling 1-2 hours then scooping so the dough is more firm. Gram weight for these cookies is roughly 60-70 grams. Refrigerate overnight and allow dough to sit on counter 15 minutes before baking as listed below. If you want a thicker cookie, colder dough is best. If you want flatter cookies, allow them to sit at room temperature for 30 minutes.
Note about freezing dough: If you choose to freeze the cookie dough, I recommend refrigerating the dough after mixing until it firms up (about 1-2 hours). Scoop your cookies and refrigerate overnight to achieve optimal fermentation. If you wish, you can skip this refrigeration step, but your dough won’t ferment as long. After dough has refrigerated, transfer to airtight containers or zip locks with air removed and freeze. When ready to bake cookies, allow dough to sit out and thaw about 1 hour and bake cookies as directed below.
Step 6: Bake the Cookies
Preheat your oven to 350°F (175°C). Line baking sheets with parchment paper (or my preference) silicone mats. I use these silicone mats for the perfect spread on my cookies.
Using a 2-ounce (approximately 2 tablespoons) cookie scoop, portion the dough onto the prepared baking sheets, spacing each cookie about 2 inches apart to allow for spreading. I scoop six to one cookie sheet.
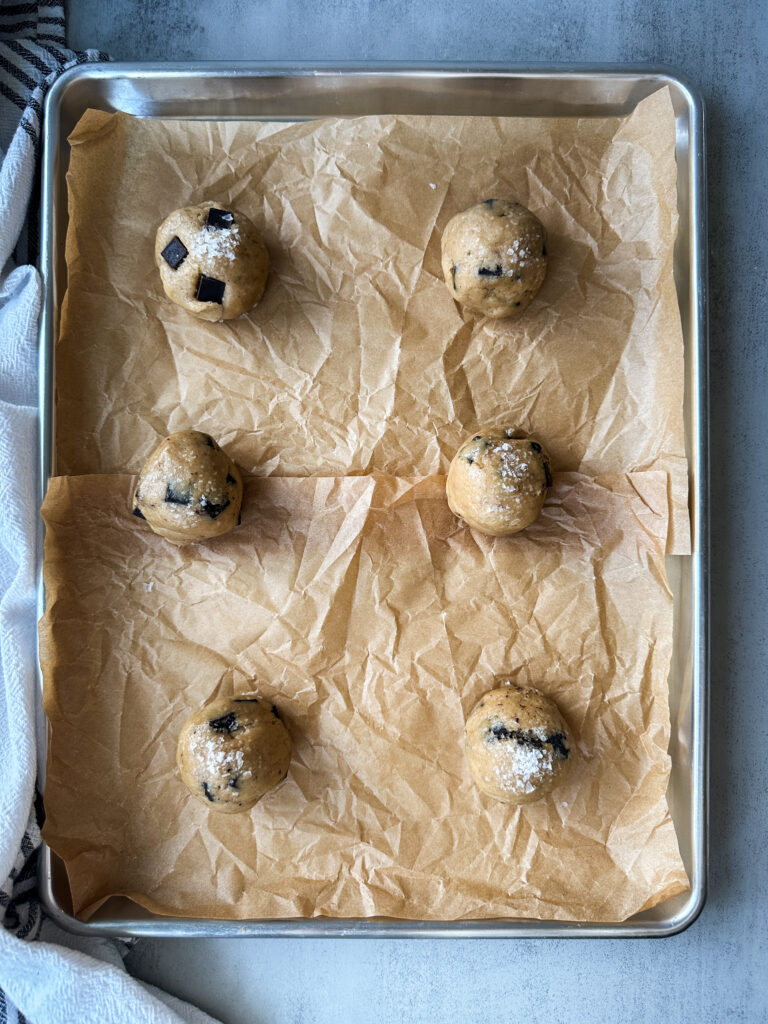
Bake in the preheated oven for 15 minutes, or until the edges are golden brown and the centers appear slightly underbaked.
Immediately upon removing from the oven, slap the baking sheets on the countertop to achieve a crinkly appearance on the cookies. You may need to return cookies to the oven for an additional five minutes at this point if baking larger cookies, mine usually require another 4-6 minutes but this will vary depending on your oven.
While the cookies are still warm, use a large circular cookie cutter larger than your cookie to perfect the edges and give your cookie a perfect shape and even thickness by placing the cookie cutter over the cookie and making a circle that will nudge any irregular edges into a perfect circle (you can also do this with a small bowl).
For extra flavor and crunch, sprinkle each cookie generously with flaky sea salt! I also like to add pieces of chopped chocolate at this stage pressed into the tops for extra melty goodness.
Step 7: Cool and Enjoy
Allow the cookies to cool completely on the baking sheets to set before transferring them to a wire rack. Serve cooled cookies!
Makes 17-18 large cookies (2 oz)
How to Store:
Room temperature- Keep in an airtight container for 6-7 days. Place a slice of bread in the container to keep them soft.
Freezing- store baked cooled cookies in a Ziplock with all of the air removed first. Freeze for up to one month.
FAQ’S
Yes! Replace the sourdough discard with 1/4 cup whole milk instead. You’ll add it in at the same step as you would the discard, and mix it into the wet ingredients
Yes! Substitute the two eggs for 2 Tablespoons of ground flax (not seeds) mixed with 6 Tablespoons water. Mix the flax and water together in a bowl and allow the mixture to rest ten minutes to gel. Add in place of the egg and proceed with the recipe as directed.
If you loved this recipe, drop a comment and leave a star review and don’t forget to checkout more of my sourdough cookie recipes like these Chewy Sourdough Lemon Crinkle Cookies or my Sourdough Butter Pecan Toffee Cookies!

Chewy Sourdough Brown Butter Chocolate Chip Cookies
Equipment
- Medium sized pot – for browning butter
- Large mixing bowl or stand mixer bowl – for combining ingredients
- Electric mixer (stand or hand-held)
- Spatula – to combine dough
- Parchment paper or silicone mats – to line baking sheets
- Baking sheets – to bake cookies
- 2 oz cookie scoop – to scoop cookies
- Cooling rack – to cool cookies
- Large circular cookie cutter or small bowl – to make perfectly round cookies
Ingredients
Wet Ingredients:
- 1 (227g) cup unsalted butter
- 1 (200g) cup packed brown sugar
- 1 (200g) cup granulated white sugar
- 1/2 (120g) cup sourdough starter discard
- 1/4 teaspoon espresso powder
- 2 large eggs
- 2 teaspoons pure vanilla extract
Dry Ingredients:
- 3 (375g) cups all-purpose flour
- 1 teaspoon baking soda
- 1 1/2 teaspoons baking powder
- 1 teaspoon sea salt
Add-ins:
- 1 3/4 (275g) cups semi-sweet chocolate chips
- Flaky sea salt for sprinkling
Instructions
Brown the Butter:
- In a medium saucepan, melt the butter over low heat. Continue cooking, stirring frequently, until the butter foams and turns a rich amber color with brown specks at the bottom, emitting a nutty aroma. Remove from heat immediately. This process typically takes about 5-7 minutes. I like to do this the night before.1 (227g) cup unsalted butter
- Once butter is browned, remove the saucepan from heat and transfer the butter to a the stand mixer bowl to cool to and become thicker again. You can pop the butter in the frig for 30 minutes to speed this process up if need just avoid it becoming solid, it should be soft.
Prepare the Dough:
- In a large mixing bowl, combine the cooled browned butter, brown sugar, and granulated white sugar. Using an electric mixer on medium speed, cream together for approximately 2 minutes until the mixture is light and fluffy. It’ll be a bit crumbly, that’s okay!1 (200g) cup packed brown sugar, 1 (200g) cup granulated white sugar
- Add the eggs, sourdough discard, vanilla extract, and espresso powder (if using) to the bowl. Continue to mix on medium speed for another 2 minutes, ensuring all ingredients are well incorporated and fluffy. Remember to scrape down the sides of the bowl and mix everything at the bottom. This insures all your cookies come out evenly.1/2 (120g) cup sourdough starter discard, 1/4 teaspoon espresso powder, 2 large eggs, 2 teaspoons pure vanilla extract
Incorporate Dry Ingredients:
- In a separate bowl, sift together with a whisk the all-purpose flour, salt, baking soda, and baking powder. This is important to make sure your ingredients are evenly distributed.3 (375g) cups all-purpose flour, 1 teaspoon baking soda, 1 1/2 teaspoons baking powder, 1 teaspoon sea salt
- Gradually add the dry ingredients to the wet mixture, mixing on low speed until just combined. Avoid overmixing to ensure a tender cookie texture.
Add Chocolate Chips:
- Fold in the semi-sweet chocolate chips (or chopped chocolate bar for chunks), ensuring they are evenly distributed throughout the dough. You can add them to the mixer if using, and pulse them through the dough for ease.1 3/4 (275g) cups semi-sweet chocolate chips
Chill the Dough:
- Cover the mixing bowl with plastic wrap or a lid and refrigerate the dough for at least 1 hour. For optimal fermentation, consider chilling the dough overnight. If chilling overnight, allow the dough to rest at room temperature for about 30 minutes before baking to make scooping easier and ensure the right consistency of your cookies.
Bake Cookies:
- Preheat your oven to 350°F (175°C). Line baking sheets with parchment paper (or my preference) silicone mats.
- Using a 2-ounce (approximately 2 tablespoons) cookie scoop, portion the dough onto the prepared baking sheets, spacing each cookie about 2 inches apart to allow for spreading. I scoop six to one cookie sheet.
- Bake in the preheated oven for 15 minutes, or until the edges are golden brown and the centers appear slightly underbaked.
- Immediately upon removing from the oven, slap the baking sheets on the countertop to achieve a crinkly appearance on the cookies. You may need to return cookies to the oven for an additional five minutes at this point if baking larger cookies, mine usually require another 4-6 minutes.
- While the cookies are still warm, use a large circular cookie cutter larger than your cookie to perfect the edges and give your cookie a perfect shape and even thickness by placing the cookie cutter over the cookie and making a circle that will nudge any irregular edges into a perfect circle, if desired.
- For extra flavor and crunch, sprinkle each cookie generously with flaky sea salt! I also like to add pieces of chopped chocolate at this stage pressed into the tops for extra melty goodness.Flaky sea salt
Cool and Enjoy:
- Allow the cookies to cool completely on the baking sheets to set before transferring them to a wire rack.
- Yields 18 cookies
Wow! Just made these fantastic Sourdough Brown Butter Chocolate Chip Cookies! They were so tasty especially with the brown butter which I’ve not done before! The recipe was really thorough and easy to follow with the addition of links too! Thanks Joselyn! My chief taste testers loved them as did I! Will be making on repeat! Xx🍪xX
This makes my heart happy! So glad it was easy and met approval from everyone 🙂
When I tell you these cookies are TO DIE FOR!!!! I’ve made several sourdough chocolate chip cookies and these are by far the best cookie that has ever come out of my kitchen. Everything about this cookie is absolute perfection from the way it mixes together, to the way it bakes, the texture, the smell. This is hands down THE BEST cookie!! Thank you Joselyn for all the time and effort you put into these recipes and most importantly thank you for sharing them with us!
Lauren! Thank you for your review, this makes me so happy that you found this recipe easy to make and equally delicious!
These are literally the perfect cookie. They look beautiful, the texture is perfect, the taste is outstanding, the fact that is uses the whole egg is such a bonus. I long fermented them….I mixed everything up in the morning. Then stuck them in the fridge for an hour, scooped and rolled the balls, the places in a container and stick in the fridge for 24 hours. I removed them from the fridge 2 hours before baking and they were perfect. You won’t ever need a cookie recipe after this one!
This review is so helpful! Thank you for sharing how you made this recipe work for you for others to see! The whole egg is so much easier!
If you could make crack into a cookie, this would be it! These cookies are indescribably AMAZING! They have the perfect crisp and crunch on the outside, with a gooey and soft middle. I could not rave about these enough. I always love how Joselyn puts what’s being used in the order per the instructions, making the recipe is so easy to follow. I made these and took them to my husbands office, and they absolutely loved them, requesting for them to be brought again!
The espresso was such a nice touch 👌🏼
I will not be using any other sourdough cookie recipe! Thank you Joselyn for sharing this amazing recipe and all the time and effort spent perfecting it!
Your cookies look perfect! I’m thrilled this recipe was a success for you!
I now use Joselyn’s recipe for my bi-weekly bake drops! I swap in milk chocolate chips and they are a customer fave… a true staple!! I think people would literally riot if I took them off the menu, so they live there now. 10/10
Thank you so much for you review and kind words! It makes me so happy to hear this recipe us well loved and see your stunning photo!
Hi Joselyn! This is Nithyashree from iGnite Bakes, Chennai, India 😊
I tried this recipe using a flax egg (2 tbsp ground flax + 6 tbsp water) in place of eggs, and the results were excellent. The cookies baked up soft and chewy with a moist, bakery-style centre and a rich, chocolate-forward flavour. I couldn’t taste the flax at all; instead, the dominant notes were caramelised sugar, deep brown butter nuttiness, and pools of melted chocolate.
The texture leaned more chewy than crisp, with softer edges, which I felt worked beautifully for a café-style cookie. While I haven’t tried the egg version to compare directly, this egg-free variation stands strongly on its own and delivers an indulgent, well-balanced cookie with no off-flavours — a fantastic option for anyone baking egg-free.
I also want to thank you for the incredibly kind and patient support you shared during the bake, and for even featuring my egg-free version on Instagram — it truly meant a lot. Such a joy baking this recipe, dear friend!
Hi my friend, thank you for sharing your success making these cookies with the flax egg substitute! Sounds divine, thank you for being here <3