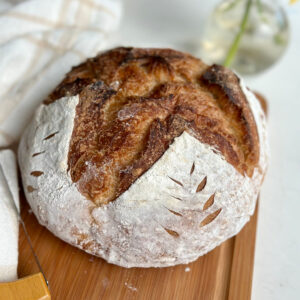
Beginner No-Knead Artisan Sourdough Loaf (Same-Day Option)
This recipe is a great way to practice making artisan loaves while still enjoying fresh bread the same day. While many sourdough recipes require an overnight proof, this version allows you to mix, ferment, shape, and bake all in one day, with an optional cold proof for enhanced flavor. This is recipe is approachable and will yield delicious light bread same-day if needed!
Equipment
- digital kitchen scale – for weighing out your ingredients (highly recommended for accuracy).
- Measuring cups & spoons - (optional, if you prefer to not use a scale)
- Bowl or straight edge container for mixing and proofing dough - to mix your dough and make sure your dough is rising properly.
- Bench knife (optional) - for shaping loaf.
- Banneton basket - or a medium bowl lined with a lint-free cloth to proof dough.
- Lint-free cloth or plastic wrap - to cover dough while resting.
- 5-quart Dutch oven with lid - for baking your loaf.
- Parchment paper or silicone bread sling - To keep bread from sticking to Dutch oven.
- Sharp knife or lame for scoring - to score your bread before baking.
- Digital Food Thermometer - optional, but recommended for accuracy.
- Bread knife – for cutting your bread once cooled.
Ingredients
Feed Starter (Night Before):
- 1 tbsp (20g) ripe mother starter
- 1/2 cup (100g) water (slightly warm, 80 degrees)
- 3/4 cup (100g) bread flour (or all-purpose)
Mix the Dough (Morning):
- ½ cup (100g) bubbly sourdough starter
- 1 ½ cups (360g) warm water (80 degrees F)
- 1 tbsp (25g) raw honey
- 2 tsp (10g) sea salt
- 4 cups (500g) all-purpose or bread flour
Instructions
Step 1: Feed Your Starter Night Before Baking
- Baker's Schedule: 8:00 PM
- Mix starter, flour and water in a jar with a spatula, cover loosely with lid, and mark the volume of the starter in your jar with a rubber band or piece of tape and marker. Let starter sit at room temperature (70-75 degrees) overnight until bubbly and doubled in size.1 tbsp (20g) ripe mother starter, 1/2 cup (100g) water , 3/4 cup (100g) bread flour
Step 2: Make the Dough
- Baker's Schedule: Day 1- 8:00 AM
- In a large bowl, mix the active starter, water, honey, salt, and flour. Stir and knead with your hand until all ingredients are combined into a shaggy dough. Cover with a damp towel or plastic and let it rest for 30 minutes at room temperature (70-77 degrees).½ cup (100g) bubbly sourdough starter, 1 ½ cups (360g) warm water, 1 tbsp (25g) raw honey, 2 tsp (10g) sea salt, 4 cups (500g) all-purpose or bread flour
Step 3: Strengthen the Dough (Stretch & Folds)
- After the rest, begin your stretch and folds. This helps build structure in your dough.
- Starting at the edge of the dough with wet hands, gently lift one edge of the dough, stretch it up, and fold it over the center. Rotate the bowl 90 degrees and repeat with the next side. Do this for all four sides of the dough to form a ball.
- To perform stretch and folds, grab dough at the edge and fold in the center. Continue until you've formed a ball.
- Cover the dough and let it rest for 30 minutes. Repeat this stretch-and-fold process two more times at 30-minute intervals for a total of 3 sets. Your dough should go from being rough and clumpy to smooth and silky.
Step 4: Bulk Fermentation (6-7 Hours)
- Assessing Rise Tip: After your dough is incorporated, try to gently push the dough down to be level in the bowl or container after the initial mix. Mark roughly where your dough is hitting on the side of the container with a sharpie (you can put a piece of tape over if you don't want to mark your bowl or jar).
- After you mark the volume, make another mark above the that where the dough would be if it rose roughly 50 percent. This will be your target for how much you want your dough to rise during bulk fermentation.
- Mark where your dough volume is and then mark a line 50 percent higher. This is your target for how much your dough needs to rise before shaping. The last photo shows my dough after proofing and hitting my mark.
- I find that my dough is best at 75-78 degrees F. To check your dough temperature, use your digital food thermometer and probe the dough and check. If your dough is warmer than this, it may be sticky and hard to handle. If its colder, your dough may take longer to proof. The dough should rise 40-50% in volume. When your dough hits the line you marked roughly at 50 percent volume, its ready to shape.
Step 5: Pre-Shaping the Dough
- Flour your work surface well and turn out the dough gently. Pre-shape by gently stretching it into a loose oval. To shape your loaf, fold the right side over the center. Next, fold the left side over the center like a letter. You will now have created a long log shape. Next, roll the dough into a football shape by rolling the log up. Pinch all of the seams together and use a bench scraper or your hands to gently shape your ball. Pop any large air bubbles.
- Allow dough to rest for 30 minutes uncovered on your work surface before returning to final shape.
Step 6: Final Shape and Refrigerate the Dough
- Reshape the dough as instructed above for a second time.
- Transfer the shaped dough into a flour-dusted banneton (or a medium bowl lined with a cloth and dusted with flour). Cover with a lint-free cloth or plastic wrap.
- Transfer your dough to a floured banneton or bowl before refrigeration.
- Cold Proof Options:
- Same Day- Refrigerate for 2 hours before baking. This is for the same-day recipe option. This short cold proof will help your loaf keep it's shape.
- Overnight- Refrigerate overnight for deeper sourdough complexity and longer fermentation.
Step 7: Preheat the Oven & Bake
- Preheat the oven to 500°F (260°C) convection bake. Place a Dutch oven inside the oven and preheat with Dutch oven inside.
- Take the dough out of the fridge. Turn it out onto parchment paper or bread sling dusted with flour.
- Use a lame or sharp knife to score the top (a simple “X” or single slash works). This cut should be about 1/2 inch deep. Be aware dough that hasn't been refrigerated as long may be more difficult to score or cut. This score helps the loaf retain a nice shape while it rises and expands in the oven.
- Carefully transfer the dough into the hot Dutch oven (using parchment paper or a bread sling for easy lifting).
- Bake bread at 450°F (230°C) for 40 minutes with the lid on. Remove the lid and bake for another 10 minutes to develop a crispy crust. Internal temperature of loaf should be between 200-205 F.
Step 8: Cool Completely Before Slicing
- Once baked, remove the bread from the Dutch oven and transfer to a wire rack carefully.
- Let it cool completely (at least 1-2 hours) before slicing. Cutting too soon will result in a gummy crumb because the inside is still setting!
Notes
Tips for Success:
Temperature is Key- If your kitchen is cool, fermentation may take longer. If you want to create a warmer environment, you can proof your dough on a cookie sheet in the oven with the light on or use a heating pad or dough mat to provide extra warmth to boost fermentation. Be aware to take your dough temperature, if your dough gets warmer that 84 degrees F you may end up with a sticky mess. Don’t Rush Cooling- Allowing the loaf to fully cool improves texture and flavor. Tried this recipe?Let us know how it was!